In today’s fast-paced world, having a dedicated workspace at home has become essential. Whether you’re working remotely, managing household tasks, or pursuing creative projects, a built-in desk can transform your space and boost productivity. This blog post will guide you through the process of how to make a built in desk, offering practical tips and insights to help you create a functional and stylish workspace.
Why Choose a Built-in Desk?
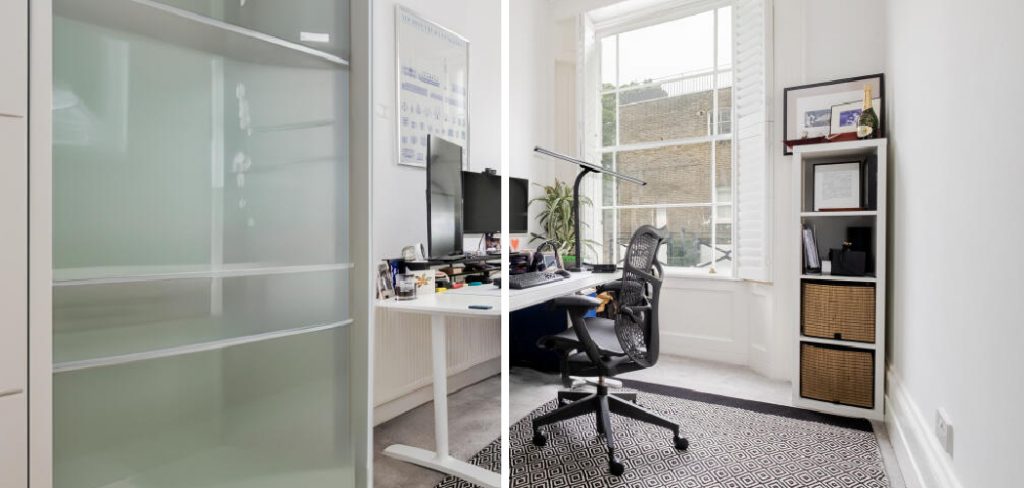
A built-in desk offers several advantages over traditional, standalone desks. First, it maximizes the use of available space, especially if you have limited room to work with. By integrating the desk into the existing layout, you can create a seamless and efficient workspace. Additionally, a built-in desk can be customized to match your home’s aesthetic, ensuring that it complements your decor while providing a personalized touch.
Another key benefit of a built-in desk is the potential for increased storage. With the ability to incorporate shelves, drawers, and cabinets, you can keep your workspace organized and clutter-free. This enhances productivity, as a tidy environment allows you to focus on the task at hand without distractions.
8 Steps for How to Make a Built in Desk
Planning Your Built-in Desk
Before you start building, it’s crucial to plan your project thoroughly. Begin by assessing the available space and determining the ideal location for your desk. Consider factors such as natural light, proximity to power outlets, and ease of access. Measure the dimensions of the space to ensure your design fits perfectly.
Next, think about the primary purpose of your desk. Will it be used for work, studying, or crafting? Identifying the main function will help you determine the necessary features and layout. For instance, if you need ample storage for office supplies, include multiple drawers and shelves in your design. If the desk is for a student, ensure there’s enough surface area for books and a computer.
Choosing Materials and Tools
Selecting the right materials is essential for a successful built-in desk project. Common materials include wood, plywood, and MDF (medium-density fiberboard). Each material has its pros and cons, so choose one that suits your budget, skill level, and desired finish. Wood offers a classic, durable option, while plywood and MDF are more affordable and easier to work with.
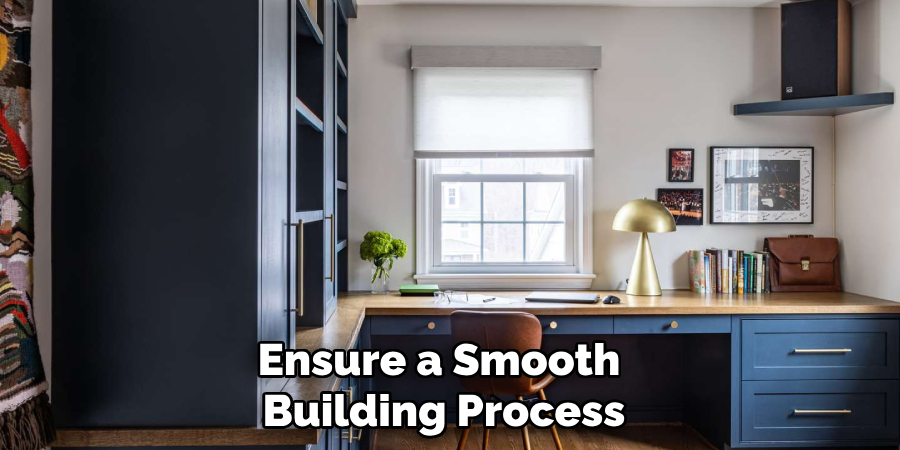
You’ll also need a variety of tools to complete the project. Basic tools include a tape measure, saw, drill, screws, and sandpaper. Depending on your design, you might also need a level, clamps, and a stud finder. Gather all necessary materials and tools before you begin to ensure a smooth building process.

Designing Your Desk
Once you’ve planned the location and purpose of your desk, it’s time to create a design. Sketch out your ideas on paper or use design software to visualize the final product. Consider incorporating ergonomic features, such as a comfortable height and sufficient legroom, to ensure long-term comfort while using the desk.
Think about the overall aesthetic of the desk and how it will blend with the surrounding decor. Choose a color and finish that complements your home’s style. You can also add decorative elements, such as trim or molding, to enhance the visual appeal of the desk.
Preparing the Workspace
Before you start building, prepare the workspace by clearing the area and protecting the floor with a drop cloth or plastic sheeting. Ensure you have adequate lighting and ventilation, especially if you’ll be working with paints or adhesives. Organize your tools and materials within easy reach to streamline the building process.
Check the walls for any obstacles, such as electrical wiring or plumbing, that could interfere with your project. Use a stud finder to locate the wall studs, as these will provide essential support for your built-in desk. Mark the positions of the studs on the wall to guide your construction.
Building the Frame
The first step in constructing your built-in desk is building the frame. Measure and cut the pieces of wood or plywood according to your design. Begin by assembling the base frame, ensuring it is level and securely attached to the wall studs. Use screws and brackets to reinforce the joints and provide stability.
Next, build the upper frame and attach it to the wall and base frame. Ensure all pieces are level and flush with the wall. This provides a solid foundation for the desk surface and storage components.
Installing the Desk Surface
With the frame in place, it’s time to install the desk surface. Measure and cut the surface material to fit the dimensions of your frame. Sand the edges to ensure a smooth finish. Attach the desk surface to the frame using screws or brackets, making sure it is level and securely fastened.
If you prefer a more polished look, consider adding a laminate or veneer to the desk surface. This can enhance the durability and appearance of the desk, providing a professional finish.
Adding Storage Solutions
One of the main advantages of a built-in desk is the ability to incorporate customized storage solutions. Depending on your needs, you can add shelves, drawers, or cabinets to keep your workspace organized.
Measure and cut the materials for your storage components, ensuring they fit within the frame. Assemble and attach the shelves or cabinets to the frame using screws and brackets. Install drawer slides and hardware, ensuring smooth operation and easy access to stored items.
Finishing Touches
Once the main construction is complete, it’s time to add the finishing touches. Sand any rough edges and surfaces to create a smooth, even finish. Apply paint, stain, or varnish to protect the wood and enhance its appearance. Allow the finish to dry completely before using the desk.
Add any final decorative elements, such as trim or molding, to complete the look. Install hardware, such as drawer pulls or handles, to enhance functionality and aesthetics. Clean the workspace and remove any protective coverings.
Personalizing Your Desk
Now that your built-in desk is complete, it’s time to personalize the space. Arrange your equipment, supplies, and decor to create a functional and inspiring workspace. Use organizers and storage solutions to keep the area tidy and clutter-free.
Consider adding lighting to enhance visibility and reduce eye strain. Task lighting, such as a desk lamp, can provide focused illumination for specific tasks. Ambient lighting, such as wall sconces or LED strips, can create a welcoming atmosphere.
Maintaining Your Built-in Desk
To ensure your built-in desk remains in top condition, perform regular maintenance. Clean the surface and storage components regularly to prevent dust and dirt buildup. Check for any loose screws or hardware and tighten them as needed.
If the finish becomes worn or damaged, consider applying a fresh coat of paint or varnish to restore its appearance. Address any minor repairs promptly to prevent further damage and maintain the desk’s functionality.

Benefits of a Built-in Desk
A built-in desk offers numerous benefits, including maximizing space, enhancing organization, and providing a customized workspace. By integrating the desk into your home’s layout, you create a seamless and efficient environment that supports productivity and creativity.
The ability to customize the design and storage solutions ensures the desk meets your specific needs and preferences. This personalized approach enhances the functionality and aesthetics of your workspace, creating a space that truly reflects your style and requirements.
Safety Precautions for Building a Desk
When constructing a built-in desk, it’s essential to prioritise safety throughout the entire process. Before you begin, ensure you wear appropriate personal protective equipment, such as safety goggles, gloves, and a dust mask, to protect yourself from debris, sharp tools, and harmful substances. Always work in a well-ventilated area, especially if you will be using paint, adhesives, or any chemicals.
Keep your workspace organized and free from clutter to prevent accidents. Familiarize yourself with the tools you’re using and follow the manufacturer’s instructions for each one. When handling power tools, maintain a firm grip and be mindful of your surroundings, ensuring that bystanders are at a safe distance. Additionally, take care when lifting heavy materials; use proper lifting techniques to avoid strain and injury. By adhering to these safety precautions, you can enjoy a safe and successful desk-building experience.

Conclusion
Creating a built-in desk is a rewarding project that can transform your space and improve your productivity. By following these steps and incorporating practical tips, you can design and build a functional and stylish workspace tailored to your needs.
Whether you’re working from home, managing household tasks, or pursuing creative projects, a built-in desk provides the perfect solution. Take the first step towards creating your dream workspace today and enjoy the benefits of a custom-built desk for years to come. We hope this guide has inspired you on how to make a built in desk. If you have any questions or need further assistance, don’t hesitate to reach out.
About the Author
Adrian Green, a lifelong woodworking enthusiast, shares his passion for the craft through The Woodenify Blog. With a foundation built on years of hands-on experience in his father’s woodworking shop, Adrian is dedicated to helping others learn and grow in the world of DIY woodworking. His approach to woodworking combines creativity, practicality, and a deep appreciation for the art of building with your own hands. Through his blog, he inspires individuals of all skill levels to embark on their own woodworking journeys, creating beautiful, functional pieces of furniture and décor.
Professional Focus
- Specializes in DIY woodworking projects, from furniture to home décor.
- Provides step-by-step guides and practical tutorials for woodworkers of all skill levels.
- Dedicated to helping readers build confidence and skill through easy-to-follow instructions and tips.
- Passionate about fostering a community of makers who can share, learn, and grow together.
Education History
- University of Craft and Design – Bachelor of Fine Arts (BFA) in Woodworking and Furniture Design
- Woodworking Apprenticeships – Extensive hands-on training with skilled craftsmen to refine carpentry and furniture making techniques.
- Online Courses & Masterclasses – Continued education in advanced woodworking techniques, design principles, and specialized tools
Expertise:
- DIY woodworking, carpentry, furniture making, and home décor projects.
- Creating accessible tutorials and guides for beginner to advanced woodworkers.
- Sharing the joys and satisfaction of woodworking, from raw materials to finished products.