Are you tired of clutter taking over your living space? Imagine having a versatile, stylish, and functional storage solution that you created with your own hands.
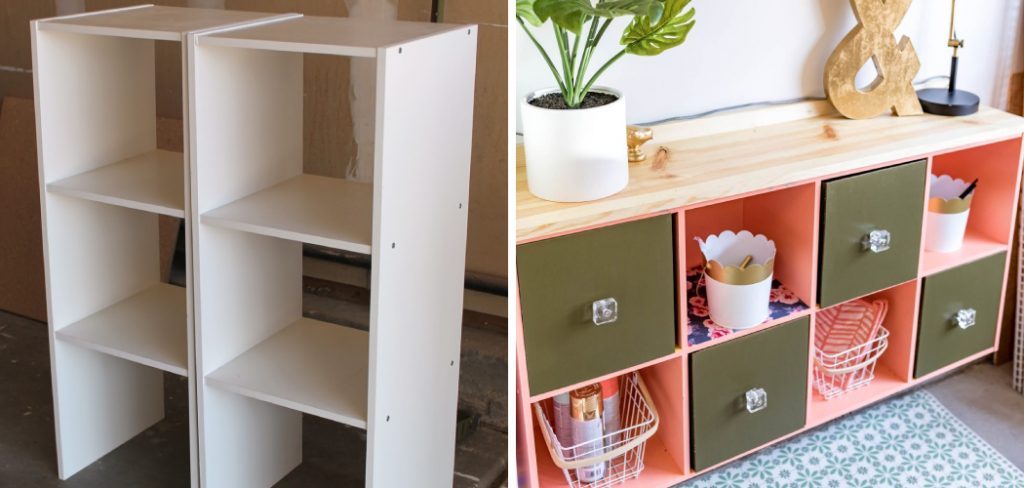
Building a cube organizer is not only a practical project for DIY enthusiasts but also a rewarding way to keep your home neat and organized. This guide will walk you through how to build cube organizer, from selecting materials to the final touches.
Why Build a Cube Organizer?
A cube organizer serves multiple purposes. It keeps your belongings in order, makes your space look tidy, and adds a touch of personal flair to any room. For organizational enthusiasts, this project is the perfect blend of functionality and creativity.
Cube organizers come in various sizes and configurations, making them suitable for nearly any room in your house—be it the living room, bedroom, or even the garage. Additionally, building your own allows you to customize it according to your specific needs and preferences.
Materials You Will Need
Before you start building, gather all your materials. Having everything on hand will make the process smoother and more enjoyable. Here’s a comprehensive list of what you’ll need:
- Plywood sheets (measurements depend on the size of your organizer)
- Wood screws
- Wood glue
- Sandpaper
- Paint or wood stain
- Paintbrushes or rollers
- Drill and drill bits
- Measuring tape
- Level
- Safety goggles and gloves
Choosing quality materials is crucial for the durability of your cube organizer. Opt for good-quality plywood, as it’s sturdy and easy to work with. If you’re planning to paint or stain your organizer, make sure the paint and stain are suitable for wooden surfaces.
8 Steps for How to Build Cube Organizer
1.Planning Your Cube Organizer
Before cutting any wood, plan the dimensions and layout of your cube organizer. Sketch out your design on paper, including measurements for each piece. Decide how many cubes you want and how they will be arranged.
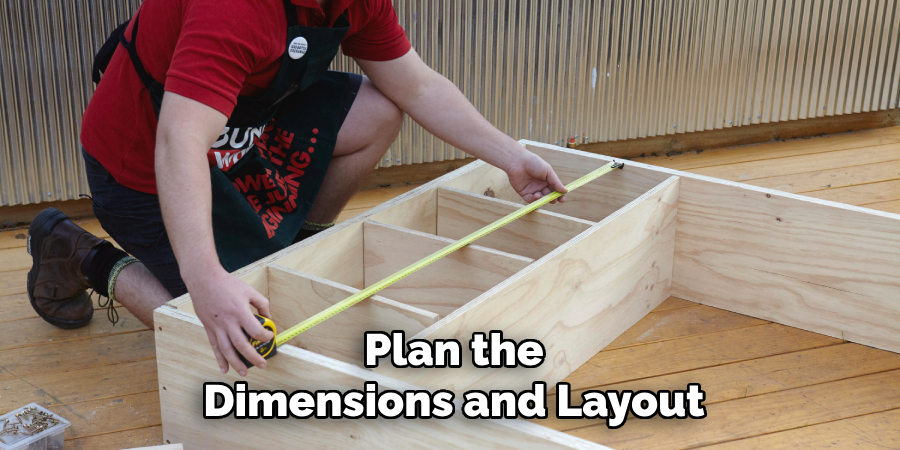
Consider the items you’ll store in your organizer. Books, bins, and decorative pieces may require different-sized cubes. Tailoring your design to your storage needs will ensure your organizer is both functional and aesthetically pleasing.
2.Cutting Your Wood Pieces
With your plan in hand, mark the measurements on your plywood sheets. Using a circular saw or table saw, cut the wood into the required pieces. Typically, you’ll need:
- Top and bottom panels
- Side panels
- Internal dividers
- Back panel (optional for added stability)
Be precise with your cuts to ensure that all pieces fit together correctly. Sand the edges of each piece to remove splinters and rough spots, making the assembly process easier and safer.
3.Assembling the Frame
Start by assembling the outer frame of your cube organizer. Apply wood glue to the edges where the panels will meet, then secure them with wood screws. Use a level to ensure each panel is straight and aligned correctly.
Attach the top and bottom panels to the side panels, forming a rectangular frame. Allow the glue to dry before moving on to the next step. Patience is key; rushing might weaken the structure.
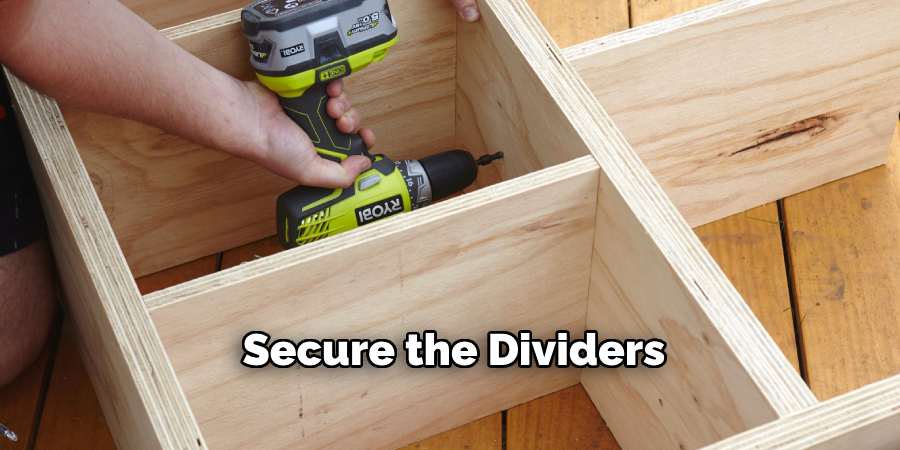
4.Adding Internal Dividers
Internal dividers will form the individual cubes of your organizer. Measure and mark the positions of the dividers on the top and bottom panels. Apply wood glue to the edges of the dividers and place them in position.
Secure the dividers with wood screws, ensuring they are perpendicular to the top and bottom panels. Use your level to check that each divider is straight. Allow the glue to set before continuing.
5.Securing the Back Panel
If you’ve chosen to include a back panel, now is the time to attach it. This step adds stability to your cube organizer and prevents items from falling out the back. Apply wood glue to the edges of the back panel and align it with the frame.
Use wood screws to secure the back panel to the top, bottom, and side panels. Ensure the back panel is flush with the edges of the frame for a professional finish.
6.Sanding and Preparing for Finish
With the main structure complete, sand the entire surface of your cube organizer. Focus on smoothing any rough edges and evening out the surfaces. This step will ensure a flawless finish when you paint or stain your organizer.
Wipe down the sanded surfaces with a damp cloth to remove any dust. This will help the paint or stain adhere better and result in a smoother finish.
7.Painting or Staining Your Cube Organizer
Now comes the fun part—adding color! Choose a paint or wood stain that complements your decor. Begin by applying a primer if you’re painting, as this helps the paint adhere and provides a uniform base color.
Apply the paint or stain in thin, even coats, allowing each coat to dry fully before applying the next. Multiple coats may be necessary to achieve the desired opacity and coverage. Use a paintbrush for corners and edges, and a roller for larger surfaces.
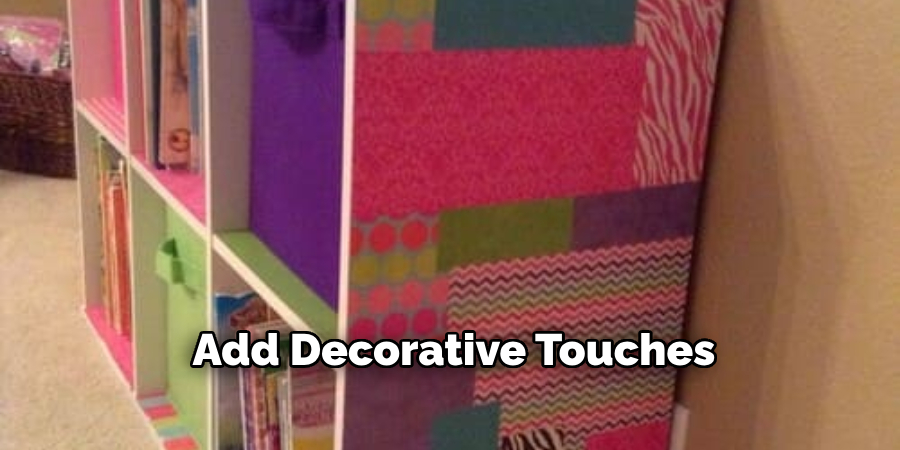
8.Adding Decorative Touches
Once your paint or stain is dry, consider adding decorative touches to personalize your cube organizer. You can line the back of each cube with patterned wallpaper or fabric for a pop of color. Adding labels or tags to each cube can also help keep things organized.
If you’re feeling creative, add some decorative trim or molding to the edges of your organizer. This small detail can elevate the overall look and make your piece stand out.
Installing in Your Space
Choose the perfect spot for your new cube organizer. Whether it’s in the living room, bedroom, or office, make sure it’s easily accessible and serves its intended purpose. Ensure the organizer is level and stable; use shims if necessary to level it on uneven floors.
Anchor the organizer to the wall for added safety, especially if you have children or pets. Use wall brackets or furniture straps to secure it, preventing any accidental tipping or falling.
Maintaining Your Cube Organizer
To keep your cube organizer looking its best, dust it regularly with a soft cloth. Avoid using harsh chemicals that could damage the paint or wood finish. If you notice any scratches or chips, touch them up with matching paint or stain.
Periodic checks of the screws and joints will ensure your organizer remains sturdy and functional. Tighten any loose screws and reapply wood glue to any joints that may have come undone over time.
Joining the Community of DIY Enthusiasts
Building a cube organizer is just the beginning. Join online communities and forums where DIY enthusiasts share their projects and tips. Engaging with others who share your passion for DIY can provide inspiration and support for future projects.
Share your finished cube organizer on social media platforms, and don’t forget to tag related DIY and home decor accounts. This not only showcases your work but also connects you with like-minded individuals.
Things to Consider When Designing Your Cube Organizer
When planning your cube organizer, several factors should be taken into account to ensure it meets your needs effectively. First, consider the intended use; will it primarily hold books, decorative items, or office supplies? This will influence the size and number of cubes you need. Second, think about the space available—measure your area meticulously to ensure a perfect fit without overwhelming the room.
Additionally, contemplate the style and aesthetic you want to achieve. Whether you prefer a minimalist look or something more elaborate, your choice of materials, colours, and finishes should complement your existing decor. Lastly, remember the accessibility of each cube; ensure that items stored at the back are easily retrievable. Balancing function with style will lead to a more satisfying and cohesive piece in your space.
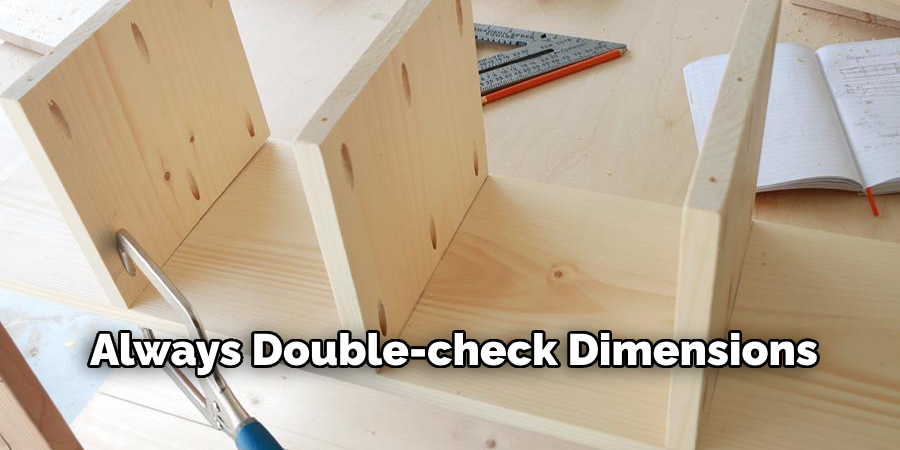
Common Mistakes to Avoid
When embarking on the journey of building your cube organizer, being aware of common pitfalls can save you time and effort. One frequent mistake is underestimating the importance of accurate measurements; always double-check dimensions before cutting materials to avoid costly errors. Another common issue is rushing the glue-drying process, which can compromise the integrity of the structure—patience is crucial for a durable build.
Additionally, neglecting to use a level during assembly can result in an uneven frame, leading to an unsightly finished product. Lastly, overlooking the need for adequate sanding can leave rough edges that detract from the overall appearance, so take the time to ensure a smooth surface before painting or staining your organizer. By steering clear of these missteps, you’ll enhance both the quality and aesthetics of your finished project.
Conclusion
Building a cube organizer is a fulfilling project that combines creativity, practicality, and craftsmanship. By following these steps, you can create a customized storage solution that enhances your space and reflects your personal style. Ready to take your DIY skills to the next level? Gather your materials, follow this guide on how to build cube organizer, and start building your cube organizer today. Once you see the transformation it brings to your space, you’ll be inspired to tackle even more DIY projects.
About the Author
Adrian Green, a lifelong woodworking enthusiast, shares his passion for the craft through The Woodenify Blog. With a foundation built on years of hands-on experience in his father’s woodworking shop, Adrian is dedicated to helping others learn and grow in the world of DIY woodworking. His approach to woodworking combines creativity, practicality, and a deep appreciation for the art of building with your own hands. Through his blog, he inspires individuals of all skill levels to embark on their own woodworking journeys, creating beautiful, functional pieces of furniture and décor.
Professional Focus
- Specializes in DIY woodworking projects, from furniture to home décor.
- Provides step-by-step guides and practical tutorials for woodworkers of all skill levels.
- Dedicated to helping readers build confidence and skill through easy-to-follow instructions and tips.
- Passionate about fostering a community of makers who can share, learn, and grow together.
Education History
- University of Craft and Design – Bachelor of Fine Arts (BFA) in Woodworking and Furniture Design
- Woodworking Apprenticeships – Extensive hands-on training with skilled craftsmen to refine carpentry and furniture making techniques.
- Online Courses & Masterclasses – Continued education in advanced woodworking techniques, design principles, and specialized tools
Expertise:
- DIY woodworking, carpentry, furniture making, and home décor projects.
- Creating accessible tutorials and guides for beginner to advanced woodworkers.
- Sharing the joys and satisfaction of woodworking, from raw materials to finished products.