Wooden Christmas trees have become a beloved decoration during the holiday season, offering a charming and unique alternative to traditional evergreen trees. These decorative pieces provide a festive touch to your home and serve as a canvas for personal expression when painted.
Personalizing and painting your wooden Christmas tree allows you to infuse your individual style and creativity into your holiday decor, making it a memorable addition to your celebrations. This article aims to guide you through the enjoyable and fulfilling process of how to paint a wooden Christmas tree, from selecting materials and preparing the surface to applying paint and adding final touches. Whether you’re a beginner or an experienced crafter, you’ll find useful tips and inspiration to create a beautiful piece that reflects your festive spirit.
Materials and Tools Needed
Essential Materials
You’ll need a few essential materials to successfully paint your wooden Christmas tree. Start with a wooden Christmas tree cutout, which serves as the foundation for your decoration. A selection of acrylic paint in various colors will allow you to bring your design to life, offering vibrant hues that suit your theme. Applying a primer or gesso ensures a smooth paint finish and promotes adhesion. Lastly, a paint sealer or varnish will help protect your artwork from wear and tear, preserving its beauty for many holiday seasons.
Tools and Workspace Preparation
Preparing your workspace and gathering the right tools is essential for a successful painting experience. Use brushes in different sizes to handle various detailing needs, ensuring precision in your designs. A paint palette or disposable plate is necessary for mixing and holding your colors.
Sandpaper will help refine the wooden surface for a smoother finish, while a clean cloth will assist in maintaining a dust-free area. Finally, cover your workspace with a protective cover to prevent any accidental spills or stains, allowing you to focus solely on your creative process.
Preparing the Wooden Surface
Proper preparation of the wooden surface is crucial for ensuring a high-quality paint finish on your wooden Christmas tree. This process involves sanding the wood, cleaning the surface, and applying primer, collectively contributing to a smooth and long-lasting result.
Sanding the Wood
Sanding the wood is vital for achieving a smooth paint finish, as it removes imperfections and rough patches that can affect the adhesion of the paint. Begin with a medium-grit sandpaper to smooth out any rough edges, working toward the wood grain to avoid scratches.

Once the surface feels even to the touch, switch to fine-grit sandpaper to achieve an ultra-smooth finish. Be sure to sand any intricate areas carefully, taking extra time on corners and edges. After sanding, wipe the surface with a clean cloth to remove any dust particles, ensuring a proper base for your paint application.
Cleaning the Surface
Once the sanding is complete, cleaning the wooden surface is essential. Use a damp cloth to remove dust and debris from the sanding process. Make sure the wood is completely dry before proceeding to the priming stage to ensure the best adhesion.
Applying Primer
Applying a primer or gesso is highly beneficial as it prepares the surface for paint, enhances color vibrancy, and provides additional durability. When applying primer, use a clean brush or roller and cover the entire surface evenly. Work in thin layers, allowing each coat to dry completely before adding another, ensuring an excellent foundation for your colored paint.
Choosing a Design
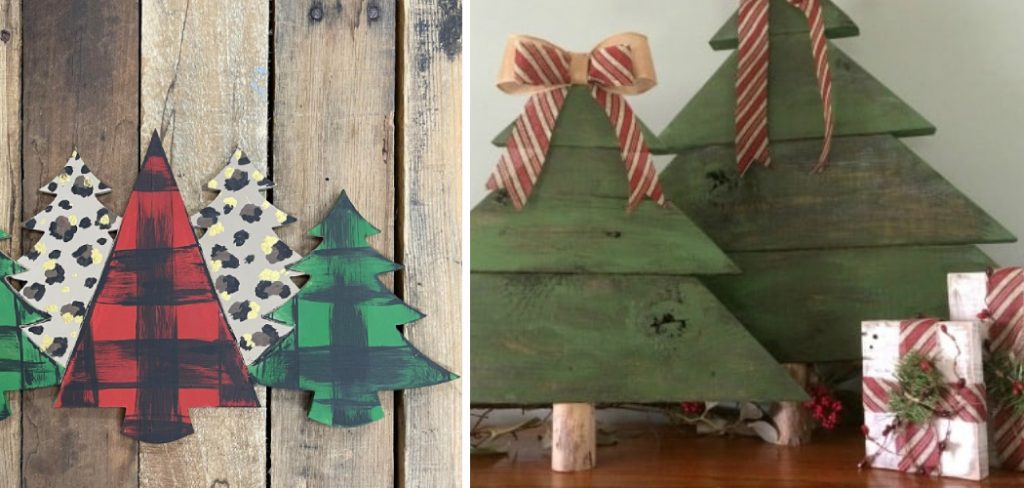
Selecting a design for your wooden Christmas tree is a vital step that allows your creativity to shine while aligning with your holiday vision. Start by deciding on a theme that resonates with your personal style or the overall decor of your home. Common themes include traditional, modern, and whimsical.
A traditional design might incorporate classic holiday motifs like ornaments, stars, and snowflakes, often in rich reds, greens, and gold. On the other hand, a modern design can feature minimalist patterns or geometric shapes, utilizing a more muted or monochromatic color palette. For a whimsical approach, consider quirky elements like playful characters or bright, eclectic colors, encouraging a fun and unique flair.
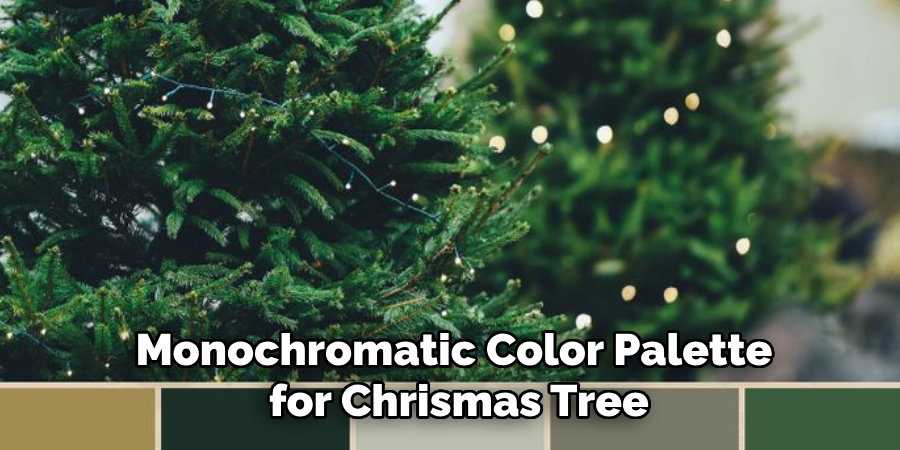
Once your theme is established, explore different color palettes that complement it. For example, rustic palettes with earthy tones suit traditional themes well, while bold, bright colors align with modern and whimsical designs.
Sketching the Design
After finalizing your theme and color palette, it’s time to sketch your design directly onto the wooden surface. Using a light pencil, lightly draw your intended design, making adjustments as needed to achieve balance and symmetry. Focus on spacing, ensuring that no area feels overcrowded or too sparse. It can help to periodically step back and view your tree from a distance to assess the overall visual appeal.
Remember, this sketch serves as a guide for your painting, so take your time to create a balanced composition that reflects your personal touch and enhances the beauty of your wooden Christmas tree.
How to Paint a Wooden Christmas Tree: Painting the Wooden Christmas Tree
Base Coat
Applying the base coat is foundational in bringing your wooden Christmas tree to life. Begin by selecting a color that aligns with your chosen design—this will be the dominant hue that sets the tone for the entire piece. Using a wide brush, apply the paint evenly across the entire tree surface, ensuring that you cover every nook and cranny.
Work in long, sweeping strokes in the direction of the wood grain to achieve a smooth, even coat. It may take two or three coats for the true vibrancy of the color to shine through, so allow each coat to dry fully before applying the next. Avoid overloading your brush with paint for an even finish, as this can lead to drips and uneven texture. Once the base layer is complete, you’ll have a beautiful canvas to build upon with intricate designs and additional colors.
Adding Details and Layers
With the base coat dry, it’s time to inject personality into your wooden Christmas tree by painting intricate details. Start by choosing smaller brushes that suit the scale of the details you want to add, such as ornaments, garlands, and stars. For instance, a fine-tipped brush is perfect for painting delicate designs like snowflakes or intricate baubles. Layering colors will enhance depth and dimension; consider using lighter shades to create highlights and darker tones for shadows.

For example, when painting a star, use yellow for the base, then add a touch of white for highlight and a deeper gold for shadow effects. This layering technique will create a three-dimensional appearance, making your decorations pop. Don’t hesitate to experiment with different color combinations and techniques—this is where your creativity truly flourishes!
Drying Time
Allowing adequate drying time between coats is vital for achieving a professional finish. Wait until each layer is completely dry before applying additional paint, as this prevents smudging and allows the colors to set properly. A good rule of thumb is to allow at least 30 minutes to an hour between applications, depending on the thickness of the paint used. If you’re in a hurry, you can use a fan or a hairdryer in a cool setting to expedite the drying process.
Fixing Mistakes
No painting project is without its hiccups, and knowing how to fix common mistakes is part of the fun. If you accidentally smudge a detail or make a color choice that doesn’t quite fit, don’t panic! For small errors, a damp cloth can be used to gently wipe off wet paint. For dried mistakes, lightly sand the area with fine-grit sandpaper to smooth out the surface before repainting.

This will provide a fresh, clean slate for touch-ups. Don’t forget to apply primer again if you’ve sanded down to bare wood, ensuring the new layer of paint adheres properly. With a few corrections here and there, your wooden Christmas tree will turn out beautifully, exuding charm and creativity throughout the holiday season.
Adding Final Touches
Once your wooden Christmas tree is beautifully painted and detailed, it’s time to add the final touches that will elevate its festive charm. Start by incorporating accents and highlights to create a dynamic look. This can be achieved by strategically applying lighter shades or metallic paints to certain areas, such as the tips of branches or the edges of ornaments.
Shadows can also be painted in darker tones to enhance depth, bringing your design to life. For extra sparkle, consider using glitter paint or metallic accents on key features, like stars or garlands, to catch the light and add an eye-catching effect.
Accents and Highlights
To make your tree truly shine, focus on adding highlights and shadows. For highlights, use metallic or shimmer paint in silver, gold, or iridescent hues to accentuate your designs. A soft touch at the edges and raised areas will create a sense of dimension.

Shadows can be added with slightly darker paint to give depth, making different elements pop visually. Don’t forget that a light application of glitter can add a whimsical, festive touch that encourages a joyful holiday atmosphere.
Sealing the Paint
After perfecting your decorations and allowing everything to dry thoroughly, it’s important to seal your masterpiece. Applying a clear sealer or varnish will protect the paint from chips and wear while enhancing its appearance. Choose a finish that aligns with your desired look—matte for a subtle, sophisticated finish, satin for a soft sheen, or glossy for a vibrant, polished effect. When applying the sealer, use a clean brush and apply thin, even coats to avoid drips and ensure a smooth finish. Allow adequate drying time between layers, and your wooden Christmas tree will be ready to dazzle all season long!
Displaying Your Wooden Christmas Tree
Once your wooden Christmas tree is painted and sealed, it’s time to think about how to proudly display it. Consider placing it in a prominent location, such as the living room, by a window, or even as a centerpiece on your dining table.

Position it on the porch or in the yard for outdoor displays, ensuring it’s visible to passersby. If you have multiple trees, try arranging them at various heights to create a whimsical seasonal display that captures the spirit of the holidays.
Placement Ideas
- Indoor: Position your tree near the fireplace, alongside holiday decorations, or in a corner accented by warm, ambient lighting for an inviting atmosphere.
- Outdoor: Display your tree on the front porch or in the garden, adorned with twinkling lights to create a festive welcome for guests.
Incorporating into Holiday Decor
To enhance your painted wooden tree’s charm, coordinate it with other holiday decorations. Use lights to illuminate your tree and draw attention to its painted details. Incorporate ornaments that reflect the colors used in your tree, and consider adding accessories like festive garlands or ribbons to create a cohesive holiday theme throughout your space. Mixing textures and styles will foster a vibrant, joyful atmosphere that celebrates the season.
Maintenance and Storage
Caring for the Painted Surface
Regularly dust the tree using a soft microfiber cloth to keep your painted surface looking vibrant. For stubborn stains, lightly dampen the cloth with water and gently wipe the affected area. Avoid harsh chemicals or abrasive materials, as they can damage the paint finish.
Storing After the Holidays
Once the holiday season is over, store your wooden tree in a cool, dry place to prevent warping or fading. Use bubble wrap or cloth to protect it from scratches, and consider placing it in a sturdy storage box to shield it from dust and potential damage until next year.

Conclusion
In summary, learning how to paint a wooden Christmas tree involves several enjoyable steps: preparing your materials, applying paint with precision, adding highlights and shadows, sealing your masterpiece, and finally finding the perfect display location.
Embrace your creativity throughout this festive project; there are no limits to how you can personalize your tree. Remember that each stroke brings your design to life and adds a unique touch to your holiday celebrations. These handmade decorations will surely bring joy and warmth to your home, making your Christmas even more special and memorable.
About the Author
Adrian Green, a lifelong woodworking enthusiast, shares his passion for the craft through The Woodenify Blog. With a foundation built on years of hands-on experience in his father’s woodworking shop, Adrian is dedicated to helping others learn and grow in the world of DIY woodworking. His approach to woodworking combines creativity, practicality, and a deep appreciation for the art of building with your own hands. Through his blog, he inspires individuals of all skill levels to embark on their own woodworking journeys, creating beautiful, functional pieces of furniture and décor.
Professional Focus
- Specializes in DIY woodworking projects, from furniture to home décor.
- Provides step-by-step guides and practical tutorials for woodworkers of all skill levels.
- Dedicated to helping readers build confidence and skill through easy-to-follow instructions and tips.
- Passionate about fostering a community of makers who can share, learn, and grow together.
Education History
- University of Craft and Design – Bachelor of Fine Arts (BFA) in Woodworking and Furniture Design
- Woodworking Apprenticeships – Extensive hands-on training with skilled craftsmen to refine carpentry and furniture making techniques.
- Online Courses & Masterclasses – Continued education in advanced woodworking techniques, design principles, and specialized tools
Expertise:
- DIY woodworking, carpentry, furniture making, and home décor projects.
- Creating accessible tutorials and guides for beginner to advanced woodworkers.
- Sharing the joys and satisfaction of woodworking, from raw materials to finished products.