Framing a poster enhances its visual appeal and protects against potential damage, such as tears, creases, or fading. A well-chosen frame can dramatically improve the overall aesthetic of the poster, allowing it to complement and enhance the surrounding space. Individuals can customize the frame by opting for a DIY framing project to align with their unique home decor and personal style preferences.

This customization ranges from selecting specific frame materials to choosing colors and designs that reflect individual tastes. Creating a frame involves a series of straightforward steps, requiring basic materials like wood or ready-made frame kits, a protective glass or acrylic sheet, and various tools for assembly. Understanding “how to make frame for poster” empowers individuals to bring a personalized touch to their artwork or posters, making them a home decoration centerpiece.
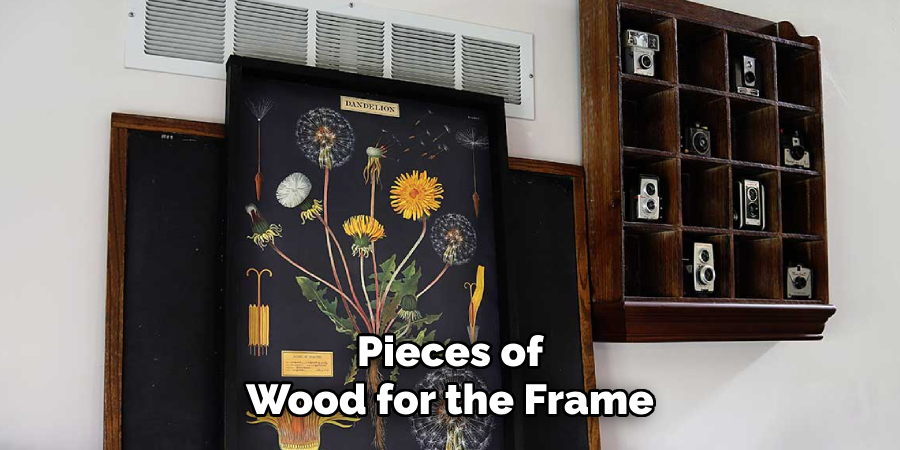
Planning Your Poster Frame
Planning your poster frame is an essential step that sets the foundation for a successful framing project. The first consideration is choosing the correct poster size and ensuring the frame fits properly. Common standard sizes include 18×24, 24×36, and other dimensions that are widely available in framing materials and ready-made kits. Equally important are the design considerations.
Different framing styles, such as simple, ornate, or shadow box frames, can complement the poster and enhance the room decor. A simple frame offers a minimalist look that accentuates the poster’s content, while ornate frames add a touch of elegance and sophistication. Shadow box frames provide depth, making them suitable for posters with three-dimensional elements or additional items like memorabilia.
Material options include wood, metal, or plastic, each with distinct aesthetic and budget implications. Wood frames offer a classic and versatile look, metal frames present a sleek and modern appearance, and plastic frames provide an affordable and lightweight solution. With careful planning, the chosen frame can perfectly complement the poster, highlighting its features and fitting seamlessly within the surrounding decor.
Materials and Tools Needed
Before embarking on your DIY poster framing journey, gathering all the necessary materials and tools is crucial to ensure a smooth assembly process. For materials, you will need either wood or a frame kit, which is available in pre-cut pieces or raw lumber if you prefer customization. A protective glass or acrylic sheet is essential to shield the poster from dust and damage.

The backing board, which can be foam board or cardboard, provides support and stability to the framed poster. You’ll need sturdy hanging hardware such as D-rings and wire to ensure your frame hangs securely. For added depth and style, consider incorporating a mat board. On the tools front, a reliable measuring tape is vital for precise dimensions. A miter or hand saw allows for clean cuts at the necessary angles.
A drill and appropriate drill bits will be needed for making holes, while a screwdriver helps secure screws. Keep a level on hand to guarantee your frame is level when mounted. Lastly, don’t forget your safety gear—goggles and gloves are essential to protect you during construction.
Preparing the Space
Selecting the Location:
Choosing the perfect spot to hang your framed poster is a critical decision that enhances its visual impact. Consider areas with ample natural or artificial lighting to accentuate the colors and details of the poster. Light is pivotal in how artwork is perceived; well-lit locations can make a significant difference. Additionally, consider the color of the wall on which the poster will be displayed. Neutral tones often highlight the poster, while colorful walls can either complement or clash with its design. Ideally, select a location where the poster serves as a focal point or adds balance to the room’s decor.
Clearing the Workspace:
Preparing your workspace is essential to ensuring a smooth and safe framing process. Choose a flat, stable surface, such as a table or workbench, where you can comfortably work without interference. Remove any clutter or obstructions that could hinder the project or pose a risk of accidents.
Gathering Materials:
Before starting your project, organize all materials and tools from the previous preparation step. Ensure everything is within easy reach, including your frame components, protective sheet, backing board, hanging hardware, and necessary tools. Being organized minimizes disruptions and contributes to a more efficient assembly process.

How to Make Frame for Poster Measuring and Cutting the Frame Pieces
Measuring for Accuracy
Accurately measuring your poster and determining the proper frame dimensions is critical to achieving a professional-looking result. Start by measuring the length and width of your poster precisely using a tape measure. If you plan to incorporate a mat board, you’ll need to consider its dimensions, as it will add additional width around the poster. To enhance the visual appeal, leave a border of one to three inches between the poster and the frame. This border will depend on your aesthetic preferences and the size limitations of the mat board.
Marking the Cuts
Once you have determined the dimensions, it’s time to mark the wood pieces for cutting. You’ll need four pieces of wood for the frame: two longer ones for the sides and two shorter ones for the top and bottom. Use a pencil to mark the point where you will cut each piece. Use a ruler or a triangle to draw guideline lines at a 90-degree angle on the wood to ensure straight and accurate lines. This ensures that the frame pieces will fit together neatly at the corners.
Making the Cuts
To create a snug fit at the corners, the wood pieces need to be cut at 45-degree angles. Using a miter saw is ideal for achieving precise cuts, but a hand saw can also be used if handled carefully. Set your miter saw to a 45-degree angle and carefully cut each marked line. Ensure that you maintain control over the saw to prevent jagged edges or splinters. If using a hand saw, employ a miter box to guide your cuts accurately.

Checking for Fit
Before assembling the frame permanently, it’s advisable to perform a temporary assembly to confirm that the pieces fit properly around your poster. Align the cut frame pieces on a flat surface, joining corners to form a rectangular or square shape. Place the poster with the mat board within this layout to ensure everything fits as planned. This step is crucial to identify any necessary adjustments before final assembly, ensuring a perfectly fitted and professionally framed piece.
How to Make Frame for Poster Assembling the Frame
Joining the Corners:
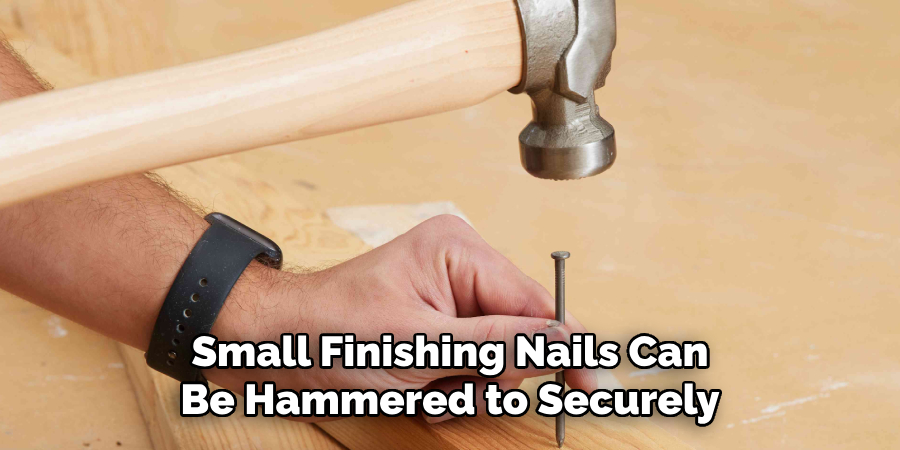
Once all frame pieces are cut to the correct dimensions, it’s time to join them to form a sturdy structure. Start by evenly applying wood glue on each piece’s ends where they will connect at the corners. Align the pieces precisely at their 45-degree cuts to form a perfect rectangle or square. To ensure a firm attachment, use corner brackets by aligning them at each joint and securing them with screws. Alternatively, small finishing nails can be hammered to securely hold the corners. Allow the wood glue to dry completely per the manufacturer’s instructions before proceeding to further assembly steps.
Reinforcing the Structure:
Consider additional reinforcement techniques to enhance your frame’s durability and stability. One effective approach is to apply a wooden or metal strap across the frame’s width at the back, which helps prevent warping or splitting over time. Use screws and a drill to attach the strap securely without penetrating the front of the frame. Moreover, ensure each corner is firmly secured, possibly adding second screws or nails if needed, to create a strong, cohesive structure that will last.
Attaching the Backing Board:
With the frame assembled, the next step involves securing the backing board to firmly hold the poster. Start by laying the frame facedown on a clean, stable surface. Position the backing board such that it fits snugly within the recess created by the frame. Attach the backing board using small screws or nails, inserting them through pre-drilled holes around the frame’s perimeter to ensure minimal damage and a neat finish. This attachment should be tight enough to support the poster but not so firm that it warps the backing material.
Adding Glass or Acrylic:
Adding a protective layer of glass or acrylic is crucial for safeguarding the poster from dust and damage. Before placing the sheet into the frame, clean it thoroughly to eliminate smudges or particles. Gently insert the glass or acrylic sheet into the frame, ensuring it rests smoothly against the inner edge. It should fit snugly without gaps. If necessary, use glazier points or additional adhesive to secure it in position, particularly if the frame is intended for display in a high-traffic area. This sheet provides a clear view of the poster while offering a protective barrier against potential wear and tear.
Adding Finishing Touches
Sanding and Preparing the Frame:
Before adding any finish to your frame, it’s important to sand down any rough edges to ensure a smooth surface. Use various grit sandpapers, starting with a coarse grain to eliminate larger imperfections, and gradually move to finer grits for a polished finish. Sand along the grain of the wood to prevent unwanted scratches. Be sure to clean the frame with a damp cloth to remove any dust or debris after sanding.
Applying Finish:
Once the frame is prepared, you can choose between painting or staining to enhance its appearance. If painting, apply a primer first to ensure the paint adheres well, followed by a couple of coats of your chosen color. Choose a wood stain that complements your decor and apply it evenly, following the wood grain for a stained finish. Both methods may benefit from a final coat of clear varnish or sealant to protect the finish and add a polished sheen.
Adding Matting (if desired):
For a professional look, consider adding a mat board inside the frame. Cut the mat board to size, ensuring it fits snugly within the frame edges, leaving an equal border around the poster. Use a sharp utility knife and a straightedge to achieve clean cuts. Once the matting is cut, place it in front of the poster, ensuring it frames the artwork neatly and provides an elegant visual border. Attach it to the backing board with archival-quality tape to preserve the poster’s condition.
Conclusion
In conclusion, understanding “how to make frame for poster” provides a fulfilling way to display cherished artwork. The process involves meticulous steps: measuring and preparing your wood, making precise cuts, assembling and reinforcing the frame, and attaching the backing board and a protective glass or acrylic layer. Adding finishing touches like sanding and applying paint or stain elevates the frame’s aesthetic appeal, while optional matting can provide a professional look.
DIY framing projects offer numerous benefits, including cost savings and the customization of size, design, and color to perfectly highlight your poster’s artistry. Crafting a personalized frame not only enhances the visual impact of the piece but also brings a sense of achievement and connection to the finished product. Embrace your creativity in designing a frame that showcases your poster beautifully, making it a distinct and cherished display within your space.
About the Author
Adrian Green, a lifelong woodworking enthusiast, shares his passion for the craft through The Woodenify Blog. With a foundation built on years of hands-on experience in his father’s woodworking shop, Adrian is dedicated to helping others learn and grow in the world of DIY woodworking. His approach to woodworking combines creativity, practicality, and a deep appreciation for the art of building with your own hands. Through his blog, he inspires individuals of all skill levels to embark on their own woodworking journeys, creating beautiful, functional pieces of furniture and décor.
Professional Focus
- Specializes in DIY woodworking projects, from furniture to home décor.
- Provides step-by-step guides and practical tutorials for woodworkers of all skill levels.
- Dedicated to helping readers build confidence and skill through easy-to-follow instructions and tips.
- Passionate about fostering a community of makers who can share, learn, and grow together.
Education History
- University of Craft and Design – Bachelor of Fine Arts (BFA) in Woodworking and Furniture Design
- Woodworking Apprenticeships – Extensive hands-on training with skilled craftsmen to refine carpentry and furniture making techniques.
- Online Courses & Masterclasses – Continued education in advanced woodworking techniques, design principles, and specialized tools
Expertise:
- DIY woodworking, carpentry, furniture making, and home décor projects.
- Creating accessible tutorials and guides for beginner to advanced woodworkers.
- Sharing the joys and satisfaction of woodworking, from raw materials to finished products.