Ah, the cane chair – a timeless piece that screams elegance, whispers comfort, and, on occasion, yells for a little TLC. Constructed from the sturdy, flexible rattan plant, these beauties have woven their way into our hearts and homes thanks to their airy design and lightweight durability. But, like that one friend who’s always a bit more high-maintenance, they do require a bit of regular care.
Enter the art (and yes, it’s an art) of learning how to fix cane chair. Whether it’s the seat that’s sagging like an old mattress or the backrest that’s seen better days, fear not! With a touch of patience and the right know-how, bringing these chairs back to their former glory is not only possible but also incredibly rewarding. And why bother, you ask?
Well, giving your cane chair some well-deserved attention extends its lifespan and saves you from parting with a piece of furniture that adds a chic touch to your space.Plus, there’s nothing like the satisfaction of plonking down in a chair you’ve nursed back to health with your own two hands. Stick around, and you’ll learn all about the magic of cane chair repair, ensuring your beloved seat keeps cradling you in style for years to come.
Inspection and Assessment
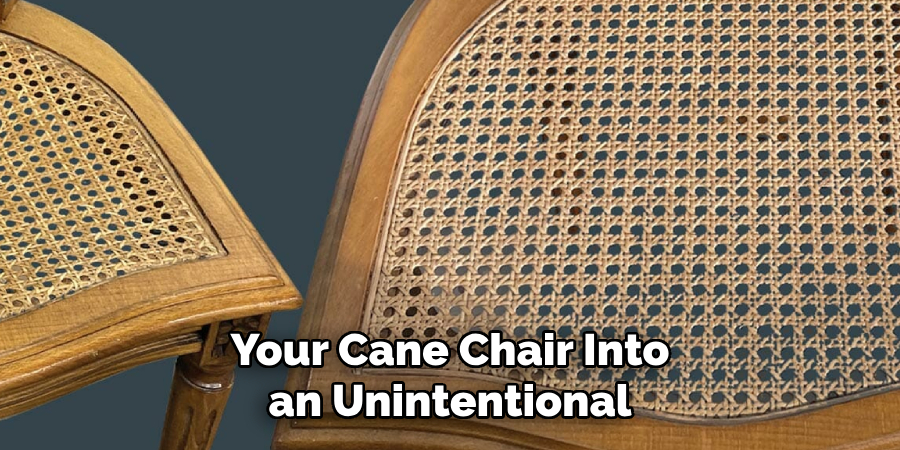
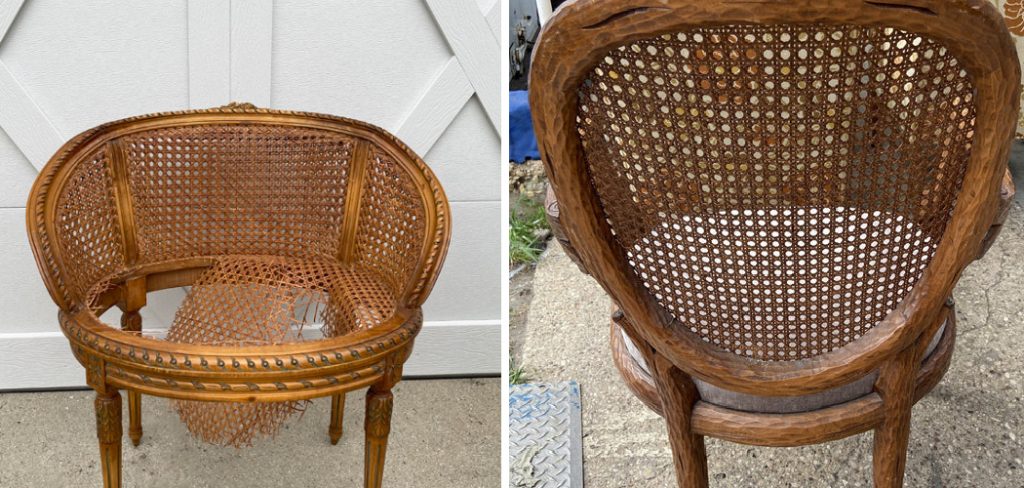
Before you turn your cane chair into an unintentional DIY disaster, the first critical step is playing detective – yep, whip out your magnifying glass, metaphorically speaking, and assess the damage. It’s like CSI but for furniture. Start by giving your chair the once-over, and I mean really look at it. You’re not just admiring its vintage charm; you’re spotting for trouble.
First, check out the seat and backrest—these are the usual suspects for wear and tear. Does the cane look more like an abstract expressionist painting than a seat? Are there visible breaks or an overall look of despair? Jot down what needs mending; this will be your “To-Do” list.
Next, give it a wiggle. No, not a dance move, but gently shake the chair to test its stability. Any ominous creaks, groans, or, heaven forbid, parts that seem to give way under scrutiny need attention. Loose joints are like family secrets; they’re there, causing problems, until you confront them.
Peek under the hood – or, in this case, the seat. Inspect the frame and legs. These areas often harbor hidden issues like cracks or weak spots, especially if the chair has been a trusty companion for many years.
Write down every flaw, no matter how tiny. It’s like gathering evidence – the more you have, the better prepared you’ll be. This list becomes your game plan, helping you identify what you’ll need to fix or replace. Remember, some issues might need a specialist’s touch, so don’t be too proud to call in a professional if things look gnarly.
And there you have it—the grand inspection! With a keen eye and a bit of patience, you’re now one step closer to reviving your cane chair and ensuring it won’t retire any time soon.
Gathering Materials and Tools
Alright, folks, it’s time to gear up! Think of this as prepping for a major heist, except the only thing you’re stealing is the spotlight back from the brink of chair despair. Here’s your arsenal for the mission:
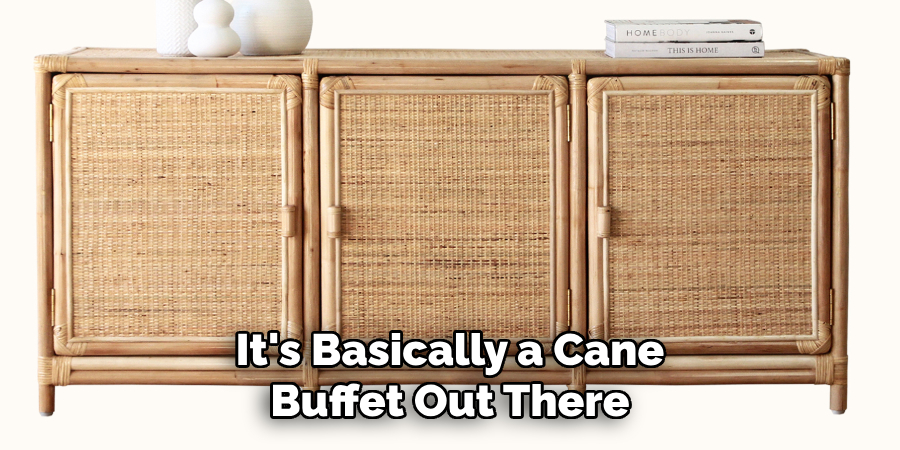
- Cane Material: Make sure it’s the right type for your chair. There’s a flat cane, round cane, binder cane… It’s basically a cane buffet out there. Choose wisely.
- Glue: Not just any glue, but the wood-friendly kind that’ll make those joints stickier than a summer afternoon in Louisiana.
- Chisel and Hammer: When gently persuading old cane or stubborn joints to part ways. Remember, it’s not about strength but finesse.
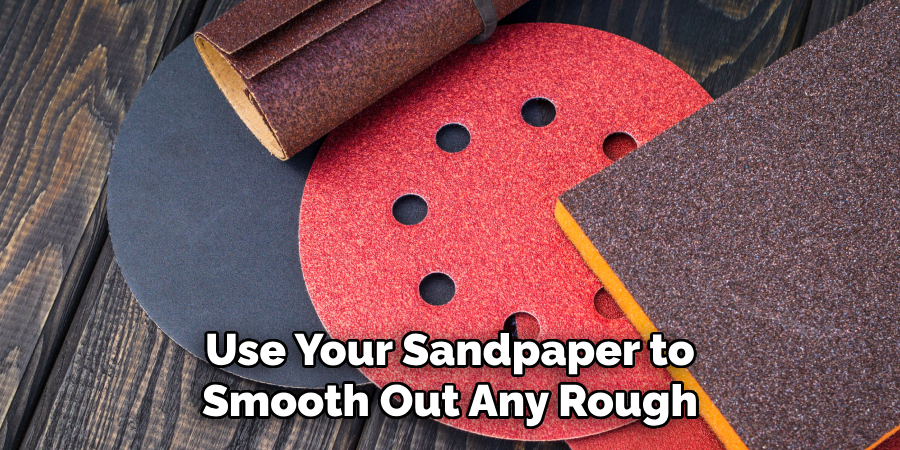
- Sandpaper: To smooth things over, literally. Because nobody likes a rough companion.
- Varish or Oil: Depending on how shiny or nourished you want your chair to look after its spa day.
- A small paintbrush: For those delicate glue applications. Think of it as painting on a canvas, but your medium is adhesive.
- Pliers: For pulling, twisting, or generally showing who’s boss.
- Towels and Sponges: For clean-up. This isn’t a messy dinner, but it’s close.
- Patience: Not available in stores. This is perhaps the most crucial tool in your kit.
A few pro tips before you hit the hardware store:
- Quality over Quantity: Don’t skimp on the materials. Your chair is a diva and deserves the best.
- Matchy-matchy: Try to match the new cane’s color and size with the old one. It’s like trying to find a roommate; compatibility is key.
- Safety First: Don those gloves and glasses. Splinters and dust are not the souvenirs you want from this adventure.
With your toolbox ready and spirit high, you’re all set to turn that “needs work” chair into a “work of art.” Happy repairing!
How to Fix Cane Chair: Replacing Broken or Damaged Cane
Alright, DIY dynamos, roll up those sleeves because it’s time to get down to the nitty-gritty of replacing that busted cane. Imagine you’re a surgeon, but your patient is your beloved cane chair and the operating room is your garage/workshop/backyard. Here we go!
- Evicting the Old Cane: First up, you need to remove the old, damaged cane. But remember, it’s more about precision than going Hulk on it. Use your chisel and hammer to gently coax the spline (that’s the strip holding the cane in place) out of its groove. Think of it as persuading an overstayed houseguest to leave. Once the spline’s out, the cane should come out easier than finding a cat video online.
- Cleaning House: Now that the old cane is history, give the groove a good cleaning. Use your sandpaper to smooth out any rough spots—this isn’t just busywork; it’s like prepping the canvas for a masterpiece.
- The Weave: Here’s where the magic happens. Start by soaking your new cane in water. Why? Because a flexible cane is a happy cane. Think of it as a spa bath that prepares it for the transformation. Once it’s pliable, start weaving. Begin in the center, working your way outward in a pattern that mirrors the original design. This part is like a dance, where every step needs to be in sync with the music—only your music is the pattern of the weave.
- Playing Tightrope: Tension is key. You want the cane tight enough to bounce a coin off but not so tight that it sings opera. If your hands start to feel like jelly, use pliers for an extra grip.
- Finishing Touches: Once the weave is complete and you’ve checked for loose ends or uneven tension, it’s time to secure the cane with the spline. Tap the spline gently into the groove using your hammer (and a piece of wood to protect it). Like tucking in a child, make sure it’s snug and secure.
- The Grand Seal: Finally, seal your work with a coat of varnish or oil, depending on the finish you want. This not only protects the cane but also gives it that glossy, “I just came from the salon” look.
- Victory Lap: Now, step back and admire your handiwork. You’ve just saved a cane chair from the brink of despair. Feel free to boast about it subtly at your next dinner party.
Remember, like all great arts, cane repair takes patience and practice. But the satisfaction of restoring beauty and function to a piece of furniture? That’s the stuff DIY dreams are made of. Now, go forth and weave your magic!
How to Fix Cane Chair: Repairing Loose Joints and Frame Damage
Okay, team, it’s time to play furniture detective again, turning our Sherlock Holmes-like attention to the mysteries of loose joints and the enigma of frame damage. Feel those wobbles? Hear those creaks? They’re not ghostly whispers; they’re your chair begging for a bit of TLC.
Identifying Loose Joints and Methods for Tightening or Regluing

First up, grab the chair by the shoulders (figuratively, of course)—give it a gentle shake. Hear that sound? That’s the loose joint’s way of waving a white flag. But worry not; we’ve got this. The key to tightening these loosey-goosey parts lies in our trusty friend: wood glue. Think of it as the chair’s personal trainer, helping those joints regain shape. Apply the glue precisely where the wood meets, using a syringe for those hard-to-reach spots because, yes, even chairs have their nooks and crannies.
For joints that are playing hard to get, it’s time to introduce them to the concept of clamping. No, not the kind of clap you give when your favorite song comes on, but the squeeze of a clamp gently persuades the joint back to its original position. Leave it on as the glue dries—it’s like a little joint spa moment.
Strategies for Reinforcing Weak or Damaged Frame Components
Now, onto the frame – the chair’s skeleton. Spotting weak or damaged areas can feel a bit like being a doctor, minus the hefty tuition fees. These spots might need more than just a pep talk; they might need reinforcements. This is where epoxy plays, acting as the superhero swooping in to provide extra strength. Mix it up, apply it to the weakened area, and wait for it to cure. It’s like giving your chair a bionic upgrade.
In cases of significant damage, you might have to play the role of a surgeon, grafting in new pieces of wood to replace the old, damaged ones. Measure twice, cut once, and secure the new piece with glue and, if needed, screws. It’s a bit like a puzzle, but you’re creating it instead of finding the missing piece.
Always remember, repairing furniture is like baking a cake – it requires patience, precision, and the right ingredients. But once you’re done, the satisfaction of having a sturdy, squeak-free chair is the sweetest reward. Plus, you get bragging rights at your next get-together, showing off your DIY prowess. Who knew chairs could be such a conversation starter?
Refinishing and Restoring

Alright, DIY aficionados, after successfully navigating the choppy waters of repair, it’s time to make that cane chair not just stand but shine—literally. We’re on to the beauty salon phase for chairs, also known as refinishing and restoring. Grab your spa robes (just kidding, wear something you can get dirty in), and let’s dive in.
Options for Refinishing the Wooden Frame of the Cane Chair
First off, you’ve got to assess your chair’s current state like a judge on a talent show. Is the finish looking tired? Is it more vintage chic or just plain old? If your chair frame’s finish is crying for help, here are a few paths you could strut down:
- The Polite Polish: If your chair’s wood frame is just a bit dull but still kicking, you might not need the full makeover. Sometimes, all you need is a good old polish. Get yourself some wood polish, and gently caress it onto the frame with a soft cloth. It’s the equivalent of a rejuvenating facial for your chair.
- Stain Lane: Staining the wood can give it a new vibe for more significant makeovers. You can go darker to add drama or lighter to keep things breezy. Staining is like dyeing your hair; always test on a small, inconspicuous area first because surprise chair colors at the big reveal are only fun on game shows.
- Paint Parade: Want to really shake things up? Painting your chair frame can transform it from a backup dancer to a lead singer. Whether you’re looking for a bold statement or a soft whisper of color, the world of paint is your oyster. Just make sure to gently sand down the surface—it helps the paint stick better than gossip in a small town.
Techniques for Restoring the Chair’s Original Appearance and Finish
Now, if your heart’s set on bringing your chair back to its original glory, buckle up; we’re going on a restoration road trip.

- Strip Tease: Sometimes, you must take things down to build them back up. If the old finish is damaged, use a gentle stripper (the chemical kind, folks) to remove the old layers. It’s like exfoliating before applying a face mask—clean canvas, better results.
- Sanding Soiree: You’ll likely need to sand the surface smooth after stripping. This isn’t the time for power tools; a gentle hand-sanding will do. It’s like prepping for prom night—you want everything smooth and flawless.
- Matchmaker Magic: Matching the original finish can be the trickiest part. This is where patience and a bit of detective work come into play. Visit local hardware stores or online forums, show pictures, or describe the original finish to get advice on matching the color and type. It’s a bit like online dating for your chair—you’ve got to find the perfect match.
Remember, friends, refinishing and restoring is not just about making a chair look pretty. It’s about giving it a new lease on life while honoring its story. And when you’re done, not only will your chair look fabulous, but you’ll also have the ultimate ice-breaker story at your next gathering. “Did I ever tell you about the time I gave my chair a full spa day…”
Upholstery Repair
Prepare yourself for the plot twist in our chair renovation saga: tackling the upholstery. This stage is where your chair goes from looking fine to fabulous, equivalent to the makeover montage in every teen movie.
First up, we’ve got to play furniture doctor and assess the patient: is the upholstery giving off more of a haunted house vibe than cozy living room chic? Are the cushions so flat they’re practically 2D? Fear not because we’re about to breathe life back into them.
Assessing and Repairing Damaged Upholstery or Cushions
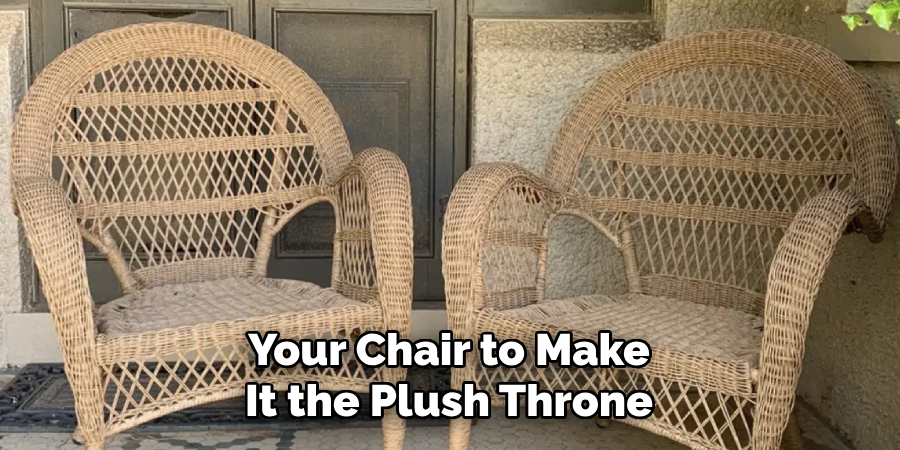
Peek under the hood—or rather, the fabric—and see what’s going on with the padding and structure beneath. Here’s where you channel your inner surgeon and decide whether the padding just needs a bit of fluffing up or if we’re talking full-on transplant. If the foam’s gone rogue and flat, consider replacing it. It’s like stuffing a turkey, but instead, you’re stuffing your chair to make it the plush throne it deserves to be.
Now, for the fabric—if it’s looking sadder than a sock without its match, it’s time to go fabric shopping. This is your chance to give your chair that runway-ready look. Choose a fabric that complements its style but also suits your life. Got cats? Maybe steer clear of that luxurious velvet unless you want it to double as a claw sharpener.
Tips for Replacing or Repairing Upholstery Fabric or Padding
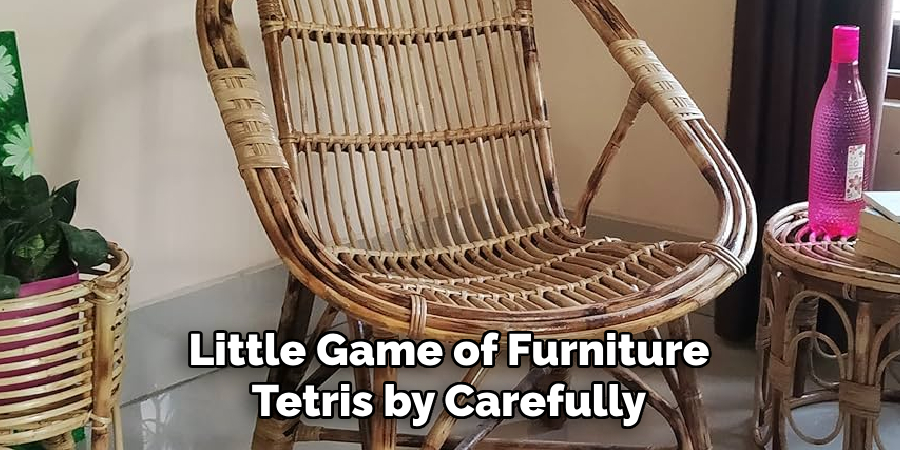
- Taking Measurements: Lay your chosen fabric out and play a little game of furniture Tetris by carefully measuring and cutting. Remember, it’s always better to have a little too much fabric than to find yourself playing a high-stakes game of “Will It Stretch?”
- Staple Gun Fun: With your fabric cut, it’s time for my personal favorite tool—the staple gun. It’s like a hot glue gun’s more powerful cousin. Attach your fabric by pulling it taut (but not too tight—you’re not trying to give your chair a facelift) and staple away. It should feel secure, like a hug from a grandma, but with metal instead of cookies.
- The Cushion Situation: If your cushion feels more like a pancake, don’t fret. Simply measure and cut foam to size, wrap it in batting for that extra puffy look (everyone loves a good puff), and encase it in your new fabric. Voilà, you’ve got yourself a cushion that could double as a cloud.
Remember, folks, upholstery repair is like giving your chair a new outfit. You want it to be stylish but comfortable, trendy yet timeless. And when you finally step back to admire your work, you’ll realize that your chair isn’t just furniture—it’s a piece of your heart. Plus, you’ll have yet another anecdote for dinner parties. Who knew upholstery could be so fulfilling?
Preventative Maintenance
Alright, so you’ve turned your chair from a before photo into an after, and you’re pretty darn proud. But hey, we’re not just about that instant gratification life. No, we’re thinking long-term, sustainable chair love. Here’s the lowdown on keeping your cane chair not just surviving but thriving so you don’t have to redo all your hard work next year.

First off, think of your cane chair as that finicky houseplant that doesn’t like too much sun or too much shade. Cane loves a bit of humidity, but too much or too little, and it goes all drama queen on you. To prevent your cane weaving from turning into a sad, saggy mess or a brittle, cracked disaster, keep your chair in a spot with stable humidity. Think “spa day” levels of pampering, okay?
Regular cleaning? It’s not just a good idea; it’s a chair survival strategy. Dust your cane with a soft brush (a makeup brush is perfect, plus it’s a great excuse for accidentally buying a new one: “But honey, it’s for the chairs!”). If your cane’s looking a little grimy, wipe it down gently with a slightly damp cloth and some mild soap. Just don’t go overboard with the water – cane is not a fan of the wet t-shirt look.
Now, here’s the secret sauce for cane chair longevity: wax. A little bit of furniture wax rubbed gently into the cane occasionally keeps it flexible and gorgeous, as chair yoga and moisturizer rolled into one. It’s like giving your chair its own personal spa treatment, and who wouldn’t want that?
Remember, a little bit of TLC goes a long way. Treat your chair like a beloved pet – feed it (wax), water it (just a dab!), and give it plenty of love (dust and clean regularly), and it’ll be your loyal companion for years to come. Plus, you’ll save yourself many “we need to talk” moments with your furniture. Keep up the good work; your cane chair will be more than just seating—it’ll be a piece of living history in your home.
Storage and Seasonal Care
Alright, strap in because we’re about to tackle the seasonal fashion of cane chairs. Yes, even chairs have a winter wardrobe, albeit a bit less glamorous. Now, storing your cane chair during off-seasons is akin to tucking your precious summer sandals away – you want to do it right so they don’t emerge looking like they’ve been through a fashion apocalypse.

First, consider your storage space as a VIP lounge for your cane chair. You want it cool, dry, and not too bright. Basements and attics can be tempting, but beware of the perils of dampness and temperature swings! Your cane chair is not a fan of saunas or freezer burns. And sunlight? Direct exposure can make your chair fade faster than a pop star’s latest hit. Consider a chair cover or, at the very least, a spot away from those UV rays that doesn’t scream “solarium session.”
When it comes to protecting your beloved chair from moisture – because, honestly, who invited moisture to the party? – silica gel packets are your new best friend. Tuck a few into the seat cushions or around your chair in storage, and you have an anti-moisture force field. It’s like having a tiny army of desiccant defenders, and who doesn’t want that?
Remember, folks, your cane chair is more than just a place to park your posterior; it’s a delicate creature that thrives with a little careful consideration. Treat it right during its hibernation period, protect it from the elements, and you’ll both emerge into the next season ready to shine. Plus, you’ll avoid those awkward “What happened to you over the winter?” conversations. Nobody wants that. Keep your cane chair stylish and intact, and it’ll be ready for its close-up come spring.
DIY vs. Professional Repair
When faced with the daunting question of whether to DIY or not to DIY—that is, to wrestle with cane chair repair yourself or call in the cavalry (a.k.a. the professionals)—there are a few things to mull over. It’s a bit like choosing between cooking at home and dining out; both have their perks, but it really boils down to what you’re in the mood for and, well, your skill level in the kitchen… or workshop, in this case.

DIY-ing, my friends, is like the Wild West of furniture repair. You can choose your path, make your own hours, and potentially learn a new party trick. “See this chair? Repaired it myself.” Instant respect. Plus, it’s usually gentler on the wallet. But, and it’s a big thing, if your skills are more akin to a bull in a china shop, you might end up with a project that screams “help me” rather than “home decor.” The major drawback? Mistakes can be costly, not just in materials but in your time and sanity.
Conversely, calling in a professional is like subscribing to a worry-free warranty. These folks have seen chairs that look like they’ve been chewed up and spat out by life and still managed to bring them back to glory. They’ve got the skills, the tools, and probably a collection of quirky stories about furniture mishaps. The downside? Your wallet might feel a bit lighter. And there’s always that tiny, niggling thought that maybe, just maybe, you could have done it yourself.
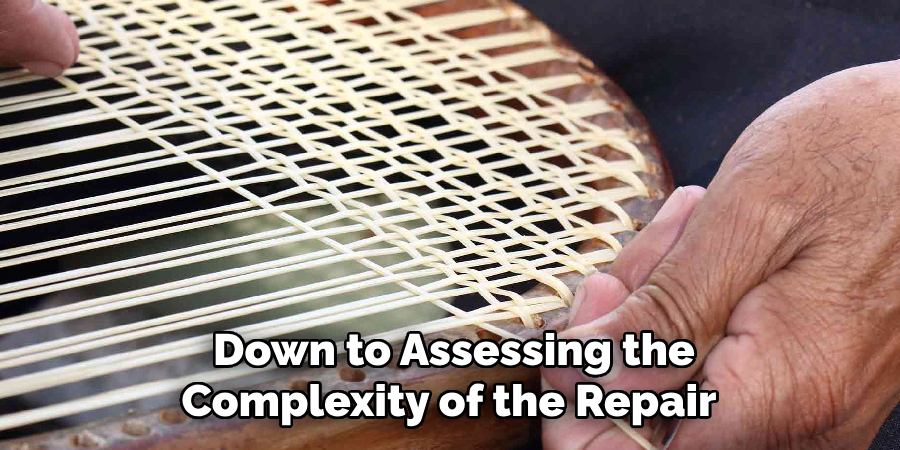
Ultimately, deciding to take the DIY route or go pro comes down to assessing the complexity of the repair, your own handiness level, and how dearly you hold onto your dollars vs. your time. If your chair’s wounds are superficial, and you’re feeling brave, DIY could be your hero’s journey. But if that chair looks like it’s been through the wars, maybe it’s time to call in the experts. Either way, you’ll end up with a piece of furniture that tells a story—and hopefully, it’s not a horror story.
Conclusion: Restoring the Beauty and Functionality of Your Cane Chair
Well, folks, we’ve twisted and turned through the riveting world of cane chair rehabilitation, surfacing from the deep with our DIY badges polished and ready to flaunt.
Remember, whether you’re facing the saga of a sagging seat, navigating the heartbreak of a break-up (literally), or hosting uninvited guests (those creaks and groans at 3 AM), there’s hope. Armed with a sprinkle of patience, a dollop of wood glue, and the fierce determination of a DIY warrior, you now know how to fix cane chair with the finesse of a seasoned pro.
No repair is too small, and no squeak is too squeaky. Each dab of glue or strategic tightening of a screw imbues your chair with stories to tell, laughter shared, and many more dinners to come. And when the whispers of wear and tear begin to murmur once again, as they inevitably will, remember this guide as your trusty sidekick on the heroic quest of cane chair salvation.
To those wielding glue brushes and contemplating the paint-or-not-to-paint conundrum, take heart. Your adventure in cane chair repair doesn’t just restore beauty and functionality; it weaves your spirit into the very fabric of your homestead. Here’s to you, the brave, the bold, the cane chair whisperers. May your seats be sturdy, your journeys rewarding, and your living spaces a testament to the tales of triumph over the trickiest of chair calamities.
About the Author
Adrian Green, a lifelong woodworking enthusiast, shares his passion for the craft through The Woodenify Blog. With a foundation built on years of hands-on experience in his father’s woodworking shop, Adrian is dedicated to helping others learn and grow in the world of DIY woodworking. His approach to woodworking combines creativity, practicality, and a deep appreciation for the art of building with your own hands. Through his blog, he inspires individuals of all skill levels to embark on their own woodworking journeys, creating beautiful, functional pieces of furniture and décor.
Professional Focus
- Specializes in DIY woodworking projects, from furniture to home décor.
- Provides step-by-step guides and practical tutorials for woodworkers of all skill levels.
- Dedicated to helping readers build confidence and skill through easy-to-follow instructions and tips.
- Passionate about fostering a community of makers who can share, learn, and grow together.
Education History
- University of Craft and Design – Bachelor of Fine Arts (BFA) in Woodworking and Furniture Design
- Woodworking Apprenticeships – Extensive hands-on training with skilled craftsmen to refine carpentry and furniture making techniques.
- Online Courses & Masterclasses – Continued education in advanced woodworking techniques, design principles, and specialized tools
Expertise:
- DIY woodworking, carpentry, furniture making, and home décor projects.
- Creating accessible tutorials and guides for beginner to advanced woodworkers.
- Sharing the joys and satisfaction of woodworking, from raw materials to finished products.