Are you hosting a special event or banquet? Folding your chair covers is an easy and cost-effective way to add elegance and sophistication to any occasion. Follow these simple steps to learn how to fold a banquet chair cover.

Folding a banquet chair covers appropriately is essential to maintain its quality and ensure it is ready for future use. Whether preparing for an event or packing up after one, knowing the correct method can save time and prevent wrinkles or damage to the fabric.
This guide on folding a banquet chair cover will walk you through the simple steps to neatly fold a banquet chair cover, helping you keep your event supplies organized and presentable. Let’s get started!
What Are the Benefits of Folding a Banquet Chair Cover?
Folding a banquet chair cover has many benefits, including:
- Cost Savings: By folding and storing your chair covers, you can save money by not purchasing pre-folded covers or paying for professional folding services.
- Convenience: Having neatly folded chair covers on hand makes it easy to quickly set up for events or change out covers if needed.
- Versatility: Folded chair covers take up less space than unfolded ones, making them easier to store and transport. They can also be stacked on top of each other, maximizing storage space.
Once you know how to fold a banquet chair cover correctly, you’ll wonder why you haven’t been doing it all along!
What Will You Need?
To fold a banquet chair cover, you will need:
- 1 Banquet chair cover
- A flat, clean surface to work on
That’s it! Now, let’s move on to the next steps.
10 Easy Steps on How to Fold a Banquet Chair Cover
Step 1. Lay the Cover Flat
Start by laying the banquet chair cover flat on a clean, smooth surface. Ensure that the surface is free from any dust or debris to prevent the cover from becoming dirty or wrinkled during the folding process. Position the chair cover with the outer side facing

down and the inner side, typically the side that touches the chair, facing up toward you. Smooth out any wrinkles or creases gently with your hands to create an even surface. Taking the time to lay out the cover in this manner properly will ensure a more uniform fold and result in a polished, professional appearance when the cover is unfolded and used at your event.
Step 2. Fold the Cover in Half Lengthwise
Take one side of the banquet chair cover and fold it over to meet the opposite side, aligning the edges carefully. This fold should be done lengthwise, creating a long and narrow shape. Smooth out any wrinkles as you fold to ensure the fabric stays even and flat. Maintaining precision during this step will help avoid bulkiness and make the subsequent folds easier to manage.
Step 3. Fold the Cover in Half Again
Take the long, narrow shape created in Step 2 and fold it in half again by bringing the two shorter ends together. Ensure the edges are correctly aligned to maintain a neat and compact fold. The banquet chair cover should form a smaller rectangle at this stage, making it easier to handle and store. Smooth out any creases or uneven areas to achieve a polished look. This secondary fold is crucial for reducing the overall size of the cover, ensuring it remains convenient to transport or place in storage while maintaining its pristine condition.
Step 4. Store the Folded Cover Properly
Place the neatly folded banquet chair cover into a storage bag or container to keep it clean and protected. Ensure the storage area is dry and free from dust or moisture, which will help maintain the fabric’s quality and longevity. Proper storage preserves the cover’s appearance and makes it easily accessible for future events.
Step 5. Inspect the Cover Before Reuse
Before reusing the banquet chair cover, carefully inspect it for any signs of wear, damage, or stains. Begin by unfolding the cover and checking for tears, loose threads, or fraying edges that might require mending. Examine the fabric for any persistent marks or
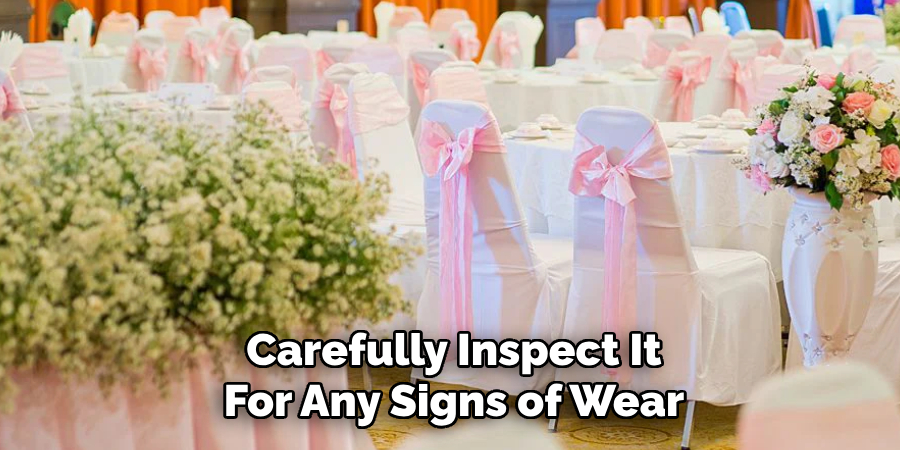
discoloration and, if needed, treat these stains using an appropriate fabric cleaner or stain remover. Pay attention to any lingering odors, as these may require the cover to be washed or aired before use. Ensuring the cover is in excellent condition ahead of time guarantees a seamless setup and a polished appearance for your event. Taking these precautionary steps not only extends the cover’s life but also ensures it meets the expectations of the occasion.
Step 6. Properly Fit the Cover on the Chair
When using the banquet chair cover, fit it properly for a sleek and professional look. Begin by draping the cover evenly over the chair, ensuring it aligns with its shape and dimensions. Smooth any wrinkles or creases by adjusting the fabric and tucking it securely. If the cover includes ties, hooks, or elastic edges, fasten them to keep them firmly in place. A well-fitted cover enhances the chair’s appearance and contributes to the overall elegance of the event setup.
Step 7. Final Touches and Inspection
Once the banquet chair cover is fitted correctly, take a moment to inspect the final setup. Ensure that all covers are uniformly aligned and free from wrinkles or loose fabric. Pay attention to details like symmetrical folds or adjustments that enhance the presentation. Use a fabric steamer or iron (in a safe setting) to smooth out any remaining creases if necessary. These finishing touches ensure a refined and polished appearance, leaving a lasting impression on your guests and creating a sophisticated event ambiance.
Step 8. Accessorize the Chairs
To elevate the visual appeal of your banquet chairs further, consider adding accessories like bows, sashes, or decorative chair bands. Choose colors and materials that complement the event’s theme and overall decor. Secure the accessories neatly, evenly
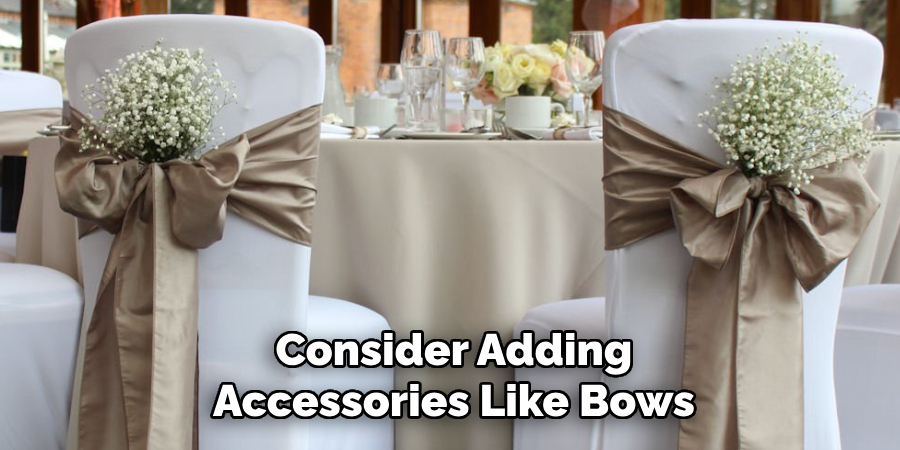
tied, or positioned for a consistent and elegant look. Additionally, consider incorporating embellishments such as florals, ribbons, or small ornaments to add a touch of personalization and sophistication. Thoughtful accessorizing can transform simple chair covers into stunning focal points that enhance the atmosphere of your event.
Step 9. Final Inspection
Before concluding the chair set up, take a moment to conduct a thorough final inspection. Walk around the event space and check each chair for uniformity and alignment. Ensure all covers and accessories are appropriately positioned and secured, with no loose ends or uneven placements. Address any imperfections promptly, such as adjusting a crooked sash or smoothing out wrinkles. A meticulous final inspection ensures a flawless and professional setup, leaving a lasting impression on all attendees.
Step 10. Clean-Up and Maintenance
After the event, prioritize cleaning and caring for the chair covers and accessories. Remove all embellishments carefully to avoid damage, and separate them for storage or reuse. Inspect the covers for any stains or tears, documenting items requiring cleaning or repair. Properly fold or roll the chair covers to prevent creasing and store them in a dry, protected space. Implementing a thorough clean-up process ensures that your chair covers remain in excellent condition ready for future use.
Following these steps, you can adequately fold, store, and fit banquet chair covers for a professional and elegant event presentation.
5 Things You Should Avoid
- Avoid Folding Without Cleaning the Cover First: Placing a dirty or stained cover in storage can lead to permanent discoloration or unpleasant odors.
- Avoid Using Excessive Force While Folding: Tugging or pulling too hard can damage the fabric or weaken the seams, reducing the lifespan of the chair cover.
- Avoid Folding in a Disorganized Manner: Randomly folding the cover can cause creases or wrinkles that are difficult to remove before subsequent use.
- Avoid Storing in Damp or Humid Conditions: Storing the folded cover in a moist environment can lead to mold or mildew growth, ruining the material.
- Avoid Folding Immediately After Washing: Ensure the cover is completely dry before folding, as the damp fabric can lead to unpleasant smells or fabric degradation during storage.
How Do You Get Wrinkles Out of Chair Covers?
If you notice wrinkles or creases in your chair covers, there are several methods you can use to remove them. One option is to lay the cover flat on an ironing board and use a steam iron on the lowest heat setting. Gently glide the iron over the fabric, careful not to apply too much pressure that could damage the material.

Alternatively, you can use a fabric steamer or spray the cover lightly with water and hang it up to air dry, gently smoothing out any wrinkles by hand. It’s essential to avoid using high heat when removing wrinkles from chair covers, as this can cause shrinkage or damage to certain fabrics.
Conclusion
How to fold a banquet chair cover properly is essential for maintaining its appearance and durability.
By following the outlined steps and avoiding common mistakes, you can ensure that your covers remain in excellent condition and are ready for future events. Always handle the fabric carefully, clean it thoroughly, and store it in a dry, organized space.
Taking a little extra time to fold and store your chair covers correctly will save you effort and stress when using them again, helping you achieve a professional and polished event setup every time.
About the Author
Adrian Green, a lifelong woodworking enthusiast, shares his passion for the craft through The Woodenify Blog. With a foundation built on years of hands-on experience in his father’s woodworking shop, Adrian is dedicated to helping others learn and grow in the world of DIY woodworking. His approach to woodworking combines creativity, practicality, and a deep appreciation for the art of building with your own hands. Through his blog, he inspires individuals of all skill levels to embark on their own woodworking journeys, creating beautiful, functional pieces of furniture and décor.
Professional Focus
- Specializes in DIY woodworking projects, from furniture to home décor.
- Provides step-by-step guides and practical tutorials for woodworkers of all skill levels.
- Dedicated to helping readers build confidence and skill through easy-to-follow instructions and tips.
- Passionate about fostering a community of makers who can share, learn, and grow together.
Education History
- University of Craft and Design – Bachelor of Fine Arts (BFA) in Woodworking and Furniture Design
- Woodworking Apprenticeships – Extensive hands-on training with skilled craftsmen to refine carpentry and furniture making techniques.
- Online Courses & Masterclasses – Continued education in advanced woodworking techniques, design principles, and specialized tools
Expertise:
- DIY woodworking, carpentry, furniture making, and home décor projects.
- Creating accessible tutorials and guides for beginner to advanced woodworkers.
- Sharing the joys and satisfaction of woodworking, from raw materials to finished products.