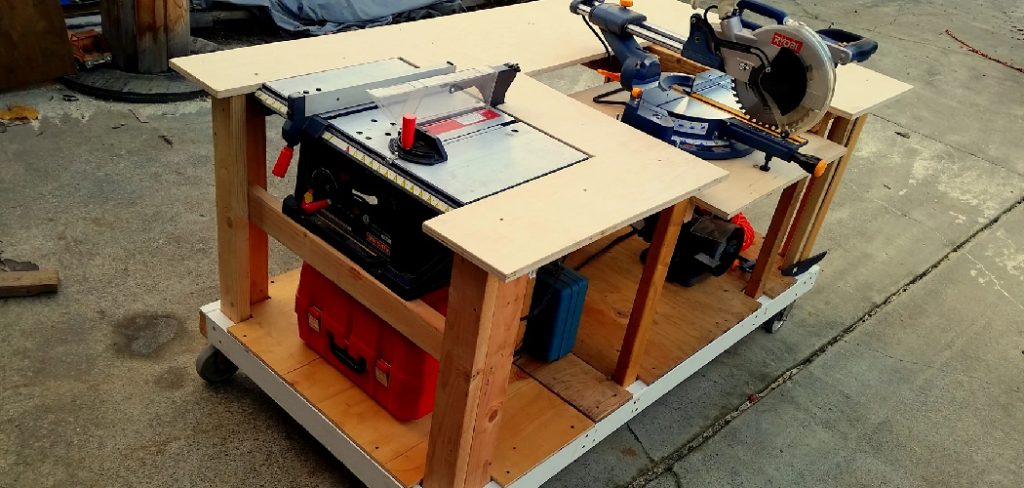
A well-designed table saw workstation is fundamental for any woodworking enthusiast or professional. It is the backbone of an efficient and safe workshop, enabling precise cuts, organized tools, and a streamlined workflow. A custom-built workstation offers numerous benefits, including increased stability to handle heavy materials, better dust collection to maintain a clean workspace, added storage for essential tools and accessories, and overall improved workflow that saves time and effort.
This guide has been meticulously crafted to provide you with step-by-step instructions on how to build a table saw workstation tailored to your needs. Whether you’re optimizing a compact workshop or creating a dedicated space for larger projects, this guide will equip you with the knowledge needed to design and construct a workstation that enhances both your productivity and safety. Let’s get started building a workstation that transforms your woodworking experience!
Planning Your Table Saw Workstation
Assessing Your Needs
Before starting, take time to assess your specific requirements. Begin by measuring the available space in your workshop and the dimensions of your table saw to ensure the workstation fits seamlessly into your setup. Consider any additional features to enhance functionality, such as outfeed tables to support larger materials, adjustable fences for precise cuts, or built-in storage compartments to keep essential tools within reach. Clearly defining your needs will help you create a workstation that matches your woodworking goals.
Choosing Materials
Selecting the right materials is crucial for durability and longevity. Plywood, MDF, and hardwood are excellent choices, offering strength and stability for heavy-duty use. Depending on your design, you may also need sturdy hardware such as screws, brackets, and hinges to secure components effectively. Choose materials that can withstand wear and tear while being easy to work with during construction.
Design Considerations
Ergonomics plays a vital role in any workstation design. Determine an optimal height and width that allows for comfortable use over extended periods. If mobility is important, consider incorporating a rolling base with lockable wheels. Additionally, plan for built-in power outlets or cable management systems to improve efficiency and convenience. Thoughtful design ensures your workstation is both functional and adaptable for various projects.
Essential Tools and Materials
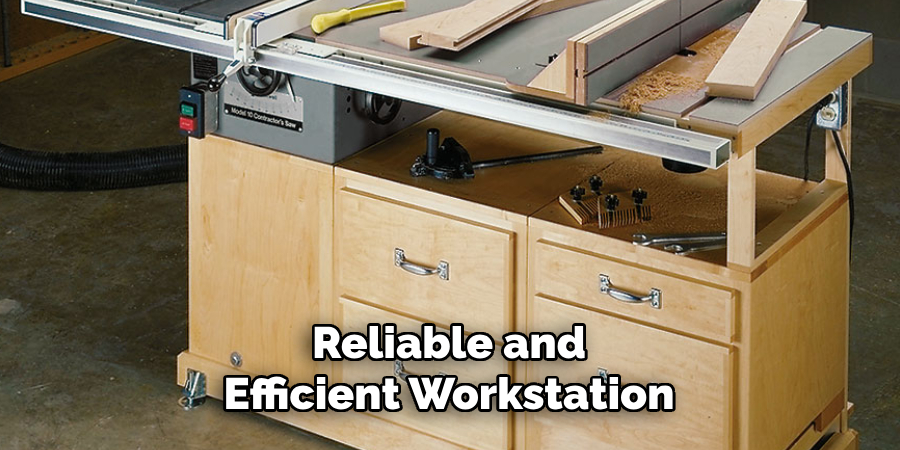
The right tools and materials are essential to constructing a reliable and efficient workstation. Proper preparation ensures smooth execution and minimizes potential challenges during the building process.
Tools Required
To complete your workstation project, gather the following tools:
- Circular saw – for cutting large sheets of wood to size.
- Drill – for creating holes and driving screws.
- Clamps – to secure materials during assembly.
- Measuring tape – for accurate measurements throughout the process.
- Square – to ensure precise angles and alignment.
- Jigsaw – for detailed cuts or curved sections.
- Router – for edge finishing and creating slots if necessary.
Materials List
Select durable and sturdy materials for your workstation:
- Plywood or MDF sheets – ideal for crafting the frame and tabletop.
- 2x4s – to create a robust support structure.
- Heavy-duty casters – for mobility if a rolling base is part of your design.
- Screws, wood glue, and brackets – to securely assemble all the components.
With these tools and materials, you can construct a professional-quality workstation tailored to your woodworking or DIY needs.
How to Build a Table Saw Workstation: Building the Workstation Frame
Step 1: Cutting Materials
Begin by measuring and cutting all the wood components to their required sizes. Use the measuring tape and square to ensure precision in your measurements, and then carefully cut the wood with a circular saw or jigsaw. For the frame, 2x4s can be used for
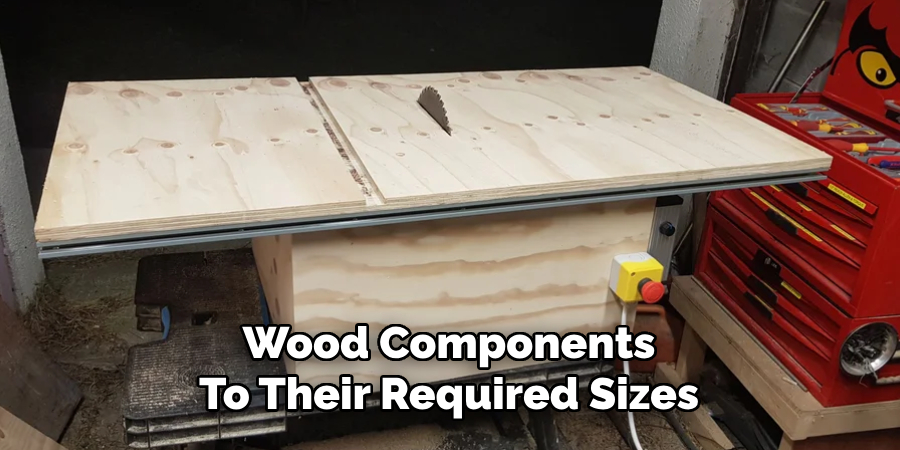
the base structure, while plywood or MDF sheets are ideal for the tabletop. Double-check all measurements before making cuts to avoid errors that could impact the assembly process later.
Step 2: Assembling the Base
Construct the base by forming a rectangular or square frame using the 2x4s, ensuring it is the desired height and width to suit your needs. Use clamps to hold pieces in place while you drill pilot holes and secure them with screws. Reinforce all joints with metal brackets to create a sturdy and reliable structure that can support the weight of your tools and materials. Confirm that the frame maintains proper alignment by checking angles with a square.
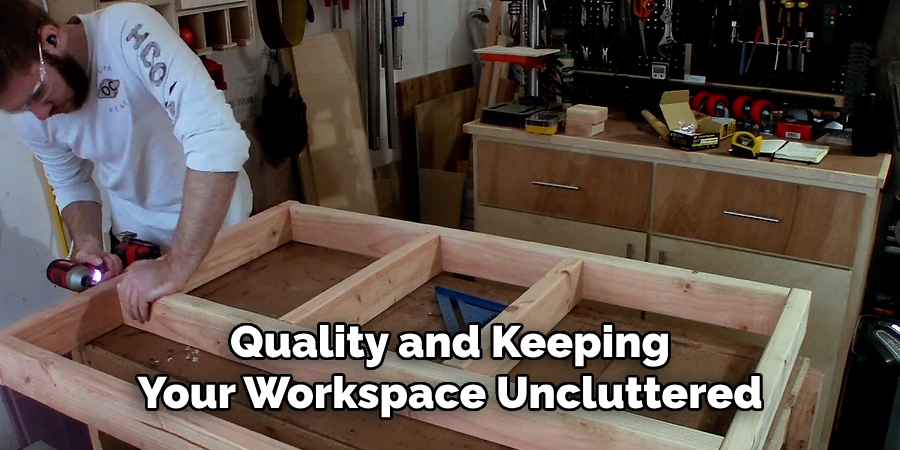
Step 3: Attaching the Top Surface
Once the base is complete, position the tabletop onto the frame. Ensure that it is level and properly aligned with the frame edges. Use screws and wood glue to secure the tabletop, but avoid over-tightening screws to prevent damaging the material. For those integrating a table saw into the workstation, ensure the top is flush with the saw surface to facilitate smooth cutting operations. Double-check that the entire assembly is stable and level before moving on to additional features or finishing touches.
Adding an Outfeed Table and Extensions
Building the Outfeed Table
An outfeed table is an essential addition to your workstation, as it extends the support area and ensures the safer cutting of longboards. To build the outfeed table, start by cutting a piece of plywood or MDF to the desired size—this should align with the
height of your table saw for seamless transitions. Use sturdy metal brackets or wooden cleats to attach the outfeed table to the rear edge of the workstation frame. For added security, use bolts or screws to fix it in place, ensuring that it is firmly attached but removable if necessary. Test the alignment to confirm it is flush with the table saw surface, preventing any material from snagging during cutting operations.
Side Extensions for Wider Cuts
Side extensions are invaluable for accommodating wider boards and increasing the versatility of your workstation. Consider foldable or removable side extensions for space-saving practicality when not in use. To build these, use durable plywood or MDF
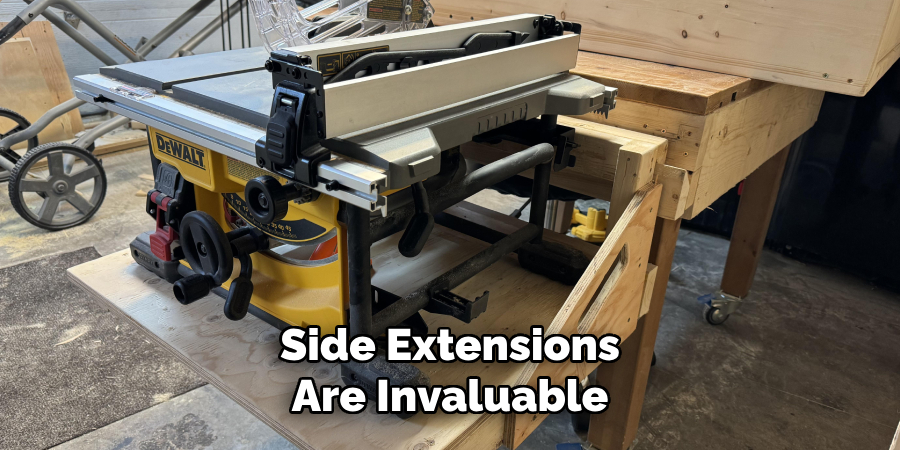
pieces that match the height of the tabletop. Hinges or folding brackets are excellent choices for adjustable extensions. Install the hinges or brackets on the sides of the workstation, ensuring they are robust enough to bear the weight of larger materials. When deployed, the extensions should lock securely to prevent movement while cutting. These additions allow for smoother handling of wide panels and improve the overall efficiency of your workshop setup.
Storage Solutions for the Workstation
Built-in Drawers and Cabinets
An organized workstation is essential for efficient workflow, and built-in drawers and cabinets offer an excellent solution for storing tools, saw blades, and other accessories. Use sturdy materials such as plywood or MDF to construct the drawers and ensure they can withstand frequent use. Installing slide rails makes the drawers easy to open and close, providing effortless access to items while keeping everything securely in place. Cabinets with adjustable shelves are ideal for larger tools and provide a tidy, professional appearance for your workstation.
Shelves for Wood Storage
Proper wood storage is crucial for maintaining material quality and keeping your workspace uncluttered. Install shelves beneath or along the sides of your workstation to store cut materials of various sizes. Strong brackets or frames are necessary to support the
weight of the wood, and allocating separate areas for different types of cuts will make it easier to find what you need when working on projects.
Magnetic Strips and Pegboards
Magnetic strips and pegboards are practical storage options for smaller tools and frequently used items. Attach magnetic strips to the sides or front of the workstation to hold metal tools such as wrenches, screwdrivers, and drill bits. Pegboards can be mounted above or near the workstation to hang items like clamps, safety goggles, or measuring tapes, ensuring everything is within easy reach during work. These features improve accessibility and keep your workspace neat and efficient.
Enhancing Safety and Dust Collection
Installing a Fence System
Adding a fence system to your workstation ensures precise cuts and enhances user safety. A sturdy and adjustable fence helps guide the material while keeping it secure during cuts, reducing the risk of misalignment or accidents. Whether you’re using a table saw or a router table, a reliable fence system is invaluable for accuracy and protection.
Adding a Dust Collection System
Effective dust management is vital for maintaining a clean and safe workspace. Dust particles can not only obscure visibility but also pose respiratory hazards. Consider integrating a dust collection system tailored to your needs. Options include using a shop vac for a budget-friendly and versatile solution, installing a dust hood for concentrated cleanup, or utilizing tools with built-in dust ports for seamless integration. These systems help minimize airborne debris and keep your work environment free of clutter.
Workbench Stability and Mobility
A stable and secure workstation is crucial for both safety and functionality. Incorporate leveling feet to ensure the workbench remains steady and balanced on uneven surfaces, preventing unwanted movement during use. For added flexibility, install lockable casters, allowing you to easily reposition your workstation when needed while keeping it firmly in place during work sessions.
Common Mistakes to Avoid
Ignoring Proper Measurements
One of the most common mistakes in any workspace setup is neglecting precise measurements. Proper alignment and accurate dimensions are essential to ensure the smooth operation of tools and equipment. Measurement errors can lead to inefficiencies,
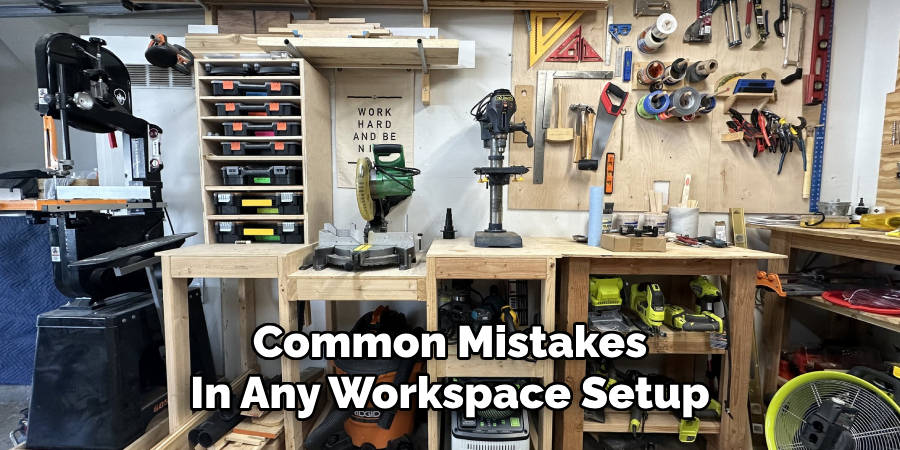
poor craftsmanship, or even accidents. Always double-check your measurements to minimize mistakes and maintain a high standard of work.
Using Weak Materials
Choosing subpar or weak materials for your workstation can significantly compromise its durability and effectiveness. Investing in strong, high-quality materials ensures that your setup can withstand wear and tear over time. This improves longevity and enhances overall safety by reducing the risk of structural failures while working on demanding projects.
Overlooking Safety Features
Failing to prioritize safety features is another critical mistake. Items like push sticks, clamps, and protective gear may seem minor, but they significantly prevent accidents. Never underestimate the importance of equipping your workspace with proper safety tools and practicing safe handling techniques to mitigate risks.
Conclusion
A custom-built workstation offers numerous advantages, including enhanced precision, better organization, and improved safety during projects. You can create an efficient and practical workspace that meets all your requirements by tailoring the design to your specific needs. For example, learning how to build a diy table saw workbench could significantly boost your woodworking capabilities. Regular maintenance, such as cleaning and inspecting for wear, ensures long-term reliability. Additionally, consider periodic upgrades to incorporate new tools or features, optimizing your setup. Customizing your workstation is an investment in both quality and safety, empowering you to achieve outstanding craftsmanship.
About the Author
Adrian Green, a lifelong woodworking enthusiast, shares his passion for the craft through The Woodenify Blog. With a foundation built on years of hands-on experience in his father’s woodworking shop, Adrian is dedicated to helping others learn and grow in the world of DIY woodworking. His approach to woodworking combines creativity, practicality, and a deep appreciation for the art of building with your own hands. Through his blog, he inspires individuals of all skill levels to embark on their own woodworking journeys, creating beautiful, functional pieces of furniture and décor.
Professional Focus
- Specializes in DIY woodworking projects, from furniture to home décor.
- Provides step-by-step guides and practical tutorials for woodworkers of all skill levels.
- Dedicated to helping readers build confidence and skill through easy-to-follow instructions and tips.
- Passionate about fostering a community of makers who can share, learn, and grow together.
Education History
- University of Craft and Design – Bachelor of Fine Arts (BFA) in Woodworking and Furniture Design
- Woodworking Apprenticeships – Extensive hands-on training with skilled craftsmen to refine carpentry and furniture making techniques.
- Online Courses & Masterclasses – Continued education in advanced woodworking techniques, design principles, and specialized tools
Expertise:
- DIY woodworking, carpentry, furniture making, and home décor projects.
- Creating accessible tutorials and guides for beginner to advanced woodworkers.
- Sharing the joys and satisfaction of woodworking, from raw materials to finished products.