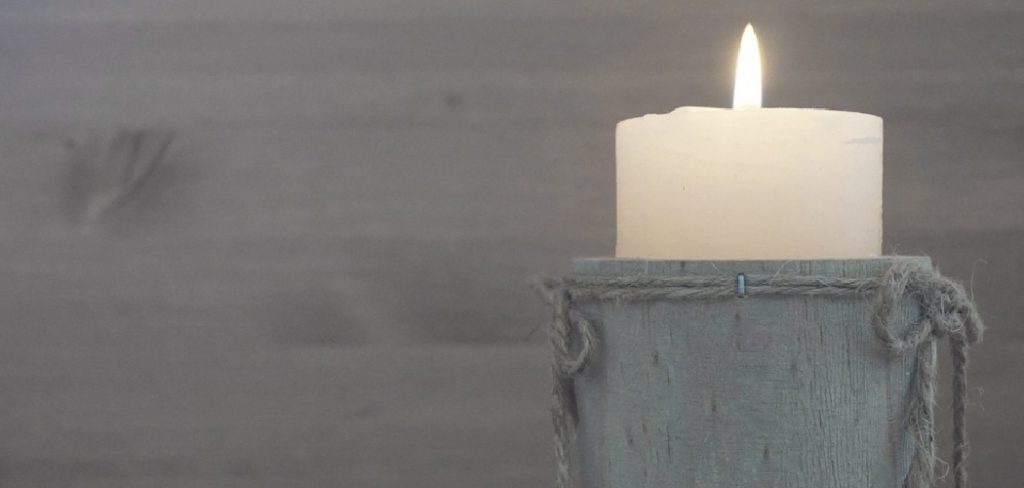
Making wood wick candles is a fun and rewarding craft that fills your space with warmth and a cozy ambiance. These candles not only emit a soothing crackling sound reminiscent of a fireplace but also burn longer and cleaner than traditional candles. With just a few simple materials and steps, you can create your own custom wood wick candles at home, which are perfect for personal use or as thoughtful handmade gifts.
In this article on how to make wood wick candles, we will cover the supplies you’ll need, the step-by-step process, and some tips and tricks to help you achieve the perfect candle.
Supplies You Will Need
To make wood wick candles, you will need:
- Soy wax flakes or blocks
- Double boiler or a heatproof container and saucepan
- Wooden wick
- Wick stickers or hot glue gun
- Fragrance oil of your choice
- Candle dye (optional)
- Glass jars or containers for candles
- Thermometer
7 Simple Step-by-step Guidelines on How to Make Wood Wick Candles
Step 1: Prepare Your Materials and Work Space
Start by gathering all the necessary supplies listed above and arranging them in your work area. Ensure you have a clean, flat surface to work on, and cover it with newspaper or a heat-resistant mat to protect it from spills. Prepare your glass jars by cleaning and drying them thoroughly to ensure the wax adheres properly.
Assemble your wooden wick by attaching it to a wick sticker or using a small amount of hot glue to secure it to the center of the jar. This preparation step will ensure a smooth and organized candle-making process.
Step 2: Melt the Wax
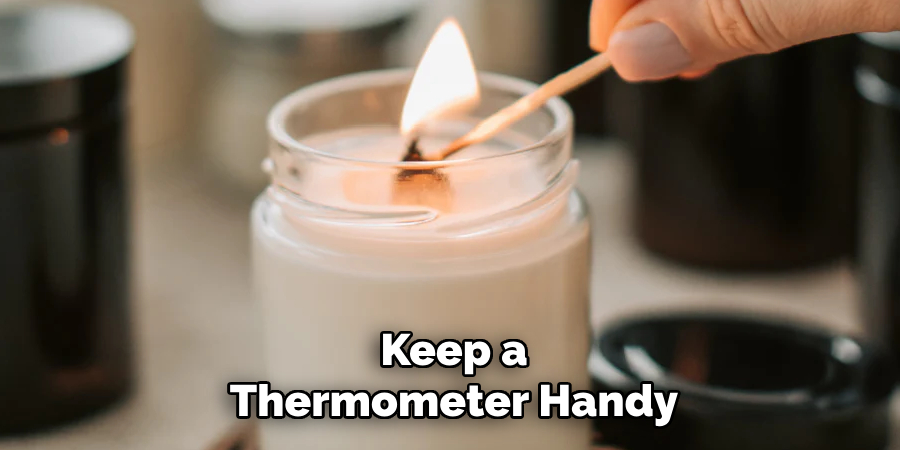
Begin by cutting your wax into smaller pieces to ensure it melts evenly and quickly. Place the wax into a heat-resistant container or a double boiler for a more controlled melting process. Use low to medium heat to gradually melt the wax, stirring occasionally with a wooden or silicone spatula to prevent clumps.
Keep a thermometer handy to monitor the temperature, as most waxes melt between 120°F to 180°F depending on the type. Avoid overheating the wax, as this can affect its color and fragrance-holding properties. Once the wax is fully melted and reaches the desired temperature, you’re ready to move on to the next step.
Step 3: Add Fragrance and Color
Once the wax has reached the desired temperature, it’s time to enhance it with fragrance and color. If you’re using fragrance oils, check the manufacturer’s recommended temperature for adding them, as this ensures optimal scent retention. Typically, this is around 175°F to 185°F. Gradually stir the fragrance oil into the melted wax using a wooden or silicone spatula, ensuring it is evenly distributed.
For color, add dye specifically designed for candles, whether in liquid, block, or chip form. Start with a small amount and mix thoroughly, then adjust if needed to achieve your desired shade.
Keep stirring until both the fragrance and color are fully blended, creating a smooth, uniform mixture. Adjust the heat as necessary to maintain the wax at the ideal working temperature before proceeding to the next step.
Step 4: Prepare Your Mold(s)
Before pouring the wax, ensure your mold(s) are clean, dry, and properly prepared. If required, secure the wick in the center of the mold using a wick holder or adhesive tab to keep it stable during the pouring process.
For ease of removal, lightly coat the inside of the mold with a mold release spray or a thin layer of cooking oil. Position the mold on a flat, heat-resistant surface to prevent any spills or tipping. Once everything is set, you’re ready to move on to the pouring stage.
Step 5: Pour Wax into Molds
Carefully pour the melted wax into the prepared molds, ensuring a slow and steady flow to avoid creating air bubbles. Fill the molds to the desired level, leaving a small gap at the top if necessary for adjustments once the wax settles. Take care to keep the wick centered while pouring to ensure a uniform burn.
If any wax spills onto the edges of the mold, wipe it away gently with a clean, dry cloth. Allow the wax to cool and solidify completely in a stable environment, free from drafts or abrupt temperature changes. This step is crucial for achieving a smooth and even surface on your finished candles.
Step 6: Insert Wicks
Once the wax has fully solidified, it’s time to adjust and secure the wicks. Gently pull each wick upright, ensuring it remains centered within the candle. Trim the wick to about 1/4 inch above the wax surface to prepare it for burning.
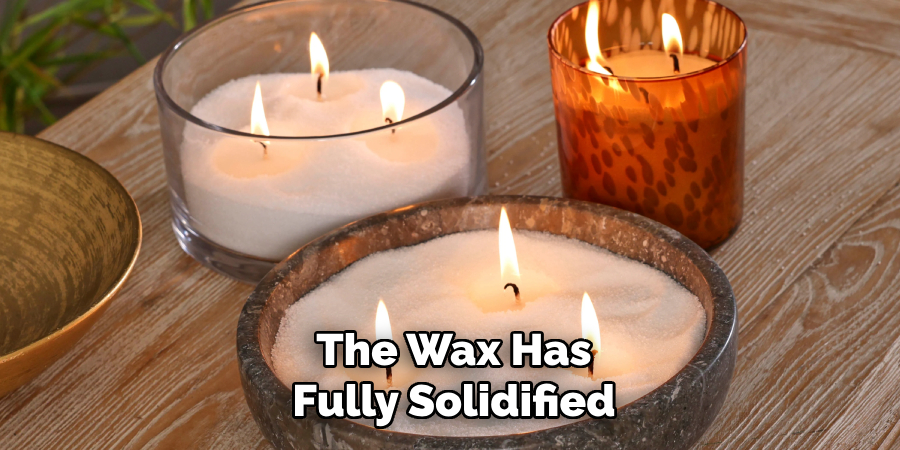
This length helps to promote a steady flame and prevents excessive smoking or soot. Check that the wick is firmly embedded in the wax; if necessary, press it gently into place to ensure stability. Your candle is now ready for decorative touches or immediate use!
Step 7: Let Candles Cool and Set
Allow your candles to cool and set for at least 24 hours before removing them from their molds. This will ensure that they have fully hardened and will hold their shape when removed.
Following these steps on how to make wood wick candles, you can now easily make homemade candles in any color and fragrance of your choice. This is a great way to personalize gifts or add a personal touch to your home decor.
How Much Wax Do You Need to Make Candles?
Determining the right amount of wax to use for your candles is a crucial step in the candle-making process. To calculate the quantity, you first need to know the volume or capacity of the containers you plan to use. A common method is to fill your candle container with water and then measure how many ounces or milliliters it holds. Once you have that measurement, subtract a small allowance for the wick and fragrance oil, then convert it to the weight of wax needed.
A general rule of thumb is that 1 ounce of water equals approximately 0.9 ounces of wax. For example, if your container holds 8 ounces of water, you will need around 7.2 ounces of wax. By accurately measuring your wax, you can avoid waste and ensure your candles fill the containers perfectly every time.
Frequently Asked Questions
Q: How Do I Choose the Right Type of Wax for My Candles?
A: The type of wax you use will depend on your preferred method and desired outcome. Paraffin wax is great for beginner candle makers as it is inexpensive and readily available. Soy wax, on the other hand, is a natural alternative that burns cleaner and has a longer burn time. Beeswax is also a popular option for its natural scent and ability to purify the air when burned.
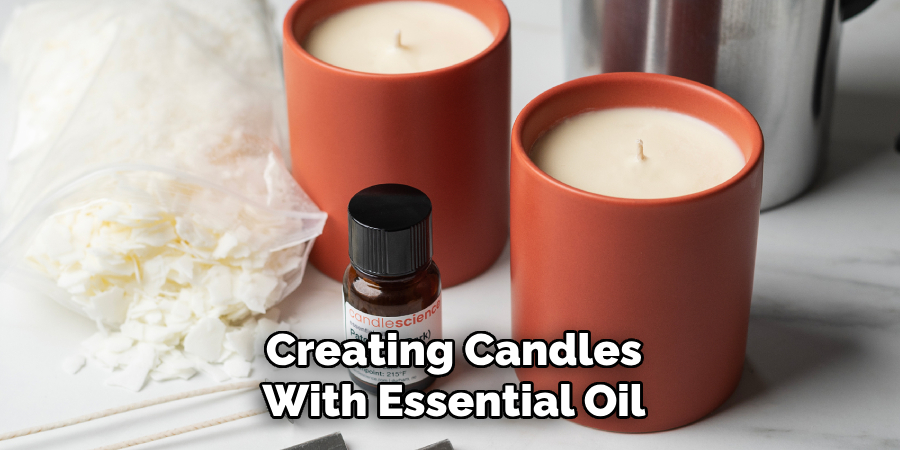
Q: Can I Use Essential Oils in My Candles?
A: Yes, you can! Using essential oils is a great way to add fragrance to your homemade candles without using synthetic fragrances that may contain harmful chemicals. However, keep in mind that essential oils have different flashpoints (the temperature at which they will ignite), so be sure to research and follow safe usage guidelines.
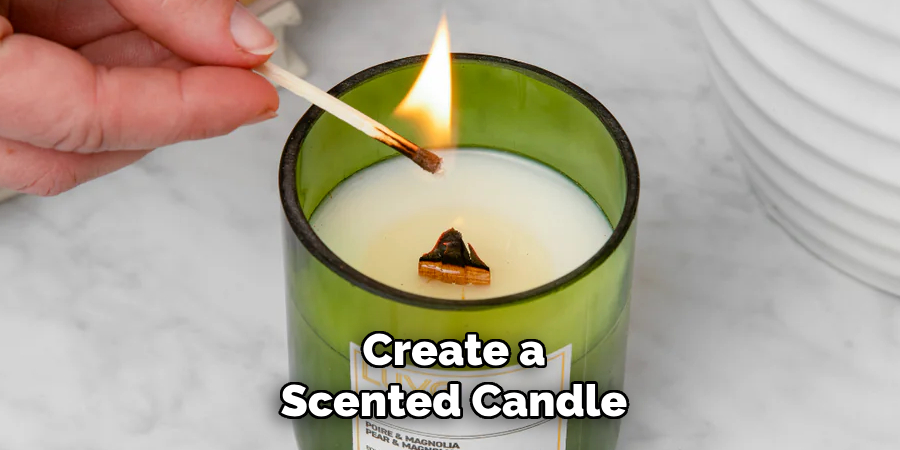
Q: How Do I Create a Scented Candle with Essential Oils?
A: To create a scented candle with essential oils, you will need to first melt your wax and add the desired amount of essential oil. Typically, 1-2 drops of essential oil per ounce of wax is enough for a subtle scent. However, feel free to adjust the amount based on your personal preference and the potency of the oil. You can also mix different oils together to create unique fragrances.
Q: Are There Any Safety Precautions When Using Essential Oils in Candles?
A: Yes, it’s important to be cautious when using essential oils in candles. As mentioned before, each oil has its own flashpoint and some oils are more flammable than others. It’s important to always keep a close eye on your candle when burning it, especially if you’ve added essential oils. Make sure the wick is trimmed to 1/4 inch before lighting and never leave a burning candle unattended.
It’s also recommended to do a skin patch test before using any new essential oils in your candles. Apply a small amount of the diluted oil to your skin and wait 24 hours to see if any irritation or allergic reaction occurs.
Q: Can I Mix Different Types of Essential Oils in My Candles?
Yes, you can mix multiple essential oils to create your own unique scent. However, it’s important to research the compatibility and safety of each oil before mixing them together. Some oils may not blend well or could cause adverse reactions when combined.
Conclusion
Creating candles with essential oils is a wonderful way to personalize your living space and enjoy the natural benefits of aromatherapy.
By understanding the properties of different oils, practicing safety precautions, and experimenting with blends, you can craft candles that are both functional and beautifully scented. Always prioritize safety and proper research to ensure a positive and enjoyable candle-making experience.
Thanks for reading this article on how to make wood wick candles with essential oils. We hope it has inspired you to explore the world of aromatherapy and candle-making!
About the Author
Adrian Green, a lifelong woodworking enthusiast, shares his passion for the craft through The Woodenify Blog. With a foundation built on years of hands-on experience in his father’s woodworking shop, Adrian is dedicated to helping others learn and grow in the world of DIY woodworking. His approach to woodworking combines creativity, practicality, and a deep appreciation for the art of building with your own hands. Through his blog, he inspires individuals of all skill levels to embark on their own woodworking journeys, creating beautiful, functional pieces of furniture and décor.
Professional Focus
- Specializes in DIY woodworking projects, from furniture to home décor.
- Provides step-by-step guides and practical tutorials for woodworkers of all skill levels.
- Dedicated to helping readers build confidence and skill through easy-to-follow instructions and tips.
- Passionate about fostering a community of makers who can share, learn, and grow together.
Education History
- University of Craft and Design – Bachelor of Fine Arts (BFA) in Woodworking and Furniture Design
- Woodworking Apprenticeships – Extensive hands-on training with skilled craftsmen to refine carpentry and furniture making techniques.
- Online Courses & Masterclasses – Continued education in advanced woodworking techniques, design principles, and specialized tools
Expertise:
- DIY woodworking, carpentry, furniture making, and home décor projects.
- Creating accessible tutorials and guides for beginner to advanced woodworkers.
- Sharing the joys and satisfaction of woodworking, from raw materials to finished products.