Alder wood cabinets are a popular choice for homeowners and designers due to their natural beauty, durability, and versatility. With its warm tones and smooth grain, alder wood adds a touch of timeless elegance to any kitchen or living space. Whether you’re building new cabinets from scratch or replacing existing ones, creating alder wood cabinets can be a rewarding project.

This guide on how to make alder wood cabinets will walk you through the essential steps and tips to craft stunning cabinets that perfectly suit your style and needs.
Why Choose Alder Wood?
Alder wood is a popular choice for cabinets due to its unique characteristics and benefits. Here are some reasons why you should consider using alder wood for your next cabinet project:
Natural Beauty:
Alder wood has a warm, rich tone that adds a touch of natural beauty to any space. It has a smooth grain pattern with occasional knots and mineral streaks, giving each piece of furniture a unique look. Its warm color ranges from light brown to reddish-brown, making it a great choice for both modern and traditional styles.
Versatility:
Alder wood is a versatile material that can be easily stained or painted to achieve the desired finish. It takes stain well and can mimic more expensive woods like cherry or mahogany. This gives you the freedom to customize your cabinets to match your existing decor or create a new look altogether.
Durability:
Alder wood is known for its durability. It has a good balance of strength and flexibility, making it resistant to warping and cracking. This makes it an ideal choice for kitchen cabinets that are subjected to constant use and exposure to moisture.
Easy to Work With:
Alder wood is relatively easy to work with, making it a favorite among carpenters and DIY enthusiasts. It can be easily cut, shaped, and sanded without splintering, which makes the construction process smooth and hassle-free.
Versatility:
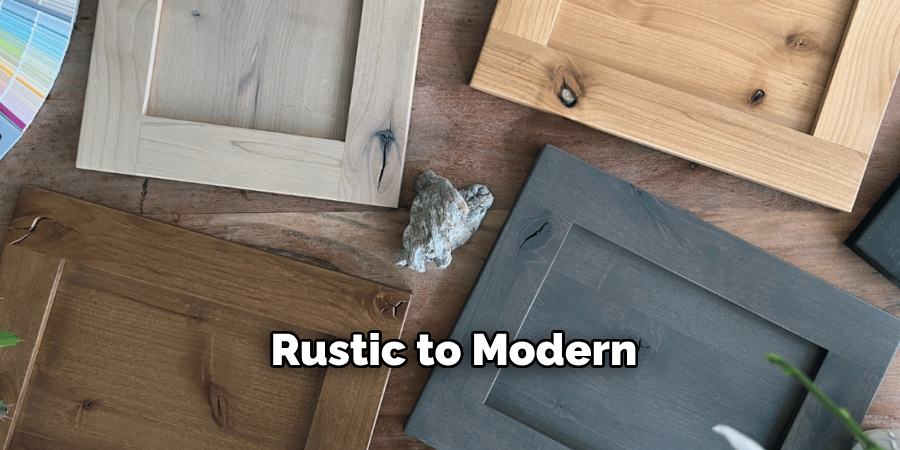
Apart from its use in cabinets, alder wood is also popular for other furniture pieces such as tables, chairs, and bed frames. Its versatility allows it to be used in various styles of interior design, from rustic to modern.
Needed Materials
To successfully work with alder wood, you will need some basic materials that are readily available at most hardware stores. These include:
Saw:
A saw is essential for cutting the wood into the desired shapes and sizes. A hand saw or a power saw can be used, depending on your preference.
Sandpaper:
As mentioned earlier, alder wood sands easily without splintering, so sandpaper with a fine grit will be sufficient to smooth out any rough edges.
Drill:
A drill will come in handy when creating holes for screws or nails to assemble the pieces of wood together.
Wood Glue:
Wood glue is necessary to join two pieces of alder wood together firmly. It dries clear and strong, making it an ideal adhesive for woodworking projects.
Nails/Screws:
Depending on the design and construction method of your project, you may need to use nails or screws to hold the pieces of alder wood together. Make sure to choose the right size and type for your project.
7 Simple Step-by-step Guidelines on How to Make Alder Wood Cabinets
Step 1: Measure and Cut Wood
Begin by carefully measuring the dimensions of your cabinet design. Use a measuring tape and pencil to mark the outlines on the alder wood. Ensure that all measurements are accurate to avoid any fitting issues later in the process.

Once measured, use a saw to cut the wood according to your markings. For precise cuts, consider using a circular saw or a miter saw, and always prioritize safety by wearing protective gear like goggles and gloves. Accurate cutting at this stage ensures the foundation of a well-constructed cabinet.
Step 2: Assemble the Frame
With the wood pieces cut to size, it’s time to assemble the frame of your cabinet. Lay the cut pieces on a flat surface and arrange them according to your design, ensuring all edges align properly. Use wood glue at the joints to strengthen the connections, then secure them with screws or nails for added stability.
A power drill can help ensure precision when driving screws, while clamps can hold the pieces steady as the glue dries. Double-check that the frame is square by measuring diagonally from corner to corner—both diagonals should be equal. A sturdy, well-aligned frame sets the stage for a durable and functional cabinet.
Step 3: Add Shelves
Once the frame is complete and secure, it’s time to install the shelves. Start by measuring and marking the desired locations for each shelf along the interior sides of the frame. Ensure the markings are level to maintain an even and professional finish. Cut the shelves to the correct dimensions, ensuring they fit snugly within the frame without forcing. Apply wood glue to the edges of the shelves and carefully position them at the marked locations.
Use clamps to hold the shelves in place while the glue sets, and reinforce them by securing screws through the exterior of the frame into the shelving. Double-check the placement and level of each shelf throughout this process to ensure a balanced and functional result. The proper installation of the shelves will provide both stability and usability for your cabinet.
Step 4: Install Cabinet Doors
To install the cabinet doors, begin by attaching the hinges to the doors themselves. Mark the appropriate locations for the hinges on both the doors and the cabinet frame, ensuring precise alignment. Once marked, use screws to secure the hinges to the door, keeping them tight but not overly forced to avoid damaging the hardware. Next, position the doors against the cabinet frame and attach the hinges to the frame, working carefully to maintain proper alignment for smooth opening and closing.

Adjust the hinges if needed to ensure that the doors hang evenly and close flush with the cabinet frame. Finally, check the functionality by opening and closing the doors several times and making any necessary tweaks. Proper installation will result in a polished and professional appearance for your cabinet.
Step 5: Sand and Finish
Once the cabinet doors are properly installed, the next step is to sand and finish the surface for a smooth and professional look. Begin by lightly sanding the cabinet and doors using fine-grit sandpaper to remove any rough edges or imperfections. Be sure to follow the grain of the wood to avoid scratches. After sanding, wipe the surfaces clean with a damp cloth or tack cloth to remove all dust.
Next, apply your chosen finish, such as paint, stain, or clear varnish, depending on the desired appearance. Use even, smooth strokes and allow adequate drying time between coats for the best results. If needed, lightly sand between coats to enhance the finish’s smoothness and durability. Once the final coat is dry, inspect the cabinet for consistency and touch up any areas as necessary. This step will not only improve aesthetics but also protect the wood and ensure longevity.
Step 6: Add Hardware
Add hardware such as knobs or handles to the cabinet doors if desired. This step is also optional and can add a decorative touch to your finished project.
Following the instructions on the hardware packaging, use a drill to attach them securely to the cabinet doors.
Step 7: Install Cabinet Doors
Using hinges, install the cabinet doors onto the frame of the cabinet. Make sure they are aligned properly and adjust them if necessary. Once all doors are installed, check that they open and close smoothly without any obstructions or gaps.
Following these steps on how to make alder wood cabinets, you have successfully built and installed your own custom cabinets. Congratulations on completing this DIY project! Alder wood cabinets are a popular choice for kitchens due to their light, smooth grain and ability to complement both traditional and modern design styles.
Additional Tips and Tricks
- Before beginning the construction process, make sure to measure the space where you plan on installing the cabinets to ensure they will fit properly.
- Sanding between each coat of stain or finish will result in a smoother and more professional-looking final product.
- Consider adding cabinet hardware, such as knobs or pulls, for added functionality and style.
- If you encounter any issues during the construction process, don’t be afraid to consult online tutorials or seek help from a professional.
- Experiment with different stains and finishes to create a unique look for your alder wood cabinets.
Frequently Asked Questions
Q: Can I Use Pre-made Cabinet Doors for My Alder Wood Cabinets?
A: Yes, you can purchase pre-made cabinet doors to save time and effort in the construction process. However, keep in mind that these doors may not fit perfectly with your custom alder wood cabinets. It is recommended that you carefully measure and compare the dimensions before purchasing pre-made doors.
Q: How Do I Care for My Alder Wood Cabinets?
A: Regular cleaning and maintenance are important to maintain the beauty and longevity of your alder wood cabinets. Use a soft cloth or sponge with mild soap and warm water to clean the surface of the cabinets. Avoid using harsh chemicals or abrasive cleaners as they can damage the finish of the wood. Additionally, periodically applying a coat of furniture polish or beeswax can help protect and enhance the natural shine of the wood.
Q: Can I Customize the Design of My Alder Wood Cabinets?
A: Yes, Alder wood cabinets can be customized to fit your personal style and preferences. You can choose from a variety of finishes such as natural, stained, glazed, or painted, to achieve the look you desire. Additionally, there are options for different door styles, hardware, and accessories to further personalize your cabinets. Consult with a professional cabinet maker to discuss your customization options and create a design that best suits your needs and taste.
Q: Are Alder Wood Cabinets Durable?

A: Yes, alder wood is known for its durability and strength. It is a hardwood that resists warping and shrinking, making it an excellent choice for kitchen or bathroom cabinets. However, like any other wood, it is still susceptible to scratches and dents if not properly cared for. Regular cleaning and maintenance can help prolong the lifespan of your alder wood cabinets. Additionally, opting for a protective finish such as lacquer or polyurethane, can also increase their durability. So, overall, alder wood cabinets are a durable option for your home.
Q: How Do I Clean and Maintain Alder Wood Cabinets?
A: Proper cleaning and maintenance are essential for keeping your alder wood cabinets looking beautiful and extending their lifespan. Here are some tips to help you keep your cabinets in top condition:
Conclusion
Alder wood cabinets are an excellent choice for homeowners seeking a balance of beauty, durability, and versatility. With proper care, including regular cleaning and the application of protective finishes, these cabinets can maintain their stunning appearance for years to come.
By following the recommended maintenance tips on how to make alder wood cabinets, you can ensure your alder wood cabinets remain a timeless and functional addition to your home.
About the Author
Adrian Green, a lifelong woodworking enthusiast, shares his passion for the craft through The Woodenify Blog. With a foundation built on years of hands-on experience in his father’s woodworking shop, Adrian is dedicated to helping others learn and grow in the world of DIY woodworking. His approach to woodworking combines creativity, practicality, and a deep appreciation for the art of building with your own hands. Through his blog, he inspires individuals of all skill levels to embark on their own woodworking journeys, creating beautiful, functional pieces of furniture and décor.
Professional Focus
- Specializes in DIY woodworking projects, from furniture to home décor.
- Provides step-by-step guides and practical tutorials for woodworkers of all skill levels.
- Dedicated to helping readers build confidence and skill through easy-to-follow instructions and tips.
- Passionate about fostering a community of makers who can share, learn, and grow together.
Education History
- University of Craft and Design – Bachelor of Fine Arts (BFA) in Woodworking and Furniture Design
- Woodworking Apprenticeships – Extensive hands-on training with skilled craftsmen to refine carpentry and furniture making techniques.
- Online Courses & Masterclasses – Continued education in advanced woodworking techniques, design principles, and specialized tools
Expertise:
- DIY woodworking, carpentry, furniture making, and home décor projects.
- Creating accessible tutorials and guides for beginner to advanced woodworkers.
- Sharing the joys and satisfaction of woodworking, from raw materials to finished products.