When water seeps into your wood flooring, it can cause significant damage if not addressed promptly. Warping, cupping, or even mold growth can occur, leading to costly repairs. Drying out a wood floor efficiently and effectively is crucial to preserving its integrity and maintaining a safe environment in your home.
This guide on how to dry out wood floor will walk you through the steps required to dry out your wood floor and prevent further damage.
Why is It Important to Dry Out a Wood Floor Promptly?
Before we dive into the steps on how to dry out wood floor, let’s first understand why it is crucial to address water damage as soon as possible.
Prevents Mold Growth:
Wood is an organic material that provides the ideal environment for mold growth. When exposed to moisture, mold spores can quickly spread and grow on your wood flooring, leading to potential health hazards and costly repairs.
Minimizes Warping and Cupping:
When water seeps into your wood flooring, it causes the wood fibers to swell and expand, resulting in warping or cupping of the boards. These issues not only affect the appearance of your flooring but can also cause tripping hazards and affect the stability of your floors.
Maintains Structural Integrity:
Water damage can compromise the structural integrity of your wood flooring. The longer the water sits, the more damage it can cause to the subfloor and joists underneath. This can lead to sagging or uneven floors and even costly repairs down the line.
Preserves Aesthetic Appeal:
Aside from functional concerns, water damage can also greatly impact the overall appearance of your wood flooring. Stains, discoloration, and warping are all common signs of water damage that can diminish the aesthetic appeal of your floors. With prompt action, you can prevent these issues and keep your floors looking beautiful for years to come.
8 Simple Steps on How to Dry Out Wood Floor
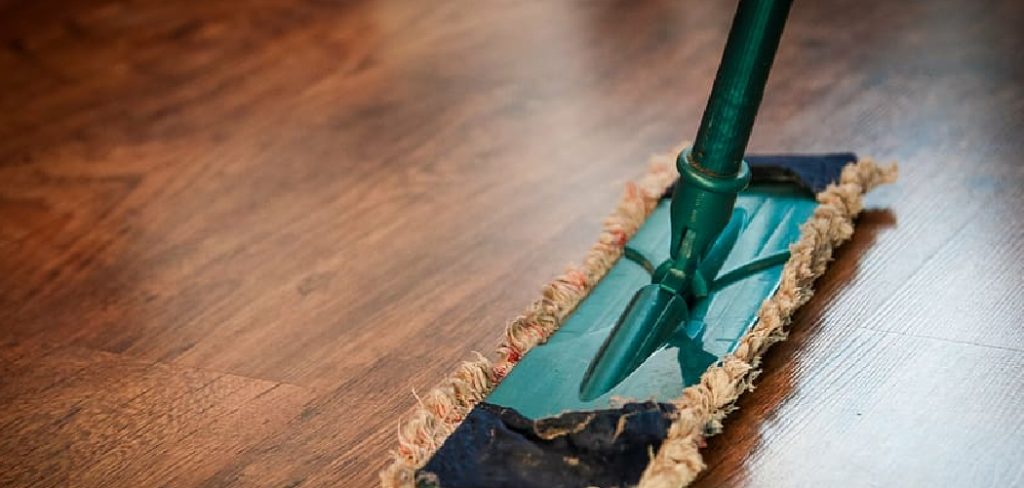
Step 1: Remove Standing Water
The first step in drying out your wood floor is to remove any standing water as quickly as possible. Use a mop, towels, or a wet/dry vacuum to soak up the excess water. It’s important to act fast, as standing water can seep into the wood and increase the likelihood of warping or damage.
Make sure to check every corner and crevice to ensure all water is removed effectively before moving on to the next step.

Step 2: Use Fans and Dehumidifiers
After removing the standing water, the next step is to speed up the drying process by using fans and dehumidifiers. Position fans to blow directly onto the affected area, ensuring good air circulation across the wood surface. Place dehumidifiers nearby to reduce moisture levels in the air and prevent further absorption by the wood.
This combination will help dry out the floor more efficiently while minimizing the risk of mold growth. Keep the fans and dehumidifiers running continuously until the floor is completely dry.
Step 3: Check for Moisture Between Floorboards
Once the surface of the floor appears dry, it’s essential to check for any residual moisture between the floorboards. A moisture meter will be used to measure the moisture levels in these areas. Insert the meter probes carefully into the gaps to get accurate readings. If you detect any lingering moisture, continue using fans and dehumidifiers to address the issue.
Neglecting this step could lead to long-term damage such as warping, mold growth, or structural instability. Regular monitoring ensures that the floor is completely dry and safe for further restoration or use.
Step 4: Remove Damaged Materials
Once the floor is completely dry, inspect it thoroughly for any materials that have been irreversibly damaged. Look for warped floorboards, areas that show signs of mold, or materials that have lost their structural integrity. Use tools such as a pry bar or chisel to carefully remove damaged boards without causing unnecessary harm to surrounding areas.
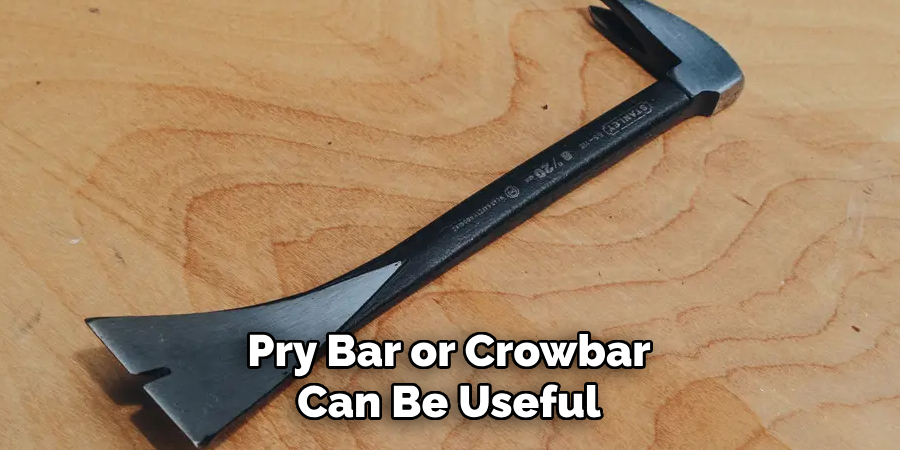
If mold is present, always wear protective gear to prevent exposure and consider using appropriate cleaning agents or seeking professional help for severe cases. Promptly removing compromised materials ensures that the affected area is ready for repair and minimizes the chance of further deterioration.
Step 5: Disinfect Surfaces
After removing damaged materials, it’s important to disinfect all surfaces that came in contact with the standing water. This will help prevent the growth of bacteria and mold. Use a mixture of bleach and water to disinfect hard surfaces or a commercial disinfectant recommended for use on porous materials.
Be sure to follow the manufacturer’s instructions and always wear protective gear when using harsh chemicals.
Step 6: Dry Out the Affected Area
Once all damaged materials have been removed and surfaces have been disinfected, it’s crucial to thoroughly dry out the affected area. This can be done with the help of fans, dehumidifiers, and open windows for proper ventilation.
It’s important to continue drying out the area until all moisture has been eliminated, as even small amounts of lingering moisture can lead to mold growth.
Step 7: Monitor for Mold Growth
After completing the drying process, it’s essential to monitor the area for any signs of mold growth. Regularly inspect the previously affected surfaces for discoloration, musty odors, or visible mold spots.
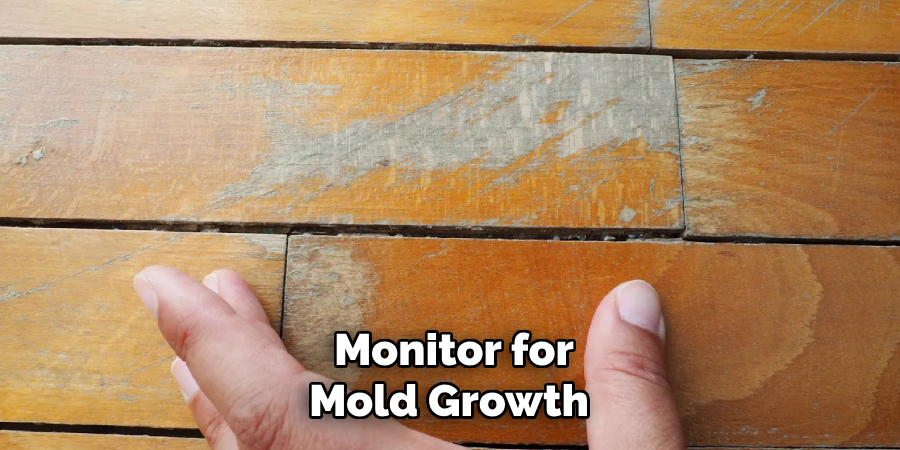
Pay close attention to hidden and hard-to-reach areas, as mold can easily develop there. If you notice any signs of mold, address the issue promptly by cleaning the area or seeking professional assistance if the problem persists. Ongoing monitoring is key to ensuring that the space remains safe and mold-free over the long term.
Step 8: Take Preventative Measures
There are some preventative measures you can take to prevent future water damage and potential mold growth. Regularly inspect plumbing fixtures and pipes for leaks or damage. Ensure proper ventilation in areas with high moisture levels such as bathrooms and basements. And if you live in an area prone to heavy rain or flooding, consider installing a sump pump in your basement.
Following these preventative measures on how to dry out wood floor can help save you time, money, and potential health risks in the long run. It’s always better to be proactive rather than reactive when it comes to water damage and mold growth. The natural wood floor texture adds warmth and character to any room, making it a popular choice for both modern and rustic interiors.
Things to Consider
- If you do experience water damage on your wood floors, it’s important to act quickly and take immediate action. The longer the moisture sits, the higher the chances of irreparable damage and mold growth.
- Always wear protective gear such as gloves and a mask when dealing with wet or moldy surfaces to avoid potential health risks.
- Seek professional help if you are unsure about how to properly dry out your wood floors or if the damage is significant.
- Regularly check for any signs of water damage or mold growth in your home, especially in areas prone to moisture.
- Stay informed about weather conditions and potential flooding risks in your area so you can take necessary precautions and be prepared.
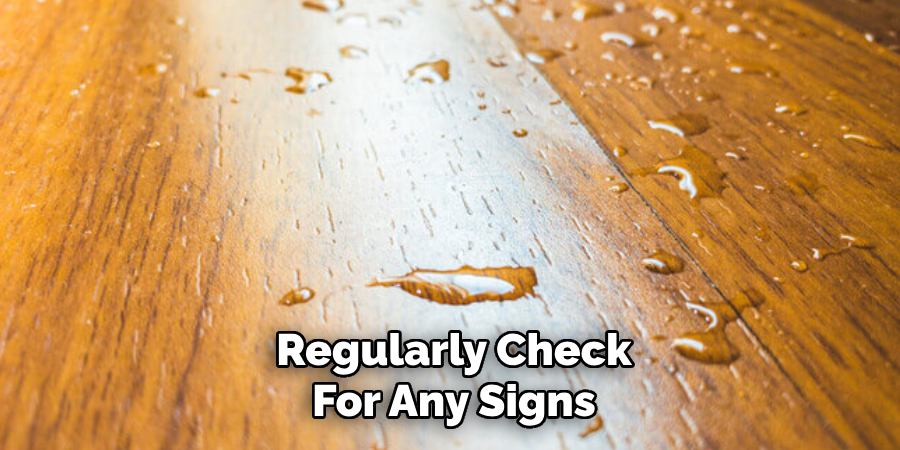
By following these tips, you can help prevent water damage and protect your wood floors from potential harm.
Frequently Asked Questions
Q: How Do I Know if My Wood Floors Have Water Damage?
A: Some signs of water damage on wood floors include warping, buckling, discoloration, and a musty smell. It’s important to regularly check for these signs and address them immediately to prevent further damage.
Q: Can Water Damage on Wood Floors Be Repaired?
A: The extent of the damage will determine if the wood floors can be repaired or need to be replaced. In cases of minor water damage, sanding and refinishing may be sufficient. However, if the damage is severe, replacement may be necessary.
Q: How Do I Prevent Water Damage on My Wood Floors?
A: To prevent water damage on your wood floors, it’s important to keep them clean and dry at all times. Avoid placing plants directly on the floor and promptly clean up any spills or leaks. Regularly checking for potential sources of moisture such as leaky pipes or appliances, can also help prevent water damage.
Q: How Do I Repair Damaged Wood Floors?
A: The first step in repairing water-damaged wood floors is to assess the extent of the damage. If it’s minor, sanding and refinishing may be enough to restore the floor’s appearance. However, if the damage is more severe and has caused warping or buckling, replacement may be necessary. It’s important to consult a professional for an accurate assessment and proper repair techniques.
Conclusion
Protecting your home from water damage and mold requires consistent effort and attention to detail. By staying vigilant, addressing issues promptly, and implementing preventative measures, you can maintain a safe and healthy living environment. Remember, a proactive approach not only preserves the structural integrity of your home but also safeguards the well-being of everyone inside.
Take the necessary steps today to ensure long-term peace of mind. Thanks for reading this article on how to dry out wood floor.
About the Author
Adrian Green, a lifelong woodworking enthusiast, shares his passion for the craft through The Woodenify Blog. With a foundation built on years of hands-on experience in his father’s woodworking shop, Adrian is dedicated to helping others learn and grow in the world of DIY woodworking. His approach to woodworking combines creativity, practicality, and a deep appreciation for the art of building with your own hands. Through his blog, he inspires individuals of all skill levels to embark on their own woodworking journeys, creating beautiful, functional pieces of furniture and décor.
Professional Focus
- Specializes in DIY woodworking projects, from furniture to home décor.
- Provides step-by-step guides and practical tutorials for woodworkers of all skill levels.
- Dedicated to helping readers build confidence and skill through easy-to-follow instructions and tips.
- Passionate about fostering a community of makers who can share, learn, and grow together.
Education History
- University of Craft and Design – Bachelor of Fine Arts (BFA) in Woodworking and Furniture Design
- Woodworking Apprenticeships – Extensive hands-on training with skilled craftsmen to refine carpentry and furniture making techniques.
- Online Courses & Masterclasses – Continued education in advanced woodworking techniques, design principles, and specialized tools
Expertise:
- DIY woodworking, carpentry, furniture making, and home décor projects.
- Creating accessible tutorials and guides for beginner to advanced woodworkers.
- Sharing the joys and satisfaction of woodworking, from raw materials to finished products.