Refinishing a wood chair is a rewarding DIY project that can breathe new life into a piece of furniture. Whether you want to restore an antique to its former glory or simply update a chair to match your decor, the process allows for creativity and customization.

By following some basic steps on how to refinish wood chair and using the right tools, you can achieve a professional-looking finish, all while preserving the character and charm of the wood. A wood chair DIY project is a great way to personalize your furniture while developing your woodworking skills.
Benefits of Refinishing a Wood Chair
Refinishing a wood chair has many benefits, including saving money and reducing waste. Instead of buying a new chair, refinishing allows you to update an existing one at a fraction of the cost. It also helps to minimize environmental impact by keeping furniture out of landfills.
In addition, refinishing allows for personalization and customization. You have control over the color, finish, and level of distressing on your chair, allowing you to create a unique piece that fits your style and preferences.
Materials Needed
To refinish a wood chair, you will need the following materials:
- Sandpaper (Medium and Fine Grit)
- Paint Stripper (if Necessary)
- Paint or Stain of Your Choice
- Protective Gloves and Eyewear
- Drop Cloth or Old Newspapers
- Paintbrushes or Foam Applicators
- Clean Cloths or Rags
- Optional: Wood Conditioner, Polyurethane for Added Protection
9 Step-by-Step Guides on How to Refinish Wood Chair
Step 1: Prepare the Work Area
Begin by choosing a well-ventilated area to work in, preferably outdoors or in a garage with open windows, to ensure proper airflow while using paints or chemicals. Lay down a drop cloth or old newspapers to protect the floor from dust, paint, or stains. Ensure your work area is free from clutter and has ample lighting for visibility.
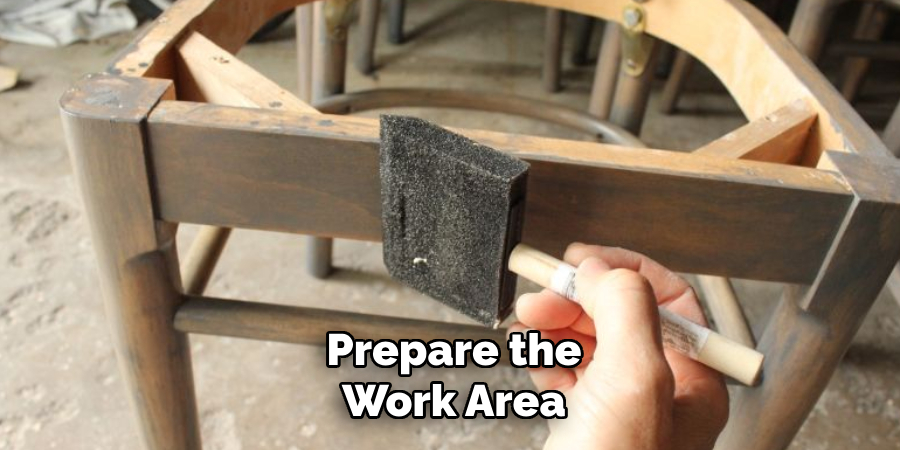
Finally, put on protective gloves and eyewear to safeguard against potential splinters, dust, or chemical exposure. A clean and organized workspace is essential for a smooth and efficient refinishing process.
Step 2: Remove Any Existing Finish
Before applying a new finish, it’s crucial to remove the old one completely. Start by using a paint or varnish stripper, following the manufacturer’s instructions for proper application and safety precautions. Apply the stripper evenly using a brush and allow it to sit for the recommended time, ensuring it penetrates the existing finish.
Once softened, use a scraper to gently remove the old finish, being careful not to damage the surface underneath. For stubborn areas, sandpaper or a sanding block can help smooth out the residue. Work systematically and dispose of stripped material responsibly. Removing the existing finish thoroughly ensures a clean base for the next steps in the refinishing process.
Step 3: Sand the Chair
After removing the old finish, sanding the chair is crucial to create a smooth and even surface for the new finish to adhere to. Start with medium-grit sandpaper (such as 120-grit) to remove any remaining residue and imperfections. Gradually switch to finer grits, like 220-grit, to achieve a polished surface.
Be sure to sand along the grain of the wood to avoid scratches or damage. For intricate details or curves, consider using a sanding sponge or smaller tools to reach tight areas. Once finished, wipe down the chair thoroughly with a tack cloth to remove all dust and debris, leaving it clean and ready for the next step.
Step 4: Clean the Chair
After sanding, it’s essential to ensure the chair is completely clean before moving forward. Use a damp cloth or sponge to gently wipe down the entire surface of the chair, removing any fine dust particles left behind from sanding. For tougher spots or residue, consider using a mild soap and water solution, but ensure the wood is not overly saturated.
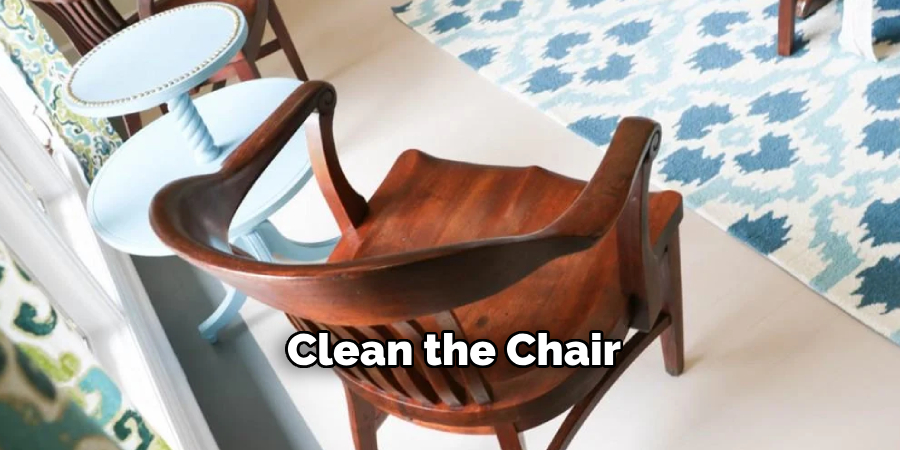
Once cleaned, allow the chair to dry completely in a well-ventilated area. This step helps to create a smooth, dust-free surface, ensuring optimal results in the next phase of the project.
Step 5: Apply the New Finish
With the chair cleaned and dried, it’s time to apply the new finish. Begin by selecting a high-quality wood finish, such as stain, paint, or a clear protective coat, depending on your desired look and durability requirements. Using a brush, roller, or cloth, apply a thin, even layer of the finish, following the direction of the wood grain. Work methodically to ensure all areas are covered evenly, avoiding drips or pooling. If you are staining the wood, allow the stain to penetrate for the recommended time before wiping away any excess with a clean cloth.
For paint or clear coats, check the manufacturer’s instructions for drying times between coats. Apply additional layers as needed for better coverage or enhanced durability, allowing adequate drying time between each coat. After the final layer, allow the finish to cure completely in a well-ventilated area before using the chair.
Step 6: Let it Dry
Once the final coat has been applied, it’s essential to give the finish ample time to dry and cure properly. Place the chair in a clean, dust-free, and well-ventilated area to ensure the drying process is as effective as possible. Avoid handling or using the chair during this period, as premature use can damage the finish.
Refer to the product instructions for specific curing times, which can vary depending on the type of finish applied. Allowing the chair to dry thoroughly will ensure a smooth and durable surface that is ready for years of use.
Step 7: Add a Second Coat (Optional)
If desired, apply a second coat of finish to enhance the durability and appearance of the chair. Before starting, ensure the first coat is completely dry and sand the surface lightly with fine-grit sandpaper to promote better adhesion. Wipe away any dust with a clean, dry cloth. Apply the second coat using the same method as before, working in smooth, even strokes and avoiding excess product to prevent drips.
Allow the second coat to dry fully, following the recommended curing time in the product instructions. This optional step can add an extra layer of protection and provide a more polished final look to your chair.
Step 8: Reattach any Hardware
Once the finish has thoroughly dried and cured, it’s time to reattach any hardware, such as hinges, screws, or decorative pieces, that were removed earlier in the process.
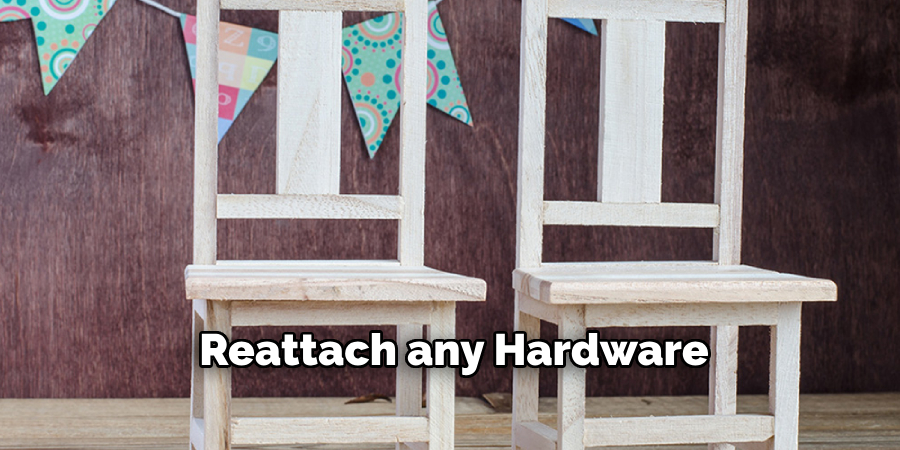
Carefully align each piece and use the appropriate tools to secure them tightly without over-tightening, which could damage the newly finished surface. Ensure all hardware is functional and properly aligned for a professional and sturdy final result.
Step 9: Display and Enjoy!
Your newly refinished chair is now ready to use and display. Whether it’s a family heirloom or a thrift store find, with some time and effort, you can transform it into a beautiful piece of furniture that can be enjoyed for years to come.
Following these steps on how to refinish wood chair and using the proper materials can ensure a successful furniture refinishing project. Remember to always work in a well-ventilated area and take breaks when needed. With some patience and creativity, you can give new life to old furniture and add your own personal touch to your home decor. Happy refinishing!
Tips and Tricks
- If you are refinishing a wooden chair, consider using wood filler to fill in any scratches or dents before sanding.
- Use a tack cloth or lint-free cloth to remove any dust or debris before applying the finish.
- To achieve a smooth finish, lightly sand between coats of paint or stain.
- Consider using a protective topcoat to help preserve the finish and prevent damage from everyday use.
- Don’t be afraid to experiment with different finishes or techniques, such as distressing or stenciling, to create a unique look for your furniture.
- Remember to wear proper safety equipment, such as gloves and goggles, when working with chemicals and power tools.
- Research and follow the instructions of any products you are using to ensure proper application and drying times.
Frequently Asked Questions
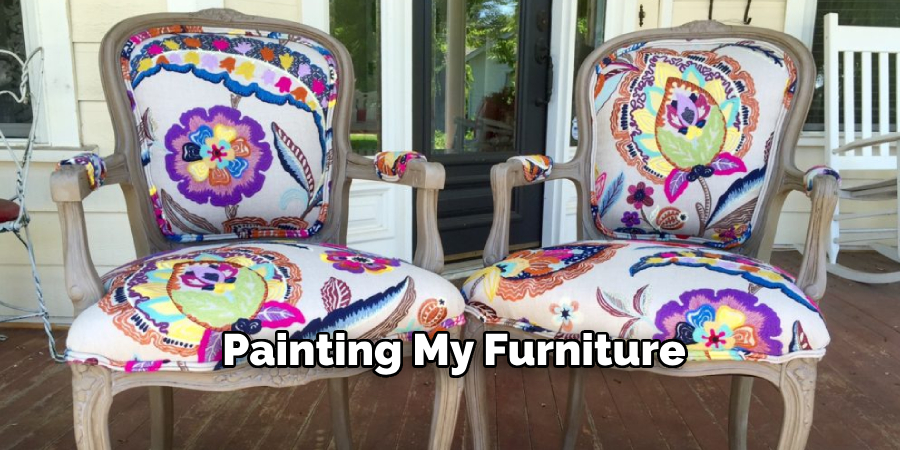
Q: How Can I Protect My Newly Painted Furniture From Damage?
A: To protect your newly painted furniture, you can apply a clear protective topcoat to help preserve the finish and prevent damage from everyday use. Be sure to follow the instructions of the product you are using for proper application and drying times. You can also use coasters or placemats to protect the surface from hot or wet items.
Q: How Can I Give My Furniture a Distressed Look?
A: If you want to give your furniture a distressed look, you can use sandpaper and create intentional scratches and dents in the wood. You can also use techniques like dry brushing or using a crackling medium to achieve a weathered appearance. Be sure to practice on a small area first before applying these techniques to your entire piece of furniture.
Q: What Should I Do if I Make Mistakes While Painting My Furniture?
A: If you make mistakes while painting your furniture, don’t panic! There are ways to fix or cover up any mistakes you may have made.
First, let the paint dry completely before attempting to fix any mistakes. This will ensure that your adjustments won’t smear or ruin the overall finish.
Conclusion
Refinishing old furniture is a rewarding activity that can save money and add a personal touch to your home decor. By following these tips and tricks on how to refinish wood chair, you can achieve professional-looking results without breaking the bank.
So, next time you come across a worn-out piece of furniture, don’t hesitate to give it new life through refinishing! Not only will you have a beautiful piece of furniture, but you’ll also have the satisfaction of knowing that you did it yourself. Happy refinishing!
About the Author
Adrian Green, a lifelong woodworking enthusiast, shares his passion for the craft through The Woodenify Blog. With a foundation built on years of hands-on experience in his father’s woodworking shop, Adrian is dedicated to helping others learn and grow in the world of DIY woodworking. His approach to woodworking combines creativity, practicality, and a deep appreciation for the art of building with your own hands. Through his blog, he inspires individuals of all skill levels to embark on their own woodworking journeys, creating beautiful, functional pieces of furniture and décor.
Professional Focus
- Specializes in DIY woodworking projects, from furniture to home décor.
- Provides step-by-step guides and practical tutorials for woodworkers of all skill levels.
- Dedicated to helping readers build confidence and skill through easy-to-follow instructions and tips.
- Passionate about fostering a community of makers who can share, learn, and grow together.
Education History
- University of Craft and Design – Bachelor of Fine Arts (BFA) in Woodworking and Furniture Design
- Woodworking Apprenticeships – Extensive hands-on training with skilled craftsmen to refine carpentry and furniture making techniques.
- Online Courses & Masterclasses – Continued education in advanced woodworking techniques, design principles, and specialized tools
Expertise:
- DIY woodworking, carpentry, furniture making, and home décor projects.
- Creating accessible tutorials and guides for beginner to advanced woodworkers.
- Sharing the joys and satisfaction of woodworking, from raw materials to finished products.