A damaged wooden door frame can compromise the security and aesthetic appeal of your home. Whether it’s due to wear and tear, water damage, or an accidental impact, fixing a wooden door frame is a manageable task that requires the right tools and a bit of patience.
This guide on how to fix wooden door frame will walk you through the steps needed to repair your door frame effectively, ensuring it looks good as new and functions properly.
Things to Consider Before Starting
Assess the Damage:
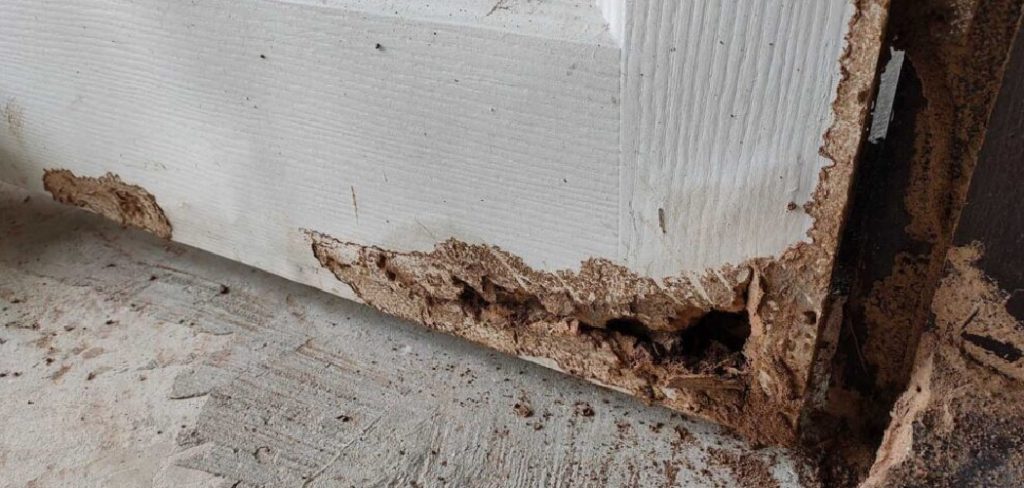
Before you start fixing your wooden door frame, it’s essential to assess the extent of the damage. This assessment will help you determine the materials and tools needed for the repair and give you an idea of how long it may take. Common types of damage to a wooden door frame include splintered or cracked wood, loose screws or hinges, and water damage.
Gather Materials:
Once you have assessed the damage, gather all the necessary materials before starting the repair. These may include wood glue, sandpaper, wood filler, a putty knife, screwdriver, hammer, nails, and paint or stain to match your door frame’s color.
Prepare Your Workspace:
To ensure a smooth repair process, it’s important to prepare your workspace properly. Lay down a drop cloth or newspapers to protect your flooring from any spills or debris. You may also want to remove the door from its hinges and place it on a stable surface.
Repairing Cracks and Splinters:
To repair cracks or splinters in a wooden door frame, start by sanding down the damaged area. This will help create a smooth surface for the wood filler to adhere to. Next, apply wood glue into the crack or splinter and press it firmly together. Once the glue has dried, use wood filler to fill in any remaining gaps. After the filler has dried, sand down any excess and blend it with the surrounding wood.
9 Step-by-step Guidelines on How to Fix Wooden Door Frame
Step 1: Gather Materials
Before starting the repair process, ensure you have all the necessary materials and tools. You will need:
- Wood Glue
- Wood Filler
- Sandpaper (Varying Grits)
- Putty Knife or Scraper
- Clamps, if Necessary
- Paint or Stain, if Desired
Step 2: Assess the Damage
Carefully examine the wooden door frame to identify areas that need repair. Look for visible cracks, splinters, dents, or sections where the wood may have rotted or broken. Use your hands to check for any loose pieces that may need to be reattached.
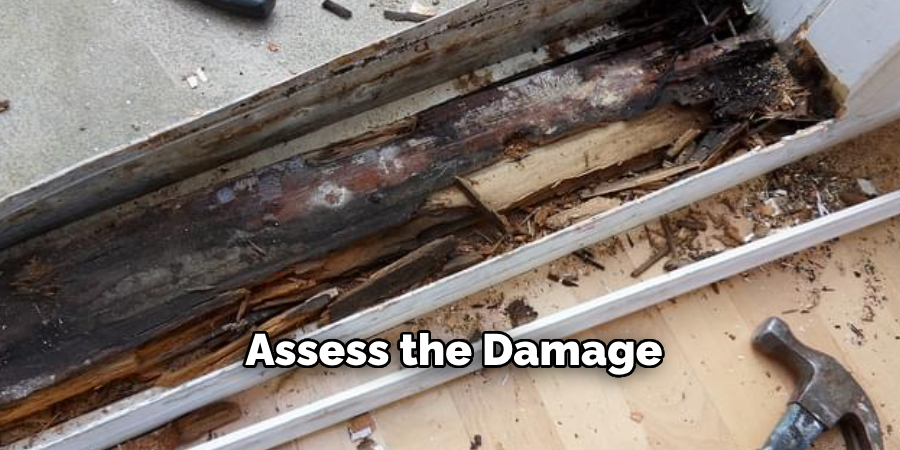
Assessing the extent of the damage will help you determine the appropriate steps and materials required for the repair, ensuring a thorough and effective fix.
Step 3: Sand Down the Damaged Area
Using medium-grit sandpaper, gently sand the damaged area of the wooden door frame. This process removes any rough edges, splinters, or loose debris and helps create a smooth surface for the repair materials to adhere to.
Be sure to sand evenly, blending the damaged area with the surrounding wood to ensure a seamless finish later. After sanding, wipe away any dust or debris with a clean, damp cloth to prepare the surface for the next steps.
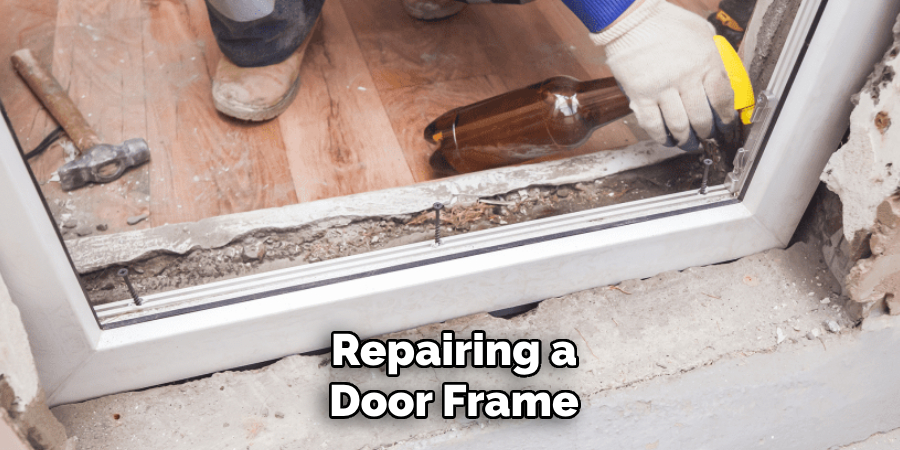
Step 4: Apply Wood Glue
Once the surface is clean and smooth, apply a high-quality wood glue to the damaged area. Use a brush or a small spatula to evenly distribute the glue, ensuring it covers the entire surface that needs repair. Press the broken or loose pieces of wood firmly back into place, holding them steady for a few moments to allow the glue to bond.
For best results, consider using clamps to secure the pieces while the glue dries. Follow the drying time recommended by the glue manufacturer before moving on to the next step.
Step 5: Fill in the Gap
Once the glue has completely dried and the wooden pieces are securely bonded, inspect the repaired area for any remaining gaps or cracks. Use a high-quality wood filler to fill in these spaces, ensuring a smooth, seamless finish. Apply the filler with a putty knife, pressing it firmly into the gaps and spreading it evenly over the surface.
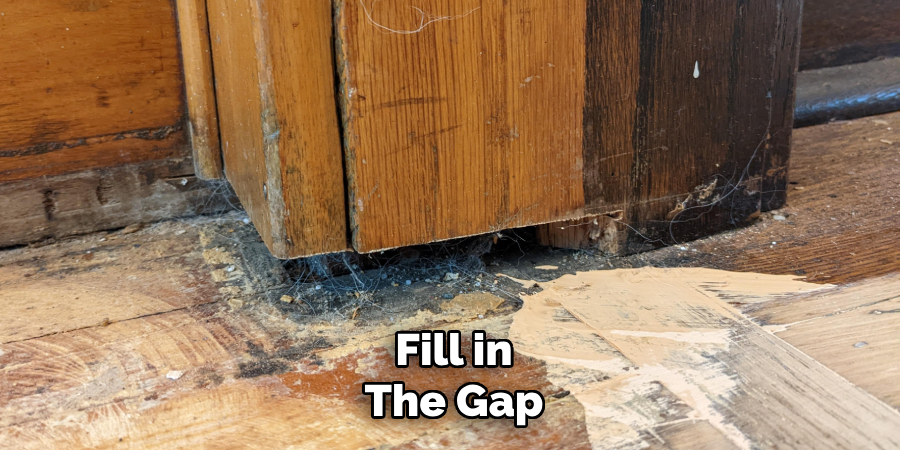
Remove any excess filler to avoid unevenness and allow it to dry thoroughly as per the manufacturer’s instructions. Sand the area lightly once dry to achieve a flawless surface ready for staining or painting.
Step 6: Sand and Repeat
Once the initial sanding is complete, carefully inspect the surface for any imperfections or uneven areas. Use fine-grit sandpaper to give the area a smooth finish and ensure it blends seamlessly with the surrounding material. If any gaps or inconsistencies remain after sanding, apply an additional layer of wood filler as needed.
Allow it to dry completely and sand again to achieve the desired result. Repeat this process until the surface is perfectly smooth and ready for the final steps, such as staining, painting, or sealing. Patience and attention to detail in this step will ensure a professional-quality finish.
Step 7: Paint or Stain (Optional)
Once the surface is smooth and fully prepared, you can choose to apply paint or stain to achieve your desired finish. If you opt to paint, start with a primer coat that suits the type of material being worked on, as this will help the paint adhere better and provide a uniform base. Allow the primer to dry completely before applying the paint in even strokes, using a brush or roller. Apply multiple thin coats for the best coverage, letting each coat dry fully before proceeding to the next.
If you prefer to stain the surface, select a wood stain that complements the project’s aesthetic. Use a clean cloth or brush to apply the stain evenly, working along the grain of the wood. Wipe off any excess with a lint-free cloth to avoid blotches and ensure an even tone. For added protection and a polished look, consider applying a clear topcoat or sealer after the paint or stain has dried. This step not only enhances durability but also provides a professional and finished appearance.
Step 8: Reinstall the Door
Once the paint or stain has fully dried and the protective topcoat is set, it’s time to reinstall the door. Carefully align the door with its frame and secure it using the hinges. If you removed the hardware earlier, reattach it now, ensuring screws are tightened properly for a secure fit.
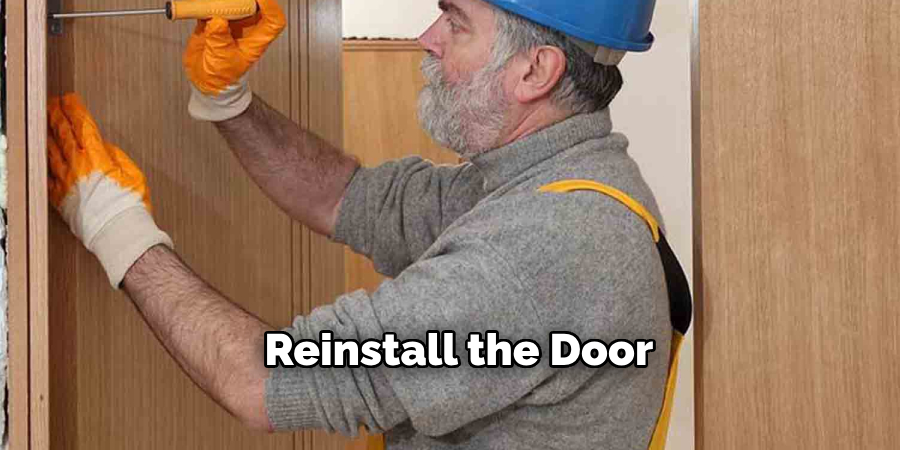
Test the door to ensure smooth operation, making any necessary adjustments to the hinges or hardware. With the door reinstalled, your project is complete, adding a refreshed and polished look to your space.
Step 9: Clean Up
After completing the project, take some time to clean up your workspace. Dispose of any used materials, such as painter’s tape, drop cloths, or old brushes, according to local disposal guidelines. Wipe down any surfaces that may have collected dust or spills during the process. Properly store any leftover paint, stain, or tools for future use. A tidy workspace not only leaves the area looking organized but also ensures you’re ready for the next project with minimal hassle.
Following these steps on how to fix wooden door frame will ensure that you have a successful and stress-free painting experience. Remember to take your time, pay attention to detail, and have fun with the process. With practice and patience, you can become a skilled painter and transform any space with a fresh coat of paint.
Do You Need to Get Support From Professionals?
While repairing a damaged door frame can be a manageable DIY project, there are situations where professional assistance may be necessary. If the damage to the frame is extensive or structural, or if you’re uncomfortable with the tools or techniques required, consulting a professional carpenter or handyman can save time and ensure high-quality results.
Additionally, professionals have experience in matching materials and finishes, ensuring the repaired area blends seamlessly with the rest of the door frame. Investing in expert support can provide peace of mind and a long-lasting repair.
Frequently Asked Questions
Q1: Can I Repair a Damaged Door Frame Myself?
A: It is possible to repair a damaged door frame yourself, but it may require specific tools and techniques. If you are uncomfortable with these or if the damage is extensive, it may be best to consult a professional carpenter or handyman. They have the necessary skills and experience to ensure a proper repair.
Q2: How do I Know if my Door Frame Needs Repair?
A: Some signs that your door frame may need repair include cracks, holes, or warping in the wood. You may also notice difficulty opening or closing the door smoothly, or gaps between the door and frame when closed.
Q3: What Materials are Needed for Repairing a Door Frame?
A: The materials needed will vary depending on the extent of the damage, but common supplies include wood putty or filler, sandpaper, primer and paint (if applicable), screws, nails, a hammer or drill, and wood glue. It is also helpful to have a putty knife, chisel, and level for more extensive repairs. It is important to choose high-quality materials that will provide long-lasting results.
Conclusion
Repairing a door frame can seem like a daunting task, but with the proper materials and tools, it is a manageable project for most homeowners. By carefully assessing the damage, using quality supplies, and following the repair process on how to fix wooden door frame step-by-step, you can restore the functionality and appearance of your door frame.
Taking the time to complete these repairs not only improves your home’s aesthetic appeal but also ensures its structural integrity for years to come.
About the Author
Adrian Green, a lifelong woodworking enthusiast, shares his passion for the craft through The Woodenify Blog. With a foundation built on years of hands-on experience in his father’s woodworking shop, Adrian is dedicated to helping others learn and grow in the world of DIY woodworking. His approach to woodworking combines creativity, practicality, and a deep appreciation for the art of building with your own hands. Through his blog, he inspires individuals of all skill levels to embark on their own woodworking journeys, creating beautiful, functional pieces of furniture and décor.
Professional Focus
- Specializes in DIY woodworking projects, from furniture to home décor.
- Provides step-by-step guides and practical tutorials for woodworkers of all skill levels.
- Dedicated to helping readers build confidence and skill through easy-to-follow instructions and tips.
- Passionate about fostering a community of makers who can share, learn, and grow together.
Education History
- University of Craft and Design – Bachelor of Fine Arts (BFA) in Woodworking and Furniture Design
- Woodworking Apprenticeships – Extensive hands-on training with skilled craftsmen to refine carpentry and furniture making techniques.
- Online Courses & Masterclasses – Continued education in advanced woodworking techniques, design principles, and specialized tools
Expertise:
- DIY woodworking, carpentry, furniture making, and home décor projects.
- Creating accessible tutorials and guides for beginner to advanced woodworkers.
- Sharing the joys and satisfaction of woodworking, from raw materials to finished products.