Are you tired of your old tabletop and want to replace it with a new one? Or would you like the flexibility to change your tabletop according to different occasions or seasons?
Tables are essential furniture in any household, office, or commercial space. They come in different shapes, sizes, and designs to cater to various needs and preferences. However, one common issue with tables is their fixed table top, which makes it difficult to move the table or rearrange the furniture in a room.
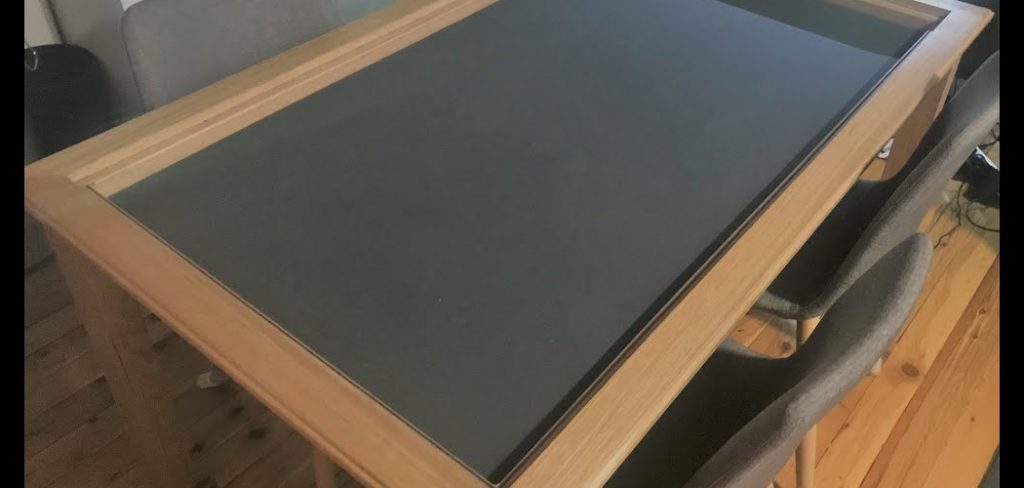
Fortunately, there is a solution to this problem: creating a removable tabletop. This allows you to easily detach the table top from the base whenever needed without damaging the structure of the table. In this guide on how to make a removable table top, we will walk you through step-by-step on how to make a diy table top using simple tools and materials.
What are the Benefits of a Removable Table Top?
A removable tabletop offers several benefits, including:
- Easy to move and rearrange furniture in a room.
- Provides versatility in usage as the table can be transformed into different shapes or sizes by changing the tabletop.
- Makes cleaning and maintenance easier as you can easily detach the table top for better access to clean underneath.
- Allows for customization options such as using different materials or designs for the tabletop to match your home decor.
What Will You Need?
To create a removable table top, you will need the following materials:
- A sturdy base or frame for your table.
- A pre-cut wood board, preferably the same size as your table base.
- Screws or bolts to attach the table top to the base.
- Optional: drill and screwdriver for easier installation.
- Optional: sandpaper and varnish if you want to customize the look of your tabletop.
10 Easy Steps on How to Make a Removable Table Top
Step 1: Measure Your Table Base

Before starting, take accurate measurements of your table base to ensure the removable table top fits perfectly. Use a measuring tape to determine the length and width of the table base. Write down these dimensions and double-check them to ensure accuracy and avoid errors. Pay attention to any irregularities or design details, such as rounded edges or unique frame shapes, that might influence the final fit.
If your table base has overhangs or protrusions, be sure to account for these in your measurements as well. Accurate measurements are crucial for creating a stable, functional, and aesthetically pleasing tabletop.
Step 2: Choose and Prepare the Wooden Board
Once you have chosen the wooden board that suits your needs, it’s essential to prepare it properly to ensure durability and a refined finish. Start by inspecting the board for imperfections such as knots, cracks, or warping, as these can affect both the appearance and structural integrity of the tabletop. Use a suitable saw to cut the board to the required dimensions, ensuring clean, straight edges. Sand the entire surface of the wood, beginning with coarse-grit sandpaper to remove any rough areas or unevenness, and gradually progress to finer grits for a smooth, polished finish.
If you desire a specific color or style, consider staining the wood to highlight its natural grain or painting it to achieve a bold look. After staining or painting, apply a protective topcoat, such as polyurethane or wood oil, to shield the wood from moisture, scratches, and wear over time. Proper preparation will not only enhance the appearance of your wooden tabletop but also extend its lifespan and functionality.
Step 3: Mark Drill Holes

Carefully measure and mark the locations where you need to drill holes for attaching hardware, such as screws or brackets. Use a measuring tape and pencil to ensure precise and evenly spaced marks. Double-check all measurements to confirm they align with the placement of legs, supports, or other components. For an extra layer of accuracy, consider using a square or a template to ensure proper alignment. Taking the time to mark drill holes accurately will make assembly easier and ensure the stability of your wooden tabletop.
Step 4: Drill Starter Holes
Using the marks you made in Step 3, carefully drill starter holes into the wooden tabletop. Starter holes help guide screws or bolts during assembly and prevent the wood from splitting. Use a drill bit that is slightly smaller than the screws you will be using to ensure a snug fit. Hold the drill perpendicular to the wood to maintain accuracy, and drill slowly to avoid creating uneven holes. Be mindful of the depth, stopping as soon as the hole is deep enough for the screw threads to grip properly.
Once all starter holes are drilled, inspect the tabletop for any splinters or debris, and clean it thoroughly to prepare for the next step.
Step 5: Attach Mounting Brackets
Before attaching the mounting brackets to the table, it is important to determine the placement of your leg assembly. Measure and mark where each bracket will be positioned, taking into account any specific instructions or measurements provided by the manufacturer.
Once the markings are made, attach the brackets to the underside of the tabletop using screws or bolts. Make sure they are securely in place before moving on to the next step.
Step 6: Secure the Table Top
To secure the tabletop, carefully align it with the leg assembly and ensure the brackets are positioned correctly. Double-check that the tabletop is placed evenly, with no overhang unless specifically intended by the design. Once aligned, use the appropriate hardware, such as screws or bolts, to fasten the tabletop to the mounting brackets. Tighten each screw or bolt securely, but avoid overtightening, as this could damage the brackets or the tabletop material.

It is helpful to tighten screws diagonally in a crisscross pattern to ensure even pressure and stability. After securing the tabletop, gently move the table to check for wobbling or instability. Make any necessary adjustments to ensure the table is solid and level before proceeding to the next step.
Step 7: Test Stability
To test the stability of your table, carefully press down on each corner and along the edges to ensure it does not wobble or shift. If you notice any instability, check the screws or bolts and tighten them further if necessary. Place a level on the tabletop to ensure it is perfectly level. If adjustments are needed, consider loosening and re-tightening specific screws or using floor protectors to stabilize uneven legs. Once the table is secure and level, you are ready to add the final touches.
Step 8: Apply Finishing Touches
To complete your table, start by inspecting the surface for any imperfections, such as rough patches or scratches. Sand these areas lightly with fine-grit sandpaper to achieve a smooth finish. Afterward, use a clean, damp cloth to remove any dust or debris. Next, consider applying a protective coating, such as wood stain, varnish, or paint, depending on your desired aesthetic and functional needs. Follow the manufacturer’s instructions carefully to ensure even application and sufficient drying time.
Finally, attach any additional accessories, such as decorative hardware or table pads, to enhance both the appearance and functionality of your piece. With these finishing touches, your table is now ready for use!
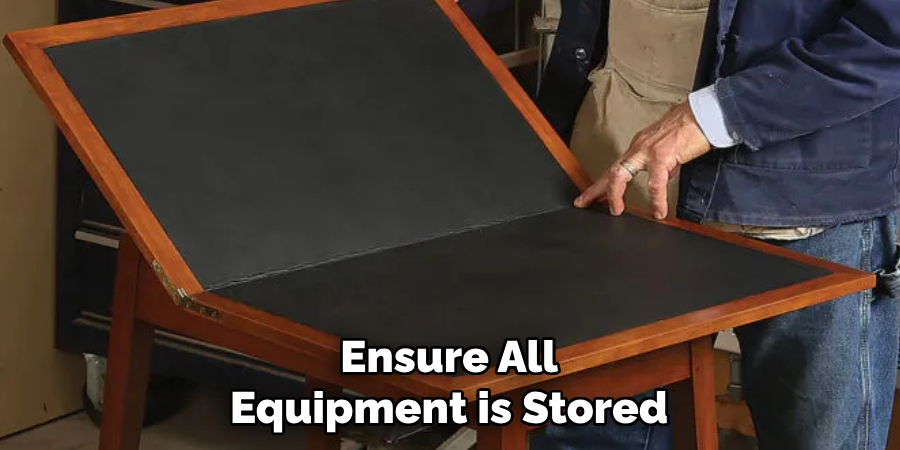
Step 9: Clean Up
After completing your project, it’s essential to clean up your workspace properly. Begin by gathering and disposing of any leftover materials, such as sandpaper scraps, paint cans, or packaging. Clean your tools thoroughly to prevent damage or deterioration. Wash brushes, wipe down surfaces, and ensure all equipment is stored in its designated place. Vacuum or sweep up dust and debris to leave your workspace tidy and safe for future use. Taking the time to clean up not only preserves your tools but also makes your next project smoother to start.
Step 10: Enjoy Your Custom Table
Your custom table is now ready to be admired and used! Take a moment to appreciate the effort, creativity, and craftsmanship that went into building it. Whether you use it as a dining centerpiece, a workspace, or a decorative piece, your table reflects your unique style and hard work. Invite friends or family to gather around and share in your accomplishment, or simply enjoy the satisfaction of creating something with your own hands. This is the time to celebrate your achievement and the charm of a handmade piece.
By following these simple tips, you can create a beautiful and functional table that will stand the test of time. Not only will it be a practical addition to your home, but it will also serve as a reminder of your determination and skill.
Conclusion
How to make a removable table top is both a practical and rewarding project that combines creativity and functionality.
By carefully selecting your materials, following precise measurements, and employing the right tools, you can craft a tabletop that meets your needs and style preferences. Whether you aim for versatility or unique design, this project allows you to expand your woodworking skills and create a custom piece for your space.
Most importantly, the time and effort invested will result in a durable, personalized table that you can take pride in for years to come.
About the Author
Adrian Green, a lifelong woodworking enthusiast, shares his passion for the craft through The Woodenify Blog. With a foundation built on years of hands-on experience in his father’s woodworking shop, Adrian is dedicated to helping others learn and grow in the world of DIY woodworking. His approach to woodworking combines creativity, practicality, and a deep appreciation for the art of building with your own hands. Through his blog, he inspires individuals of all skill levels to embark on their own woodworking journeys, creating beautiful, functional pieces of furniture and décor.
Professional Focus
- Specializes in DIY woodworking projects, from furniture to home décor.
- Provides step-by-step guides and practical tutorials for woodworkers of all skill levels.
- Dedicated to helping readers build confidence and skill through easy-to-follow instructions and tips.
- Passionate about fostering a community of makers who can share, learn, and grow together.
Education History
- University of Craft and Design – Bachelor of Fine Arts (BFA) in Woodworking and Furniture Design
- Woodworking Apprenticeships – Extensive hands-on training with skilled craftsmen to refine carpentry and furniture making techniques.
- Online Courses & Masterclasses – Continued education in advanced woodworking techniques, design principles, and specialized tools
Expertise:
- DIY woodworking, carpentry, furniture making, and home décor projects.
- Creating accessible tutorials and guides for beginner to advanced woodworkers.
- Sharing the joys and satisfaction of woodworking, from raw materials to finished products.