Are you looking to add some bohemian flair to your outdoor space? A boho picnic table is the perfect addition!
Creating a boho picnic table is a fantastic way to add a touch of charm and creativity to your outdoor space. With its relaxed and eclectic vibe, a boho-style table is perfect for hosting gatherings, enjoying meals with loved ones, or simply lounging in your backyard. Building your own table allows you to customize it to suit your style, blending natural textures, earthy tones, and artistic accents.
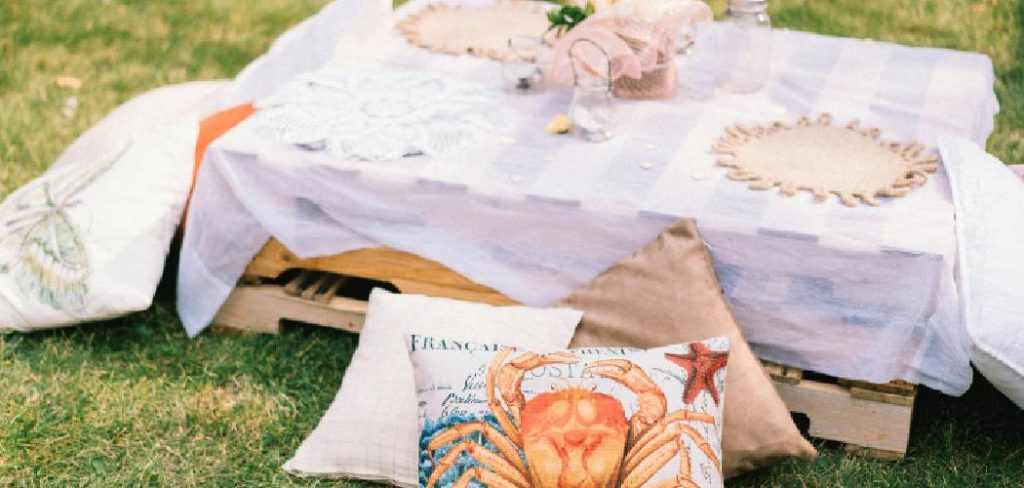
This guide on how to build a boho picnic ideas table will walk you through the steps needed to craft a beautiful boho picnic table that is both functional and uniquely yours. Whether you’re experienced with DIY projects or a beginner, this process is accessible and rewarding!
What Are the Benefits of Building a Boho Picnic Table?
There are several benefits to building your boho picnic table, including:
- Customization: By building your table, you have the freedom to choose materials, design elements, and dimensions that suit your style and needs. You can also incorporate any special features or functionalities that you desire.
- Cost-effective: Building your table can be more budget-friendly compared to purchasing one from a store. You can save money by sourcing materials yourself and only paying for what you need.
- Quality: When you build a piece of furniture with your own hands, you have control over the quality of the finished product. This means using sturdy materials and ensuring proper construction techniques, resulting in a more durable and long-lasting table.
- Satisfaction: There is a great sense of satisfaction that comes with building your own furniture. It allows you to showcase your skills and creativity while creating something useful for your home.
What Will You Need?
To build your own table, you will need a few materials and tools. Here is a general list of what you may need:
- Wood for the tabletop, legs, and support pieces
- Screws or nails
- Saw
- Drill with drill bits
- Measuring tape
- Level
- Sandpaper
- Paint or stain (optional)
It is important to gather all necessary materials before starting your project to ensure a smooth building process.
10 Easy Steps on How to Build a Boho Picnic Table
Step 1: Measure and Cut Your Wood
Start by measuring and cutting all the wood pieces you’ll need for your picnic table. For a standard-size table, cut the wood for the tabletop, legs, and support beams according to your desired dimensions. Be sure to use a measuring tape and mark your cuts accurately. Use a saw to make clean, precise cuts.

Step 2: Sand the Wood
Once all your wood pieces are cut, take the time to sand each piece thoroughly. Sanding is a crucial step as it smooths out rough edges, splinters, and imperfections in the wood, ensuring a polished and professional finish. Start with a coarse-grit sandpaper to remove uneven surfaces, and then move to a fine-grit sandpaper for a smoother finish.
If you have an electric sander, it can speed up this process, but sanding by hand is also effective. Remember to sand in the direction of the wood grain to avoid causing scratches or damage. Ensure that all surfaces are smooth to the touch before moving on to the next step, as this will make the staining or painting process much easier and result in a more refined final product.
Step 3: Build the Tabletop
To begin constructing the tabletop, first arrange the wooden planks side by side in the desired order. Make sure the edges align evenly, and check for any gaps between the planks. Once satisfied with the arrangement, apply wood glue along the edges of the planks and press them firmly together. Use clamps to secure the planks in place while the glue sets, ensuring a tight bond. Allow the glue to dry completely, following the manufacturer’s recommended drying time. After the planks are securely glued together, reinforce the assembly by attaching support beams underneath the tabletop using screws. This will add stability and prevent warping over time.
Step 4: Attach the Legs
Begin by positioning the legs at each corner of the tabletop. Ensure they are evenly aligned and perpendicular to the surface. Use a pencil to mark the placement of the legs and the locations for the screws. Pre-drill holes into both the legs and the underside of the tabletop to prevent the wood from splitting. Secure each leg in place using strong wood screws, tightening them firmly to ensure stability. For additional reinforcement, consider using metal brackets or corner braces to strengthen the connection between the legs and the tabletop. Once all legs are attached, carefully flip the table upright and check for stability before putting it to use.

Step 5: Add Support Bracing
To enhance the table’s strength and durability, install support bracing between the legs. Cut wooden braces to fit diagonally between each pair of legs or in an “X” pattern for optimal stability. Pre-drill holes at the ends of the braces to avoid splitting the wood. Attach the braces securely to the legs using wood screws, ensuring that they are flush and tightly fitted. This additional support will help distribute weight evenly and prevent wobbling, providing a more robust final structure. Double-check that all screws are tight and the braces are properly aligned before proceeding to the next step.
Step 6: Check Level and Adjust
Use a spirit level to ensure that the surface of your structure is completely level. Place the level on various parts of the surface to check for any inconsistencies. If the structure is uneven, adjust by either tightening or loosening screws, or by subtly altering the placement of the legs. For significant discrepancies, you may need to add shims beneath the legs to achieve balance. Ensuring the structure is level at this stage is crucial for stability and functionality, particularly if the structure is intended to support weight or precise work.
Step 7: Sand Again

After making adjustments to ensure the structure is level, it’s time to sand the surface one more time. Use fine-grit sandpaper to smooth out any remaining rough spots or edges that may have appeared during the leveling process. Pay special attention to corners, joints, and areas where adjustments were made. This final sanding ensures a smooth and even finish, making the surface safe to use and preparing it for any finishing touches such as painting, staining, or sealing. Always remember to clean the surface thoroughly after sanding to remove dust and debris.
Step 8: Apply Paint or Stain
Choose a high-quality paint or stain that suits your project and desired aesthetic. Before applying, ensure the surface is clean and completely dry. Use a brush, roller, or sprayer to apply the first coat evenly, working in long, smooth strokes in the direction of the grain if applicable. Allow the first coat to dry thoroughly according to the manufacturer’s instructions, then assess whether a second coat is needed for more even coverage or a richer color. Remember to work in a well-ventilated area and take necessary precautions, such as wearing gloves or a mask if using products with strong fumes.
Step 9: Add Decorative Touches
Once the surface is fully dry and the base coat is complete, it’s time to add decorative touches to enhance the finished look. Consider using stencils, tape, or freehand designs to create patterns, borders, or unique details. Metallic accents, textured finishes, or contrasting colors can also add visual interest and personality. Use fine brushes for precision or sponges for softer effects, depending on your design preference. Take your time and allow each layer or detail to dry completely before adding additional accents.
Step 10: Place and Enjoy
Once all the decorative details are complete and fully dried, it’s time to find the perfect spot for your creation. Whether it’s a centerpiece for your dining table, an accent for your living room, or a gift for someone special, placing your finished piece is a moment of celebration. Step back and admire the hard work and creativity you’ve put into it. Not only have you crafted something unique, but you’ve also added a personal touch that makes it truly one of a kind. Enjoy the compliments and the satisfaction of having completed a remarkable project!

By following these simple steps, you can unleash your creativity and create beautiful pieces of art with polymer clay.
5 Things You Should Avoid
- Using Low-Quality Materials
Avoid using cheap or low-quality wood and tools, as they can compromise the durability and aesthetics of your picnic table. Invest in sturdy materials like weather-resistant wood to ensure your table can withstand outdoor conditions.
- Skipping the Planning Phase
Do not skip creating a detailed plan or blueprint. Without proper measurements and design preparation, your table may turn out uneven or unstable, disrupting the boho style you want to achieve.
- Neglecting Surface Preparation
Avoid building directly on uneven ground or without preparing the workspace. A level surface is critical to constructing a stable and well-balanced table.
- Overlooking Weatherproofing
Failing to seal the wood or protect it from moisture can lead to warping, rotting, or fading over time. Always apply a protective sealant or weather-resistant finish.
- Overloading on Decorations
While adding a boho flair is important, overdecorating the table with excessive patterns, fabrics, or colors can make it look cluttered. Stick to a balanced aesthetic for a cohesive and stylish final product.
Conclusion
How to build a boho picnic table is both a functional and creative project that adds charm to any outdoor space.
By focusing on sturdy materials, incorporating unique design elements, and balancing aesthetics with practicality, you can craft a table that embodies the boho spirit. Avoid common mistakes like neglecting weatherproofing or overloading on decorations to ensure the table remains durable and visually appealing.
With careful planning and attention to detail, your boho picnic table will become a centerpiece for memorable gatherings and a reflection of your style.
About the Author
Adrian Green, a lifelong woodworking enthusiast, shares his passion for the craft through The Woodenify Blog. With a foundation built on years of hands-on experience in his father’s woodworking shop, Adrian is dedicated to helping others learn and grow in the world of DIY woodworking. His approach to woodworking combines creativity, practicality, and a deep appreciation for the art of building with your own hands. Through his blog, he inspires individuals of all skill levels to embark on their own woodworking journeys, creating beautiful, functional pieces of furniture and décor.
Professional Focus
- Specializes in DIY woodworking projects, from furniture to home décor.
- Provides step-by-step guides and practical tutorials for woodworkers of all skill levels.
- Dedicated to helping readers build confidence and skill through easy-to-follow instructions and tips.
- Passionate about fostering a community of makers who can share, learn, and grow together.
Education History
- University of Craft and Design – Bachelor of Fine Arts (BFA) in Woodworking and Furniture Design
- Woodworking Apprenticeships – Extensive hands-on training with skilled craftsmen to refine carpentry and furniture making techniques.
- Online Courses & Masterclasses – Continued education in advanced woodworking techniques, design principles, and specialized tools
Expertise:
- DIY woodworking, carpentry, furniture making, and home décor projects.
- Creating accessible tutorials and guides for beginner to advanced woodworkers.
- Sharing the joys and satisfaction of woodworking, from raw materials to finished products.