Are you planning to build horse stall doors for your barn? Then you’ve come to the right place!
Building horse stall doors is an essential aspect of creating a safe and functional environment for your horses. Well-constructed stall doors provide security, proper ventilation, and ease of access, ensuring both the safety of the animal and the convenience of the handler. Whether you’re designing a new barn or upgrading the existing stalls, constructing durable and practical doors can significantly enhance the overall usability of your facility.
This guide on how to build horse stall doors will walk you through the necessary materials, tools, and steps to build sturdy and reliable horse stall doors tailored to meet your specific needs. Let’s get started with the materials needed for the project.
What Are the Benefits of Building Custom Horse Stall Doors?
Custom horse stall doors offer several benefits for both the horse and the handler. Here are some reasons why you should consider building custom horse stall doors:
1. Durability
By building your horse stall doors, you have control over the materials used and the construction process. This allows you to choose high-quality, sturdy materials that will withstand wear and tear from daily use by horses.
2. Personalization
Every horse is unique, and their needs may differ from one another. By building custom horse stall doors, you can tailor them to meet your specific requirements.
3. Cost-Effective
Building custom horse diy stall doors can also be cost-effective in the long run. While there may be upfront costs for materials and tools, you can choose budget-friendly options without compromising on quality.
4. Aesthetics
Horse stall doors are not just functional structures – they can also enhance the overall appearance of your barn or stable. By building custom doors, you have creative control over the design and can incorporate unique elements that match the style of your property.
5. Durability
Custom horse stall doors are built with high-quality materials, making them more durable and long-lasting compared to pre-made options. You can choose sturdy materials such as solid wood, metal, or composite materials that can withstand wear and tear from horses.
What Will You Need?
To build custom horse stall doors, you will need a few essential tools and materials. Here are some of the basics to get you started:
- Measuring tape
- Saw (hand or power)
- Wood or metal materials
- Screws or nails
- Hinges and door hardware
- Paint or stain (optional)
Additionally, you may also want to consider using specialized tools such as a router, drill press, or miter saw for more precise cuts and finishes. It is important to have all necessary tools and materials before starting your project to ensure a smooth building process.
10 Easy Steps on How to Build Horse Stall Doors
Step 1: Plan and Measure
Before you begin construction, take accurate measurements of the stall door opening, including width and height. Consider the door’s design—whether you want a solid door, a half-door, or one with a window or grille. Planning ensures that the door fits perfectly and functions correctly. Sketch your design and double-check all measurements before proceeding.

Step 2: Cut Materials
Using a saw, cut your wood or metal materials to match the dimensions of your stall door design. Make sure to include pieces for the frame, panels, and any additional components like cross braces or window sections. Sand the edges of wooden materials to prevent splinters.
Step 3: Assemble the Frame
Begin by laying out the cut pieces of your frame on a flat surface according to your design sketch. Ensure all pieces align properly and match the measurements. Use clamps to hold the pieces in place while assembling to prevent shifting. If you are working with wood, apply wood glue to the joints for extra stability before securing them with screws or nails. For metal frames, welding is typically the most secure method for joining the pieces together; make sure to wear protective equipment during this process. Check that corners are square using a carpenter’s square to ensure the frame is level and properly aligned.
Step 4: Attach Panels
Once the frame is securely assembled, it’s time to attach the panels. Begin by aligning the panel edges with the frame, ensuring a precise fit. If the panels are pre-drilled, match the holes to the frame and secure them with screws or bolts, depending on the material. For wood panels, consider using wood screws and apply a bead of adhesive along the edges before attaching, ensuring a stronger bond. If the panels require cutting or trimming, measure carefully and use a saw that is appropriate for the material.

Step 5: Install Hinges
To install the hinges, begin by selecting the appropriate type of hinge based on the purpose and weight of the panels. Position the hinges evenly along the edge where the panels will move, typically spacing them equal distances apart for stability. Mark the spots for the screws or bolts and pre-drill holes if necessary to make securing the hinges easier. Align the hinge plates with the markings, ensuring they are flush with the surface, and attach them using screws or fasteners.
Step 6: Add Door Hardware
To enhance functionality and style, install the necessary door hardware. Start by selecting handles, knobs, or pulls that match the design and purpose of the panels. Mark the placement of the hardware on the panel, ensuring it is easily accessible and visually aligned. Use a drill to create holes for mounting, if required, and secure the hardware firmly using screws provided. For additional features like locks, latches, or stoppers, follow the manufacturer’s instructions to ensure proper installation and functionality.
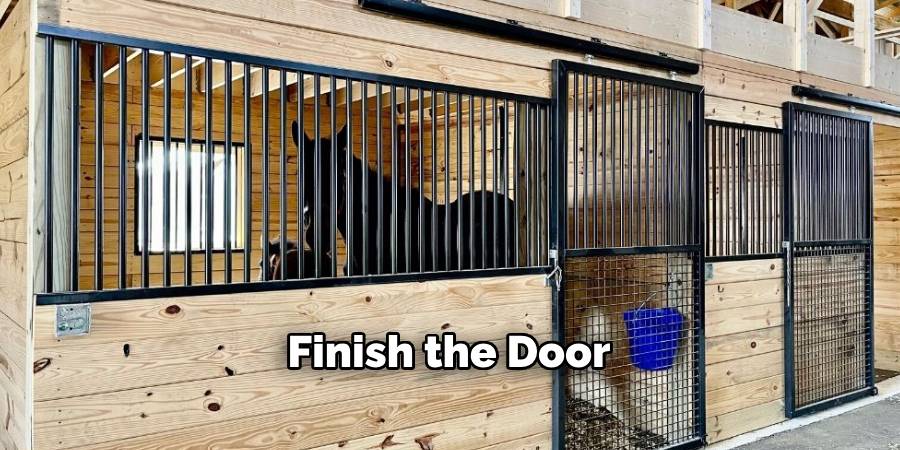
Step 7: Finish the Door
To complete the door, apply a finish that enhances its appearance and protects the material. Begin by sanding the surface to ensure it is smooth and free of imperfections. Choose a finish that complements your desired aesthetic, such as paint, stain, or varnish. If painting, apply a primer first for better adhesion and durability. Work in thin, even coats, allowing each layer to dry thoroughly before adding the next.
Step 8: Test the Swing
Once the finish has dried completely, it’s time to test the door’s swing. Open and close the door several times to ensure it moves smoothly without sticking or creaking. Check that the hinges are securely attached and aligned properly. If the door does not swing evenly, make minor adjustments to the hinges or frame as needed. Verify that the latch or locking mechanism functions correctly and engages securely. Testing the swing thoroughly ensures the door is both functional and ready for everyday use.
Step 9: Ensure Safety
Safety is a critical component when finalizing your door installation. Begin by inspecting all hardware, such as hinges, locks, and screws, to confirm they are properly tightened and secure. Check for any sharp edges or protruding parts that could cause injury, and file or adjust them as needed. If the door includes glass panels, ensure the glass is intact and free of cracks. Additionally, test the door’s locking mechanism to confirm it provides adequate security. For exterior doors, consider adding weatherstripping or a threshold seal to enhance safety and insulation. Taking these precautions ensures that your door is not only functional but also safe for daily use.
Step 10: Final Touches
Now that all the major adjustments and checks are complete, take a moment to add the finishing touches to your door. Clean the surface of the door thoroughly to remove any dust, fingerprints, or debris. If the door is painted or stained, inspect the finish to ensure there are no imperfections, and apply touch-ups as necessary. Lubricate hinges and moving parts to ensure smooth operation and prevent squeaks. Finally, step back and admire your work, ensuring the door looks appealing and functions flawlessly.

By following these simple steps, you can easily install a new door or give your old one a much-needed upgrade.
5 Things You Should Avoid
- Using Low-Quality Materials
Cheap or low-quality materials might save money upfront, but they can lead to safety issues and a shorter lifespan for the stall door. Always opt for durable and sturdy materials, such as solid wood or high-grade metal, to ensure the door withstands the wear and tear of regular use.
- Ignoring Proper Measurements
Incorrect measurements can lead to doors that don’t fit properly, leaving gaps that might allow a horse to get stuck or injured. Always double-check your measurements and ensure the door frame and opening are accurately sized.
- Neglecting Safety Features
A stall door must prioritize safety for both the horse and the handler. Avoid omitting essential safety features like smooth edges, strong latches, and proper ventilation, which are crucial for preventing injuries and ensuring a healthy environment.
- Using Weak Hardware
Subpar or weak hardware, such as hinges or latches, can fail under pressure, potentially leading to dangerous situations. Ensure that all moving parts are heavy-duty and designed to handle the strength and activity level of a horse.
- Compromising on Ventilation
A poorly ventilated stall door can lead to issues like excessive heat and a buildup of harmful gases, which can negatively impact your horse’s health. Avoid using solid doors with no airflow; instead, incorporate mesh or bars to allow proper ventilation while maintaining security.
Conclusion
How to build horse stall doors requires careful consideration of safety, durability, and practicality.
Prioritize the use of strong, high-quality materials to ensure the door can withstand daily wear and tear. Incorporate designs that allow proper ventilation, such as mesh or barred panels, to promote healthy airflow and prevent the accumulation of harmful gases. Additionally, focus on safe locking mechanisms that are easy to operate but secure enough to keep your horse contained.
By addressing these critical factors, you can create stall doors that provide a safe, comfortable environment for your horse while ensuring long-term functionality and reliability.
About the Author
Adrian Green, a lifelong woodworking enthusiast, shares his passion for the craft through The Woodenify Blog. With a foundation built on years of hands-on experience in his father’s woodworking shop, Adrian is dedicated to helping others learn and grow in the world of DIY woodworking. His approach to woodworking combines creativity, practicality, and a deep appreciation for the art of building with your own hands. Through his blog, he inspires individuals of all skill levels to embark on their own woodworking journeys, creating beautiful, functional pieces of furniture and décor.
Professional Focus
- Specializes in DIY woodworking projects, from furniture to home décor.
- Provides step-by-step guides and practical tutorials for woodworkers of all skill levels.
- Dedicated to helping readers build confidence and skill through easy-to-follow instructions and tips.
- Passionate about fostering a community of makers who can share, learn, and grow together.
Education History
- University of Craft and Design – Bachelor of Fine Arts (BFA) in Woodworking and Furniture Design
- Woodworking Apprenticeships – Extensive hands-on training with skilled craftsmen to refine carpentry and furniture making techniques.
- Online Courses & Masterclasses – Continued education in advanced woodworking techniques, design principles, and specialized tools
Expertise:
- DIY woodworking, carpentry, furniture making, and home décor projects.
- Creating accessible tutorials and guides for beginner to advanced woodworkers.
- Sharing the joys and satisfaction of woodworking, from raw materials to finished products.