Are you tired of your old and worn-out kitchen countertop? Do you want to upgrade your home’s interior design without spending too much money? Look no further because a plywood countertop is the perfect solution for you!
Making a plywood countertop is a fantastic DIY project combining functionality and creativity. Whether you’re renovating your kitchen on a budget, designing a workbench for your garage, or simply looking for a customizable solution for your home, a plywood countertop can be an excellent choice. This project provides you with a durable and practical surface and allows you the flexibility to finish and style it in numerous ways to match your decor.
In the following sections, we will guide you through the step-by-step process of how to make a plywood countertop, from selecting the right type of plywood to applying the finishing touches.
What are the Benefits of Using Plywood for Countertops?
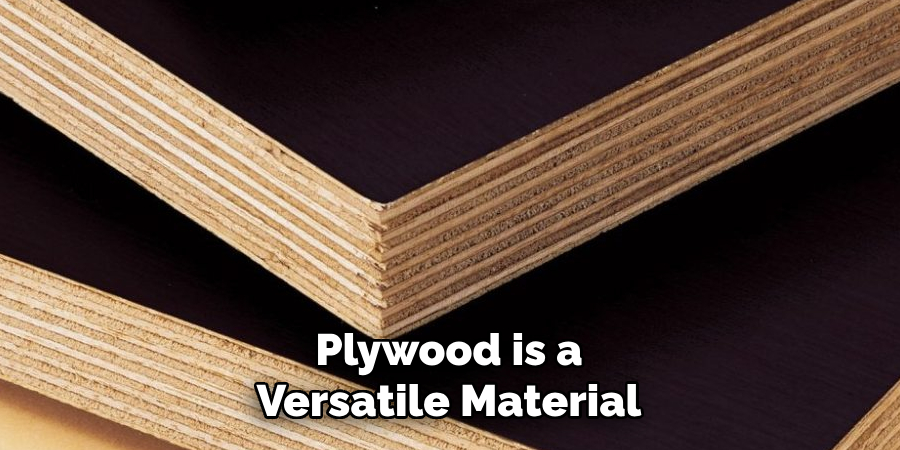
Plywood is a versatile and cost-effective building material that has been used in construction and woodworking for decades. It is made by gluing together thin layers of wood veneers, which makes it sturdy, strong, and resistant to warping or cracking. Unlike solid wood, plywood has a consistent grain pattern that eliminates the need for facing joints, making it an ideal choice for large surfaces like countertops. Some other benefits of using plywood for countertops include:
- Affordable: Plywood is more budget-friendly than other countertop materials such as granite or solid wood.
- Easy to Work With: It can be cut, drilled, and sanded easily, making it a popular choice among DIY enthusiasts.
- Durable and Long-lasting: Plywood is highly resistant to moisture, heat, and wear and tear, making it a suitable material for high-traffic areas like kitchens.
- Customizable: You can choose from various plywood thicknesses, grades, and finishes to suit your specific needs.
Overall, plywood is an excellent option for countertops for those looking for an affordable yet durable and stylish material.
What Will You Need?
Before we dive into the steps, let’s first gather all the necessary tools and materials:
- Plywood sheets (3/4 inch thickness recommended)
- Measuring tape
- Saw (circular saw or table saw)
- Sandpaper (various grits – 80, 120, 220)
- Wood glue
- Clamps
- Jigsaw or router (for cutting sink hole, if needed)
- Wood screws
- Wood stain or paint
- Polyurethane sealant
- Paintbrush/roller
- Drill
- Safety gear (gloves, goggles, face mask)
Once you have all the tools and materials ready, let’s move on to the step-by-step guide.
9 Easy Steps on How to Make a Plywood Countertop
Step 1. Measure and Plan:

Begin by accurately measuring the dimensions of the area where you’ll install the plywood countertop. This includes length, depth, and thickness. A standard countertop is usually around 25 inches deep for kitchens, but ensure it fits your specific space requirements. Sketch a rough plan, including any cutouts for sinks or fixtures. Remember, planning thoroughly at this stage can save a significant amount of time and resources later on.
Step 2. Select and Prepare Your Plywood:
Choosing the right plywood is crucial for your countertop project. Opt for high-grade plywood to ensure durability and a smoother surface. Once you’ve selected your plywood, it’s time to cut it according to the measurements taken earlier.
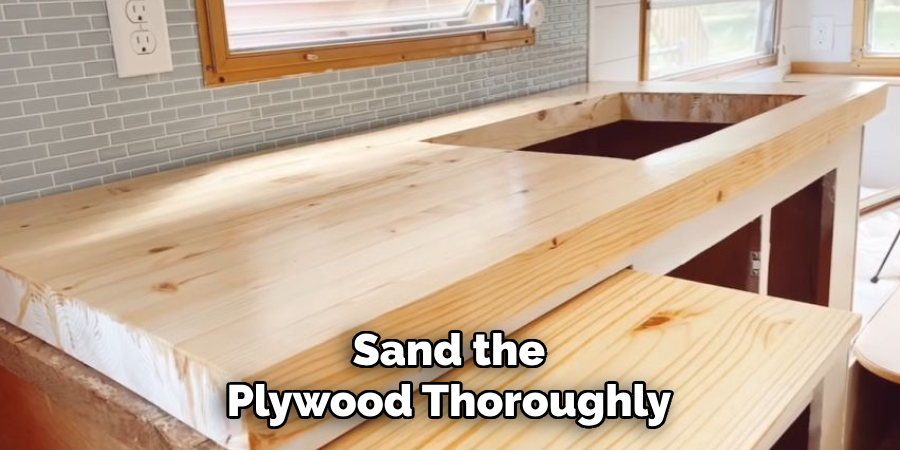
Carefully cut the plywood to size using a circular saw or table saw. If your design includes a sink or other fixtures, use a jigsaw or router to make these cutouts. After cutting, sand down the edges and surfaces with sandpaper, starting with a coarse grit and moving to a finer grit for a smooth finish.
Step 3. Join the Plywood Sheets:
If your countertop design requires a larger surface area than a single sheet of plywood can provide, you will need to join two or more sheets together. To achieve a seamless join, apply a generous amount of wood glue along the edge of one plywood sheet.
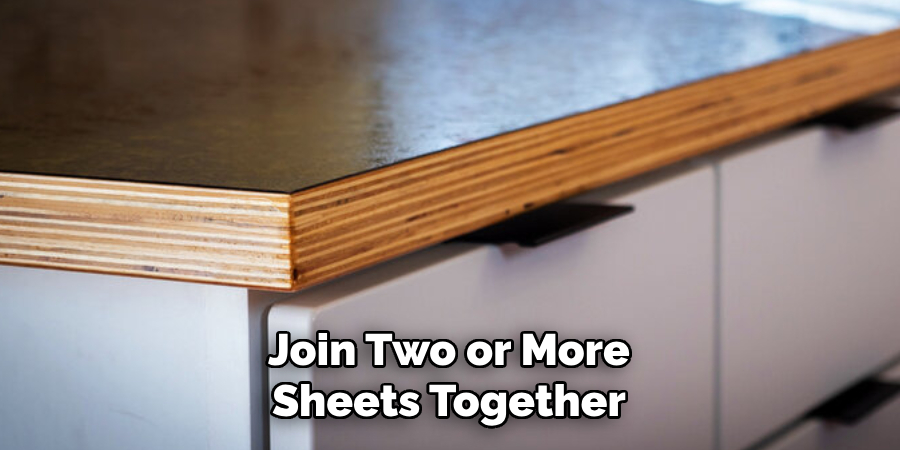
Place the second sheet tightly against the first, ensuring the edges are perfectly aligned. Use clamps to hold the sheets together firmly while the glue dries, usually for at least 24 hours. For additional strength and stability, you can also secure the sheets together from underneath using wood screws.
Drill pilot holes first to prevent the wood from splitting, and make sure the screws are short enough not to penetrate the top surface. After joining the sheets, the seam is smooth to make the joint as inconspicuous as possible. This step is critical for ensuring your plywood countertop has a uniform and polished appearance.
Step 4. Apply Finish:
Once your plywood sheets are joined and sanded smoothly, it’s time to apply the finish. Whether you prefer a natural look or a painted surface, the choice of finish will significantly affect the appearance and durability of your countertop. If opting for a wood stain, select a shade that complements your home decor and apply it evenly using a brush or roller. Allow the stain to dry thoroughly, following the manufacturer’s instructions. For those preferring a painted surface, apply a primer first, then paint in your chosen color.
Multiple coats may be needed for an even and durable finish. Lastly, a polyurethane sealant should be applied to protect the surface from water damage and wear. This sealant adds a layer of protection and enhances the countertop’s beauty by giving it a glossy or matte finish, depending on your preference. Allow ample drying time for the sealant before proceeding to the next step.
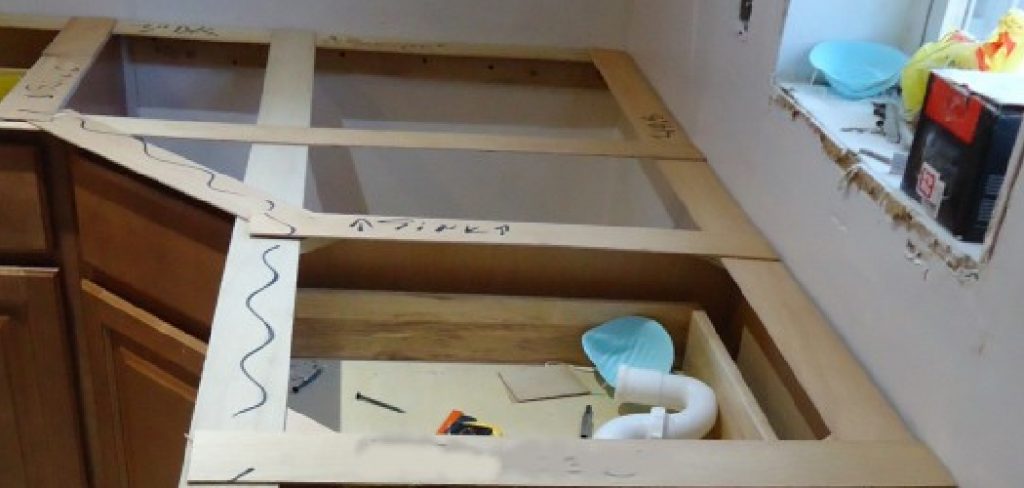
Step 5. Attach the Countertop to the Cabinets:
After the finish has dried completely, it’s time to install your new plywood countertop onto the cabinets. Position the countertop precisely where you want it on the cabinets, ensuring it’s aligned properly. Use a drill to create pilot holes through the countertop’s underside into your cabinets’ support structure. Take care not to drill too deep and puncture the surface of your countertop.
Next, secure the countertop to the cabinets using wood screws. Ensure that the screws are appropriately sized – long enough to anchor the countertop securely without protruding through the top. A properly attached countertop should be stable and flush against the cabinet frames, offering your newly updated space a seamless and polished look.
Step 6. Apply Additional Finishing Touches:
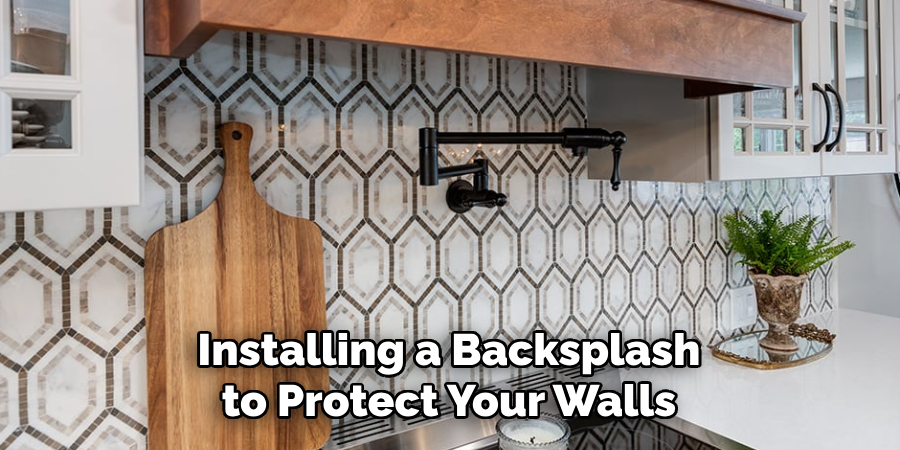
Once your countertop is securely attached to the cabinets, consider applying additional finishing touches to elevate its appearance and functionality. This could include installing a backsplash to protect your walls from splashes and stains or adding edge trim to the countertop sides for a more polished look. For the backsplash, you can choose materials that complement or contrast with your countertop, such as tiles, stainless steel, or even a continuation of the plywood for a cohesive look.
To install edge trim, measure the perimeter of your countertop, cut your trim pieces to length, and attach them using wood glue or nails. Sand any rough edges for a smooth finish. These final touches not only enhance the aesthetic appeal of your project but also contribute to its durability and maintenance ease.
Step 7. Seal the Edges and Cutouts:
To ensure your plywood countertop stands up to daily use and moisture exposure, it’s imperative to seal the edges and any cutouts thoroughly. Unsealed wood can absorb water, leading to swelling, warping, or even mold growth. Use a clear polyurethane sealant, applying it generously along the edges and around the sink cutout or any other fixtures.
Applying multiple coats is crucial, allowing each coat to dry completely before applying the next. This step not only protects the wood but also gives the edges a finished, polished look, enhancing the overall aesthetic of your countertop. Remember to wear gloves and work in a well-ventilated area during this process to ensure safety.
Step 8. Maintain Your Plywood Countertop:
Proper maintenance is key to extending the life and preserving the appearance of your plywood countertop. Regular cleaning with a soft cloth and mild soap will prevent dirt buildup and potential stains. Avoid using harsh chemicals or abrasive cleaners, as they can damage the finish.
It’s also important to reapply a coat of sealant periodically, especially in high-use areas, to maintain its waterproof barrier and protect against wear. Be mindful of heavy objects and sharp tools on the countertop surface to prevent scratches or dents. With careful use and routine care, your plywood countertop can remain a beautiful and functional part of your home for years to come.
Step 9. Alternative Uses for Plywood:
Plywood is a versatile material that can be used for more than just countertops. Consider using leftover pieces of plywood to create other DIY projects such as shelves, headboards, or furniture. With its durability and affordability, plywood is an excellent choice for various home improvement projects.
Get creative and explore different design possibilities with this reliable and versatile material. Not only will you save money, but you can also proudly showcase your DIY skills and unique style in your home.
Following these simple steps, you can transform a plain plywood sheet into a beautiful and functional countertop that adds character and value to your home.
5 Additional Tips and Tricks
1. Choose the Right Type of Plywood: Selecting the appropriate type of plywood is crucial for durability and aesthetics. Opt for a higher grade, such as A or B, with fewer imperfections and a smoother finish, which is ideal for countertops.
2. Seal the Plywood Properly: To protect the wood from moisture and wear, apply a high-quality sealant. Consider using a food-safe sealant if you’re designing a kitchen countertop, ensuring safety and longevity.
3. Add Edge Banding: Edge banding can give your plywood countertop a more finished look and prevent the layers from peeling over time. Choose a matching or contrasting material to add an interesting visual detail.
4. Use the Right Tools: When cutting and installing plywood, make sure to use proper tools like a circular saw or jigsaw. This will ensure clean and precise cuts and a polished and professional finish.
5. Consider Adding a Backsplash: If your plywood countertop will be used in the kitchen or bathroom, consider adding a backsplash. This will protect your walls from water damage and add a decorative element to the space. You can use the same plywood material or choose a different tile or stone for contrast.
Overall, with these additional tips and tricks, you can create a beautiful and durable plywood countertop that fits your style and budget.
5 Things You Should Avoid When Making a Plywood Countertop
1. Skipping Sanding: Please sand the plywood thoroughly before applying sealant or paint can result in a rough and professional finish. Sanding smoothens the wood surface, ensuring a more refined end result.
2. Using Low-Quality Plywood: Opting for cheaper, lower-grade plywood may save costs upfront, but it can lead to issues like warping, peeling, and a less durable countertop over time. Invest in higher-quality plywood for a long-lasting surface.
3. Neglecting Water Resistance: Plywood is susceptible to water damage. Not applying a waterproof sealant, especially in areas prone to moisture like kitchens and bathrooms, can significantly shorten the lifespan of your countertop.
4. Improper Measurements and Cuts: Accuracy is key when measuring and cutting plywood for countertops. Inaccurate cuts can lead to gaps, uneven surfaces, and a countertop that doesn’t fit your space as intended.
5. Overlooking Ventilation When Applying Finishes: Applying sealants, paints, or stains in poorly ventilated areas can be hazardous to your health due to the fumes. Additionally, proper ventilation ensures a faster and more even curing process.
By steering clear of these common mistakes, you can enhance the appearance, functionality, and durability of your plywood countertop.
Some Frequently Asked Questions
1. What Type of Wood is Used for Countertops?
While plywood is a popular choice for countertops, it’s not the only option available. Other types of wood that can be used include:
- Solid Wood: This includes hardwoods like oak, maple, or cherry, which are more expensive but offer a classic and durable countertop.
- Butcher Block: This type of wood countertop is made by gluing together multiple strips of wood, giving it a unique and textured appearance.
- Reclaimed Wood: Using reclaimed wood for countertops is environmentally friendly and adds character and warmth to any space.
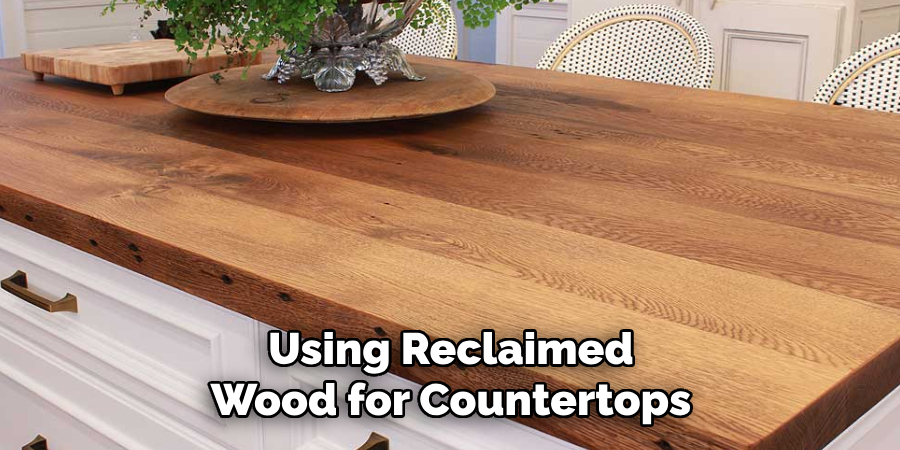
Ultimately, the type of wood used for your countertop will depend on personal preference, budget, and desired look. Consider researching different options and consulting with experts to find the best fit for your project. With the right materials and techniques, you can create a beautiful, functional, and long-lasting wood countertop that adds value to your home.
2. What Are the Disadvantages of Wood Countertops?
While wood countertops have many benefits, there are a few potential downsides to consider:
- Prone to Scratches and Stains: Wood is not as durable as other countertop materials like granite or quartz and can easily scratch or stain if improper maintenance.
- Requires Regular Maintenance: To prolong the lifespan of wood countertops, they require regular sealing, sanding, and refinishing. This can be time-consuming and add to the overall cost.
- Susceptible to Water Damage: As mentioned earlier, wood is susceptible to water damage, so it’s important to properly seal and maintain these countertops in areas prone to moisture.
While these may seem like significant disadvantages, they can be managed with proper care and maintenance. Ultimately, wood countertops’ natural beauty and warmth can outweigh these potential downsides for many homeowners.
3. Do Wood Countertops Crack?
Wood countertops can crack under certain conditions due to their natural properties. Temperature changes and humidity levels play a significant role in causing these materials to expand and contract, which can lead to cracking over time. Additionally, if the wood isn’t properly sealed or if it’s exposed to excessive moisture without adequate protection, the risk of cracking increases.
However, with appropriate installation, regular maintenance, and immediate attention to spills, the likelihood of cracks forming in wood countertops can be significantly minimized. It’s also beneficial to use hardwoods known for their durability and to ensure the wood is acclimated to your home’s environment before installation to further reduce the potential for cracking.
4. How Do I Waterproof a Wooden Countertop?
To waterproof a wooden countertop, follow these steps:
- Sand the surface of the wood to remove any rough spots or imperfections.
- Clean the wood thoroughly with a mild detergent and water, then allow it to dry completely.
- Apply a high-quality sealant specifically designed for wood surfaces, following the manufacturer’s instructions.
- Use a brush or cloth to evenly distribute the sealant, ensuring full coverage.
- Allow the sealant to dry completely before applying a second coat for added protection.
- Once the final coat is dry, lightly sand the surface with fine-grit sandpaper and wipe away any dust or debris.
- Repeat this process every 1-2 years, depending on use and environmental conditions, to maintain the waterproofing of your wooden countertop.
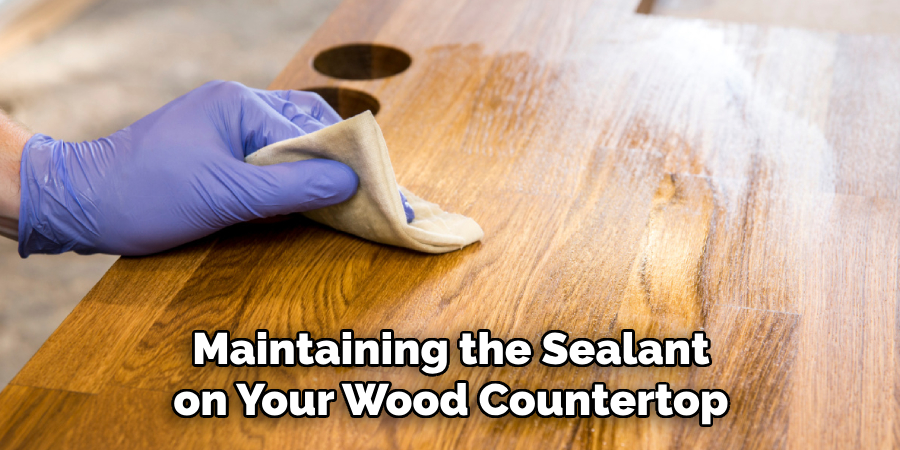
By following these steps and regularly maintaining the sealant on your wood countertop, you can ensure its longevity and resistance to water damage. Additionally, using a cutting board or trivet for hot items can help prevent scratches and stains, further protecting the surface.
Conclusion
In conclusion, making a plywood countertop involves carefully selecting materials, precise measurements, and diligent finishing processes.
By avoiding common pitfalls such as using low-quality plywood, neglecting water resistance, and overlooking the importance of proper ventilation when applying finishes, one can craft a countertop that looks beautiful and lasts for years.
Remembering to maintain the wood by regularly sealing and protecting it from water damage and wear will ensure its durability and enhance the aesthetic appeal of any space. Whether you’re a seasoned woodworker or a determined DIY enthusiast, following these guidelines will help you create a functional, stylish, and custom plywood countertop that adds value and charm to your home.
Hopefully, this guide how to make a plywood countertop has provided helpful information and answered any questions you may have had about plywood countertops. Happy crafting!
About the Author
Adrian Green, a lifelong woodworking enthusiast, shares his passion for the craft through The Woodenify Blog. With a foundation built on years of hands-on experience in his father’s woodworking shop, Adrian is dedicated to helping others learn and grow in the world of DIY woodworking. His approach to woodworking combines creativity, practicality, and a deep appreciation for the art of building with your own hands. Through his blog, he inspires individuals of all skill levels to embark on their own woodworking journeys, creating beautiful, functional pieces of furniture and décor.
Professional Focus
- Specializes in DIY woodworking projects, from furniture to home décor.
- Provides step-by-step guides and practical tutorials for woodworkers of all skill levels.
- Dedicated to helping readers build confidence and skill through easy-to-follow instructions and tips.
- Passionate about fostering a community of makers who can share, learn, and grow together.
Education History
- University of Craft and Design – Bachelor of Fine Arts (BFA) in Woodworking and Furniture Design
- Woodworking Apprenticeships – Extensive hands-on training with skilled craftsmen to refine carpentry and furniture making techniques.
- Online Courses & Masterclasses – Continued education in advanced woodworking techniques, design principles, and specialized tools
Expertise:
- DIY woodworking, carpentry, furniture making, and home décor projects.
- Creating accessible tutorials and guides for beginner to advanced woodworkers.
- Sharing the joys and satisfaction of woodworking, from raw materials to finished products.