Are you looking to add some charm and character to your outdoor space? Painting a pergola can be a great way to do just that. Not only does it add visual interest, but it also helps protect the wood from weathering and rotting.
Painting a pergola can transform your outdoor living space, adding beauty and protection to this charming garden structure. Whether your pergola serves as a serene retreat, a venue for outdoor entertaining, or a support for climbing plants, a fresh coat of paint can enhance its appearance and longevity. In this guide, we’ll walk you through the steps of how to paint a pergola, from selecting the right type of paint to applying it for a durable and stunning finish.
By following these instructions, you can ensure your pergola stands out as a focal point in your garden and withstands the elements for years to come.
What are the Benefits of Painting a Pergola?
Aside from the obvious aesthetic improvement, there are several benefits to painting your pergola. Here are just a few:
- Protection: As mentioned earlier, painting your pergola helps protect it from weathering and rotting. This is especially important for wooden pergolas that are exposed to the elements year-round.
- Longevity: By protecting your pergola from the elements, painting it can help prolong its lifespan. This means you won’t have to worry about replacing or repairing it as often.
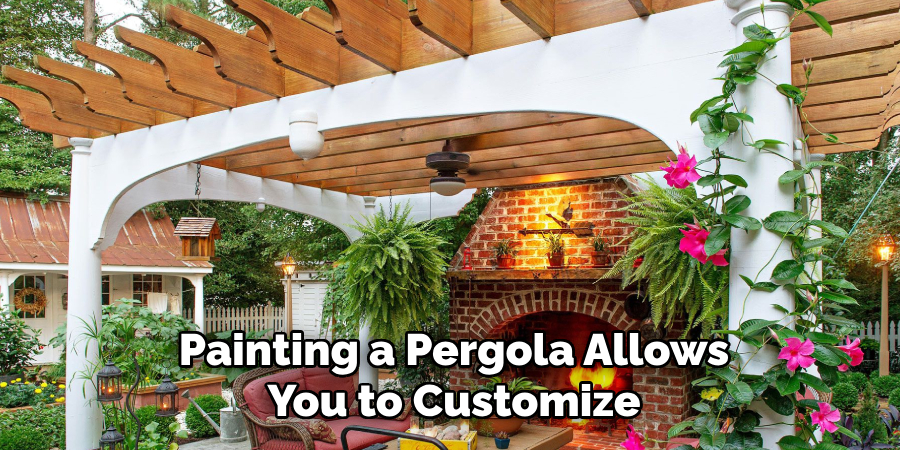
- Customization: Painting a pergola allows you to customize it to your desired color and style, adding a personal touch to your outdoor space.
- Maintenance: A painted pergola is easier to maintain as it can be simply wiped down or repainted if needed, rather than sanding and re-stainting the wood every few years.
- Increased Property Value: A well-maintained and aesthetically pleasing pergola can add value to your property, making it a worthwhile investment.
These are just a few of the benefits of painting a pergola, making it a valuable addition to any outdoor space.
What You’ll Need
Before you begin painting your pergola, ensure you have all the necessary materials and tools on hand. Here’s a list of what you’ll need:
- Paint: Choose an exterior-grade paint specifically designed for outdoor use. Avoid using regular interior paint, as it won’t hold up well against the elements.
- Primer: If your pergola is made of bare wood, applying a primer before painting is important. This will help seal the wood and create a smooth base for the paint.
- Paintbrushes: Various sizes will come in handy to reach different areas of the pergola.
- Roller and Paint Tray: These will help with larger, flat surfaces on the pergola.
- Drop Cloth or Tarp: Protect your flooring or surrounding plants from drips or spills.
- Sandpaper: If your pergola has rough spots or old paint that needs to be removed, sandpaper will be handy.
- Cleaner or TSP (trisodium phosphate): This will help clean and prepare the surface of your pergola for painting.
- Gloves, Mask, and Safety Glasses: To protect yourself while working with paint and chemicals.
Once you have all these materials gathered, it’s time to start painting your pergola.
10 Easy Steps on How to Paint a Pergola
Step 1: Prepare the Area
Before you start painting, preparing the area around your pergola is crucial. To protect the ground or flooring, begin by laying down a drop cloth or tarp under the pergola. This will help catch any drips or spills of paint and make cleanup much easier. If plants, furniture, or decorations are near the pergola, either cover them with a tarp or move them to a safe distance to avoid accidental paint splatters.
Step 2: Clean the Pergola

Before you start painting, it’s important to clean your pergola thoroughly. Use a mixture of water and TSP (trisodium phosphate) to scrub away dirt, grime, and any mildew that may have accumulated on the wood. Rinse off the cleaning solution with a hose or pressure washer and allow the pergola to dry completely before moving on to the next step.
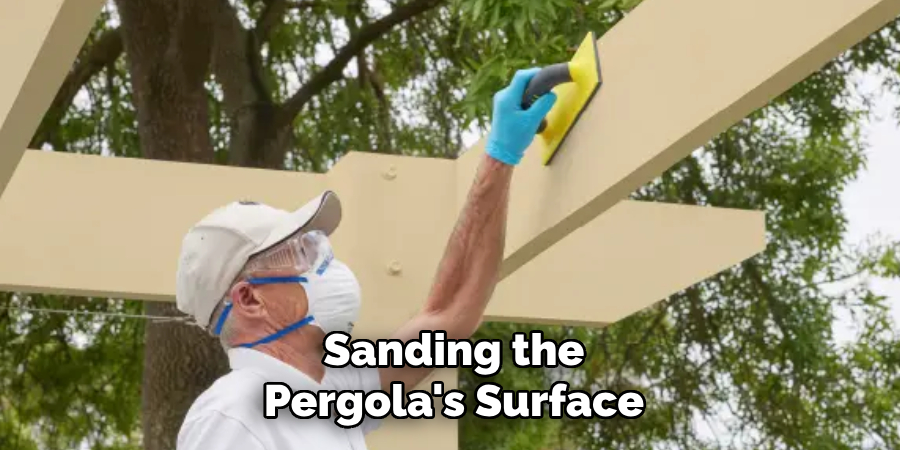
Step 3: Sand if Necessary
If your pergola has any rough spots or peeling paint, you must sand these areas before you can start painting. Sanding helps create a smooth surface for the paint to adhere to and ensures a more uniform finish. Start with a coarse-grit sandpaper for any rough or uneven areas, then switch to a finer grit to smooth everything out.
Make sure to sand along the direction of the wood grain to avoid scratches that could mark the appearance of your pergola. Once you’ve finished sanding, wipe down the pergola with a damp cloth to remove any dust and debris. This step is crucial for achieving the best painting results, so take your time to thoroughly prep the surface.
Step 4: Apply Primer
After ensuring that your pergola is clean and smooth, it’s time to apply a coat of primer. Primer is essential for bare wood as it helps seal the surface, providing a better base for the paint to adhere to. Choose an exterior-grade primer suitable for the type of wood your pergola is made from.
Apply the primer evenly using a brush or roller, making sure to cover all areas, especially those that are more exposed to the elements. Allow the primer to dry completely according to the manufacturer’s instructions before moving on to painting. This step not only enhances the longevity of your paint job but also improves the overall appearance of the finish.
Step 5: Choose the Right Paint Color
Selecting the perfect paint color for your pergola is crucial in the painting process. Consider the overall theme and color scheme of your outdoor space and the color of your home and surrounding landscape. Opt for a color that complements your garden and adds visual interest to your outdoor area. When in doubt, neutral colors like white, beige, or gray can add a touch of elegance and are less likely to clash with your existing outdoor décor.
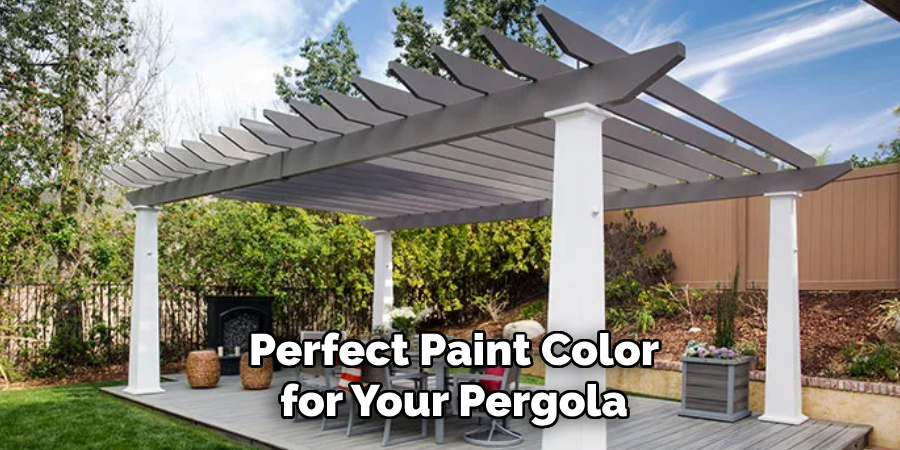
Additionally, consult with a paint specialist to ensure the color you choose is available in an exterior-grade paint that’s suitable for wood and outdoor use. Remember, the color you select will significantly impact the aesthetic appeal of your pergola, so take your time to make an informed decision.
Step 6: Begin Painting
With your chosen color, it’s time to start the painting. Begin with the harder-to-reach areas and corners, using a paintbrush to ensure even coverage. For larger, flat surfaces, a roller can be more efficient and will help you cover more area in less time. Apply the paint in thin, even coats to avoid drips and runs. It’s often better to apply several light coats than to try to cover everything with one thick coat.
Allow each coat to dry thoroughly before applying the next. Patience during this process will result in a smoother, more durable finish that can withstand the elements and keep your pergola looking great for years to come. Remember to overlap your strokes to ensure every area is intact and balanced.
Step 7: Check for Missed Spots and Imperfections
After you’ve applied a few coats of paint, take a moment to scrutinize your work for any missed spots or imperfections. Correcting these issues while the paint is still relatively fresh is easier. Use a smaller paintbrush to touch up areas that may have been overlooked or where the coverage is not as even as you would like.

Pay special attention to the joints and crevices of the pergola, as these areas are prone to being missed. Ensuring thorough coverage enhances the pergola’s appearance and its protection against the elements.
Step 8: Apply a Second Coat if Necessary
Once the first coat of paint has dried completely and you’ve touched up any imperfections, assess whether a second coat is needed. A second coat of paint can enhance the color intensity, ensure even coverage, and provide additional protection against weathering and wear.
If you decide to apply a second coat, follow the same procedure as before, starting with the hard-to-reach areas and moving onto the larger, flat surfaces with a roller. Ensure the first coat is thoroughly dry to avoid any blending or smudging. Waiting for the recommended drying time between coats can significantly affect your paint job’s final appearance and longevity.
Step 9: Final Inspection and Cleanup
After the final coat of paint has dried completely, conduct a comprehensive inspection of your pergola. Look for any areas requiring additional touch-ups or a bit more paint to achieve perfect coverage. Once you are satisfied with the final result, it’s time to clean up your work area. Remove any drop cloths or tarps you placed around the pergola, ensuring to carefully fold them to contain any drips or spills.
Clean your brushes, rollers, and any other painting tools according to the manufacturer’s instructions. Store any leftover paint in a cool, dry place for future touch-ups or projects. Finally, return any moved furniture or decorations to their original spots, and take a moment to admire your freshly painted pergola, ready for years of enjoyment.
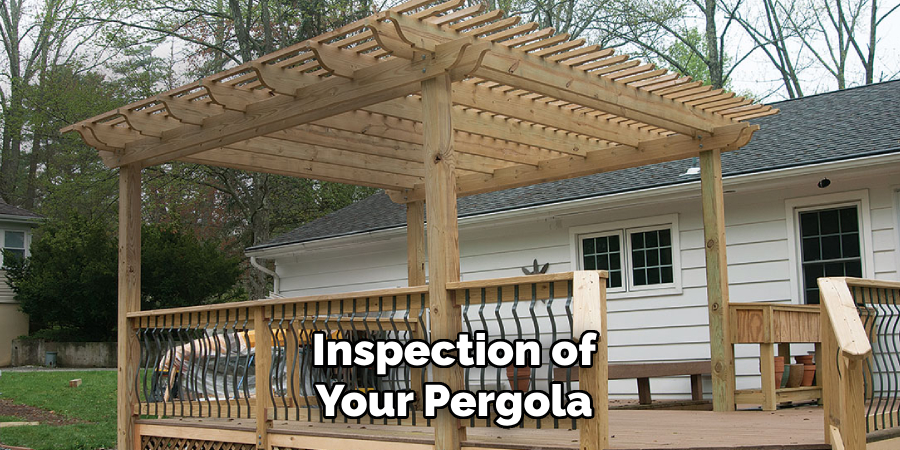
Step 10: Maintenance and Care
Regular maintenance is crucial to ensure your pergola remains in excellent condition for as long as possible. Inspect your pergola annually for any signs of wear, such as chipping paint or exposed wood, which could lead to further damage if left untreated. Cleaning your pergola regularly can also help maintain its appearance by removing dirt, debris, and any mildew growth that could damage the paint over time.
Use a soft brush or cloth with a gentle cleaner suitable for painted surfaces. For more significant touch-ups or repainting, make sure to match the paint color and type used initially, as this will help maintain a consistent finish. Proper care and maintenance will keep your pergola looking beautiful and provide a welcoming outdoor space for years to come.
By following these steps and taking the time to properly prepare, paint, and maintain your pergola, you can transform it into a stunning focal point in your outdoor area.
5 Additional Tips and Tricks
- Timing is Everything: Choose a calm, dry day for painting your pergola. Humidity and wind can affect the paint’s dryness, potentially leading to imperfections. Avoid painting under direct sunlight, as this can cause the paint to dry too quickly, preventing it from adhering properly to the wood.
- Invest in Quality Supplies: While saving money on cheaper brushes and paint might be tempting, investing in high-quality painting supplies can significantly impact the finish of your pergola. High-quality brushes and rollers provide smoother application and better coverage, reducing the time and effort required for a beautiful finish.
- Prep the Area Thoroughly: Besides preparing the pergola itself, preparing the surrounding area is crucial. Cover any plants, grass, or nearby surfaces with drop cloths or plastic sheeting to protect them from drips and spills. This ensures a clean work environment and prevents your garden or patio damage.
- Use a Primer Designed for Outdoor Use: While the main document highlights the importance of using a primer, it’s worth noting that you should specifically opt for an outdoor-grade primer. These are formulated to endure the elements, offering a better base for your topcoat and improving its longevity and durability against weather conditions.
- Maintain Your Tools: Properly clean and store your painting tools after completing your project. Paintbrushes and rollers can be reused if they are cleaned thoroughly, which involves removing all paint residue and allowing them to dry completely before storing. Keeping your tools in good condition saves money and ensures they’re ready for your next project.
With these additional tips and tricks, you can ensure a successful and long-lasting paint job on your pergola.
5 Things You Should Avoid When Painting a Pergola
- Skipping Sanding: One of the critical preparatory steps is sanding the pergola’s surface. Skipping this step can lead to a rough finish and poor paint adhesion. Sanding helps create a smooth base, ensuring the paint coats evenly and adheres properly.
- Ignoring the Weather Forecast: Weather plays a pivotal role in the painting process. Painting your pergola on a rainy day or when high humidity levels are forecasted can hinder drying, potentially ruining your hard work. Always check the weather and plan accordingly.
- Using the Wrong Type of Paint: Not all paints are suitable for outdoor use or compatible with wood. Utilizing interior paint or the wrong type for your pergola can result in a finish that peels, chips, or fades prematurely. Always choose a paint formulated for outdoor use compatible with your pergola’s material.
- Overlooking the Importance of Primer: A common mistake is bypassing the application of primer. Primer serves as an essential foundation for the paint, improving its adhesion and enhancing the overall durability of the paint job. Use an outdoor-grade primer specific to your pergola’s material for best results.
- Rushing the Drying Times: Patience is key when painting a pergola. Rushing the drying times between coats or not allowing the final coat to dry completely before use can lead to smudging, sticking, or incomplete curing of the paint. Always adhere to the recommended drying times for the primer and paint you use.
By avoiding these common pitfalls, you can ensure a smooth, durable finish for your pergola, enhancing its appearance and longevity.
5 Different Theme Ideas to Transform Your Pergola
- Bohemian Oasis: Create a relaxed, bohemian vibe by incorporating colorful fabrics, patterned cushions, and hanging string lights around your pergola. Add potted plants and lanterns for a cozy ambiance.
- Tropical Paradise: Turn your pergola into a tropical oasis with bamboo accents, lush greenery, and a tiki bar. Incorporate tropical prints and bright colors into your decor for an exotic feel.
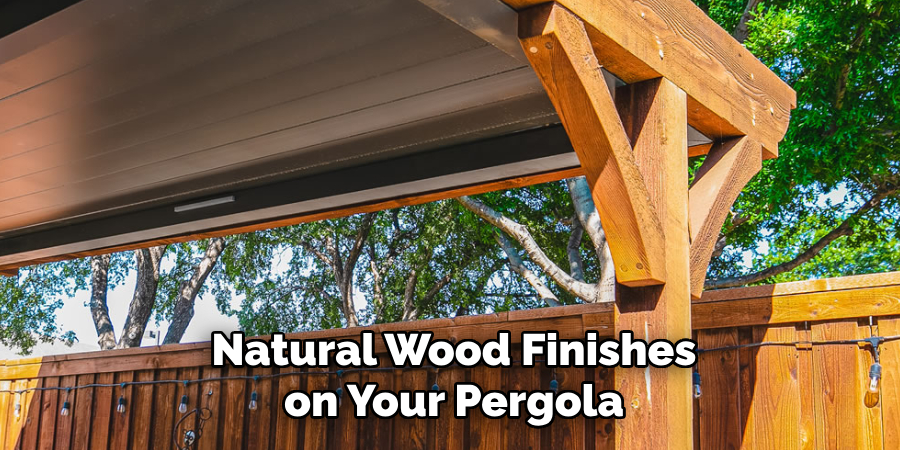
- Rustic Retreat: Opt for natural wood finishes on your pergola for a rustic look and add cozy elements like a fire pit or outdoor rug. Use earthy tones, textures, and materials such as wicker and distressed wood to create a warm and inviting space.
- Mediterranean Escape: Transform your pergola into a Mediterranean escape with wrought iron accents, bold colors, and rustic elements. Add clay pots filled with herbs and olive trees for an authentic touch.
- Modern Minimalism: Keep your pergola simple with clean lines and minimalist decor for a sleek, modern look. For a contemporary feel, incorporate metal and concrete elements, along with neutral colors and geometric patterns.
The possibilities are endless when it comes to transforming your pergola into a stunning outdoor space. Use your imagination and have fun creating a theme that reflects your personal style. Remember to choose paint colors and finishes that complement your chosen theme for a cohesive look.
Conclusion
How to paint a pergola not only enhances its aesthetic appeal but also provides a layer of protection against the elements, ensuring its durability and longevity.
By following the guidelines outlined in this document—from choosing the right weather conditions and investing in quality supplies to the importance of preparation and selecting the appropriate paint—you can achieve a professional-looking finish that transforms your outdoor space.
Remembering to avoid common pitfalls and incorporating one of the theme ideas can further personalize your pergola, making it a truly unique and enjoyable extension of your home.
With patience, proper technique, and a bit of creativity, you can ensure your pergola remains a beautiful and cherished part of your outdoor living area for years to come.
About the Author
Adrian Green, a lifelong woodworking enthusiast, shares his passion for the craft through The Woodenify Blog. With a foundation built on years of hands-on experience in his father’s woodworking shop, Adrian is dedicated to helping others learn and grow in the world of DIY woodworking. His approach to woodworking combines creativity, practicality, and a deep appreciation for the art of building with your own hands. Through his blog, he inspires individuals of all skill levels to embark on their own woodworking journeys, creating beautiful, functional pieces of furniture and décor.
Professional Focus
- Specializes in DIY woodworking projects, from furniture to home décor.
- Provides step-by-step guides and practical tutorials for woodworkers of all skill levels.
- Dedicated to helping readers build confidence and skill through easy-to-follow instructions and tips.
- Passionate about fostering a community of makers who can share, learn, and grow together.
Education History
- University of Craft and Design – Bachelor of Fine Arts (BFA) in Woodworking and Furniture Design
- Woodworking Apprenticeships – Extensive hands-on training with skilled craftsmen to refine carpentry and furniture making techniques.
- Online Courses & Masterclasses – Continued education in advanced woodworking techniques, design principles, and specialized tools
Expertise:
- DIY woodworking, carpentry, furniture making, and home décor projects.
- Creating accessible tutorials and guides for beginner to advanced woodworkers.
- Sharing the joys and satisfaction of woodworking, from raw materials to finished products.