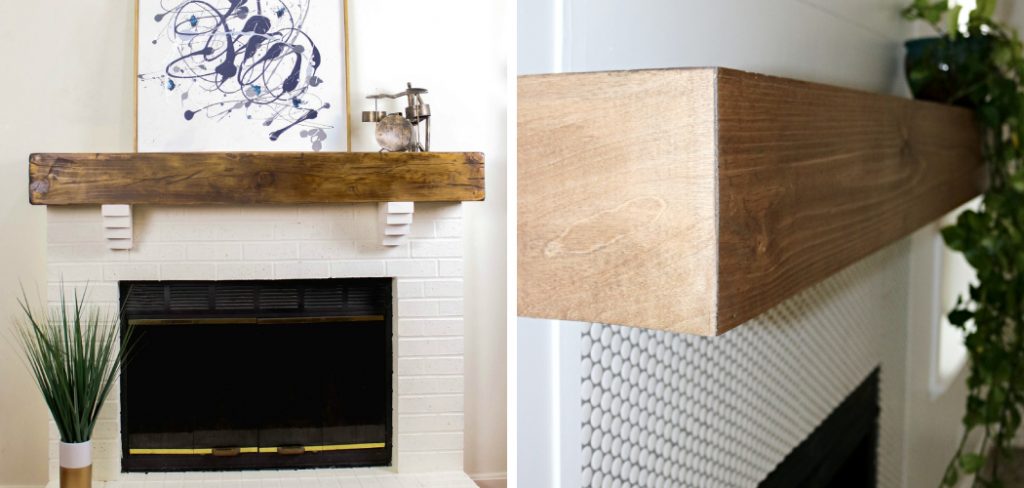
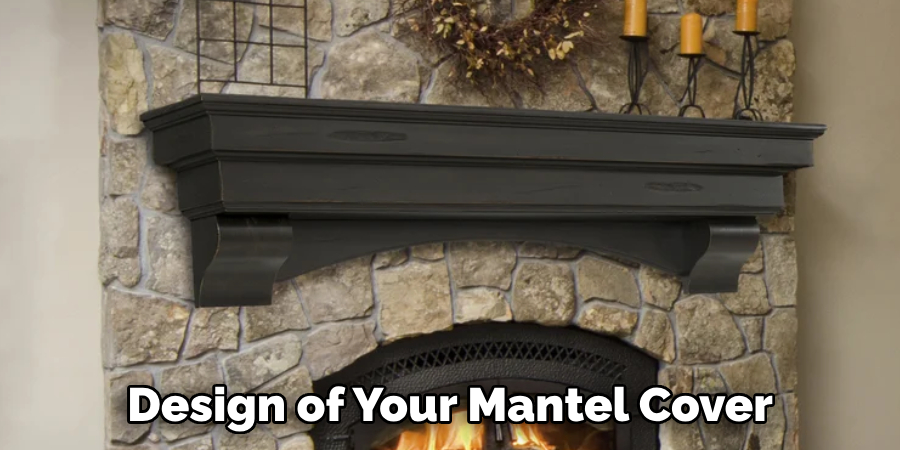
Creating a wood mantel cover is a fantastic way to add warmth, character, and a touch of sophistication to your fireplace. Whether you’re updating an existing mantel or adding one to a fireplace lacking this focal point, crafting a wood mantel cover allows for customization to suit your style and space. From selecting the type of wood and design details to measuring and installing, there are several steps involved in making a wood mantel cover.

Whether you’re a seasoned DIY enthusiast or a novice woodworker, this project offers an opportunity to unleash your creativity and enhance the aesthetic appeal of your living space. In this article, we’ll explore the essential steps and considerations involved in how to make a wood mantel cover, providing insights and tips to help you embark on this fulfilling and transformative project.
Benefits of Making a Wood Mantel Cover
Creating a wood mantel cover for your fireplace comes with numerous advantages that go beyond merely enhancing the room’s aesthetic. Firstly, it offers the flexibility of customization. You can choose the specific wood type, finish, and design that perfectly matches your home décor. This level of personalization ensures that your fireplace mantle becomes a unique centerpiece that reflects your taste and style.
Another significant benefit is the potential increase in home value. A well-crafted wood mantel cover can add a sense of luxury and sophistication to your living space, making it more appealing to potential buyers if you decide to sell your home.
Additionally, undertaking a project like making a wood mantel cover can provide a fulfilling sense of accomplishment. Completing a hands-on project successfully can boost your confidence in your DIY skills and inspire you to take on more home improvement projects. Lastly, it can also serve as a fun and productive way to spend your free time, possibly even becoming a bonding activity if you involve family or friends in the making process.
Determining the Desired Size and Style of the Mantel Cover
Before you begin gathering materials or cutting wood, the first critical step in creating your wood mantel cover is to decide on the specific size and style that will best fit your fireplace and align with your home’s aesthetic.

Sizing Your Mantel Cover
Start by measuring the width of your fireplace to determine how wide your mantel cover should be. A good rule of thumb is to add at least 3-6 inches on each side beyond the width of the fireplace, ensuring that the mantel has a substantial presence and adequately frames the firebox. Additionally, consider the mantel’s depth and height. A deeper mantel allows for more decorative items to be displayed, while the height should complement the space without overpowering the room or obscuring the firebox.
Selecting a Style
The style of your wood mantel cover should harmonize with your home’s existing decor. Do you lean towards a modern, sleek look with clean lines and minimal detailing? Or, is your space more traditional, where a mantel with intricate carvings and a rich, stained finish would be at home? Consider also if you want the wood grain to be a focal point or if a painted mantel might better suit your style. From rustic to contemporary, the style you choose will significantly impact the overall feel of your living space and how the fireplace integrates with your décor.
Combining the right dimensions with the perfect style will ensure that your wood mantel cover not only enhances the appearance of your fireplace but also elevates the entire room.
Choosing the Right Materials
Selecting the right materials is paramount in creating a wood mantel cover that not only looks beautiful but also stands the test of time. The type of wood you choose will significantly influence both the appearance and durability of your mantel cover. Common choices include oak, pine, maple, and cherry, each offering its own unique grain patterns and staining capabilities.

Oak, for example, is renowned for its strength and grain texture, making it a popular choice for a rustic or traditional aesthetic. Pine, on the other hand, is more affordable and easier to work with, ideal for those new to woodworking or on a budget.
Aside from the wood type, consider the finish you’ll use. Finishes can range from natural oils and varnishes that enhance the wood’s natural beauty, to paints that can match or complement your room’s color scheme. Selecting the right finish will protect your mantel cover from heat damage, moisture, and wear over time, while also highlighting the wood’s natural charm or aligning with your desired color palette.
Lastly, don’t overlook the hardware and mounting materials. Depending on the weight and size of your mantel cover, you’ll need to ensure you have the right supports in place. Heavy-duty brackets or a mounting system hidden behind the mantel can offer a secure installation while maintaining a clean, unobtrusive look. Making informed choices about materials at this stage lays a solid foundation for your project, ensuring a high-quality finish that complements your space beautifully.
The Characteristics of Each Wood Species
When selecting the wood for your mantel cover, understanding the characteristics of each species is crucial. This knowledge will help ensure that the material not only matches your aesthetic preferences but also performs well over time.
- Oak: Known for its durability and resistance to wear and tear, oak is a favorite for those seeking a timeless, sturdy mantel. Its prominent grain pattern adds texture and character to the piece, making it ideal for both traditional and rustic designs. Oak can be stained to a variety of shades, highlighting its natural beauty.
- Pine: Pine offers a softer alternative, making it easier to work with, especially for those new to woodworking. Its lighter color and subtle grain pattern provide a blank canvas for paints and stains, allowing for a wide range of design possibilities. Pine is a cost-effective option but may be more prone to dents and scratches.
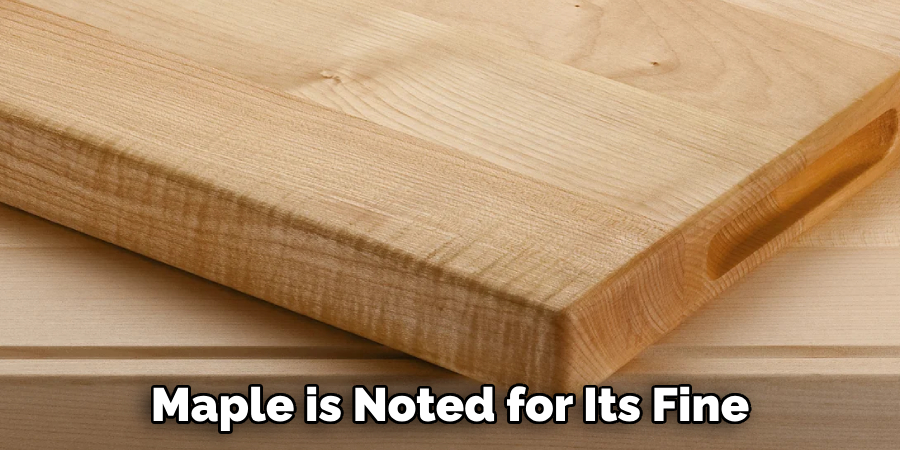
- Maple: Maple is noted for its fine, consistent grain, offering a smooth finish that’s perfect for a contemporary look. Its hardness and durability make it a solid choice for a mantel. Maple can be challenging to stain evenly due to its density, but with the right preparation, it can showcase a beautiful, uniform appearance.
- Cherry: Cherry wood stands out with its rich, red hues that deepen over time, offering a warm, elegant aesthetic. Its smooth grain and natural luster make it a premium choice for a mantel cover. Cherry is relatively hard and durable, though it commands a higher price point compared to the other options.

Each wood species brings its unique attributes to a mantel cover project, influencing the piece’s visual appeal, functionality, and longevity. Consider these characteristics carefully to select the best wood type for your design vision and practical needs.
10 Methods How to Make a Wood Mantel Cover
1. Design Planning:
Start by determining the design and dimensions of your wood mantel cover. Consider the style of your home and the aesthetics you want to achieve. You can opt for a simple, sleek design or something more ornate and decorative. Sketch out your design ideas and take measurements to ensure the mantel cover will fit properly.
Next, choose the type of wood you want to use for your mantel cover. Popular options include oak, pine, cherry, and mahogany. Each type of wood has its own unique characteristics and grain patterns that can add to the overall look of your mantel cover.
When it comes to construction, you have two main options: building from scratch or using a pre-made mantel cover kit. Building from scratch allows for more customization and creativity, but it requires more time and woodworking skills. Using a pre-made kit can be easier and quicker, but you may have limited options in terms of design.
2. Selecting the Right Wood:
Choose high-quality wood that complements your home’s decor and matches your personal preferences. Common choices for mantel covers include hardwoods like oak, maple, cherry, or walnut, as well as softer woods like pine or cedar. Consider the durability, grain pattern, and finish options available for each type of wood. However, keep in mind that the type of wood you choose may also impact the cost of your mantel cover. Although hardwoods tend to be more expensive, they are typically more durable and offer a wider variety of finishes.

In addition to the type of wood, you should also consider the style and design of your mantel cover. Traditional styles often feature intricate carvings and ornate details, while modern designs may have clean lines and a sleek finish. Consider the overall aesthetic of your home and choose a style that complements it. You may also want to consider adding custom touches, such as personalized engravings or unique patterns, to make your mantel cover truly one-of-a-kind.
3. Gathering Materials:
Once you’ve selected the wood for your mantel cover, gather all the necessary materials and tools for the project. This may include wood boards or planks for the mantel, wood glue, screws or nails, sandpaper, wood stain or paint, a saw, drill, and measuring tape. Make sure to also have a drop cloth or tarp to protect your work surface and some gloves and safety glasses for protection.
When gathering materials, it’s important to have everything on hand before starting the project, as it can be frustrating to have to pause and run to the store for missing items. Though it may seem obvious, double-checking all materials and tools beforehand can save time and ensure a smoother project.
4. Preparing the Wood:
Before assembling the mantel cover, prepare the wood by cutting it to the desired dimensions and sanding it smooth. Use a saw to cut the wood to the proper length and width, and then use sandpaper to remove any rough edges or imperfections. Be sure to wear safety goggles and a dust mask when cutting and sanding the wood.

Next, decide on the type of finish you want for your mantel cover. This can be a natural wood finish, stain, or paint. If choosing a natural wood finish, consider using a sealant or varnish to protect the wood from wear and tear. If staining or painting, make sure to choose a high-quality product that will provide long-lasting results.
If you are staining or painting the wood, it may be beneficial to do so before assembling the mantel cover. This will make it easier to reach all areas and avoid any accidental spills on already assembled pieces. Allow the finish to dry completely before moving onto the next step.
5. Assembling the Mantel Cover:
Once the wood is cut and sanded, it’s time to assemble the mantel cover. Use wood glue and screws or nails to join the pieces together according to your design plan. Take care to ensure that the corners are square and the joints are tight. Use clamps to hold the pieces in place while the glue dries.
After the mantel cover is assembled, you may choose to add decorative elements such as trim, molding, or carved details. These can be attached with wood glue and/or nails depending on their size and weight. Be sure to carefully measure and cut these pieces to fit precisely.
6. Adding Decorative Details:
If desired, you can add decorative details to your wood mantel cover to enhance its appearance. This could include carving intricate designs, adding decorative trim or molding, or applying wood appliques or overlays. Get creative and personalize the mantel cover to reflect your style and taste.

Another way to add decorative details is by incorporating different finishes or paint colors. You could choose a distressed finish for a rustic look, or a glossy finish for a more modern touch. Experiment with different techniques such as glazing or stenciling to create unique and eye-catching designs on your mantel cover.
7. Finishing the Wood:
Once the mantel cover is assembled and any decorative details are added, it’s time to finish the wood. You can choose to stain the wood to enhance its natural color and grain, or paint it to match your home’s decor. Apply the stain or paint evenly with a brush or cloth, and allow it to dry completely before proceeding. Once dry, you may choose to add a protective coat of polyurethane or varnish to help preserve the wood and give it a glossy finish.
8. Installing the Mantel Cover:
With the wood finished, it’s time to install the mantel cover above your fireplace. Use a level to ensure that the mantel is straight and centered, and then attach it to the wall using screws or brackets. If you’re attaching the mantel to brick or stone, you may need to use masonry anchors or adhesive. Make sure to follow the manufacturer’s instructions for your specific type of surface and mantel.
Once the mantel is securely attached, you can add decorative elements such as corbels or trim pieces. These can be attached using wood glue or finishing nails. Remember to measure and mark the placement of these accents before attaching them to ensure a cohesive and balanced look.
9. Sealing and Protecting the Wood:
To protect your wood mantel cover from damage and wear, consider sealing it with a clear polyurethane or varnish. This will help to seal the wood and prevent moisture from penetrating the surface. Apply the sealer evenly with a brush or cloth, and allow it to dry completely before using the fireplace.

In addition to sealing the wood, you may also want to consider adding a protective layer on top. This can be done by applying a coat of wax or furniture polish. Not only will this add a beautiful shine to your mantel cover, but it will also act as an extra barrier against potential scratches and damage.
10. Adding Accessories:
Once the mantel cover is installed, you can add accessories to decorate and personalize the space. This could include a decorative mirror or artwork above the mantel, candle holders, vases, or seasonal decorations. Get creative and have fun styling your new wood mantel cover to create a cozy and inviting focal point in your home.
Conclusion
In conclusion, crafting a wood mantel cover offers a fulfilling opportunity for DIY enthusiasts to add a touch of warmth and elegance to their fireplace and living space. By following the outlined steps with careful planning, measuring, cutting, and assembly, individuals can create a custom mantel cover that complements their décor and personal style. From selecting the right materials and tools to installing and finishing the mantel cover, each step contributes to the creation of a beautiful and functional focal point for the room.
Additionally, prioritizing safety measures and regular maintenance ensures the mantel cover remains a safe and attractive addition to the home for years to come. With creativity and attention to detail, anyone can embark on the satisfying journey of making a wood mantel cover, knowing they’ve added a timeless touch of craftsmanship and charm to their living space.
About the Author
Adrian Green, a lifelong woodworking enthusiast, shares his passion for the craft through The Woodenify Blog. With a foundation built on years of hands-on experience in his father’s woodworking shop, Adrian is dedicated to helping others learn and grow in the world of DIY woodworking. His approach to woodworking combines creativity, practicality, and a deep appreciation for the art of building with your own hands. Through his blog, he inspires individuals of all skill levels to embark on their own woodworking journeys, creating beautiful, functional pieces of furniture and décor.
Professional Focus
- Specializes in DIY woodworking projects, from furniture to home décor.
- Provides step-by-step guides and practical tutorials for woodworkers of all skill levels.
- Dedicated to helping readers build confidence and skill through easy-to-follow instructions and tips.
- Passionate about fostering a community of makers who can share, learn, and grow together.
Education History
- University of Craft and Design – Bachelor of Fine Arts (BFA) in Woodworking and Furniture Design
- Woodworking Apprenticeships – Extensive hands-on training with skilled craftsmen to refine carpentry and furniture making techniques.
- Online Courses & Masterclasses – Continued education in advanced woodworking techniques, design principles, and specialized tools
Expertise:
- DIY woodworking, carpentry, furniture making, and home décor projects.
- Creating accessible tutorials and guides for beginner to advanced woodworkers.
- Sharing the joys and satisfaction of woodworking, from raw materials to finished products.
