The shift toward lighter, airier interiors has sparked significant interest in how to lighten dark wood floors, a trend reflecting a broader movement towards minimalist and Scandinavian-inspired home aesthetics. Homeowners are increasingly drawn to the idea of transforming their dark, dated wood floors into brighter, more inviting spaces. The motivation behind such transformations varies, ranging from the desire to refresh and update the look of a home to making spaces appear larger and more open.
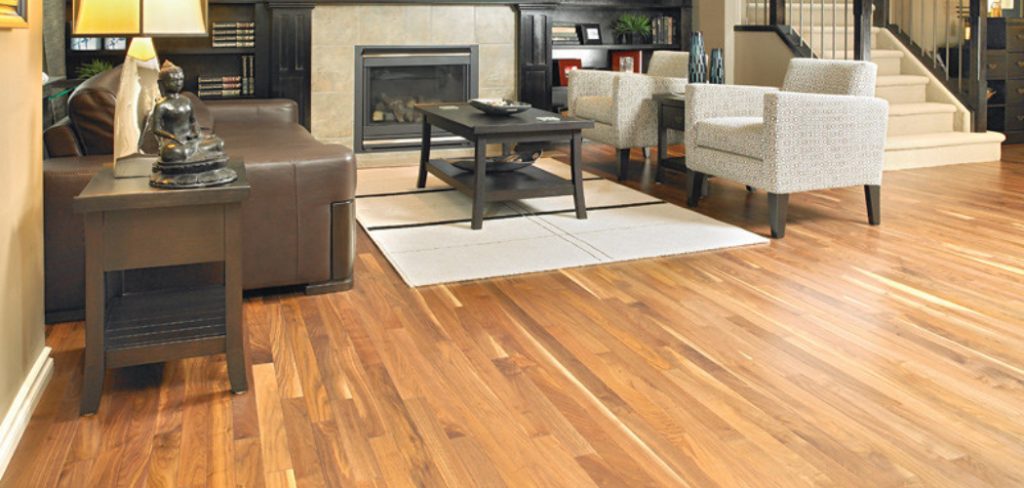
Lightening dark wood floors can significantly impact the ambiance of a room, injecting a fresh, modern vibe that complements a wide range of decorating styles. Whether driven by the pursuit of a specific design scheme or the simple wish to brighten up a home, the quest for techniques to lighten wood floors is more prominent than ever.
Understanding Dark Wood Floors
A. Types of Dark Wood Floors
When it comes to dark wood floors, several species stand out for their naturally deep hues and striking appearance. Popular choices among homeowners and designers include mahogany, known for its rich, reddish-brown color; walnut, which offers a blend of deep browns and lighter tan shades; ebony, renowned for its almost black coloration; and cherry, which starts off with a lighter red and darkens to a rich, deep red over time.
It’s important to note, however, that the darkness of the wood is not solely determined by its species. Wood stain plays a crucial role in achieving the desired shade, allowing even lighter wood species to mimic the appearance of their darker counterparts.
B. Factors Affecting Lightening Potential
The potential to lighten darkwood floors significantly depends on several factors. Firstly, the type of wood determines its ability to absorb or resist lightening treatments. Denser species, such as ebony, might resist efforts to lighten, while porous woods, like pine, are more amenable to change.
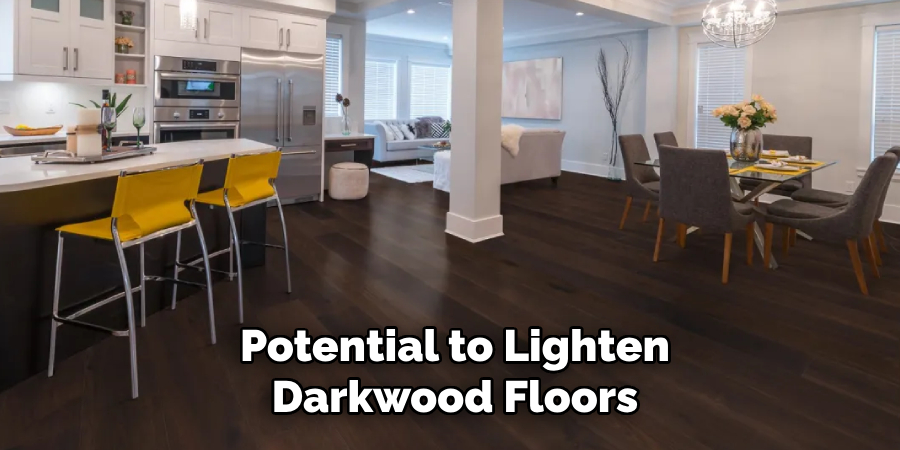
The presence of stain also impacts lightening potential; deeply stained woods may require more intensive treatments to achieve noticeable results. Lastly, the existing finish on the floor—be it oil or polyurethane—can affect the effectiveness of lightening methods. Oil finishes might penetrate deeply into the wood, complicating the lightening process, whereas polyurethane coatings create a surface barrier that may be easier to sand or treat chemically.
Choosing the Right Lightening Method
A. Considerations Before Lightening
Before undertaking the project of lightening darkwood floors, it’s crucial to evaluate the overall condition and understand the inherent risks of potentially damaging the wood. Factors such as age, previous treatments, and the type of wood must be carefully considered.
For floors that have been heavily stained or are made from valuable wood species, seeking professional advice may prevent irreversible damage and ensure the best outcome. This preparatory step is fundamental for setting realistic expectations and choosing the most appropriate lighting method to achieve desired results without compromising the integrity of the floors.
B. Sanding Techniques
Light Sanding for Minor Tone Shifts
Light sanding is an effective method for achieving minor tone shifts in wood floors. This process involves using fine-grit sandpaper to gently remove the top layer of the finish, slightly lightening the wood’s appearance without drastically altering its natural color. The limitation of this method lies in its subtleness; it may not be suitable for those seeking a dramatic change. It’s also imperative to sand evenly to avoid uneven shades and to preserve the wood’s integrity.

Aggressive Sanding for Dramatic Lightening
For those aiming for a more dramatic change, aggressive sanding can strip away deeper layers of both stain and wood, revealing the natural, lighter color beneath. This method requires coarse-grit sandpaper and a more forceful approach.
While effective, it comes with risks such as uneven removal, potential damage to the wood’s surface, and the necessity of refinishing the floor afterward to protect the now-exposed wood. This technique demands careful execution and is often best left to professionals, especially for valuable or intricately patterned wood floors.
C. Chemical Lightening Options
Oxalic Acid
Oxalic acid is a chemical option suitable for lightening wood floors stained by watermarks or other organic matter. Safety precautions are critical when using oxalic acid, including wearing protective gear and ensuring proper ventilation. This method is effective for targeting specific stained areas but has limitations; it may not uniformly lighten unstained wood and requires neutralization after application.
Wood Bleach
Wood bleach comes in different types, including those formulated for lightening the wood more uniformly than oxalic acid. The application process involves spreading the bleach solution evenly across the wood’s surface and allowing it to process.
Testing on a hidden area first is crucial to predict the outcome and ensure that the wood reacts well to the treatment. Following manufacturer instructions and understanding the specific type of bleach used is essential for achieving the best results while minimizing damage to the wood.
How to Lighten Dark Wood Floors: Light Sanding for Minor Tone Shifts
A. Tools and Materials
To undertake light sanding, you will need a sanding machine or hand sander, sandpaper of various grits (starting with 120 or higher), a dust mask to prevent inhalation of fine particles, and safety glasses to protect your eyes from dust.
B. Sanding Process
The process of sanding should always follow the direction of the wood grain to avoid scratching or damaging the wood’s natural pattern. Start with a light-grit sandpaper, such as 120, to gently remove the top layer of the finish. This initial step aims to achieve a minor tone shift without drastically altering the wood’s natural color.
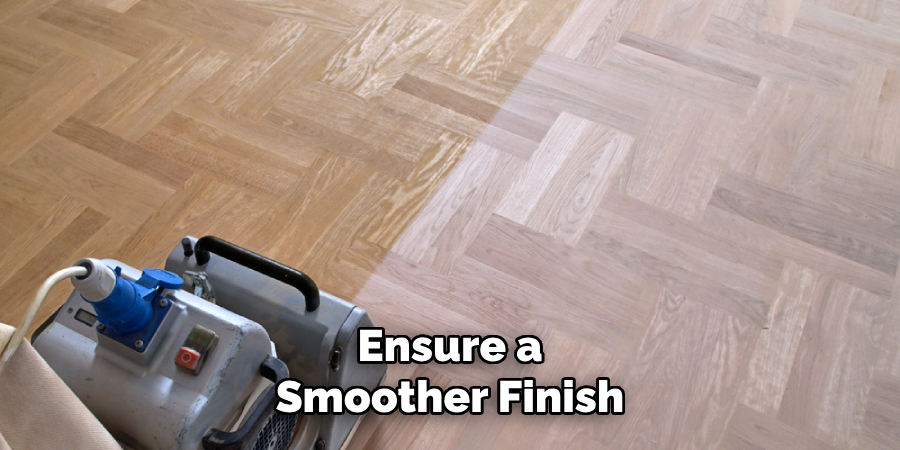
To ensure a smoother finish, gradually increase the sandpaper grit, moving to finer grades as the surface becomes smoother. This systematic approach helps in evenly lightening the floor while maintaining its integrity and aesthetic appeal.
C. Assessing Results and Next Steps
After completing the sanding process, assess the level of lightening achieved. If the desired tone has been reached, you may proceed to apply a new finish to protect the floor. However, if the floor is not sufficiently lightened, consider if further sanding with finer grit sandpaper is needed or if another lightening method might be more effective.
Refinishing After Sanding
A. Cleaning the Sanded Floor
After sanding, it is crucial to thoroughly remove all dust and debris from the floor’s surface to ensure a smooth and clean finish. Using a tack cloth, gently wipe the floor in a systematic manner. This sticky cloth picks up even the finest particles, leaving the wood perfectly prepared for the next steps of refinishing.
B. Applying a New Stain (optional)
Applying a new, lighter stain to the sanded wood floor can achieve this effect for those desiring an additional level of lightening. Choose a stain shade that complements the natural wood color while aligning with your desired aesthetics. Apply the stain evenly across the floor using a brush or cloth, following the wood grain, and allow it to dry thoroughly before proceeding to the final finishing step.
C. Choosing and Applying a Finish
Selecting the right finish is essential for protecting the newly lightened wood and achieving the desired sheen level. Clear coat finishes, such as polyurethane or oil-based finishes, are popular choices. Polyurethane delivers a durable, protective layer with options for a matte, semi-gloss, or glossy finish.
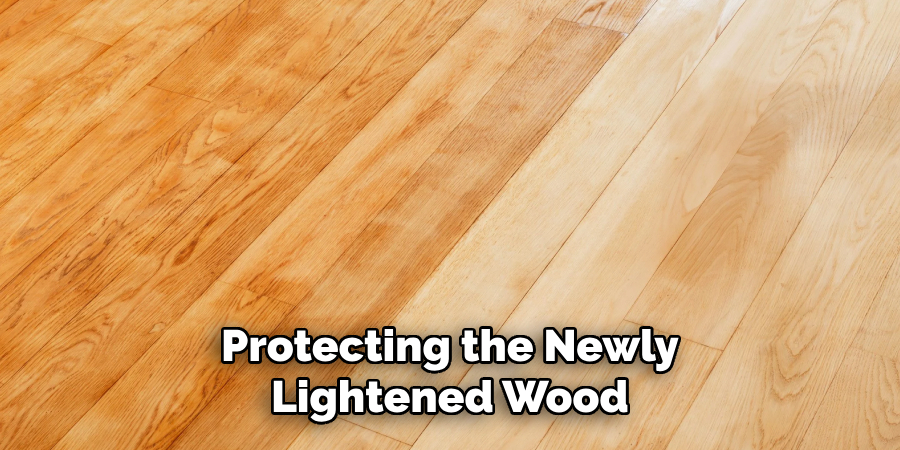
Oil finishes, on the other hand, penetrate deeper into the wood, enhancing its natural beauty and offering a softer sheen. Apply the chosen finish using a high-quality brush or roller, working in smooth, consistent strokes along the grain of the wood. Allow adequate drying time as instructed by the product’s guidelines before using the floor to ensure a hardwearing and attractive finish.
How to Lighten Dark Wood Floors: Chemical Lightening Options
A. Wood Bleach (Continued)
After applying wood bleach, it’s critical to neutralize the bleach to prevent it from continuing to react with the wood. This step is usually done using a neutralizing solution, such as a mild vinegar and water mixture, which should be applied across the surface. Once neutralized, a thorough cleaning is essential to remove any residues.
In some cases, the bleaching process might lighten the wood too much, necessitating the application of a new stain to achieve the desired color before finishing. This restaining should be followed by the application of a protective finish to seal the wood and maintain its appearance.
B. Wood Lighteners
Wood lighteners offer a gentler alternative to traditional bleach, often incorporating components like ammonia or oxalic acid into their formula. These products are designed to brighten the wood without the aggressive chemical reaction seen with stronger bleaches. Following the manufacturer’s instructions is paramount for safe and effective application when using wood lighteners.

However, it’s important to acknowledge that results can vary depending on the type of wood and the previous treatments it has undergone. Testing on a discreet area before full application can help gauge the outcome and avoid unexpected results.
C. Safety Precautions for Chemical Lightening
The use of chemicals for lightening wood necessitates strict adherence to safety precautions. Ensuring proper ventilation within the workspace is crucial to avoid inhaling fumes. Protective gloves and eye protection should be worn at all times to prevent skin and eye irritation. Additionally, it’s important to read and follow all safety instructions meticulously on the product labels. Remember, safety should never be compromised during the application process, and taking these precautions can help mitigate the risk of accidents or health issues.
Alternative Lightening Methods
A. Whitewashing
Whitewashing stands as a venerable technique for subtly lightening wood floors, imparting a soft, muted appearance that retains the wood’s natural textures. This method involves applying a thin, diluted paint solution to the wood’s surface, typically a mix of white paint and water.
The key to successful whitewashing lies in the application’s consistency, ensuring an even distribution of the wash across the floor to achieve a uniform look. It’s crucial to work in sections, using a brush or sponge to apply the solution and wiping away excess to prevent pooling and achieve the desired effect.
B. Painting (optional)
Painting the wood floor is an option for those seeking a more dramatic transformation. While this method can significantly lighten a room, it comes with the consequence of obscuring the natural wood grain, altering the floor’s inherent character.
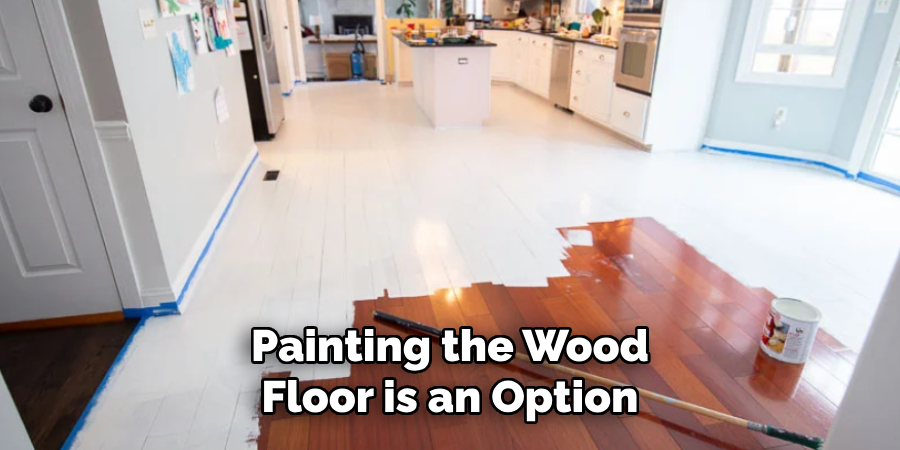
Selecting a paint specifically designed for wood floors and adhering to a detailed preparatory process—including cleaning, sanding, and priming—is crucial for a durable and visually pleasing outcome. Careful consideration should be given to this approach, balancing the desire for lightness with the appreciation for natural wood aesthetics.
Maintaining Lightened Wood Floors
A. Using Protective Floor Coverings
Incorporating rugs and carpets in high-traffic areas is advised to safeguard your newly lightened wood floors. This simple measure significantly reduces the risk of scratches and premature wear, thereby preserving the floor’s aesthetic appeal and structural integrity.
B. Regular Cleaning
Maintaining the pristine condition of lightened wood floors involves regular cleaning with products specifically formulated for wood flooring. These solutions gently cleanse without damaging the finish, ensuring the floors remain vibrant and free of grime or stains.
C. UV Protection
Excessive direct sunlight can lead to fading or yellowing of lightened wood floors over time. To counteract this, consider using window treatments or UV-protective coatings to minimize sunlight exposure, thereby extending the life and beauty of the flooring.
D. Touch-ups
Despite careful maintenance, lightened wood floors may eventually exhibit signs of wear or slight discoloration in certain areas. Utilizing touch-up stains or finishes as needed helps maintain a consistent appearance across the floor, ensuring minor imperfections are addressed promptly and effectively.
Considering Professional Help
A. Complex Projects or Valuable Floors
When facing comprehensive floor lighting projects, dealing with heavily stained floors, or working with valuable wood species, seeking professional help can be a prudent decision. Professionals bring a wealth of experience and access to specialized equipment that can ensure the project’s success, minimizing the risk of damage to valuable flooring.
Their expertise is particularly beneficial for complex projects, where the right balance between achieving desired aesthetic outcomes and maintaining the wood’s integrity must be struck. The benefits of professional intervention include not only a guarantee of quality but also peace of mind regarding the longevity and durability of the finish.
B. Finding a Qualified Floor Refinisher
Selecting the right professional floor refinisher is crucial to the success of your floor lighting project. Start by gathering references from friends, family, or online reviews to compile a list of potential candidates. Ensure that their qualifications, including licenses and insurance, are a guarantee of their legitimacy and professionalism.

Don’t hesitate to ask for before-and-after photos of previous projects to assess their capability and aesthetic alignment with your vision. Remember, a qualified and experienced floor refinisher is your best bet for achieving a beautifully lightened wood floor that enhances your home’s overall ambiance.
Conclusion
In exploring how to lighten dark wood floors, we have discussed a range of methods, including chemical bleaches, wood lighteners, whitewashing, painting, and seeking professional help. Each technique comes with its own set of advantages and limitations—chemical applications offer precision but require careful handling and safety precautions while whitewashing and painting provide a more substantial aesthetic shift but may obscure the wood’s natural beauty.
The choice among these methods should depend on the type of wood, the level of lighting desired, and one’s comfort and experience with DIY projects. Additionally, it’s crucial to consider the preservation of the wood’s integrity and its long-term maintenance in your decision-making process.
Achieving a brighter, more modern look for your home is entirely possible with careful planning, attention to detail, and proper execution. Whether through a personal DIY project or by enlisting the expertise of professionals, lightening dark wood floors can significantly enhance the ambiance and aesthetic appeal of your living space, making it feel more inviting and vibrant.
About the Author
Adrian Green, a lifelong woodworking enthusiast, shares his passion for the craft through The Woodenify Blog. With a foundation built on years of hands-on experience in his father’s woodworking shop, Adrian is dedicated to helping others learn and grow in the world of DIY woodworking. His approach to woodworking combines creativity, practicality, and a deep appreciation for the art of building with your own hands. Through his blog, he inspires individuals of all skill levels to embark on their own woodworking journeys, creating beautiful, functional pieces of furniture and décor.
Professional Focus
- Specializes in DIY woodworking projects, from furniture to home décor.
- Provides step-by-step guides and practical tutorials for woodworkers of all skill levels.
- Dedicated to helping readers build confidence and skill through easy-to-follow instructions and tips.
- Passionate about fostering a community of makers who can share, learn, and grow together.
Education History
- University of Craft and Design – Bachelor of Fine Arts (BFA) in Woodworking and Furniture Design
- Woodworking Apprenticeships – Extensive hands-on training with skilled craftsmen to refine carpentry and furniture making techniques.
- Online Courses & Masterclasses – Continued education in advanced woodworking techniques, design principles, and specialized tools
Expertise:
- DIY woodworking, carpentry, furniture making, and home décor projects.
- Creating accessible tutorials and guides for beginner to advanced woodworkers.
- Sharing the joys and satisfaction of woodworking, from raw materials to finished products.