Wood floors add a touch of elegance and warmth to any home, making them a popular choice for many homeowners. However, the charm of wood flooring can be diminished by the common problem of squeaking.
This nuisance is typically caused by the natural expansion and contraction of wood over time, leading to friction between floorboards or between the floorboards and the subfloor. In this guide on how to stop squeaky wood floors, we will explore some effective strategies to address and stop your wood floors from squeaking, ensuring they remain as visually and acoustically pleasing as the day they were installed.
What is a Squeaky Wood Floor?
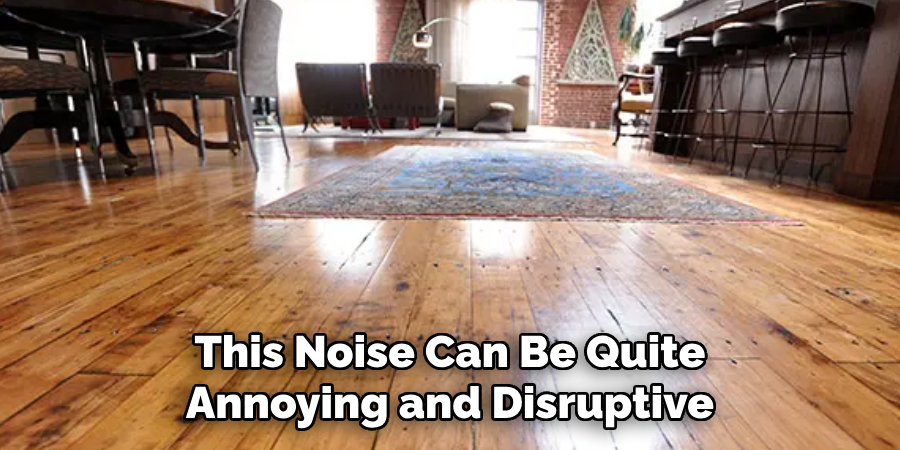
A squeaky wood floor is one that produces a high-pitched noise when pressure is applied to certain areas or when walked on. This noise can be quite annoying and disruptive, especially in high traffic areas of the house. Apart from being an irritant, squeaky floors can also be a sign of underlying issues with your flooring, such as loose nails, worn subflooring or damaged floorboards. It is important to address these issues promptly to prevent further damage and ensure the longevity of your wood floors.
You may also notice that your wood floors squeak more during certain seasons or weather conditions. This is because changes in temperature and humidity can cause the wood to swell or shrink, resulting in movement and friction between floorboards.
Why Do Wood Floors Squeak?
As mentioned earlier, the most common cause of squeaky floors is natural wood movement and friction between floorboards or between the floorboards and subfloor. But there are other factors that can contribute to this problem, such as:
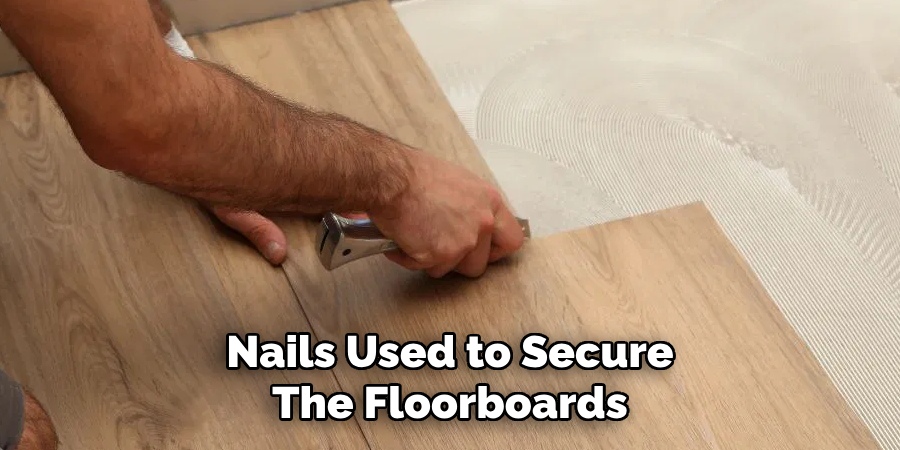
Loose Nails:
Over time, nails used to secure the floorboards may become loose due to wear and tear, causing them to rub against the subfloor or floorboards and produce squeaks.
Worn Subflooring:
If the subfloor is worn out or uneven, it can create gaps between the subfloor and the floorboards, leading to movement and noise.
Moisture Damage:
Exposure to moisture can weaken wood fibers, making them more prone to movement and squeaks.
Poor Installation:
Improper installation of wood flooring, such as using incorrect or insufficient fasteners, can result in squeaky floors.
Needed Materials
To effectively address and fix squeaky wood floors, gathering the right materials is crucial. Here’s a list of tools and materials you might need for the job:
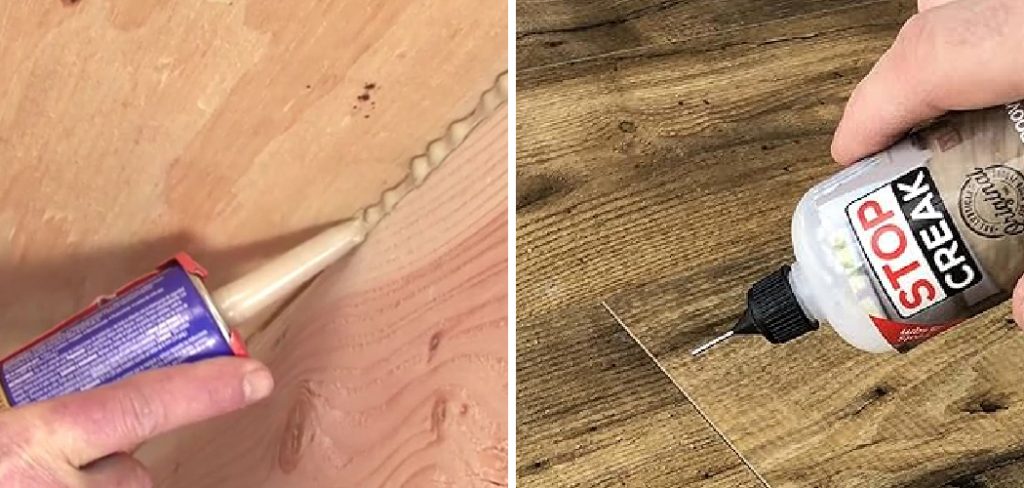
Carpenter’s Glue or Wood Adhesive:
To secure loose floorboards and fill gaps.
Flooring Nails or Screws:
To fasten loose floorboards to the subfloor securely.
Drill:
For pre-drilling holes for screws.
Hammer:
To drive nails or tap blocks into place.
Wax or Lubricant:
For lubricating areas where two floorboards rub against each other.
Sanding Block or Sandpaper:
To remove rough edges and smoothen the surface of the floorboards.
8 Easy Step-by-step Guides on How to Stop Squeaky Wood Floors
Step 1: Identify the Source of the Squeak
Walk around your floor and locate where the noise is coming from. You may need to ask someone to walk on the floor while you listen. The squeak may come from floorboards rubbing against each other or between the floorboards and subfloor. Identifying the source will help you determine which method to use to fix it. The squeak may also be caused by multiple sources, so make sure to thoroughly inspect the entire floor.
Step 2: Clean the Area
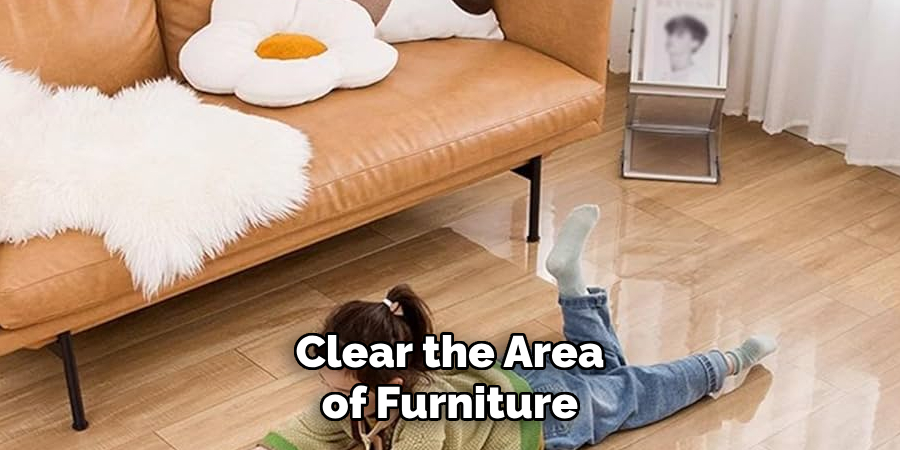
Before attempting any fixing, clear the area of furniture, rugs, and debris. This will give you better access to the problem area and make fixing easier. It’s also a good idea to sweep or vacuum the floor to remove any dirt and debris that may have accumulated between the floorboards. You can also use a wood cleaner to remove any built-up grime that may be causing the squeaks.
Step 3: Use Carpenter’s Glue or Wood Adhesive
If the squeak is caused by loose floorboards, use a carpenter’s glue or wood adhesive to secure them back in place. Apply a generous amount of glue between the subfloor and floorboard, then press down firmly and hold for a few minutes until the glue dries. You can also use a flooring nail or screw to secure the floorboard if needed.
Step 4: Fill Gaps with Glue
If there are gaps between the subfloor and floorboards, fill them with wood glue and use a clamp to hold them in place until dry. If you don’t have a clamp, you can use heavy objects such as books or weights to hold the floorboards down.
Step 5: Pre-drill Holes
To fix squeaks caused by loose nails, pre-drill holes into the floorboards near the nail using a drill. This will prevent the wood from splitting when you hammer in the new flooring nail or screw. It’s recommended to use a smaller drill bit than the size of the nail or screw. You can also use screws with a slightly larger diameter than the existing nail for better grip and stability.
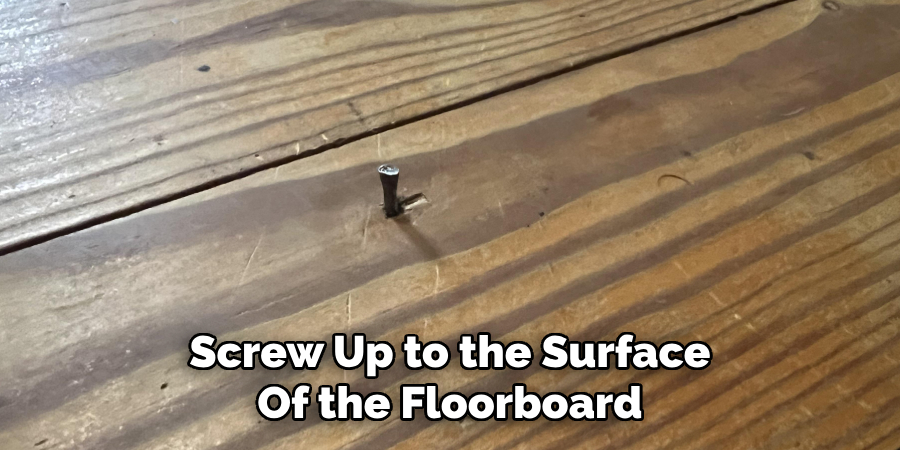
Step 6: Secure Nails or Screws
After pre-drilling, hammer in the new nail or screw up to the surface of the floorboard. Be careful not to drive it too deep as this could cause damage to your flooring. If using screws, use a drill to secure them tightly. The goal is to secure the loose floorboard snugly against the subfloor. But be cautious not to over-tighten the screws, as this could cause the wood to split.
Step 7: Use Wax or Lubricant
If the squeak is caused by friction between floorboards, apply a small amount of wax or lubricant between them. This will reduce friction and eliminate the noise. You can also use baby powder or powdered graphite for this step. Simply sprinkle the powder between the floorboards and sweep or vacuum off any excess. The powder acts as a lubricant and reduces friction between floorboards.
Step 8: Sand Rough Edges
If the squeak is cause by rough edges or splinters, use a sanding block or sandpaper to smooth them out. This will prevent any future squeaks caused by rubbing between floorboards. After sanding, clean the area with a vacuum or damp cloth. It’s recommended to do this step after the glue has dried, if you used it in previous steps.
Following these steps on how to stop squeaky wood floors should help you eliminate squeaks and restore the silence of your wood floors. However, if the problem persists or seems to be coming from a more extensive issue such as moisture damage or structural problems, it’s best to seek professional help. With proper maintenance and care, your wood floors can stay squeak-free for many years to come.
Frequently Asked Questions
Q1: Can I Fix Squeaky Floors Without Removing the Carpet?
A1: Yes, you can use the methods mentioned above to fix squeaks under a carpeted floor. The only difference is that you may need to use a stud finder to locate the floor joists before securing the floorboards. But if the squeak is coming from the subfloor, you may need to remove the carpet temporarily to access and fix the issue.
Q2: How Often Should I Check for Squeaky Floors?
A2: It’s a good idea to check for squeaks regularly, especially in high-traffic areas of your home. This will help you catch and fix any potential issues before they become major problems. It’s also recommended to check for squeaks after any significant changes, such as new furniture or renovations, to ensure there are no underlying issues.
Q3: Can I Fix Squeaky Floors on My Own?
A3: Yes, with the right tools and materials, fixing squeaky floors can be a DIY project. However, if you are unsure or uncomfortable with the process, it’s best to seek professional help. It’s also recommended to seek professional assistance if the squeaks persist after trying these methods or seem to be caused by a structural issue.
Q4: Is It Possible to Prevent Squeaky Floors?
A4: While some factors such as moisture and age of the flooring, cannot be controlled, there are steps you can take to prevent squeaky floors. These include regular maintenance and cleaning, avoiding excessive weight or pressure on floorboards, and using proper techniques when installing new flooring. Keeping an eye out for any potential issues and addressing them promptly can also help prevent squeaks in the future.
Overall, regular maintenance and prompt fixing of squeaky floors can save you time and money in the long run. So don’t ignore those annoying noises and follow these easy steps to silence your squeaky wood floors. Happy fixing!
Conclusion
Fixing squeaky wood floors can significantly enhance the peace and quiet of your living environment. By following the step-by-step guide provided on how to stop squeaky wood floors, you can address the common causes of floorboard noises with relative ease. Whether your squeaky floor problem stems from loose nails, worn subflooring, moisture damage, or poor installation, the solution often lies in simple repairs.
Remember, patience and precision are vital in ensuring your efforts yield lasting results. With the right tools and a bit of elbow grease, you can restore the tranquility of your home and enjoy your wood floors without the constant annoyance of squeaks.
About the Author
Adrian Green, a lifelong woodworking enthusiast, shares his passion for the craft through The Woodenify Blog. With a foundation built on years of hands-on experience in his father’s woodworking shop, Adrian is dedicated to helping others learn and grow in the world of DIY woodworking. His approach to woodworking combines creativity, practicality, and a deep appreciation for the art of building with your own hands. Through his blog, he inspires individuals of all skill levels to embark on their own woodworking journeys, creating beautiful, functional pieces of furniture and décor.
Professional Focus
- Specializes in DIY woodworking projects, from furniture to home décor.
- Provides step-by-step guides and practical tutorials for woodworkers of all skill levels.
- Dedicated to helping readers build confidence and skill through easy-to-follow instructions and tips.
- Passionate about fostering a community of makers who can share, learn, and grow together.
Education History
- University of Craft and Design – Bachelor of Fine Arts (BFA) in Woodworking and Furniture Design
- Woodworking Apprenticeships – Extensive hands-on training with skilled craftsmen to refine carpentry and furniture making techniques.
- Online Courses & Masterclasses – Continued education in advanced woodworking techniques, design principles, and specialized tools
Expertise:
- DIY woodworking, carpentry, furniture making, and home décor projects.
- Creating accessible tutorials and guides for beginner to advanced woodworkers.
- Sharing the joys and satisfaction of woodworking, from raw materials to finished products.