Are you a boat owner who is worried about water damage? Do you want to protect your plywood boat from rot and decay caused by exposure to water? Look no further. In this tutorial, we will discuss how to waterproof plywood for boat.
Waterproofing plywood for use in boats is a critical step in ensuring the longevity and durability of your marine projects. While sturdy and versatile, plywood is susceptible to water damage if not properly treated. Exposure to moisture can lead to warping, rotting, and delamination, which can compromise the structural integrity of your boat. To prevent these issues, applying the right waterproofing techniques and materials is essential.
This guide will walk you through the process of waterproofing plywood, from selecting the appropriate type of plywood to applying sealants and protective coatings, ensuring your boat remains seaworthy for years to come.
Why Waterproof Your Plywood Boat?
Waterproofing your plywood boat is crucial as it helps to prevent the wood from deteriorating due to constant exposure to water. As mentioned earlier, plywood is highly susceptible to water damage, and if left untreated, it can result in costly repairs or even render your boat unusable.
Here are some reasons why waterproofing your plywood boat is essential:
- Protects Against Rot and Decay: Water can penetrate the surface of untreated plywood, causing the wood fibers to swell and eventually lead to rot and decay. By waterproofing your plywood, you create a barrier that prevents water from seeping into the wood, protecting it from damage.
- Strengthens the Structure: Water-damaged plywood can weaken the structure of your boat. Waterproofing helps to maintain the structural integrity of the wood, making it more resistant to wear and tear caused by constant exposure to water.
- Increases Longevity: Waterproofing your plywood boat can extend its lifespan, saving you money on repairs and replacements in the long run.
With these benefits in mind, let’s dive into how to waterproof plywood for boats.
What Will You Need?
To waterproof your plywood boat, you will need the following supplies:
- Marine Grade Plywood: This type of plywood is specifically designed for marine use and is more resistant to water and moisture. It may be more expensive than regular plywood, but it’s worth the investment.
- Waterproofing Sealant: There are various types of sealants available in the market, including epoxy resin, polyurethane, and marine varnish. Each has its advantages and drawbacks, so choose the one that best fits your needs.
- Paintbrush or Roller: You will need a paintbrush or roller to apply the sealant to your plywood. A brush is ideal for small areas, while a roller is more suitable for larger surfaces.
- Sanding Equipment: Before waterproofing, you must sand your plywood to ensure a smooth and even surface for the sealant to adhere to.
- Protective Gear: When working with sealants, it’s essential to wear protective gear such as gloves, goggles, and a face mask to prevent skin and eye irritation.
Once you have gathered all the necessary supplies, it’s time to start waterproofing your plywood boat.
10 Easy Steps on How to Waterproof Plywood for Boat:
Step 1. Choose the Right Type of Plywood

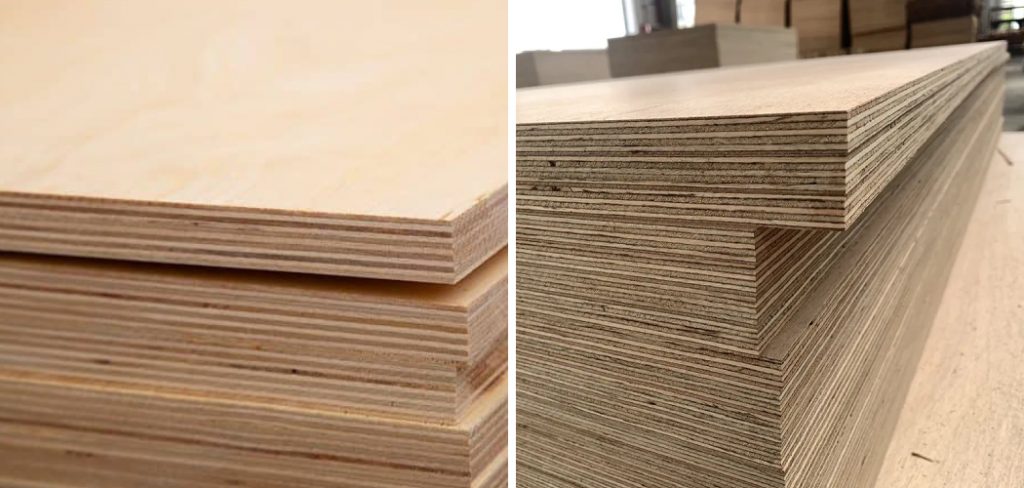
Selecting the appropriate type of plywood is the foundation of ensuring your boat’s durability and resilience against water damage. For marine applications, it’s best to opt for marine-grade plywood.
This type of plywood is manufactured with waterproof adhesive, preventing delamination in moist environments. Additionally, marine grade plywood is made with fewer voids and is typically composed of higher quality woods like Douglas fir or Western Larch, providing superior strength and stability.
Avoid using standard or construction-grade plywood, as these are not designed for prolonged exposure to water and will deteriorate quickly. The initial investment in high-quality marine-grade plywood will pay off in the long run by significantly extending the lifespan of your boat.
Step 2. Cut and Sand the Plywood
Once you’ve selected the right type of plywood, the next step is to cut it to the required dimensions for your boat project. Use a saw to carefully make the necessary cuts, ensuring precision to avoid wasted material.
After cutting, it’s crucial to sand the edges and surfaces of the plywood pieces. Start with coarse-grit sandpaper to smooth out any rough spots or splinters, then switch to a finer grit for a polished finish.
Sanding not only creates a smooth surface for the sealant to adhere to but also helps remove contaminants or residues.
Make sure to thoroughly clean off any dust and debris after sanding to ensure a strong bond with the waterproofing sealant in the next steps.
Step 3. Clean the Plywood Surface
Before applying any sealant, it is crucial to clean the surface of the plywood thoroughly. Dust, dirt, and oils can interfere with the bond between the plywood and the waterproofing materials. Begin by wiping down the plywood surface with a damp cloth to remove visible dust and debris. For a more thorough cleaning, use a mixture of mild detergent and water.
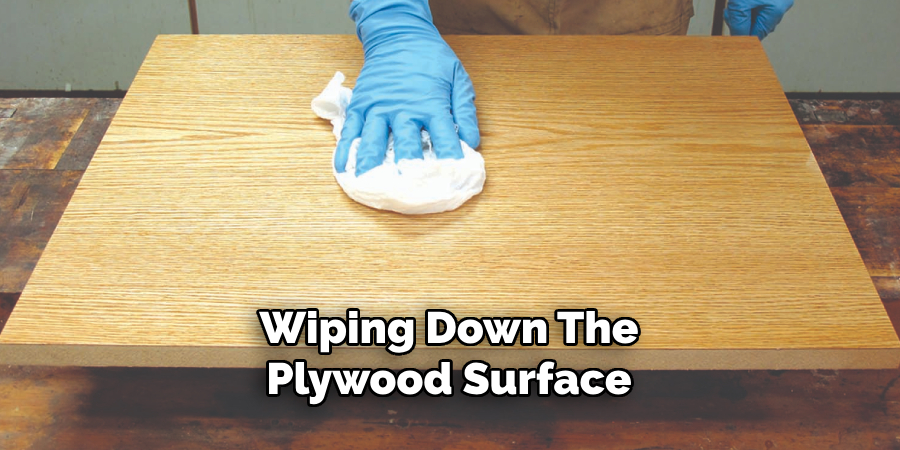
Scrub the plywood gently with a soft brush and rinse it with clean water. Ensure that the plywood is completely dry before moving on to the next step. Any residual moisture can prevent the sealant from adhering properly, so allow adequate drying time or use fans to accelerate the process if necessary.
Step 4. Apply the First Coat of Sealant
With the plywood surface cleaned and fully dried, you can now begin applying the first coat of waterproof sealant. Choosing the right sealant depends on your specific needs, but epoxy resin is a popular choice due to its strong, durable finish.
Using a paintbrush or roller, apply an even layer of sealant over the entire surface of the plywood, paying special attention to edges and corners where moisture is most likely to penetrate. Work in a well-ventilated area and follow the manufacturer’s safety guidelines, including wearing protective gear like gloves and a mask.
Allow the first coat to dry thoroughly, as recommended by the sealant instructions, before applying subsequent coats. This initial layer creates a strong base that will enhance the effectiveness of additional coats, fortifying your plywood against water damage.
Step 5. Sand Between Coats
Once the first coat of sealant has fully dried, it’s essential to lightly sand the surface before applying additional coats. This step helps to create a better bond between layers, ensuring a more uniform and durable finish.
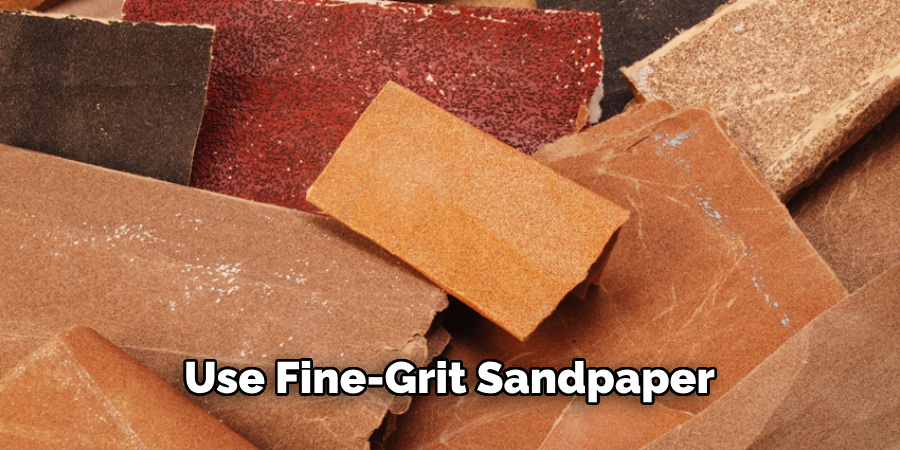
Use fine-grit sandpaper for this process, gently sanding the surface to remove any imperfections or bubbles that may have formed. Be careful not to sand too aggressively, as this can damage the sealant layer and the plywood underneath.
After sanding, clean off any dust and debris with a damp cloth or vacuum to ensure the surface is smooth and ready for the next application. Proper preparation between coats will significantly enhance the waterproofing effectiveness and longevity of your plywood boat.
Step 6. Apply Additional Coats of Sealant
After sanding the first coat and ensuring the surface is clean, proceed to apply additional coats of sealant. Depending on the type of sealant being used, you may need to apply two to three more coats to achieve optimal waterproofing.
Each coat should be applied in the same way as the first—using a paintbrush or roller to ensure even coverage, particularly on edges and corners. Allow each coat to fully dry according to the manufacturer’s specifications before sanding lightly and cleaning the surface between applications.
This layering process builds up a robust barrier that will protect the plywood from water penetration and extend the lifespan of your boat. Taking the time to apply multiple coats correctly is crucial for achieving a durable and long-lasting waterproof seal.
Step 7. Seal the Edges and Joints
Sealing the edges and joints of your plywood is critical to ensuring comprehensive waterproofing, as these areas are particularly vulnerable to water penetration.
Use a high-quality marine sealant or epoxy to coat all exposed edges and where plywood panels join. Apply a generous bead of sealant along the seams and use a putty knife or similar tool to smooth it out and ensure complete coverage.
Pay extra attention to any gaps or cracks, filling them adequately to prevent any potential water ingress. Allow the sealant to dry thoroughly according to the manufacturer’s directions.
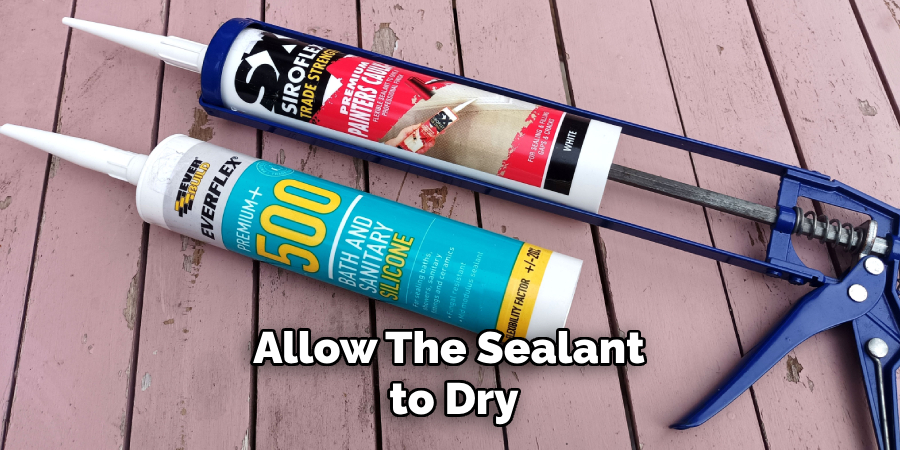
This step fortifies the overall structure and adds an additional layer of protection against moisture, further ensuring the longevity and durability of your plywood boat.
Step 8. Inspect and Perform Final Touch-Ups
With all the sealant layers applied and fully dried, it’s time to conduct a thorough inspection of your waterproofing work. Check all surfaces, edges, and joints to ensure that there are no missed spots or weak points where water might penetrate.
Look for any areas that may need additional sealant or touch-ups, particularly around edges and joints. If any issues are found, apply more sealant as needed and allow it to dry completely.
Taking the time to meticulously inspect and perfect your work can make a significant difference in the longevity and performance of your waterproofed plywood boat. Once satisfied, you can proceed to the next stages of your boat project with confidence that your plywood is well-protected against water damage.
Step 9. Apply a Final Finish
To complete the waterproofing process, consider applying a final finish to your plywood boat. This can include paint, varnish, or another protective coating that enhances aesthetics and adds an extra layer of protection against the elements.
Choose a finish suitable for marine use to ensure durability and resilience. Using a high-quality marine paint or varnish, apply an even coat over the entire surface, including edges and joints, to seal the plywood completely.
Follow the manufacturer’s instructions for application and drying times, and apply additional coats if necessary for optimal protection. This final finish will provide a robust barrier against UV rays, salt, and humidity, extending the life of your boat and keeping it looking new for longer.
After the finish has dried thoroughly, your boat is ready for the water, and you can proceed with any additional customizations or fittings as per your project requirements.
Step 10. Conduct Water Testing
Before embarking on your first journey, it’s crucial to test the waterproofing of your plywood boat to ensure it can withstand water exposure without any leaks or issues. Find a safe, controlled environment like a small pond or a shallow part of a lake to perform your water test.
Gradually submerge different parts of the boat, paying close attention to the edges, joints, and any areas that may seem susceptible to leaks. Monitor the boat for a sufficient period, checking the interior for any signs of water ingress.
If any leaks are detected, promptly address them by applying additional sealant to the problematic areas and allowing it to dry thoroughly before retesting. This step confirms the effectiveness of your waterproofing efforts and provides peace of mind that your boat is ready for extended use on the water. Conducting a careful and thorough water test will help ensure the durability and safety of your vessel.
By following these ten steps, you can effectively waterproof your plywood boat and extend its lifespan.
5 Additional Tips and Tricks
- Use Marine-Grade Plywood: Start with marine-grade plywood specifically designed to resist moisture and decay. It is made with waterproof glue and has fewer gaps and voids, making it more durable in wet environments.
- Apply a Penetrating Epoxy Sealer: A penetrating epoxy sealer soaks into the plywood, creating a waterproof barrier from the inside out. Apply several coats, allowing each layer to dry thoroughly before adding the next to ensure optimal protection.
- Coat with a Marine-Grade Varnish: After sealing with epoxy, add a layer of marine-grade varnish for additional UV protection and a glossy finish. This varnish helps to protect the wood from sun damage and further seals out moisture.
- Use Fiberglass Cloth: Cover the plywood with a layer of fiberglass cloth and resin for extra strength and waterproofing. This method creates a tough, impermeable skin that effectively shields the wood from water intrusion and abrasion.
- Seal Edges and Joints Thoroughly: Pay special attention to sealing the edges and joints of your plywood. These areas are particularly vulnerable to water penetration. Use a high-quality waterproof sealant or additional epoxy resin to ensure these areas are fully protected.
With these additional tips and tricks, you can ensure that your plywood remains in top condition for longer.
5 Things You Should Avoid
- Skipping Surface Preparation: Never bypass the crucial step of properly preparing the plywood surface before applying any sealant or coating. Dirt, dust, and grease can prevent adhesives from bonding correctly, compromising your waterproofing efforts.
- Using Low-Quality Materials: Avoid using substandard materials for waterproofing. Low-quality sealants, epoxies, and varnishes might save money upfront but can lead to costly repairs and replacements in the long run.
- Ignoring Drying Times: Do not disregard the recommended drying times between coats of sealant or varnish. Applying subsequent layers too soon can trap moisture and lead to a weaker, less effective waterproof barrier.
- Neglecting Regular Maintenance: Failing to upkeep waterproofed plywood can result in gradual degradation. Regular inspections and touch-ups with appropriate sealants ensure lasting durability and protection against water damage.
- Overlooking Hard-to-Reach Areas: It’s easy to miss or inadequately cover nooks, crannies, edges, and joints. These spots are often the first to succumb to water intrusion, so ensure they are meticulously sealed and inspected frequently.
By steering clear of these common pitfalls, you can significantly enhance the longevity and performance of your waterproofed plywood, ensuring it withstands the harsh marine environment.
Which Type of Plywood is Waterproof?
When shopping for plywood, knowing which types are waterproof and suitable for your project is essential. The two main types of waterproof plywood are marine-grade and exterior-grade.
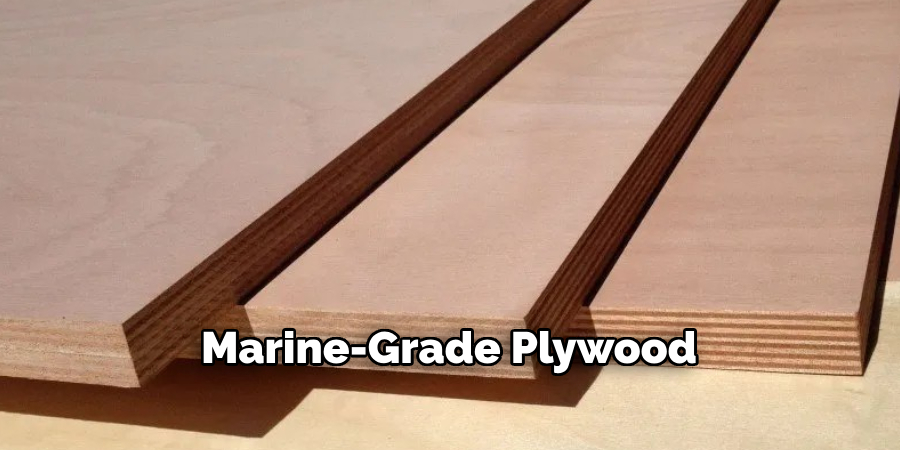
- Marine-Grade Plywood: As mentioned earlier, marine-grade plywood is specifically designed to resist moisture and decay. It is the highest quality type of waterproof plywood and is commonly used in boat building, docks, and other marine applications.
- Exterior-Grade Plywood: Exterior-grade plywood is also waterproof but not as durable or resistant to moisture as marine-grade plywood. It is typically used in outdoor construction projects such as decks, fences, and exterior walls.
It is essential to note that even though these types of plywood are considered waterproof, they still require proper sealing and maintenance to ensure long-term waterproofing effectiveness.
Conclusion
How to waterproof plywood for boat is a critical process that ensures the longevity and durability of your vessel. By selecting the right materials, such as marine-grade plywood, and applying comprehensive sealing techniques like a penetrating epoxy sealer and marine-grade varnish, you create robust protection against water damage.
In addition to these methods, reinforcing the plywood with fiberglass cloth and resin significantly enhances its strength and waterproofing capabilities. Vigilantly sealing edges and joints, coupled with using high-quality materials and following proper drying times, cannot be overstated. Regular maintenance and inspections are imperative to uphold the plywood’s integrity.
By meticulously following these tips and avoiding common mistakes, you safeguard your boat against moisture-related issues, ensuring it remains seaworthy for many future adventures.
About the Author
Adrian Green, a lifelong woodworking enthusiast, shares his passion for the craft through The Woodenify Blog. With a foundation built on years of hands-on experience in his father’s woodworking shop, Adrian is dedicated to helping others learn and grow in the world of DIY woodworking. His approach to woodworking combines creativity, practicality, and a deep appreciation for the art of building with your own hands. Through his blog, he inspires individuals of all skill levels to embark on their own woodworking journeys, creating beautiful, functional pieces of furniture and décor.
Professional Focus
- Specializes in DIY woodworking projects, from furniture to home décor.
- Provides step-by-step guides and practical tutorials for woodworkers of all skill levels.
- Dedicated to helping readers build confidence and skill through easy-to-follow instructions and tips.
- Passionate about fostering a community of makers who can share, learn, and grow together.
Education History
- University of Craft and Design – Bachelor of Fine Arts (BFA) in Woodworking and Furniture Design
- Woodworking Apprenticeships – Extensive hands-on training with skilled craftsmen to refine carpentry and furniture making techniques.
- Online Courses & Masterclasses – Continued education in advanced woodworking techniques, design principles, and specialized tools
Expertise:
- DIY woodworking, carpentry, furniture making, and home décor projects.
- Creating accessible tutorials and guides for beginner to advanced woodworkers.
- Sharing the joys and satisfaction of woodworking, from raw materials to finished products.