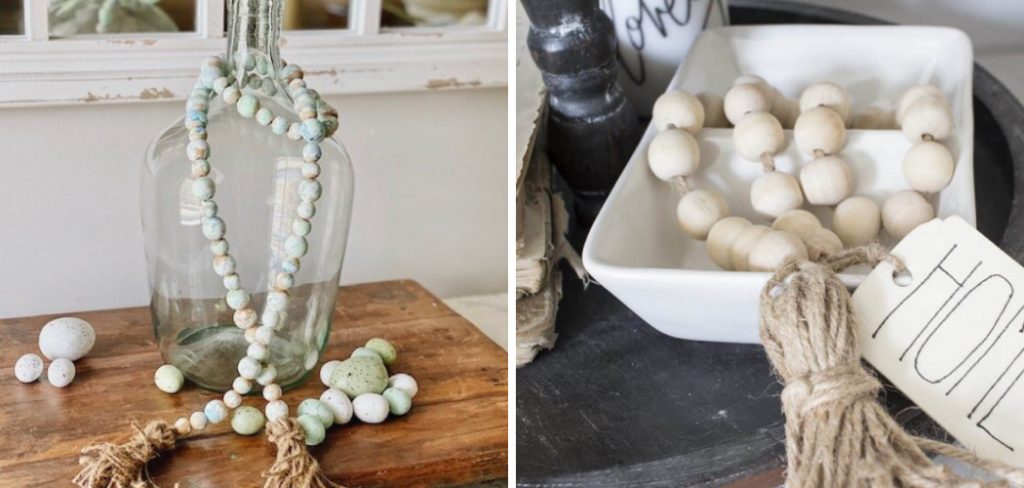
Are you looking for a simple and charming way to add some natural texture to your home decor? Look no further than wooden bead garlands! These versatile and affordable decorations are perfect for adding a touch of rustic charm or bohemian flair to any space.
Wooden bead garlands are a versatile and stylish addition to any home decor. Their natural texture and neutral tones make them perfect for adding a rustic, bohemian, or even a minimalist touch to various spaces. Whether you want to enhance your living room, bedroom, or outdoor area, wooden bead garlands can be a wonderful accessory to elevate your interior design.
In this guide, we will explore creative and practical ways how to decorate with wooden bead garland, offering both aesthetic appeal and a personal touch.
What are the Benefits of Wooden Bead Garlands?
There are many reasons to love wooden bead garlands. Not only are they affordable and readily available, but they also offer numerous design possibilities.
- Natural Aesthetic: The wooden beads in these garlands have a beautiful, organic look that instantly adds warmth and texture to any space.
- Versatility: Wooden bead garlands come in various sizes, shapes, and colors, making them versatile enough to complement any home decor style.
- Cost-effective: Wooden bead garlands are an affordable way to elevate your decor without breaking the bank. They add charm to your home without spending a fortune.
- DIY-friendly: Wooden bead garlands are the perfect DIY project if you love getting creative and adding a personal touch to your home. With just a few supplies and some basic crafting skills, you can create your own unique garland to suit your specific style and taste.
These are just a few of the many benefits of incorporating wooden bead garlands into your home decor.
Where to Use Wooden Bead Garlands?
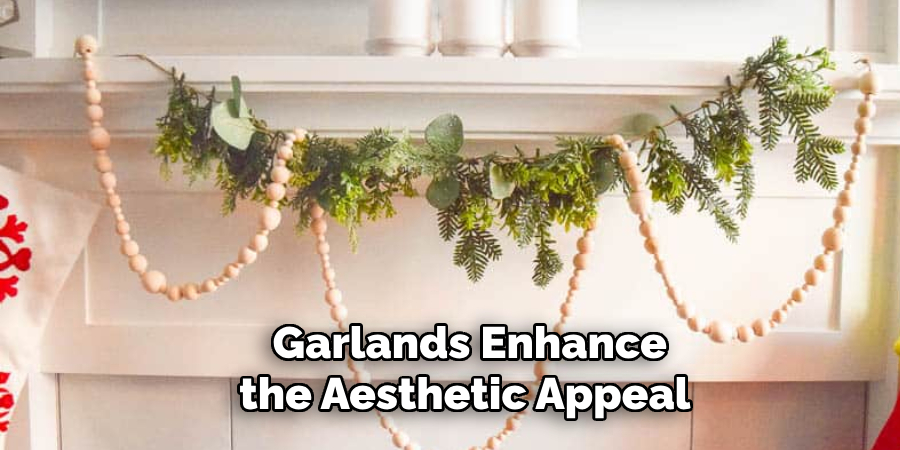
Wooden bead garlands can enhance the aesthetic appeal of any room in your home. Here are some ideas on where you can use them:
- Living Room: For a rustic and cozy touch, drape a long wooden bead garland over your mantle or coffee table.
- Bedroom: Hang a shorter garland over your headboard or use it to style a bedside table.
- Kitchen: Add some charm to your kitchen by using wooden bead garlands as napkin rings, draped over cabinets, or even as a decorative element on the dining table.
- Nursery: These garlands are also a popular choice for nurseries. Hang them on the wall or use them to decorate shelves and cribs.
- Outdoor Spaces: Wooden bead garlands can add a touch of bohemian style to your outdoor area. Use them to dress up a patio table, hang on a porch swing, or drape over trees and bushes in your garden.
With their versatility, wooden bead garlands can be used in almost any home space to add a touch of natural charm.
What Will You Need?
To create your own wooden bead garland, you will need the following supplies:
- Wooden Beads: You can find a variety of sizes and shapes at craft stores or online.
- String or Twine: Choose a color that complements your wooden beads. Jute or hemp twine are popular choices for a rustic look.
- Scissors: For cutting your string or twine.
- Optional: Paint, stain, or dye your beads to customize their color. Add tassels, pom poms, or other embellishments for a unique touch.
Now that you have all the necessary supplies let’s get crafting!
10 Easy Steps on How to Decorate With Wooden Bead Garland:
Step 1. Plan Your Design:
Before you start crafting your wooden bead garland, you must have a clear vision of what you want to achieve. Consider the style and color scheme of the room where you plan to use the garland. Do you want a natural wooden look, or would you prefer to paint or stain the beads to match your decor?
You can also consider incorporating additional elements like tassels, pom poms, or small charms to add flair. Sketch out a rough design on paper to help visualize your garland’s final look. This planning stage will help guide you through crafting and ensure you create a garland that perfectly complements your space.
Step 2. Gather Your Supplies:

Once you have your design in mind, gather all the necessary supplies. You will need wooden beads, string or twine, scissors, and any optional embellishments like paint, stain, tassels, or pom poms. Make sure you have adequate quantities of each item to complete your garland. If you plan to paint or stain the beads, it’s a good idea to do this step first and allow them to dry completely before assembling your garland. Working in a clean and organized space will make crafting more enjoyable and efficient.
Step 3. Prepare the Beads:
If you decide to customize the color of your wooden beads, now is the time to do it. Lay out some newspaper or a drop cloth to protect your work surface. Use paint, stain, or dye to color your beads, keeping in mind the overall aesthetic you want to achieve. By using different shades and techniques, you can create patterns or gradients. Allow the beads to dry thoroughly before handling them. This step adds a personal touch to your garland and ensures it coordinates well with your home decor.
Step 4. Cut Your String or Twine:
Measure and cut a string or twine length based on your garland’s desired placement and size. Cut a bit more than you think you’ll need; you can always trim the excess at the end. If unsure about the length, you can create a shorter garland and gradually add more beads as you see fit.
Once the string is cut, tie a secure knot at one end to prevent the beads from slipping off as you thread them. If you’re using thicker twine, perhaps coat the ends with clear nail polish or glue to stiffen them, making it easier to string the beads. Preparing your string or twine correctly helps ensure a smooth assembly process and prevents any disruptions while placing the beads.

Step 5. Start Stringing the Beads:
Begin threading the wooden beads onto your prepared string or twine. You can follow a pattern or randomly select beads for a more eclectic look, depending on your design. This is also the time to add any additional embellishments like tassels, pom poms, or charms. Slide each bead carefully down the string, ensuring they sit closely together to prevent gaps.
Continue this process until your garland reaches the desired length. If you want to add variety, consider alternating bead sizes or colors to create an interesting visual effect. Stringing the beads is a relaxing and enjoyable step, bringing your garland design to life.
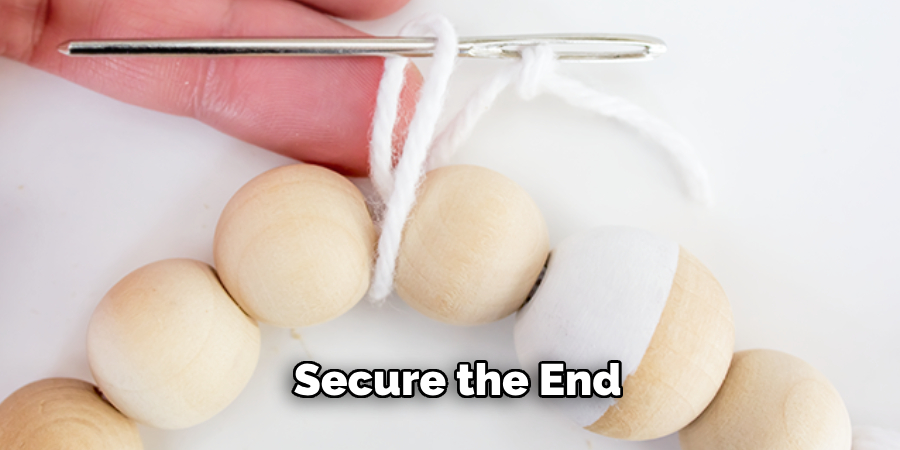
Step 6. Secure the End:
Once you have strung all your beads and embellishments, it’s time to secure the other end of your garland. Tie a tight knot at the end to prevent the beads from slipping off. If you have excess string or twine, consider adding a decorative knot or attaching a tassel or charm for a finishing touch. Make sure the knot is secure and won’t come undone easily. This step ensures that your garland stays intact and looks polished, ready to be displayed in your chosen spot.
Step 7. Drape or Hang Your Garland:
Now that your wooden bead garland is complete, it’s time to display it in your chosen space. Depending on your initial design and intended use, drape or hang your garland to achieve the best visual effect. You can drape it over a mantel, wrap it around a railing, or hang it vertically on a wall for a striking display. Use small hooks or nails to secure it in place if necessary. Ensure the garland is arranged neatly and avoid any tangling or twisting. This final step showcases your handcrafted garland and enhances the aesthetic appeal of your living space.
Step 8. Add Finishing Touches:
To enhance the overall appearance of your wooden bead garland, consider adding some finishing touches. This could include adjusting the positioning of the beads to ensure they are evenly spaced and making any final tweaks to the arrangement. If you incorporated tassels, pom poms, or charms, check that they are securely attached and positioned according to your design plan. For a rustic look, you can slightly fray the twine or string’s ends. These small adjustments will help give your garland a professional and polished appearance, making it a standout piece in your decor.
Step 9. Maintain and Store Your Garland:
Proper maintenance and storage are key to ensuring its longevity once you have enjoyed your wooden bead garland for a season or event. Dust off your garland periodically to keep it looking fresh. When storing it away, carefully coil it to avoid tangling and place it in a sealed container to protect it from dust and damage. Proper care will allow you to enjoy your wooden bead garland year after year, maintaining its beauty and charm.
Step 10. Experiment with Different Uses:
Don’t limit your wooden bead garland to just one use. Experiment with different ways to incorporate it into your home decor. Use it as a festive adornment for holiday decorating, a charming addition to a party setup, or a unique embellishment for a gift-wrapping project. The versatility of a wooden bead garland makes it a valuable and reusable component of your decor toolkit, allowing you to get creative and easily personalize your living space.

By following these simple steps, you can create a beautiful and versatile wooden bead garland to enhance the aesthetic of your home.
5 Additional Tips and Tricks
- Layering for Depth: Combine multiple strands of wooden bead garlands of varying lengths and bead sizes to create a layered effect. This adds depth and visual interest to your décor, making any space feel more dynamic and engaging.
- Seasonal Accents: Integrate seasonal elements like small holiday ornaments, dried flowers, or foliage into your wooden bead garland. This allows you to refresh your décor throughout the year without replacing the garland itself.
- Draping Techniques: Experiment with different draping techniques over mantelpieces, shelves, or light fixtures. Loop the draping loosely for a relaxed, bohemian vibe, or keep it taut for a more structured look.
- Paint or Stain Customization: Don’t be afraid to paint or stain your wooden beads to match your color scheme. Soft pastels can create a calming atmosphere, while bold, vibrant colors might excite your décor.
- Personalize with Charms: To personalize your wooden bead garland, attach small charms, tassels, or even letters. This makes your decoration visually appealing, meaningful, and unique to your personal style or family traditions.
With these additional tips and tricks, you can elevate your wooden bead garland décor to the next level.
5 Things You Should Avoid
- Overloading with Accessories: Avoid adding too many accessories to your wooden bead garland, as it can make the décor look cluttered and overwhelming. Simplicity often works best to maintain an elegant and balanced appearance.
- Ignoring Proportions: Be mindful of the proportions in relation to the space you are decorating. Using a garland that is too long or too short can disrupt the overall harmony of the décor. Ensure it fits well within the context of the surrounding elements.
- Choosing Low-Quality Beads: Stick to high-quality wooden beads to avoid a cheap or unfinished look. Poor-quality beads can detract from the overall aesthetic and may not withstand the test of time.
- Neglecting Color Harmony: It’s crucial to consider the room’s color scheme. Mismatched colors can create visual dissonance. Make sure the colors of the garland complement or enhance the existing décor.
- Improper Hanging Methods: Avoid using flimsy or inadequate methods to hang your garland, as it could sag or fall. Use sturdy hooks or nails and ensure they are securely fixed to support the weight of the garland.

By steering clear of these common mistakes, you can ensure your wooden bead garland adds a touch of charm and sophistication to your home décor.
How to Hang a Bead Garland?
There are a few simple methods for hanging your wooden bead garland, depending on the type of space you are decorating:
- Over a Mantel or Shelf: Drape the garland over the front edge of the mantel or shelf and let it hang down in a loose loop. You can also add small hooks to the top edge of the mantel or shelf and thread the garland through for a more secure hanging.
- Around a Light Fixture: For this method, you can either wrap the garland around the base of the light fixture or create a loop from which it will hang. Just make sure to choose an appropriate length that won’t interfere with the fixture’s function.
- On a Wall: To hang your garland on a wall, you can use sturdy hooks or nails spaced evenly apart. Be sure to measure and plan the placement before securing the hooks to ensure a straight and balanced hanging.
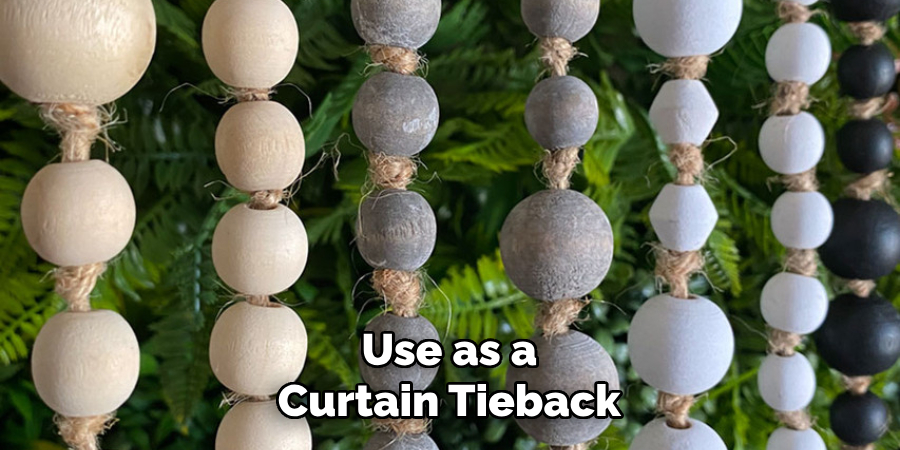
- As a Curtain Tieback: For a unique touch, you can use your wooden bead garland as a curtain tieback by wrapping it around the curtains and then hooking it onto a wall-mounted tieback holder.
Whichever method you choose, consider the weight of your garland and use appropriate hanging materials to ensure it stays in place.
What Do You Paint Wooden Beads With?
Acrylic paint is an excellent option for painting wooden beads. It is water-based, easy to work with, and available in various colors. You can also mix different shades to create your desired color. Make sure to choose a non-toxic paint if you have young children or pets at home. After painting the beads, seal them with a clear acrylic sealer to protect the color and give a glossy finish.
Alternatively, you can use wood stain for a more natural look or even spray paint for a quick and easy application. Just be sure to follow the instructions on the product label for best results. Happy crafting!
Another creative option is to leave some beads unpainted for a charming, rustic touch. This adds texture and dimension to your garland, giving it a more organic and handmade feel. Experiment with different techniques and colors to find the perfect look for your home décor. Choosing the right paint or stain allows you to customize your wooden bead garland to match any style or color scheme.
Conclusion
How to decorate with wooden bead garland into your home décor offers a versatile and charming way to enhance any space.
Whether you choose to layer them for depth, customize them with paint, or accessorize them with personal touches, wooden bead garlands can reflect your unique style and suit any season. You can maintain an elegant and balanced look by avoiding common pitfalls like overloading with accessories or neglecting color harmony. Utilize various hanging methods to creatively display your garlands, considering the practical aspects of securing them properly.
Ultimately, wooden bead garlands add a touch of warmth and sophistication to your home, making them a wonderful addition to your decorating toolkit. Happy decorating!
You can also check it out to Neutralize Red Tones in Wood
About the Author
Adrian Green, a lifelong woodworking enthusiast, shares his passion for the craft through The Woodenify Blog. With a foundation built on years of hands-on experience in his father’s woodworking shop, Adrian is dedicated to helping others learn and grow in the world of DIY woodworking. His approach to woodworking combines creativity, practicality, and a deep appreciation for the art of building with your own hands. Through his blog, he inspires individuals of all skill levels to embark on their own woodworking journeys, creating beautiful, functional pieces of furniture and décor.
Professional Focus
- Specializes in DIY woodworking projects, from furniture to home décor.
- Provides step-by-step guides and practical tutorials for woodworkers of all skill levels.
- Dedicated to helping readers build confidence and skill through easy-to-follow instructions and tips.
- Passionate about fostering a community of makers who can share, learn, and grow together.
Education History
- University of Craft and Design – Bachelor of Fine Arts (BFA) in Woodworking and Furniture Design
- Woodworking Apprenticeships – Extensive hands-on training with skilled craftsmen to refine carpentry and furniture making techniques.
- Online Courses & Masterclasses – Continued education in advanced woodworking techniques, design principles, and specialized tools
Expertise:
- DIY woodworking, carpentry, furniture making, and home décor projects.
- Creating accessible tutorials and guides for beginner to advanced woodworkers.
- Sharing the joys and satisfaction of woodworking, from raw materials to finished products.