Spray foam is a popular material used in construction and insulation due to its excellent thermal resistance and ability to fill gaps, creating an airtight seal.
Commonly applied in walls, roofs, and crawlspace, it effectively enhances building energy efficiency. However, when spray foam comes into contact with wood surfaces, the potential for damage increases if not properly removed. The adhesive properties of spray foam can be particularly challenging, leading to wood fibers being pulled away or surfaces getting scratched during removal.
This article serves as a comprehensive guide on how to remove spray foam from wood safely and effectively, ensuring that you can preserve the integrity of your wooden surfaces while eliminating unwanted foam.
Understanding Spray Foam
Types of Spray Foam
Spray foam insulation comes in two main types: open-cell and closed-cell. Open-cell spray foam is lightweight and has a soft, sponge-like texture, making it ideal for interior applications where insulation and soundproofing are priorities.
It expands significantly upon application, filling gaps effectively, but is less moisture-resistant and has a lower R-value. In contrast, closed-cell spray foam is denser and provides a superior barrier against moisture, making it suitable for exterior applications. Its rigidity offers added structural support, but it tends to be more expensive and requires a more meticulous application.
Common scenarios where spray foam might contact wood surfaces include installing insulation in attics or walls and sealing gaps in roofing systems, where spray foam is used to prevent air leaks or water ingress.
Challenges in Removing Spray Foam
Due to its strong adhesive properties, removing spray foam can be particularly challenging. Once cured, the foam adheres firmly to the wood, making it difficult to extract without causing damage.
The risks associated with removal include pulling away wood fibers or leaving scratches on the surface, which can compromise the wood’s aesthetic and structural integrity. Understanding these challenges is crucial for successful removal.
Preparing for Removal
Gathering Necessary Tools and Materials
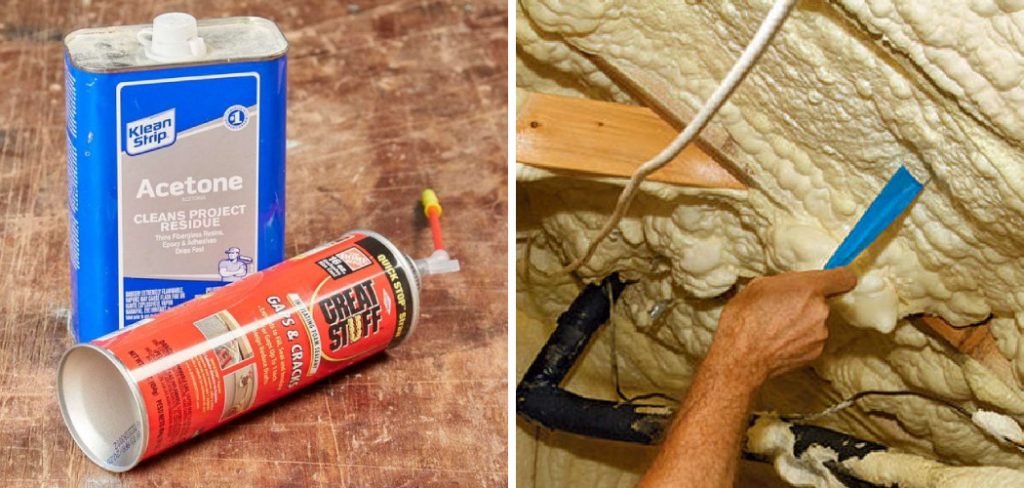
Before beginning the removal process, gathering all necessary tools and materials is essential. You will need protective gloves to shield your hands, safety goggles to protect your eyes and a plastic scraper for gentle removal.
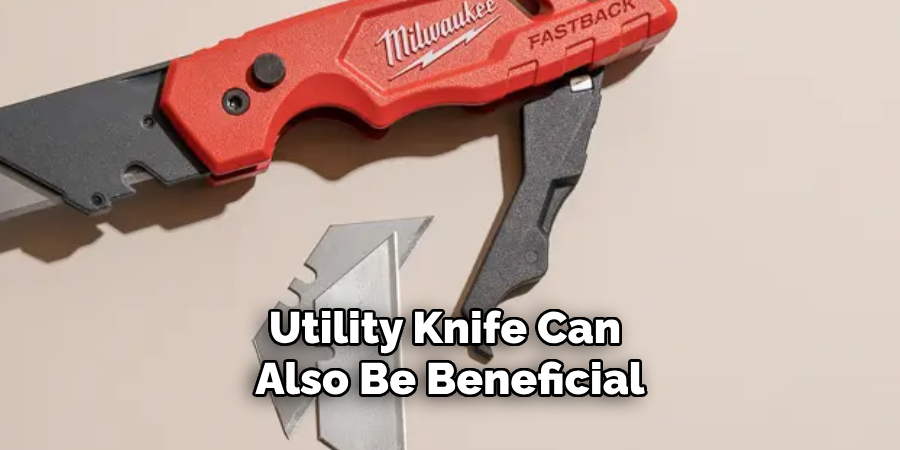
A utility knife can also be beneficial for cutting through tougher foam. Additionally, having the right solvents available—such as acetone or a commercial foam remover—is crucial for effectively breaking down cured foam. Ensure these materials are on hand to facilitate a smoother and safer removal experience.
Setting Up the Work Area
Creating a safe and conducive work environment is vital for effective removal. Start by ensuring proper ventilation, especially if you are using solvents, as fumes can be harmful. Open windows and, if possible, use fans to facilitate air circulation.
Additionally, protect surrounding surfaces by covering them with drop cloths or plastic sheeting to avoid any accidental damage from the solvents or foam. These precautions will help maintain a clean workspace and mitigate risks associated with solvent exposure, ensuring a more efficient removal process.
How to Remove Spray Foam from Wood: Manual Removal Methods
1. Removing Fresh Spray Foam
When dealing with fresh, uncured spray foam, acting quickly is key to successful removal. Start using a plastic scraper to gently scrape off any excess foam, ensuring you do this before it can harden.
Applying light pressure is important to avoid damaging the wood surface beneath. After removing the bulk of the foam, take a damp cloth and wipe away the residue. This will help ensure that you remove as much of the foam as possible before it can cure, significantly simplifying the removal process.
If any stubborn bits remain, dampening the cloth further can help loosen them, making for easier clean-up. Working swiftly to minimize the effort required in subsequent steps is crucial.
2. Removing Cured Spray Foam
Once spray foam has cured, it becomes considerably more challenging to remove. Begin by carefully cutting away any excess foam from the wood surface using a utility knife or a plastic scraper.
It’s imperative to work delicately, applying minimal pressure to avoid gouging or scratching the wood beneath. When scraping, aim to lift the foam away rather than digging into the wood, which can cause lasting damage.
After the bulk of the foam has been cut and removed, inspect the area for any remaining foam residue that may need further addressing. Some areas might require additional effort or more intricate tools to ensure the thorough and safe removal of all cured foam without sacrificing the integrity of the wooden surface.
3. Sanding and Buffing
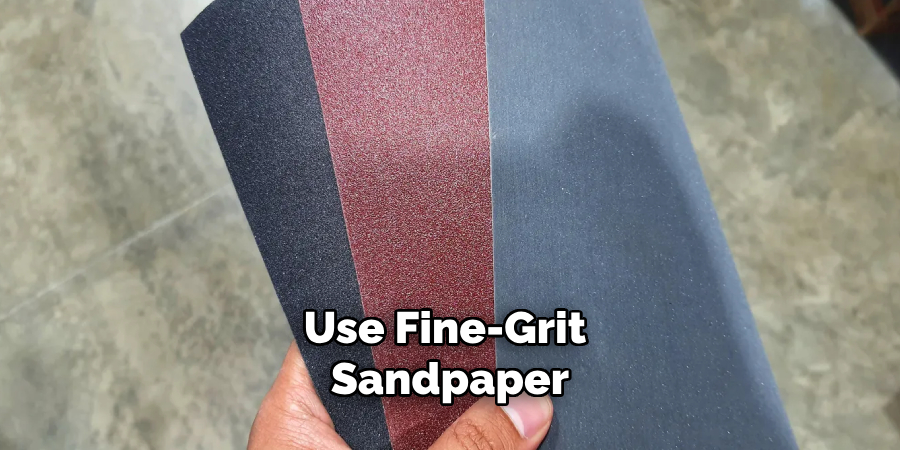
Once you have removed as much foam as possible, the next step involves sanding and buffing to restore the wood’s appearance. Use fine-grit sandpaper to gently smooth any remaining foam residue or uneven surfaces left after scraping.
Move toward the wood grain to achieve the best results and minimize the potential for scratching. It’s wise to start with lighter sanding, gradually increasing pressure as needed to remove any stubborn remnants without jeopardizing the wood’s surface.
After sanding, use a soft cloth to buff the area, which will help restore the wood’s natural shine and appearance. This step not only enhances the wood’s visual appeal but also helps blend the cleaned area with the rest of the surface, creating a seamless finish. Regular maintenance and care can keep your wood looking pristine for years.
Using Solvents and Chemical Removers
Selecting the Right Solvent
When it comes to removing cured spray foam, selecting the appropriate solvent is essential for effective results. Acetone is a popular choice due to its strong solvent properties and ability to break down polyurethane foam quickly. However, it can be harsh and may damage certain finishes, so caution is advised.
Alternatively, commercial foam removers are specifically formulated for this purpose and often contain a blend of solvents designed to soften spray foam without causing damage to surrounding materials.
Before proceeding, it’s advisable to test the chosen solvent on a small, inconspicuous area of the wood to ensure that it does not adversely affect the finish or structure. This preliminary test will help make an informed decision regarding the best product to use and minimize potential damage during removal.
Applying the Solvent
Once the right solvent has been chosen, the application process is critical for effective foam removal. Start by dabbing a small amount of the solvent onto a clean cloth or sponge, being mindful not to oversaturate it.
Carefully apply the solvent directly onto the areas of the foam, ensuring that it covers the affected surface without running off. Allow the solvent to penetrate the foam for several minutes; this will help to soften the material, making it easier to remove.
Be patient during this step, as allowing enough time for the solvent to work is key in breaking down the foam’s structure. If necessary, reapply the solvent in areas where the foam has not softened sufficiently, especially if opting for more stubborn commercial removers that might require additional dwell time for effectiveness.
Removing Solvent-Softened Foam
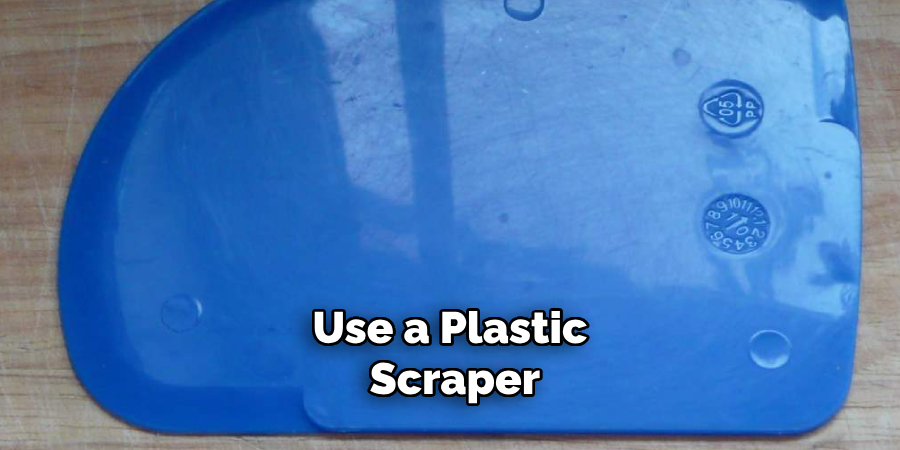
After allowing adequate time for the solvent to soften the foam, the next step is to carefully remove it. Use a plastic scraper to gently scrape away the softened foam, starting from the edges and working your way toward the center. This approach minimizes the risk of damaging the wood surface underneath.
Applying light pressure while scraping is crucial, as excessive force can gouge or scratch the wood. Once the majority of the foam has been removed, take a damp cloth to wipe the area clean of any remaining residue or solvent.
It’s important to ensure no solvent is left behind, as this can affect subsequent treatments or finishes applied to the wood. Finally, allow the cleaned area to dry completely before proceeding with any further restoration or maintenance tasks to preserve the integrity of the wood.
Cleaning and Restoring the Wood Surface
After successfully removing the cured spray foam and solvent-softened remnants, it’s essential to ensure that the wood surface is properly cleaned and restored. Start by using a mild wood cleaner to wipe down the area, targeting any remaining residue that may not have been cleared during the previous steps.
It’s important to follow the manufacturer’s instructions on the cleaner to avoid any adverse reactions with the wood. Once the surface is cleaned, rinse the area with a damp cloth to remove any cleaning solution traces and then dry thoroughly to prevent moisture-related issues.
Restoring the finish of the wood is the final touch in achieving a revitalized appearance. To bring back the wood’s natural luster, apply a quality wood polish or furniture oil, following the grain of the wood to ensure even coverage.
Allow the product to penetrate the surface as per the manufacturer’s recommendations for optimal results. After letting it sit, buff the surface gently with a soft cloth to achieve a smooth and polished finish. This enhances the aesthetic appeal and provides a protective layer, helping maintain the wood’s health and longevity for years to come.
Preventive Measures
Protecting Wood Surfaces
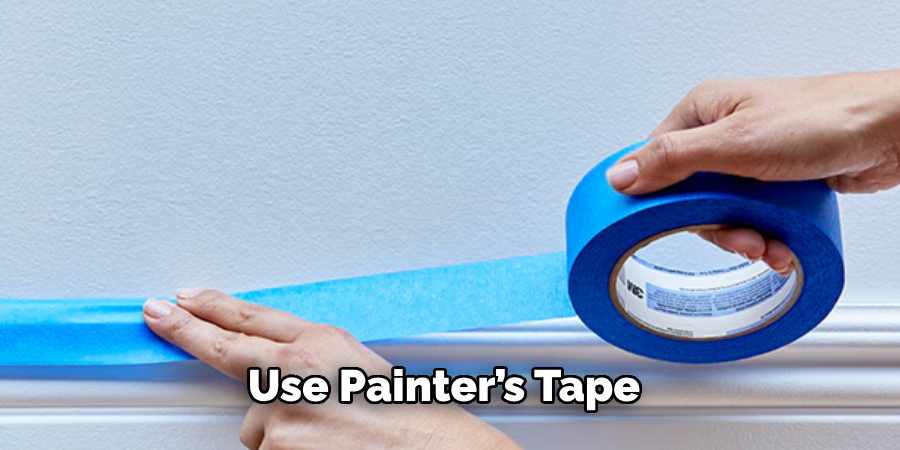
To protect wood surfaces from unwanted spray foam contact, it’s beneficial to use painter’s tape and plastic sheeting to create a barrier before application. Careful application techniques can further minimize the risk of overspray and ensure that the foam only adheres to designated areas.
Regular Maintenance
Periodically checking wood surfaces for foam buildup is crucial to preserving their integrity. Regular cleaning can prevent residues from accumulating, while promptly addressing any accidental foam contact allows for easier removal and helps maintain the wood’s aesthetic and structural quality.
Conclusion
In conclusion, carefully removing spray foam protects wood surfaces from potential damage. Understanding how to remove spray foam from wood involves a combination of methods, including manual scraping, applying solvent-based removers, and implementing effective preventive measures.
By meticulously selecting appropriate solvents and employing gentle scraping techniques, one can successfully eliminate foam while preserving the integrity of the wood.
Equally important is the commitment to regular maintenance and inspection, which can prevent build-up and facilitate easier removal in the future. Ultimately, following these best practices will help maintain the beauty and longevity of your wood surfaces, ensuring they remain a cherished part of your home for years.
About the Author
Adrian Green, a lifelong woodworking enthusiast, shares his passion for the craft through The Woodenify Blog. With a foundation built on years of hands-on experience in his father’s woodworking shop, Adrian is dedicated to helping others learn and grow in the world of DIY woodworking. His approach to woodworking combines creativity, practicality, and a deep appreciation for the art of building with your own hands. Through his blog, he inspires individuals of all skill levels to embark on their own woodworking journeys, creating beautiful, functional pieces of furniture and décor.
Professional Focus
- Specializes in DIY woodworking projects, from furniture to home décor.
- Provides step-by-step guides and practical tutorials for woodworkers of all skill levels.
- Dedicated to helping readers build confidence and skill through easy-to-follow instructions and tips.
- Passionate about fostering a community of makers who can share, learn, and grow together.
Education History
- University of Craft and Design – Bachelor of Fine Arts (BFA) in Woodworking and Furniture Design
- Woodworking Apprenticeships – Extensive hands-on training with skilled craftsmen to refine carpentry and furniture making techniques.
- Online Courses & Masterclasses – Continued education in advanced woodworking techniques, design principles, and specialized tools
Expertise:
- DIY woodworking, carpentry, furniture making, and home décor projects.
- Creating accessible tutorials and guides for beginner to advanced woodworkers.
- Sharing the joys and satisfaction of woodworking, from raw materials to finished products.