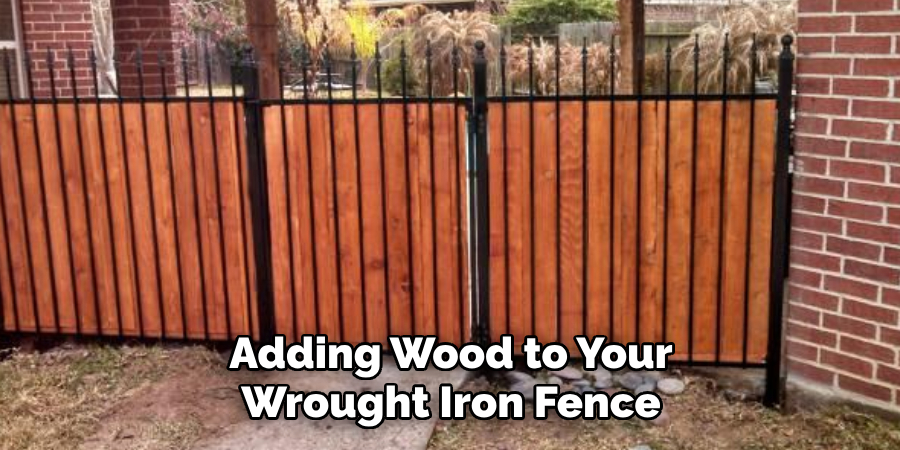
Are you tired of your boring wrought iron fence and want to spice it up with wood accents? Adding wood panels to a wrought iron fence is a great way to add warmth and texture while maintaining the metal’s durability.

Adding wood to a wrought iron fence can transform the look and feel of your property, blending the traditional elegance of iron with the warm, natural beauty of wood. This combination can provide enhanced privacy and a unique aesthetic appeal that sets your fence apart from the rest.
Whether you’re aiming to increase privacy, add a decorative touch, or simply experiment with materials, incorporating wood into your wrought iron fence is a project that offers both versatility and creativity.
In the following sections, we’ll guide you through the considerations on how to add wood to wrought iron fence.
What are the Benefits of Adding Wood to a Wrought Iron Fence?
There are several benefits to adding wood panels to your wrought iron fence, including:
- Enhanced Privacy: Adding wood panels increases the height and coverage of your fence, providing additional privacy for you and your property.
- Visual Appeal: Combining the sleek look of wrought iron with the natural warmth and texture of the wood can create a visually stunning fence that stands out from traditional all-metal or all-wood options.
- Durability: Wrought iron is known for its strength and durability, and when combined with wood panels, it can provide an even stronger and longer-lasting fence.
- Customization Options: Adding wood to a wrought iron fence allows for endless customization possibilities, including choosing the type, color, and style of wood panels to suit your personal taste and match your property’s design.
These are just a few of the many benefits of adding wood to your wrought iron fence. Now, let’s explore the steps to do it.
What Will You Need?
Before adding wood to your wrought iron fence, ensure you have all the necessary tools and materials on hand. These include:
- Wrought iron fence panels
- Wood panels or boards in desired dimensions
- Measuring tape
- Pencil or chalk
- Saw (hand saw or power saw)
- Drill and drill bits
- Screws designed for
Once you have all of these materials, you can begin the process of adding wood to your wrought iron fence.
10 Easy Steps on How to Add Wood to Wrought Iron Fence
Step 1: Measure and Mark
The first step is to measure your wrought iron fence panels and mark where the wood panels will be installed. Use a measuring tape to determine the dimensions of your iron panels and then transfer those measurements onto the wood panels using a pencil or chalk.
Step 2: Cut the Wood Panels
Once you have your measurements clearly marked on the wood panels, it’s time to cut them to fit your wrought iron fence. If you’re working with large panels, a power saw will make the job quicker and smoother, but a hand saw can also do the job if that’s what you have available. Make sure to wear protective gear, such as safety glasses and gloves, to avoid any accidents.
As you cut, follow the lines you’ve drawn carefully to ensure that each wood panel accurately fits the corresponding section of your wrought iron fence. This precision will be crucial for the next steps, ensuring a seamless blend between the two materials.
Step 3: Prepare the Surface
Before attaching the wood panels to the wrought iron fence, preparing the surface is important to ensure a strong, lasting bond. Start by cleaning the iron where the wood will be attached; remove any rust, dirt, or debris using a wire brush or sandpaper. If any areas are particularly rusty, consider applying a rust inhibitor to further protect the fence.
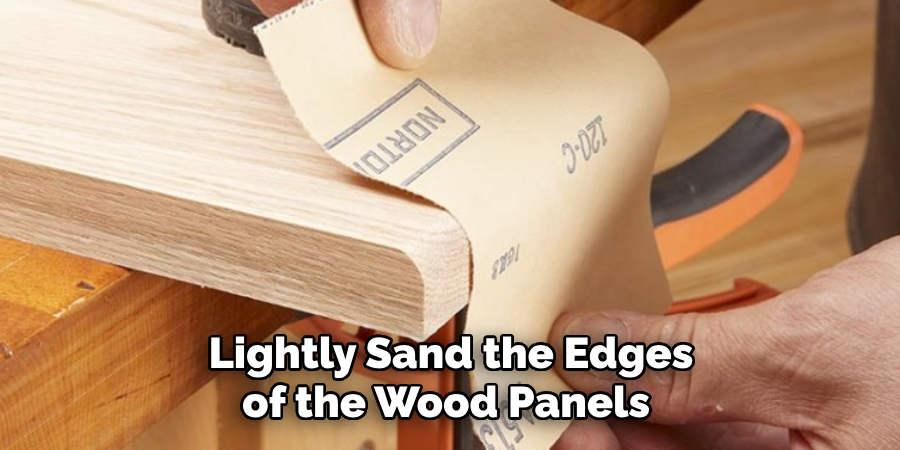
Once the iron surfaces are clean and dry, lightly sand the edges of the wood panels to remove any splinters or rough spots, preparing them for a smooth installation. This step is crucial for creating a finished look that appears professional and stands up to the elements over time.
Step 4: Drill Pilot Holes
Once your wood panels are cut to size and the iron and wood surfaces have been properly prepared, the next step is to drill pilot holes. Position the wood panels against the wrought iron fence where they will be installed. Using a pencil, mark the spots on the wood panels where screws will go through to secure them to the iron. Remove the wood and drill pilot holes at these marks.
Pilot holes prevent the wood from splitting when you insert the screws and make it easier to drive the screws into the hard metal. Choose a drill bit slightly smaller than the diameter of your screws for the best results. This step is essential for ensuring that the wood panels will be securely attached to the iron fence with minimal damage to the wood.
Step 5: Attach the Wood Panels to the Iron Fence
Now that you have drilled pilot holes in your wood panels, it’s time to securely attach them to your wrought iron fence. Align the wood panels with the pilot holes you’ve made in the iron and begin screwing them into place. Use screws that are long enough to go through the wood and into the iron but not so long that they protrude out the other side. It’s important to use screws designed for metal to ensure they can penetrate the iron fence without stripping.

Tighten each screw securely, but be careful not to over-tighten, as this could strip the holes or crack the wood. Repeat this process until all wood panels are securely attached to the fence, checking regularly to ensure each panel is properly aligned and securely fastened. This step not only enhances your fence’s privacy and aesthetic appeal but also significantly increases its structural integrity.
Step 6: Seal and Protect the Wood
After all the wood panels have been attached to the wrought iron fence, protecting them from the elements is important. Start by applying a coat of primer to all exposed wood surfaces. Once the primer has dried, apply at least two coats of outdoor paint or stain, depending on your preference and the look you’re aiming to achieve.
Be sure to choose products specifically designed for outdoor use to ensure they can withstand weather conditions and protect the wood for years to come. This sealing process not only enhances the visual appeal of your fence but also acts as a protective layer against moisture, UV rays, and potential pests, preserving the integrity and longevity of the wood.
Step 7: Regular Maintenance

Regular maintenance is essential to ensure your wood-adorned wrought iron fence remains in peak condition for years to come. Periodically inspect the wood and iron components for signs of wear, damage, or rust. Reapply a sealant or paint to the wood panels as needed to prevent moisture damage and keep the wood looking fresh and vibrant.
For the iron parts, touch up any areas where the finish has worn away to prevent rusting. Additionally, tightening any loose screws will help maintain the structural integrity of the fence. A little time spent on maintenance can greatly extend the life and beauty of your fence, ensuring it continues to enhance your property’s aesthetic and privacy.
Step 8: Add Decorative Elements
To further personalize your fence and add an extra layer of style, consider adding decorative elements to the wood panels. This can include mounting outdoor-safe art pieces, hanging planters, or installing solar-powered lights for nighttime ambiance.
When choosing decorations, ensure they are suitable for outdoor use and appropriately secured to withstand weather conditions. This step is about enhancing the visual appeal and creating a unique outdoor space that reflects your personal style and adds to the overall charm of your property.
Step 9: Enjoy Your Transformed Space
With the meticulously attached and decorated wood panels and the wrought iron fence boasting a fresh, personalized look, the final step is to step back and appreciate your handiwork. Your fence now provides enhanced privacy and security and serves as a feature piece in your outdoor space, reflecting your style and craftsmanship.
Enjoy the fruits of your labor with family and friends, and take pride in your property’s functional and aesthetic upgrade. Whether hosting gatherings, enjoying quiet moments in your garden, or simply admiring the view from your window, your updated fence is a testament to your dedication and flair for home improvement.
Step 10: Conduct a Final Inspection
After completing the installation and decoration of your wood-adorned wrought iron fence, conducting a final inspection is vital. Carefully examine each panel and screw to ensure everything is properly aligned and securely fastened. Check for any sharp edges on the wood or iron that may need sanding to avoid injuries. Review all decorative elements to confirm they are firmly attached and pose no safety risks.

This final walkthrough is your opportunity to address any minor issues and ensure your newly transformed space is safe, secure, and exactly as you envisioned. Addressing these details not only maximizes the enjoyment of your outdoor area but also helps maintain the longevity and beauty of your personalized fence.
By following these steps, you can easily and successfully adorn your wrought iron fence with wood panels, transforming it into a functional and visually appealing outdoor feature.
5 Additional Tips and Tricks
- Pre-treat Your Wood: Before attaching wood slats or panels to your wrought iron fence, it’s essential to pre-treat the wood with a protective coating. This not only enhances the wood’s durability against weathering but also helps preserve its aesthetic appeal over time.
- Choose the Right Type of Wood: When adding wood to your wrought iron fence, choosing the right type of wood that can withstand outdoor conditions is crucial. Cedar, redwood, and pressure-treated pine are popular outdoor fencing choices as they are resistant to rot and decay.
- Regular Maintenance is Key: Like any other outdoor structure, your wood and wrought iron fence requires regular maintenance to keep it in good condition. This includes cleaning, sanding, and reapplying protective coatings every few years to prevent rotting or rusting.
- Consider Using Decorative Accents: Adding decorative accents to your wood and wrought iron fence can enhance its overall appearance and make it stand out. These can include finials, post caps, or decorative scrolls that complement the fence’s design.
- Incorporate Lighting: Another way to add a unique touch to your wood and wrought iron fence is by incorporating lighting elements. This adds a decorative element and provides added security and visibility at night. For an eco-friendly and cost-effective option, you can opt for solar-powered lights or low-voltage LED lights.
With these additional tips and tricks, you can ensure that your wood or wrought iron fence serves its practical purpose and enhances your property’s aesthetic appeal.
5 Things You Should Avoid
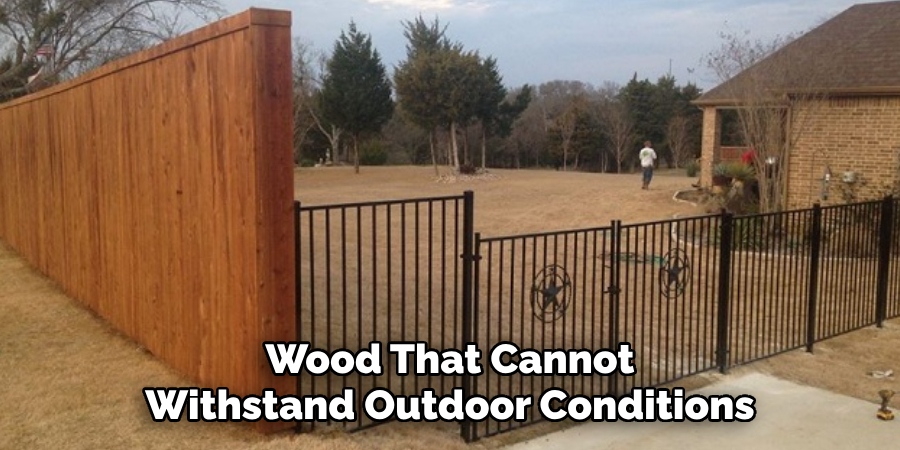
- Using Non-Weather-Resistant Wood: Choosing wood that cannot withstand outdoor conditions, like some types of hardwoods that rot easily, can lead to premature damage and require more frequent replacements.
- Ignoring Local Zoning Laws: Before modifying your fence, it’s important to check local zoning laws. Certain areas have specific regulations regarding fence heights, materials, and aesthetics.
- Skimping on Secure Attachments: Using inadequate fasteners or attachment methods can weaken the connection between the wood and wrought iron. This not only risks structural stability but can also pose safety hazards.
- Forgetting to Account for Wood Expansion: Wood tends to expand and contract with changes in moisture and temperature. Not accounting for this natural movement can cause the wood to warp, crack, or damage the iron framework.
- Neglecting Privacy Concerns: While adding wood slats can offer additional privacy, placing them too far apart or choosing a design that doesn’t adequately block visibility could defeat the purpose of enhancing your fence for privacy reasons.
By avoiding these common mistakes, you can ensure that your wood and wrought iron fence remains durable, functional, and aesthetically pleasing for years to come.
How Do You Turn a Wrought Iron Fence Into a Privacy Fence?
- Add Wood Slats: One of the most popular ways to turn a wrought iron fence into a privacy fence is by adding wood slats between the iron bars. This offers privacy and adds a touch of warmth and natural beauty to your fence.
- Use Decorative Screens or Panels: Another option is to install decorative screens or panels on the iron fence. These can be made of wood, metal, or other materials and come in various designs to add privacy and style to your fence.
- Grow Climbing Plants: You can also use nature to create a natural privacy screen for your wrought iron fence by planting climbing plants like ivy, clematis, or wisteria. These not only add greenery but also provide additional privacy as the plants grow and fill in the gaps.
- Install a Trellis: Adding a trellis panel to the top of your wrought iron fence can offer both privacy and an opportunity for vertical gardening. You can plant vines, flowers, or even herbs in pots on the trellis to add a touch of nature to your fence while creating a privacy barrier.
- Attach Outdoor Curtains: For a more temporary option, outdoor curtains can be attached to the wrought iron fence using clips or hooks. This provides privacy when needed and can easily be removed for a more open feel.
By incorporating one or a combination of these methods, you can transform your wrought iron fence into a private oasis while still maintaining its elegant and timeless look.
Is Wrought Iron Fence Cheaper Than Wood?
The cost of a wrought iron fence versus a wood fence can vary depending on many factors. Generally, wrought iron fences are more expensive than wood fences due to the materials used and the intricate designs often found in wrought iron fencing.
However, maintenance costs should also be considered when comparing prices. While a wood fence may have a lower initial cost, it will require regular maintenance, such as staining and sealing to prevent rotting and warping. Wrought iron fences, on the other hand, have a longer lifespan and require less maintenance.
Furthermore, the location and size of your property can also impact the overall cost. A wrought iron fence may be more cost-effective for larger properties as it requires fewer materials than a wood fence. Additionally, if you live in an area with harsh weather conditions, a wrought iron fence may be a more durable and cost-effective choice in the long run.

Ultimately, deciding between a wood or wrought iron fence will depend on your budget, aesthetic preferences, and maintenance capabilities. It’s important to weigh all these factors before making a decision to ensure you are getting the best value for your money.
Conclusion
In conclusion, blending wood with wrought iron to upgrade your fence not only enhances privacy and security but also elevates the aesthetic appeal of your outdoor space. This guide has outlined practical tips on how to add wood to wrought iron fence and strategies to avoid common pitfalls.
Whether you choose to insert wood slats, attach decorative screens, or cultivate climbing plants, each approach offers its unique charm and functionality. The key to a successful project lies in careful planning, selecting quality materials, and adhering to local zoning laws. By considering both the aesthetic and functional aspects and potential challenges, homeowners can effectively transform their wrought iron fences into beautiful, durable, and private barriers.
Remember, the ultimate goal is to create a fence that meets your needs and complements your home’s exterior, ensuring satisfaction for years to come.
About the Author
Adrian Green, a lifelong woodworking enthusiast, shares his passion for the craft through The Woodenify Blog. With a foundation built on years of hands-on experience in his father’s woodworking shop, Adrian is dedicated to helping others learn and grow in the world of DIY woodworking. His approach to woodworking combines creativity, practicality, and a deep appreciation for the art of building with your own hands. Through his blog, he inspires individuals of all skill levels to embark on their own woodworking journeys, creating beautiful, functional pieces of furniture and décor.
Professional Focus
- Specializes in DIY woodworking projects, from furniture to home décor.
- Provides step-by-step guides and practical tutorials for woodworkers of all skill levels.
- Dedicated to helping readers build confidence and skill through easy-to-follow instructions and tips.
- Passionate about fostering a community of makers who can share, learn, and grow together.
Education History
- University of Craft and Design – Bachelor of Fine Arts (BFA) in Woodworking and Furniture Design
- Woodworking Apprenticeships – Extensive hands-on training with skilled craftsmen to refine carpentry and furniture making techniques.
- Online Courses & Masterclasses – Continued education in advanced woodworking techniques, design principles, and specialized tools
Expertise:
- DIY woodworking, carpentry, furniture making, and home décor projects.
- Creating accessible tutorials and guides for beginner to advanced woodworkers.
- Sharing the joys and satisfaction of woodworking, from raw materials to finished products.