Bleaching stained wood serves a crucial purpose by effectively removing or lightening dark stains that can detract from the wood’s natural beauty.
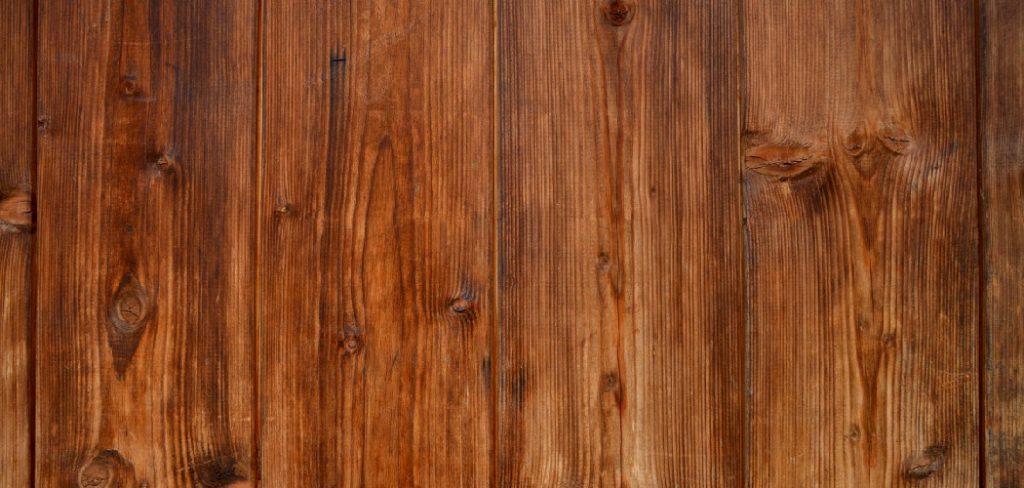
This process eliminates unsightly marks and refreshes and restores wood surfaces, allowing them to regain their original charm. Whether dealing with old furniture, cabinets, or floors, knowing how to bleach stained wood can be a valuable skill for DIY enthusiasts and homeowners alike.
This article provides a comprehensive step-by-step guide that outlines everything you need to know, from preparing your workspace and mixing the bleach solution to applying it properly and finishing the wood.
By following these instructions, you will be equipped to achieve successful results and enhance the aesthetic appeal of your wooden items.
Materials and Tools Needed
To successfully bleach stained wood, gather the following materials and tools:
Materials:
- Household bleach
- Water
- Mild detergent
- Neutralizing agent (such as white vinegar)
- Tools Required:
- Bucket
- Sponge or brush
- Rubber gloves
- Safety goggles
- Mask
- Drop cloth
Optional Materials:
- Sandpaper (fine grit)
- Wood conditioner
Preparing the Workspace
Setting Up the Area
Before beginning the bleaching process, ensure your workspace is adequately prepared for safety and efficiency.
Start by enhancing ventilation in the area, opening windows, and strategically positioning fans to circulate fresh air, which will help dissipate any bleach fumes that may arise. Use drop cloths or plastic sheeting to cover the surrounding surfaces, protecting them from potential splashes or spills of the bleach solution.
Always wear safety goggles, rubber gloves, and a mask to safeguard against both skin contact with bleach and inhalation of harmful vapors. This protective gear ensures a safe working environment as you tackle your wood bleaching project.
Preparing the Wood Surface
To achieve the best results, thoroughly prepare the wood surface prior to bleaching. Begin by cleaning the wood with a mild detergent solution, which helps remove dust, dirt, and any grease that may be present.
After washing, rinse the surface with clean water and allow it to dry completely. Once dry, lightly sand the wood using fine-grit sandpaper; this step is important as it removes any existing finish and effectively opens the wood grain, allowing for better absorption of the bleach solution.
How to Bleach Stained Wood: Mixing and Applying the Bleach Solution
Preparing the Bleach Solution
To effectively bleach stained wood, start by preparing your bleach solution. Mix household bleach with water in a clean bucket, typically using a 1:1 ratio. However, always check the manufacturer’s guidelines for specific recommendations; some products may suggest different mixtures.
Once the bleach and water are combined, stir the solution thoroughly to ensure an even blend. To test its efficacy and ensure no adverse reactions, apply a small amount of the solution to an inconspicuous area of the wood.
Observe any color changes to ensure they align with your expectations before proceeding to the full application.
Applying the Bleach Solution
Apply the prepared bleach solution generously and evenly across the stained wood surface using a sponge or brush.
It’s best to work in small sections to ensure that each area receives thorough coverage, which will help achieve uniform lightening of the wood. Pay attention to any areas where staining is particularly stubborn; these may require added solutions for effective bleaching.
Allow the bleach solution to sit on the wood for approximately 10-15 minutes, or follow the specific recommendations outlined in the product instructions, as the soaking time may vary based on the desired level of stain removal.
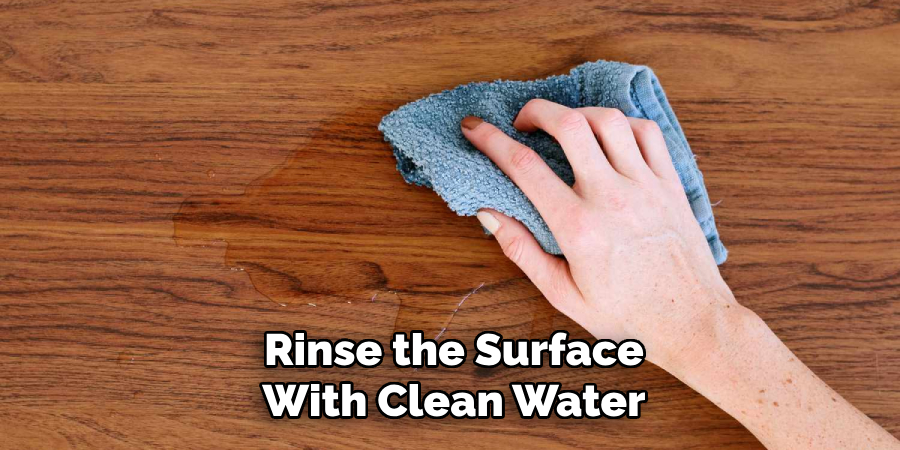
Rinsing and Neutralizing
Once the bleaching process is complete, it’s crucial to rinse the wood surface thoroughly with clean water to eliminate any residual bleach, which can harm the wood if left untreated.
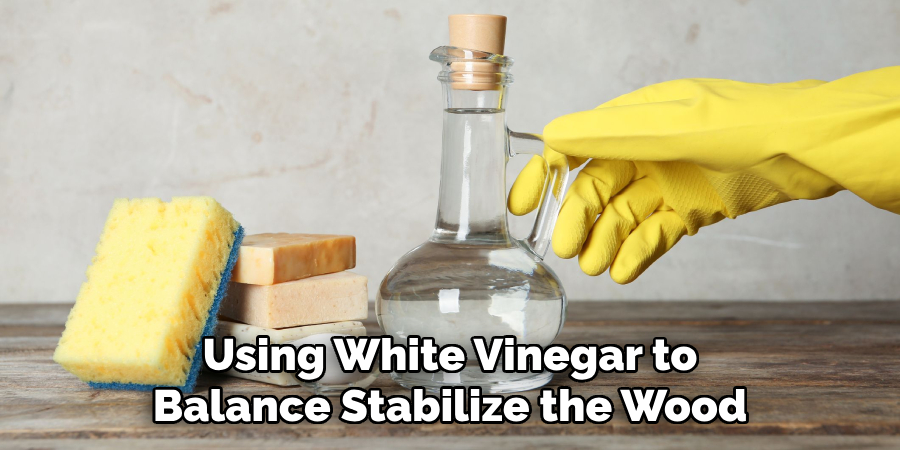
Follow the rinsing with a neutralizing agent, such as white vinegar or a commercial neutralizer, to counteract the effects of the bleach and stabilize the wood’s pH. Allow the wood to dry completely before inspecting the results, as this will give you a better idea of the final color and texture achieved.
After drying, assess whether further bleaching or additional steps are needed to perfect the wood surface.
Inspecting and Finishing the Wood

Inspecting the Wood
After the bleaching process is complete and the wood has dried, it’s essential to inspect the surface carefully. Check for evenness in color and examine how effectively the stains have been removed.
If certain areas appear darker or uneven, don’t hesitate to reapply the bleach to those spots, focusing on achieving additional lightening and uniformity throughout the entire surface. Ensure there are no streaks or uneven areas visible after drying, as these can detract from the overall appearance.
If needed, repeat the bleaching and neutralizing steps until satisfactory results are achieved, keeping in mind that patience and careful observation are key to perfecting your project.
Sanding and Smoothing
Once satisfied with the bleaching results, lightly sand the bleached wood using fine-grit sandpaper. This step is crucial in smoothing the surface and removing any raised grain or imperfections resulting from bleaching.
After sanding, be sure to wipe away all sanding dust with a clean, damp cloth to prepare the surface for finishing.
Take a moment to reassess the wood; if you notice areas that may benefit from additional bleaching or smoothing, address them before proceeding. This attention to detail will contribute to a more polished final product.
Applying a Finish
To enhance the appearance and longevity of the bleached wood, apply a suitable wood conditioner or protective finish. This final touch not only enriches the wood’s aesthetic but also provides essential protection against damage from UV rays, moisture, and everyday wear.
Using a brush or roller, ensure even coverage of the finish across the entire surface, following the grain of the wood for the best results. Allow the finish to dry completely, which may take several hours or as specified by the product instructions.
Selecting a finish that complements the bleached wood is crucial; consider using a clear varnish or polyurethane for added durability and a beautiful sheen that will maintain the fresh look of your project for years to come.
Troubleshooting Common Issues
Uneven Bleaching
If you encounter uneven bleaching, don’t worry; this can happen. To address this issue, reapply the bleach solution specifically to the darker areas, using an even application method.
A brush or sponge will help blend the solution more thoroughly, ensuring that the bleach penetrates uniformly. Work methodically in small sections, allowing the solution adequate time to act before evaluating the results again.
Bleach Residue or Chemical Smell

A common issue after bleaching is a lingering bleach residue or chemical smell. To resolve this, it is vital to rinse the wood surface thoroughly with clean water, ensuring that all bleach is removed.
If any odor persists, you may need to use a neutralizing agent such as white vinegar to stabilize the wood’s pH and effectively eliminate any residual bleach aroma. This step will help restore a fresh, clean scent to your freshly treated wood.
Maintenance and Care
Regular dusting and cleaning with a soft cloth are essential to ensure the longevity and beauty of bleached wood. This practice helps maintain its appearance without scratching the surface.
It’s crucial to avoid harsh chemicals or abrasive cleaners, as these can damage the finish and diminish the wood’s natural beauty. Additionally, reapplying a protective finish as needed, typically every few years or when signs of wear become apparent, will help preserve the wood’s appearance and protect it from environmental factors.
These simple steps will keep your bleached wood looking fresh and well-maintained for years to come.
Frequently Asked Questions
1. Can I Use Any Type of Bleach for Wood Bleaching?
While there are various types of bleach available, it is recommended to use sodium hypochlorite (household bleach) or a wood-specific bleaching product. Avoid using bleach-containing additives or fragrances, as they may affect the wood’s finish.
2. How Long Does the Bleaching Process Take?
The total time for bleaching wood can vary, but generally, you should allow about 10-15 minutes for the bleach to soak into the wood, plus additional time for rinsing, neutralizing, and drying. Overall, factor in several hours for the entire process and allow sufficient drying time before applying any finish.
3. Is It Necessary to Neutralize the Bleach After the Process?
Yes, neutralizing the bleach is essential to prevent any damage to the wood in the long term. Using a neutralizing agent like white vinegar helps balance the pH and stabilize the wood, ensuring it remains healthy and does not warp or discolor over time.
4. Can I Bleach Finished Wood Surfaces?
Bleaching can be done on finished wood, but keep in mind that it may not yield the desired results, as the finish can act as a barrier. Removing the finish before bleaching is often best, allowing the bleach to penetrate the wood more effectively.
5. What Should I Do if The Wood Doesn’t Lighten as Expected?
If the wood doesn’t lighten as anticipated, additional applications of the bleach solution may be required. To achieve the desired level of lightening, ensure even coverage, focus on stubborn areas, and allow adequate soak time. Patience and careful observation are crucial in this process.
Conclusion
In summary, effectively bleaching stained wood involves preparing a bleach solution, applying it evenly, rinsing and neutralizing the surface, inspecting for color uniformity, sanding, and applying a protective finish.
Each step is crucial for restoring and refreshing wood surfaces, enhancing their natural beauty, and prolonging their life. how to bleach stained wood.
Don’t hesitate to experiment with different bleaching techniques to find what works best for your specific project, ensuring your wood maintains its charm and durability for years to come.
About the Author
Adrian Green, a lifelong woodworking enthusiast, shares his passion for the craft through The Woodenify Blog. With a foundation built on years of hands-on experience in his father’s woodworking shop, Adrian is dedicated to helping others learn and grow in the world of DIY woodworking. His approach to woodworking combines creativity, practicality, and a deep appreciation for the art of building with your own hands. Through his blog, he inspires individuals of all skill levels to embark on their own woodworking journeys, creating beautiful, functional pieces of furniture and décor.
Professional Focus
- Specializes in DIY woodworking projects, from furniture to home décor.
- Provides step-by-step guides and practical tutorials for woodworkers of all skill levels.
- Dedicated to helping readers build confidence and skill through easy-to-follow instructions and tips.
- Passionate about fostering a community of makers who can share, learn, and grow together.
Education History
- University of Craft and Design – Bachelor of Fine Arts (BFA) in Woodworking and Furniture Design
- Woodworking Apprenticeships – Extensive hands-on training with skilled craftsmen to refine carpentry and furniture making techniques.
- Online Courses & Masterclasses – Continued education in advanced woodworking techniques, design principles, and specialized tools
Expertise:
- DIY woodworking, carpentry, furniture making, and home décor projects.
- Creating accessible tutorials and guides for beginner to advanced woodworkers.
- Sharing the joys and satisfaction of woodworking, from raw materials to finished products.