Are you tired of having to go inside every time you want a cold drink while working on your car in the garage? Or do you wish you had a space to entertain friends and family while still being able to work on your projects?
Transforming your garage into a bar offers a fantastic way to create a personal retreat or an entertainment space where friends and family can gather. The process marries creativity with practicality, allowing you to design a cozy, welcoming area that reflects your personal style and meets your entertainment needs. From selecting the right theme and materials to considering the essentials like lighting, seating, and beverage storage, building a garage bar requires careful planning and execution.
This guide will walk you through the steps on how to build a garage bar, ensuring your garage bar becomes the go-to spot for relaxation and social gatherings.
What are the Benefits of a Garage Bar?
Before diving into the steps for building a garage bar, let’s first explore some of its benefits.
- Personal Retreat: A garage bar provides you with a dedicated space to unwind and relax after a long day. You can customize the design to match your taste and create an atmosphere that helps you de-stress.
- Entertainment Space: A garage bar is a perfect spot for hosting parties and gatherings with friends and family. With your car projects as a backdrop, it creates a unique and fun atmosphere for social events.
- Cost-Effective: Building a garage bar can be more cost-effective than renovating an entire room in your house. As long as your garage has the necessary space and structure, you can transform it into a bar without breaking the bank.
- Multifunctional: With a garage bar, you get the best of both worlds – a functional space for working on your car projects and an entertaining space for hosting guests. It allows you to maximize the use of your garage while also fulfilling your personal needs.

These are just a few of the benefits a garage bar offers, but there are many more depending on your specific needs and preferences.
What Will You Need?
Before you start building your garage bar, gathering all the necessary materials and tools is essential. Here’s a list of some items you may need:
- Building materials such as lumber, drywall, insulation, and paint
- Bar counter or table
- Shelves for storing glasses and bottles
- Mini-fridge or cooler for keeping beverages cold
- Lighting fixtures and wiring
- Bar stools or chairs for seating
- Decorative items like signs, posters, and neon lights to add personality
Remember that your specific needs may vary depending on the size of your garage, budget, and design preferences.
10 Easy Steps on How to Build a Garage Bar
Step 1: Plan and Design
Planning and designing the layout is the first step in building a garage bar. Consider the size of your garage, existing structure, and any necessary permits for building. Take precise measurements to ensure that everything fits perfectly in your space.
Think about the theme you want for your bar – rustic, modern, industrial, or something else. This will help you determine the overall design and choice of materials.

Step 2: Prepare the Space
The next crucial step is to prepare your garage space for the transformation. Start by clearing out any clutter or items that won’t be part of your bar area. This includes tools, car parts, and anything else that doesn’t fit with your vision for the space.
Once cleared, thoroughly clean the garage, paying special attention to the floors and walls. If your garage is used for working on vehicles, you may need to degrease the floor and fix any significant cracks or damages to ensure a solid foundation for your bar.
Next, evaluate the condition of your garage. Look for issues such as leaks, insulation problems, or inadequate ventilation. Fixing these issues before you start the construction and decoration of your bar is critical for creating a comfortable and safe environment.
If you’re planning any major structural changes, such as adding windows, doors, or walls, now is the time to address these as well. Be mindful of the local building codes and, if necessary, obtain the proper permits to ensure your project complies with the regulations.
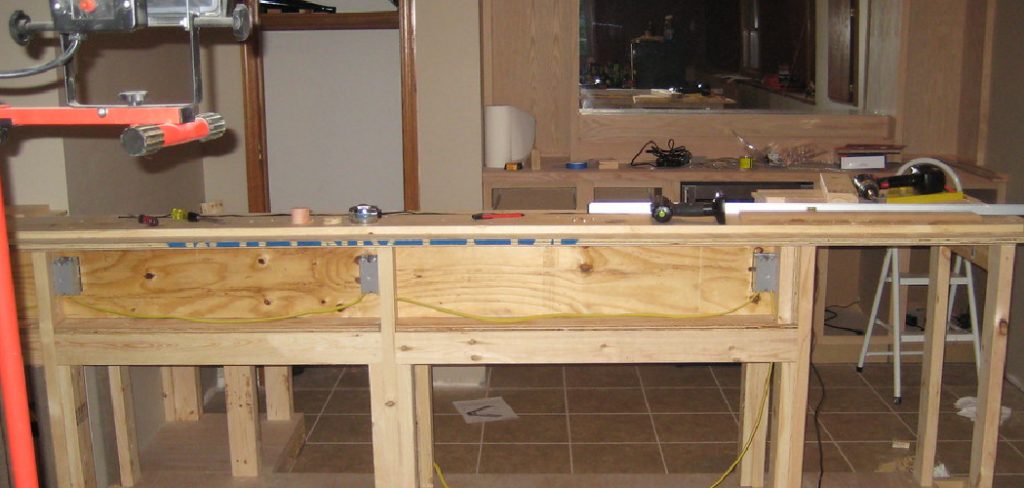
Step 3: Install Insulation and Drywall
Once your space is prepared, the next step is to install insulation and drywall if your garage still needs to be fitted with it. Insulation is vital for making your garage bar comfortable year-round, keeping it warm in the winter and cool in the summer. Measure your walls accurately and cut the insulation to fit before securing it in place. After insulating, hang the drywall.
This process may require a helping hand or professional assistance, especially for fitting large panels and ensuring they are properly aligned. Once the drywall is installed, be sure to finish it with tape and joint compound for a smooth surface, ready for painting or wallpaper. Proper insulation and drywall installation are keys to transforming your raw garage into a cozy, inviting bar area.
Step 4: Flooring
Choosing the right flooring for your garage bar is essential for both aesthetics and functionality. You want a floor that not only complements the design theme of your bar but is also durable and easy to clean. Epoxy flooring is a popular choice for garage bars because of its resistance to stains, spills, and heavy foot traffic. It also comes in various colors and finishes, allowing you to customize the look to match your theme.
Alternatively, you can consider installing vinyl flooring or interlocking floor tiles for a quicker and sometimes more budget-friendly option. Before laying down any flooring, ensure the subfloor is clean, even, and free of any cracks or damage. If you’re uncomfortable doing this yourself, hiring a professional can ensure the job is done right.

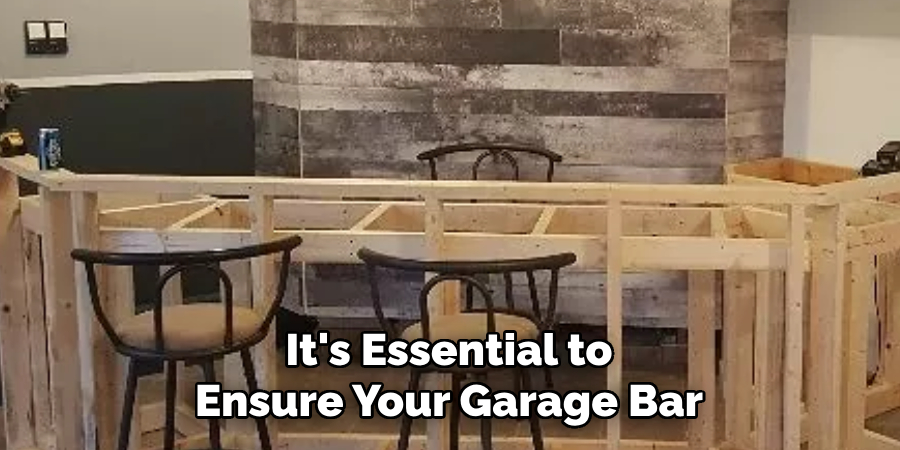
Step 5: Setting Up the Bar Counter
The centerpiece of your garage bar is, without a doubt, the bar counter. This is where you’ll mix drinks, serve guests, and display your collection of spirits and glassware. When choosing the style and materials for your bar counter, consider the overall theme of your bar. A wooden bar counter can add a warm, classic feel, perfect for a rustic or traditional theme, while a sleek metal or concrete counter might suit a more modern, industrial vibe.
You can build the bar counter from scratch, customize its dimensions to fit your space perfectly or repurpose an existing piece of furniture to serve as your counter. Whichever route you choose, ensure your bar counter has enough space for a sink (if you plan to install one), a preparation area, and storage for bottles and bar tools. Adding a high-quality finish to the counter will not only protect it but also enhance the look of your bar. Consider adding bar railings and a footrest for added comfort and authenticity.
Step 6: Add Lighting and Electrical Outlets
Proper lighting is crucial for creating the right ambiance in your garage bar. Consider installing a combination of overhead lighting, task lighting over the bar counter, and accent lights to highlight shelves or decorations. LED strip lights can be an excellent option for adding a modern touch and can be placed under the bar counter or shelves for dramatic effect.
Additionally, ensure you have enough electrical outlets for appliances such as a mini-fridge, blender, or sound system. Planning your electrical needs in advance will ensure that you have all the necessary power sources for your bar’s operation. Hiring a professional electrician to help with wiring and outlets is advisable to ensure everything is up to code and safely installed.
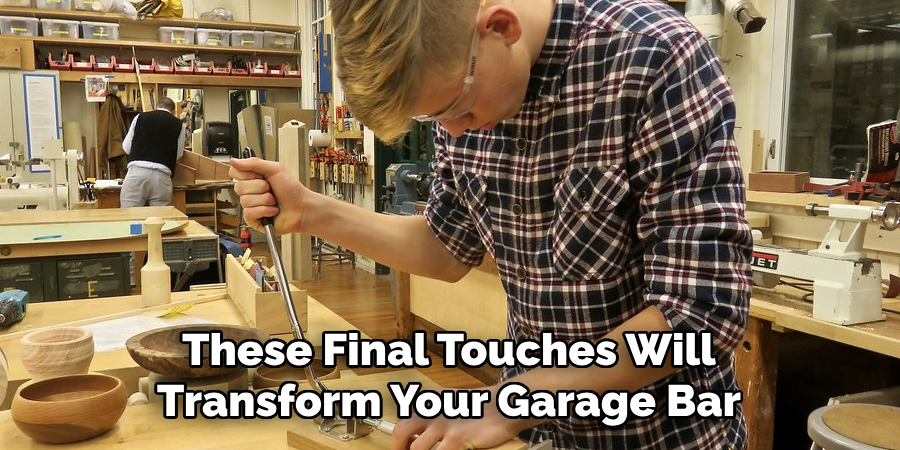
Step 7: Decor and Accessories
The final touch to your garage bar involves choosing the right decor and accessories to bring your theme to life. Whether your bar has a classic, vintage, sports, or any other theme, select pieces that reflect your interests and enhance the atmosphere. Consider adding wall art, neon signs, vintage posters, or sports memorabilia to fill the space with personality.

Functional accessories like a dartboard, pool table, or music system can provide entertainment for your guests. Don’t forget about seating – opt for comfortable bar stools or chairs that match the style of your bar. Lastly, accessorize your counter with quality glassware, unique bottle openers, and any other bar tools that will make serving drinks a breeze. These final touches will transform your garage bar from a simple drinking area into a cozy, inviting space where friends and family will love to gather.
Step 8: Stock Your Bar
The final but most exciting step in creating your dream garage bar is stocking it with various beverages. Don’t forget to include mixers such as tonic water, cola, fruit juices, and essential garnishes like lemons, limes, and olives.
Additionally, having a selection of non-alcoholic options is important to cater to all your guests’ preferences. This might include soft drinks, flavored waters, and non-alcoholic versions of popular spirits. Remember, the key to a well-stocked bar is variety and quality – choose products that you and your guests will enjoy. Once your bar is fully stocked, you’re ready to host gatherings that are sure to be remembered for their warmth, hospitality, and of course, fantastic drinks!
Step 9: Organize Regular Maintenance and Cleaning
After you’ve built and stocked your dream garage bar, organizing regular maintenance and cleaning schedules is the final step to ensure its longevity and maintain its welcoming atmosphere. This includes periodic checks and maintenance of appliances, plumbing for your sink (if installed), and ensuring electrical systems function safely.
Regular cleaning of the bar surface, flooring, and glassware will keep your space inviting and hygienic for every use. Additionally, consider a schedule for restocking your bar essentials and performing a deep clean every few months to keep everything in pristine condition. Keeping your garage bar well-maintained will make it a favorite spot for gatherings for years to come.
Step 10: Enjoy Your Garage Bar
With your garage bar now fully designed, built, and stocked, the final step is simply to enjoy it. Invite friends and family over for gatherings, celebrations, or a casual evening drink. Your garage bar is not just a place to serve drinks; it’s a personal retreat and a social hub for creating memorable moments.
Mixing different cocktails, hosting themed nights, or enjoying a quiet evening in your newly created space. The effort you’ve put into creating this bar will pay off in countless hours of enjoyment, making it a cherished addition to your home. Remember, the true value of your garage bar lies in the warmth and joy it brings to you and your guests.
By following these steps and adding your personal touch to the design, you can create a one-of-a-kind garage bar that reflects your style, interests, and personality.
5 Additional Tips and Tricks
- Maximize Space with Smart Shelving: Installing versatile shelving units can drastically improve storage and display options. Opt for floating shelves to showcase spirits and glassware while utilizing lockable cabinets for expensive liquors and equipment.
- Incorporate a Theme: Choose a theme that reflects your personal style or interests to create a unique atmosphere. Whether it’s vintage, sports, tiki, or industrial, a cohesive theme can transform your garage bar into a memorable escape for you and your guests.
- Invest in Quality Lighting: Lighting can make or break the ambiance of any space, and a garage bar is no exception. Consider installing dimmable lights to set the mood and highlight certain areas, such as the bar counter or shelves. Adding string lights or neon signs can also add a fun touch to your theme.
- Get Creative with Bar Seating: Don’t limit yourself to traditional bar stools for seating. Get creative with options such as repurposed car seats, tractor stools, or even old toolboxes turned into seating. This adds a unique touch to your garage bar and can also be a conversation starter.
- Utilize Wall Space for Storage: When it comes to storage, don’t forget about the walls. Install hooks or pegboards to hang tools and equipment, or add shelves to display your favorite glasses and mugs. This not only maximizes space but also adds a personalized touch to your garage bar design.

With these additional tips and tricks, you can take your garage bar to the next level and create a one-of-a-kind space that reflects your personality and style.
5 Things You Should Avoid When Building a Garage Bar
- Neglecting Ventilation: A well-ventilated space is crucial for comfort and safety, especially if you plan on smoking cigars or frying food. Overlooking ventilation can lead to smoke and odors lingering in your garage bar, making it an unpleasant environment for you and your guests.
- Underestimating Electrical Needs: It’s essential to ensure your garage bar has adequate electrical outlets and power for appliances, lighting, and electronics. Failing to plan for electrical needs can limit your ability to use blenders, refrigerators, and sound systems, hindering the overall functionality of the bar.
- Skimping on Insulation and Climate Control: Proper insulation and climate control are vital for a garage bar. Without them, the space can become too hot in the summer and too cold in the winter, making it unusable for large portions of the year.
- Ignoring Local Laws and Regulations: Before starting your garage bar project, check local zoning laws, building codes, and regulations regarding serving alcohol. Ignoring these can lead to fines or legal issues, dampening your bar project.
- Overlooking Safety Measures: Safety should be a top priority in your garage bar design. This includes installing non-slip flooring, ensuring all electrical work is up to code, and keeping fire extinguishers and first aid kits readily accessible. Overlooking these safety measures can put you and your guests at risk.
By avoiding these common pitfalls, you can ensure that your garage bar is a safe and enjoyable space for all who visit.
What Type of Accessories Should You Consider for Your Garage Bar?
- Bar Tools and Equipment: No bar is complete without the necessary tools and equipment, such as shakers, strainers, jiggers, and bottle openers. These can be displayed on your shelves or stored in a designated drawer or cabinet.
- Glassware: Having the right glassware is essential for serving different types of drinks. Consider investing in a variety of glasses, including rocks glasses, highball glasses, and stemware for cocktails and wine.
- Decorative Accents: Adding decorative accents, such as wall art, neon signs, or themed memorabilia, can enhance the atmosphere of your garage bar. These accessories can also serve as conversation starters and add a personal touch to the space.
- Bar Necessities: Don’t forget about the essentials, such as napkins, coasters, and a garbage bin. These may seem small, but they contribute to the overall functionality and cleanliness of your garage bar.
- Furniture and Seating: Depending on the size of your garage bar, you may want to invest in comfortable seating options, such as bar stools, chairs, or even a couch. Having enough seating allows for more guests to enjoy your space comfortably.
By considering these accessories, you can create a well-equipped and visually appealing garage bar that is both functional and enjoyable for all who visit.
Conclusion
How to build a garage bar is not just about creating a space to enjoy drinks; it’s about crafting a personal retreat that reflects your style and caters to your entertaining needs. From selecting a theme that resonates with your interests to ensuring the space is well-lit and comfortable, each decision contributes to the overall experience.
By maximizing space with smart shelving, investing in quality lighting, and getting creative with seating, you transform your garage into a unique and inviting spot for gatherings. However, avoiding common pitfalls such as neglecting ventilation, underestimating electrical needs, and overlooking safety measures is crucial. Incorporating the right accessories, from essential bar tools to decorative accents, further enhances the functionality and ambiance.
Building a garage bar is a rewarding project that offers a bespoke escape within your home, where memories are made and shared. Whether you’re a DIY novice or a seasoned craftsman, following these guidelines will help you establish a garage bar that stands out for its comfort, style, and welcoming atmosphere.
About the Author
Adrian Green, a lifelong woodworking enthusiast, shares his passion for the craft through The Woodenify Blog. With a foundation built on years of hands-on experience in his father’s woodworking shop, Adrian is dedicated to helping others learn and grow in the world of DIY woodworking. His approach to woodworking combines creativity, practicality, and a deep appreciation for the art of building with your own hands. Through his blog, he inspires individuals of all skill levels to embark on their own woodworking journeys, creating beautiful, functional pieces of furniture and décor.
Professional Focus
- Specializes in DIY woodworking projects, from furniture to home décor.
- Provides step-by-step guides and practical tutorials for woodworkers of all skill levels.
- Dedicated to helping readers build confidence and skill through easy-to-follow instructions and tips.
- Passionate about fostering a community of makers who can share, learn, and grow together.
Education History
- University of Craft and Design – Bachelor of Fine Arts (BFA) in Woodworking and Furniture Design
- Woodworking Apprenticeships – Extensive hands-on training with skilled craftsmen to refine carpentry and furniture making techniques.
- Online Courses & Masterclasses – Continued education in advanced woodworking techniques, design principles, and specialized tools
Expertise:
- DIY woodworking, carpentry, furniture making, and home décor projects.
- Creating accessible tutorials and guides for beginner to advanced woodworkers.
- Sharing the joys and satisfaction of woodworking, from raw materials to finished products.