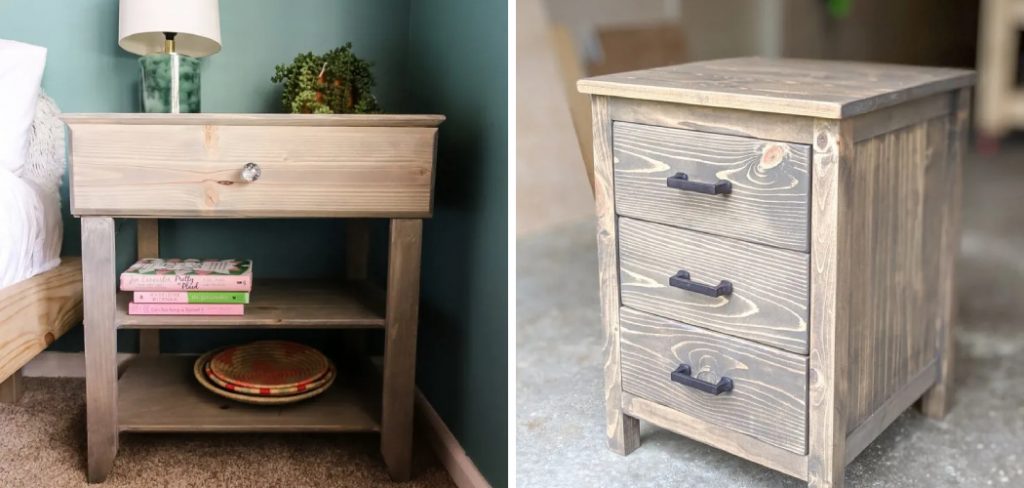
A nightstand plays a crucial role in enhancing the organization and decor of a bedroom, serving as a convenient surface for lamps, alarm clocks, and personal items. Its design can reflect individual style while ensuring that essential items are within easy reach. Building your own nightstand offers numerous benefits, including the ability to customize the design to fit your specific needs and preferences, alongside the cost-effectiveness of creating quality furniture without the hefty price tag.
This project will guide you through the essential steps of how to build a nightstand with a drawer, from selecting the right materials and tools to the assembly and finishing touches. By the end of this guide, you will be equipped not only with a beautiful piece of furniture but also with the satisfaction that comes from completing a DIY project tailored just for you.
Materials and Tools Needed
Materials
To successfully build your nightstand with a drawer, gather the following necessary materials: high-quality plywood or hardwood, drawer slides for smooth functionality, screws and wood glue for strong assembly, a drawer pull for easy access, and nails to reinforce connections. Optional materials include paint, stain, or sealant to finish and protect the wood, allowing you to customise the appearance of your nightstand to match your décor.
Tools
Having the right tools on hand is essential for this project. You will need a saw for cutting the wood, a drill for creating holes, and a measuring tape to ensure accuracy. Clamps will help hold pieces together while you assemble, and a sander will smooth surfaces for a polished look. Additional tools include a screwdriver, a hammer, a square for measuring right angles, and a nail gun (optional) for quicker assembly. Always remember to wear safety equipment such as goggles and gloves to protect yourself during the process.
Planning and Design
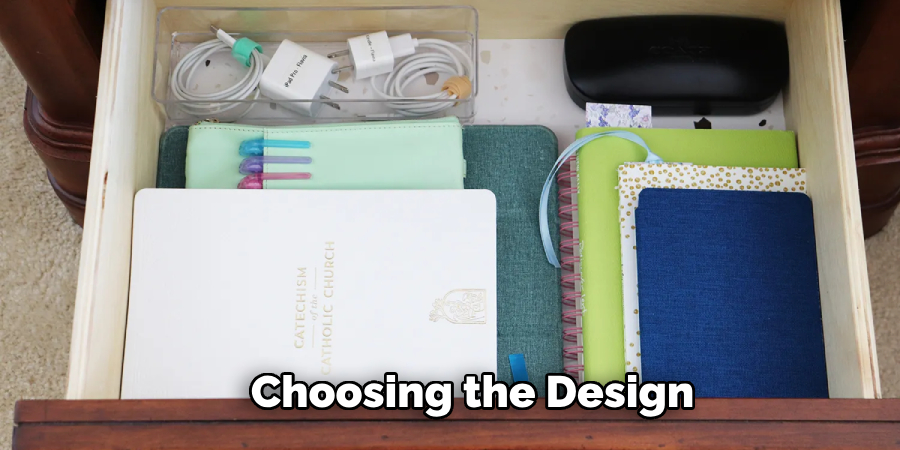
Choosing the Design and Size
When planning your nightstand, begin by considering the overall dimensions that will best suit your space and needs. Typical nightstand height is around 24 to 30 inches, allowing easy access from the bed. The width and depth should accommodate essential items without overpowering the room. Sketching a design will help visualise the nightstand, including the positioning of the drawer and any additional features such as shelves or decorative elements. Be sure to factor in the style of your bedroom decor, whether it’s modern, rustic, or traditional, to ensure cohesion in your design.
Creating a Detailed Plan
Once you have settled on a design, create a detailed plan that includes a cut list with precise measurements for all parts of the nightstand. This should encompass the top, sides, bottom, back, and drawer components, taking into account any wood thickness that may affect measurements. Additionally, plan the drawer dimensions and positioning within the nightstand to ensure smooth functionality. Establishing a well-defined plan at this stage will streamline the building process and minimise errors during construction.
How to Build a Nightstand with A Drawer: Cutting and Preparing the Lumber
Selecting and Cutting Lumber
Choosing the right lumber is crucial for building a sturdy nightstand that lasts. Opt for high-quality plywood or hardwood, which not only ensures durability but also enhances the overall aesthetic of your project. Begin by measuring and marking the dimensions needed for each component, including the top, sides, bottom, back, and drawer parts. Using a power saw, carefully cut each piece according to your detailed plan, ensuring that all cuts are straight and precise for a seamless assembly later on.
Sanding and Smoothing
After cutting the lumber, it’s important to sand each piece to eliminate any rough edges and splinters. Begin with a coarser grit sandpaper to address the more significant imperfections, followed by a finer grit for a smooth finish. This step not only prepares the surfaces for better adhesion during assembly but also ensures that the final finish adheres properly. Smooth surfaces will contribute to a more visually pleasing final product and make it easier to apply paint, stain, or sealant later.
Drilling Pilot Holes
To prevent the wood from splitting during assembly, marking and drilling pilot holes is essential. Use a measuring tape to determine where screws will go, then mark each location clearly. Carefully drill pilot holes at these marked spots, ensuring the holes are straight and not too wide, as this can affect the strength of the joint. This preparation step will enable a smoother assembly process, contributing to the overall durability and integrity of your nightstand. Properly drilled pilot holes also help in aligning the screws, leading to a neater and more professional-looking result.

How to Build a Nightstand with A Drawer: Assembling the Nightstand Frame
Building the Main Structure
To start building the main structure of your nightstand, take the pre-cut pieces for the sides, top, and bottom. Lay the side panels on a flat surface, ensuring they are positioned vertically. Apply wood glue along the edge of the bottom panel before carefully aligning it between the side panels. Use screws to secure the bottom to the sides, inserting pilot holes to avoid splitting the wood.
Next, position the top panel and repeat the process by applying glue and screwing it to the top edges of the side panels. To ensure the frame is square and level, measure across the diagonals from corner to corner; both measurements should be equal. If not, make the necessary adjustments before the glue dries completely. Once square, allow the frame to cure for at least an hour or as per the glue manufacturer’s instructions.
Adding the Back Panel
With the frame constructed, it’s time to strengthen the structure by adding the back panel. Take the pre-cut back panel and align it flush with the edges of the frame. Apply wood glue around the perimeter where the back meets the side, top, and bottom panels. Use screws to attach the back panel securely, placing them every few inches to reinforce stability.
This additional support prevents any wobbling and adds rigidity to your nightstand. After securing the back panel, inspect the structure to ensure it remains square. If necessary, use clamps to hold everything in place while the glue sets, reinforcing the joint’s strength and creating a sturdy foundation for your project.
Constructing and Attaching the Legs
The next step involves cutting and attaching the legs to the bottom of the frame. Using the remaining lumber, cut four pieces to your desired leg length, keeping in mind the overall height of the nightstand. Once cut, sand the edges smoothly for a polished finish. To attach the legs, position each leg at the corners of the bottom frame, ensuring they are perpendicular to the structure.
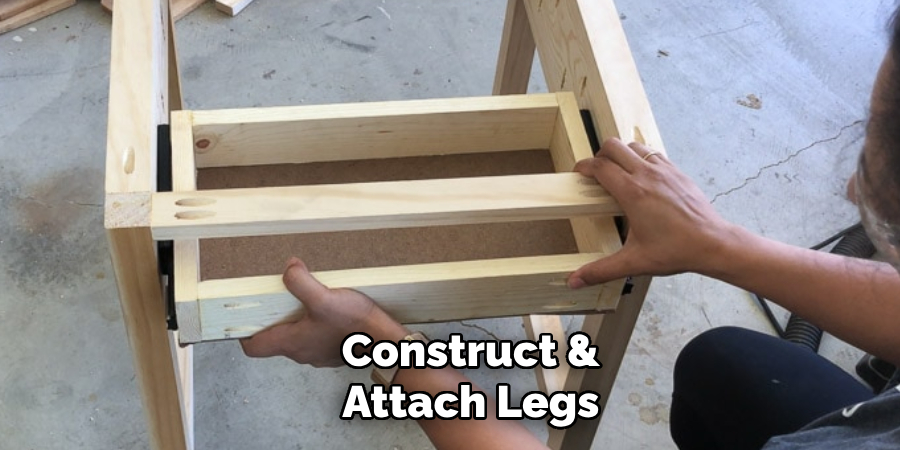
Apply wood glue to the top of each leg before securing them with screws through the bottom of the frame into the legs, using pilot holes for precision. Verify that each leg is even by measuring from the bottom of the frame to the ground. If adjustments are necessary, use small blocks of wood under uneven legs until the nightstand stands level. Finally, double-check all connections for tightness and stability before proceeding to the finishing touches.
Building and Installing the Drawer
Constructing the Drawer Box
To start constructing the drawer box, gather the pre-cut pieces for the sides, front, back, and bottom. Begin by laying the side pieces flat on a workspace and arranging the front and back panels between them. Apply wood glue to the edges where the sides meet the front and back, then ensure everything is square by checking that the corners form right angles.
Once aligned, reinforce these joints with screws, using pilot holes to prevent splitting. After the box is assembled, take the bottom panel and insert it into the groove, applying glue along the edges before securing it with nails or screws. This added layer will provide the necessary support and maintain the square shape of the drawer box. Allow the glue to cure thoroughly before proceeding to the next steps.
Installing Drawer Slides
With the drawer box complete, the next phase involves installing the drawer slides. Start by selecting appropriate slides based on the weight capacity required for your nightstand drawer. Attach one half of the slide mechanism to each side of the drawer box. It is crucial to ensure they are level and positioned correctly so that the drawer can slide in and out smoothly.
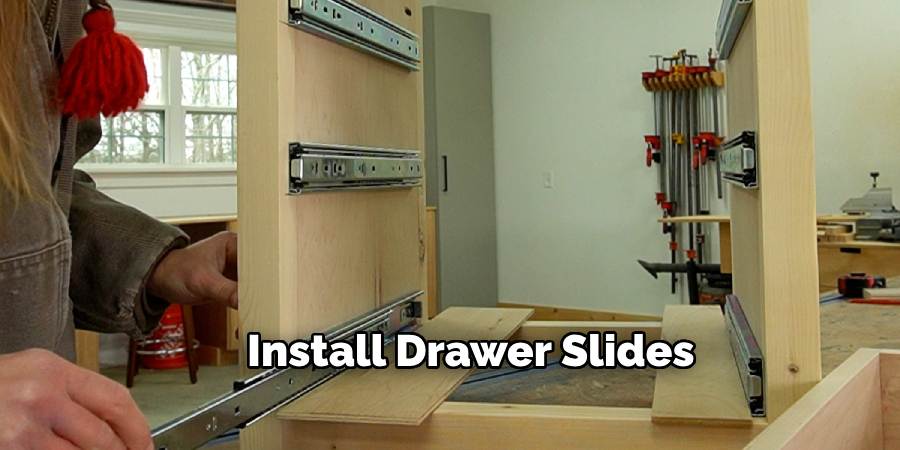
Mark the corresponding positions inside the nightstand where the other half of the slides will be affixed. Again, use pilot holes for the screws to maintain stability. Once both halves of the slides are installed, test the drawer for smooth operation and proper alignment, making adjustments as necessary to ensure it glides effortlessly along its tracks. This step is vital for maintaining ease of use and functionality in your nightstand.
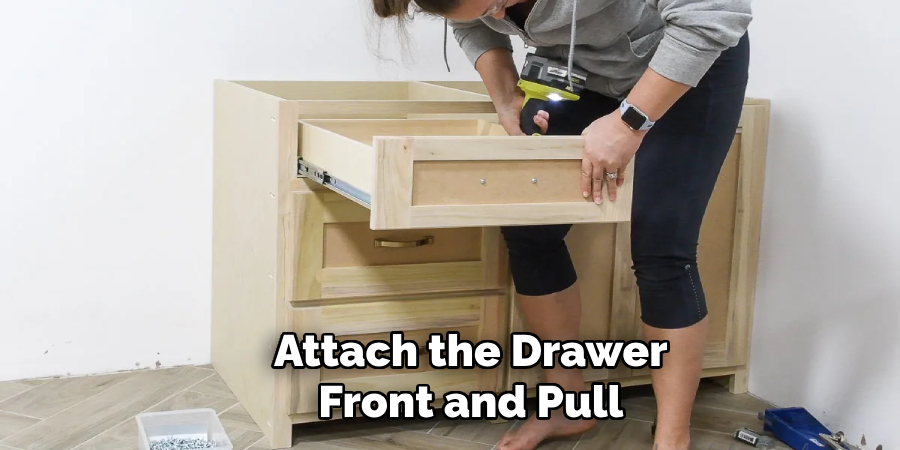
Attaching the Drawer Front and Pull
The final step in building the drawer involves attaching the drawer front and installing the pull. Begin by centering the drawer front on the face of the drawer box, ensuring that it hangs evenly on all sides. Mark the location of the mounting holes, then use screws to secure the front in place, making sure everything remains flush for a polished appearance.
Once the front is attached, it’s time to install the drawer pull. Position the pull at an ergonomic height, typically around two inches from the bottom of the drawer front, and ensure it is centered. Mark the attachment holes and drill pilot holes before securing the pull with screws. After installation, open and close the drawer to confirm that it operates smoothly without any hindrance from the front. This final touch will enhance both the aesthetics and functionality of your nightstand, completing your project.
Conclusion
In summary, you’ve learned how to build a nightstand with a drawer, encompassing each step from constructing the frame to installing the drawer front and pull. By gathering the right materials and following the outlined procedures, you’ve not only created a functional piece of furniture but also added a personal touch to your home. Embrace the satisfaction that comes with taking on such a project; the sense of accomplishment cannot be underestimated.
A custom-made nightstand enhances your space while reflecting your style and craftsmanship. We encourage you to take on this rewarding journey of DIY furniture making, as each phase of construction is an opportunity to hone your skills and express creativity. With patience and determination, you’ll find immense joy in completing your nightstand and enjoying the benefits of your handiwork for years to come.
About the Author
Adrian Green, a lifelong woodworking enthusiast, shares his passion for the craft through The Woodenify Blog. With a foundation built on years of hands-on experience in his father’s woodworking shop, Adrian is dedicated to helping others learn and grow in the world of DIY woodworking. His approach to woodworking combines creativity, practicality, and a deep appreciation for the art of building with your own hands. Through his blog, he inspires individuals of all skill levels to embark on their own woodworking journeys, creating beautiful, functional pieces of furniture and décor.
Professional Focus
- Specializes in DIY woodworking projects, from furniture to home décor.
- Provides step-by-step guides and practical tutorials for woodworkers of all skill levels.
- Dedicated to helping readers build confidence and skill through easy-to-follow instructions and tips.
- Passionate about fostering a community of makers who can share, learn, and grow together.
Education History
- University of Craft and Design – Bachelor of Fine Arts (BFA) in Woodworking and Furniture Design
- Woodworking Apprenticeships – Extensive hands-on training with skilled craftsmen to refine carpentry and furniture making techniques.
- Online Courses & Masterclasses – Continued education in advanced woodworking techniques, design principles, and specialized tools
Expertise:
- DIY woodworking, carpentry, furniture making, and home décor projects.
- Creating accessible tutorials and guides for beginner to advanced woodworkers.
- Sharing the joys and satisfaction of woodworking, from raw materials to finished products.