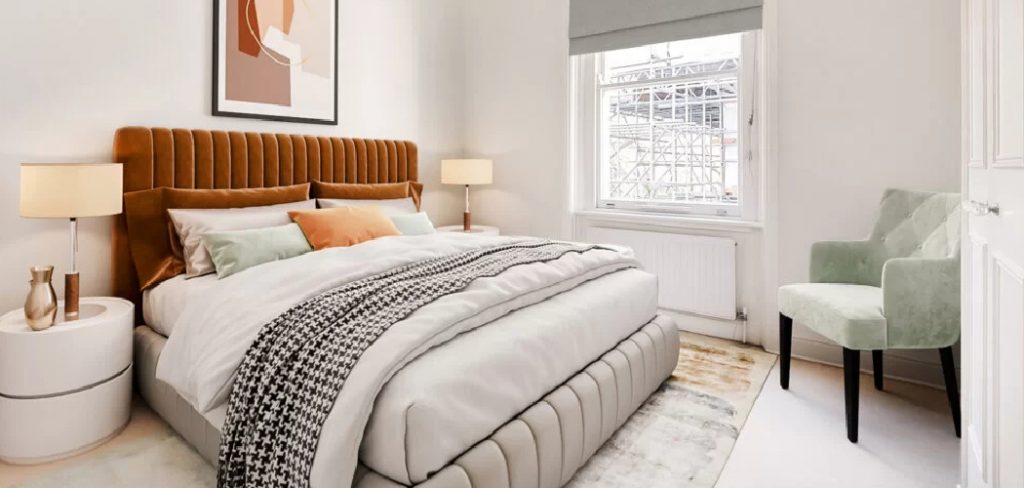
Looking to make the most of your bedroom space? Building a storage bed is the perfect solution for both function and style. Whether you’re tight on space or just want to keep things organized, a storage bed can provide the extra room you need while adding a touch of craftsmanship to your home.
In this blog post, we’ll guide you through the step-by-step process of how to build a storage bed. We will cover everything from choosing materials to final touches, ensuring you have all the information needed to create a piece that is both practical and aesthetically pleasing. Let’s get started!
Why Build a Storage Bed?
Maximize Your Space
One of the greatest benefits of a storage bed is the ability to maximize your space. For those living in small apartments or homes with limited storage, this can be a game-changer. Imagine having a bed that not only offers a comfortable place to sleep but also provides ample storage for clothes, shoes, bedding, and more.
Save Money
Building your own storage bed can be more cost-effective than buying one. Pre-made storage beds can be expensive, and you may not always find one that fits your specific needs or room dimensions. By taking on this project yourself, you can save money and customize the bed to your exact preferences.
Personal Satisfaction
There’s a unique sense of accomplishment that comes from creating something with your own hands. A DIY storage bed allows you to take pride in your work and enjoy a custom piece of furniture that reflects your personal style and skill.
Planning Your Storage Bed
Decide on the Bed Size
Before you start building, decide on the size of the bed. Are you making a twin for a child’s room, or a queen for the master bedroom? The size of the bed will determine the amount of materials you need and influence the overall design.
Choose Your Design
There are various storage bed designs to choose from. Some include drawers, while others feature open shelves or lift-up mechanisms. Consider what type of storage will best suit your needs and how the bed will fit into your existing décor.
Gather Materials
Once you’ve decided on the size and design, it’s time to gather your materials. Common materials for building a storage bed include plywood, wood screws, drawer slides, and handles. You’ll also need basic tools like a saw, drill, and measuring tape.
Cutting and Preparing Wood
Measure Twice, Cut Once
Begin by measuring and marking your wood according to the dimensions you’ve planned. Precision is key here – being off by even a small amount can affect the stability and appearance of your bed.
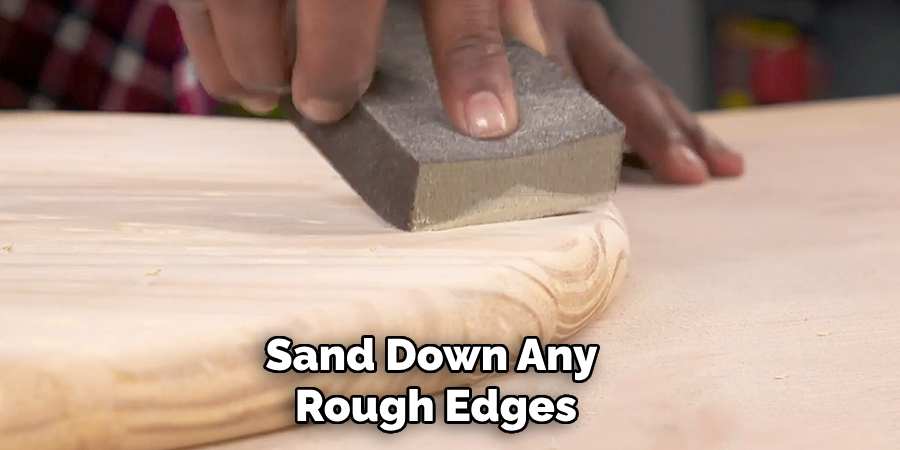
Cut the Wood Pieces
Using your measurements, cut the plywood and other wood pieces to size. This will typically include the bed frame, headboard, footboard, and storage compartments. Make sure to sand down any rough edges for a smooth finish.
Drill Pilot Holes
Drill pilot holes in the wood where you will be attaching screws. This helps prevent the wood from splitting and ensures a more secure fit. Mark these spots carefully and make sure they align correctly.
Constructing the Bed Frame
Assemble the Frame
Begin by constructing the main frame of the bed. This will consist of the side panels and the head and footboards. Use wood screws to attach the pieces together, ensuring they are square and level.
Add Support Slats
Once the frame is assembled, add support slats across the width of the bed. These slats will hold up the mattress and help distribute weight evenly. Space them evenly and secure them with screws.
Check for Stability
It’s important to check the stability of the frame before moving on. Make sure all pieces are securely attached and that the frame doesn’t wobble. Reinforce any weak spots as needed.
Building the Storage Components
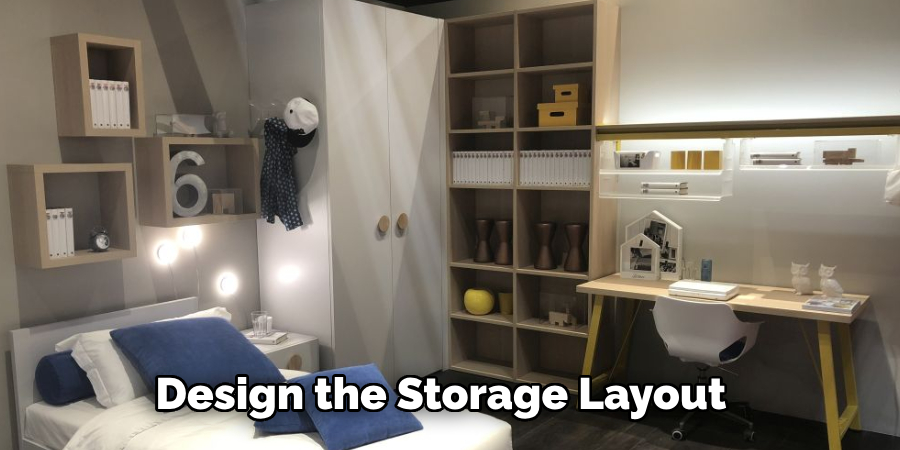
Design the Storage Layout
Decide on the layout of your storage compartments. Will you have drawers that pull out from the sides? Open shelves? A combination of both? Sketch out your plan to ensure everything fits neatly.
Construct Drawers or Shelves
Using your pre-cut wood pieces, assemble the drawers or shelves. If you’re adding drawers, install the drawer slides according to the manufacturer’s instructions. Make sure everything moves smoothly.
Attach Storage Units to the Frame
Securely attach the storage units to the bed frame. Double-check measurements to ensure everything aligns properly and is easily accessible. This step may require additional support brackets for added stability.
Finishing Touches
Sand and Paint
For a polished look, sand down the entire bed frame and storage units. Apply a coat of primer and paint in your chosen color. You might also consider staining the wood for a more natural finish.

Install Hardware
Install any hardware, such as drawer handles or knobs. This not only adds functionality but also enhances the overall appearance of your storage bed.
Add the Mattress
Once everything is dry and securely assembled, place your mattress on the bed frame. Test out the drawers or shelves to make sure everything is functioning properly.
Maintenance Tips
Regular Cleaning
Keep your storage bed looking its best by regularly cleaning both the exterior and interior. Dust and debris can accumulate in drawers and shelves, so make it a habit to clean these areas periodically.
Check for Wear and Tear
Over time, the screws and joints may loosen. Periodically check for any signs of wear and tear and tighten any loose screws to maintain stability.
Protect the Finish
If you’ve painted or stained your bed, protect the finish by using coasters or mats under heavy objects. This will help prevent scratches and keep your storage bed looking new.
Things to Consider on How to Build a Storage Bed
Space Availability
Before beginning your storage bed project, assess the space in your bedroom. Ensure you have enough room not only for the bed itself but also for the storage components. Consider leaving ample space for movement and easy access to drawers or shelves.
Weight Capacity
It’s essential to account for the weight capacity of your storage bed, especially if you plan to store heavy items. Use sturdy materials and reinforce the structure to ensure it can support both the mattress and the load of stored belongings without compromising stability.
Aesthetics
Select finishes and styles that complement your existing décor. Whether you prefer a modern, rustic, or classic look, the design of your storage bed should harmonize with the overall aesthetic of your room.

Accessibility
Think about how frequently you will need to access the stored items. If you’ll be opening drawers or shelves regularly, ensure they are easy to reach and designed for convenience. This might influence whether you choose drawers on the sides, lift-up storage, or open shelving.
Future Modifications
Consider the potential need for modifications in the future. Life changes might require different storage needs, so building your storage bed with adaptability in mind could save you hassle down the line. For instance, you might want to make provisions for expanding storage or altering the structure to accommodate different mattress sizes.
Common Mistakes to Avoid
Skipping Measurements
One of the most common mistakes when building a storage bed is neglecting to take accurate measurements. Failing to measure correctly can lead to ill-fitting pieces or an unstable structure. Always double-check your measurements before cutting any wood.
Ignoring Material Quality
Choosing low-quality materials can compromise the durability and strength of your storage bed. Opt for high-quality wood and hardware to ensure a sturdy build that will last over time.
Underestimating Weight Distribution
Another frequent oversight is not properly considering weight distribution. It’s essential to reinforce support slats and design the storage layout to evenly distribute weight. This prevents stress on weak points and reduces the risk of damage.
Forgetting to Sand Properly
Neglecting to sand rough edges can lead to splinters and an unrefined look. Always take the time to sand all surfaces thoroughly to achieve a smooth finish that is safe and visually appealing.
Overloading Storage Compartments
Finally, overloading your storage compartments can lead to issues such as drawer malfunction or frame instability. Be mindful of the weight and volume of items stored to maintain the integrity of your storage bed.
Conclusion
Building a storage bed is not only a practical solution for maximizing space but also a rewarding DIY project that allows you to showcase your skills. From planning and cutting wood to assembling and finishing, each step brings you closer to creating a functional and stylish piece of furniture. Hopefully, this article gave you some helpful tips about how to build a storage bed successfully, so now that you have the proper knowledge on how to get the job done, why not give it a try today?
About the Author
Adrian Green, a lifelong woodworking enthusiast, shares his passion for the craft through The Woodenify Blog. With a foundation built on years of hands-on experience in his father’s woodworking shop, Adrian is dedicated to helping others learn and grow in the world of DIY woodworking. His approach to woodworking combines creativity, practicality, and a deep appreciation for the art of building with your own hands. Through his blog, he inspires individuals of all skill levels to embark on their own woodworking journeys, creating beautiful, functional pieces of furniture and décor.
Professional Focus
- Specializes in DIY woodworking projects, from furniture to home décor.
- Provides step-by-step guides and practical tutorials for woodworkers of all skill levels.
- Dedicated to helping readers build confidence and skill through easy-to-follow instructions and tips.
- Passionate about fostering a community of makers who can share, learn, and grow together.
Education History
- University of Craft and Design – Bachelor of Fine Arts (BFA) in Woodworking and Furniture Design
- Woodworking Apprenticeships – Extensive hands-on training with skilled craftsmen to refine carpentry and furniture making techniques.
- Online Courses & Masterclasses – Continued education in advanced woodworking techniques, design principles, and specialized tools
Expertise:
- DIY woodworking, carpentry, furniture making, and home décor projects.
- Creating accessible tutorials and guides for beginner to advanced woodworkers.
- Sharing the joys and satisfaction of woodworking, from raw materials to finished products.