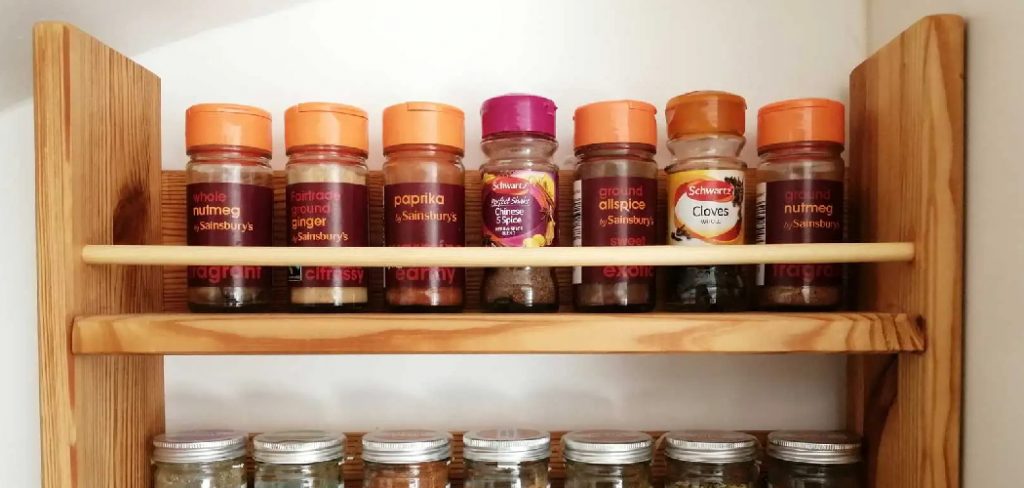
A wooden spice rack is a functional and stylish addition to any kitchen, helping to keep your spices organized and easily accessible. Building your own spice rack not only allows you to customize it to fit your space and preferences but also gives you the satisfaction of creating something practical with your own hands.
This guide on how to build a wooden spice rack will walk you through the steps to construct a simple yet durable wooden spice rack, perfect for beginners and seasoned DIY enthusiasts alike.
Why Build a Wooden Spice Rack?
There are several benefits to building a wooden spice rack compared to buying one from the store. First and foremost, it allows you to have full control over the design and size of your spice rack. This means you can tailor it to fit your specific needs and space limitations.
Additionally, building your own spice rack can be a fun and rewarding project that allows you to develop new skills and techniques. It also gives you the opportunity to work with wood, which is a versatile material that can be stained or painted in various colors to match your kitchen decor.
Materials Needed
1×4 Pine Board
A 1×4 pine board is the most commonly used wood for building a spice rack. It is affordable, readily available at most hardware stores, and easy to work with.
Saw
You will need a saw to cut the pine board into pieces according to your desired design and size. A circular saw or hand saw would be suitable for this project.
Sandpaper
To achieve a smooth finish on your spice rack, you will need sandpaper to sand down rough edges and surfaces.
Drill
A drill will be necessary to create holes in the wood and attach the pieces together.
Wood Screws
Wood screws are essential for connecting the different pieces of your spice rack together. Make sure to select screws that are the appropriate length for your project.
Wood Glue
In addition to wood screws, using wood glue can provide extra support and stability to your spice rack. Apply a thin layer of glue between the connecting surfaces before screwing them together.
Paint or Stain
Once you have assembled your spice rack, you can choose to paint or stain it according to your preference. This will not only add a decorative touch but also protect the wood from any potential damage.
Mounting Hardware
Lastly, you will need some mounting hardware such as hooks or brackets to securely attach your spice rack onto the wall in your kitchen. Be sure to select hardware that is strong enough to hold the weight of your spice rack and its contents.
7 Simple Steps on How to Build a Wooden Spice Rack
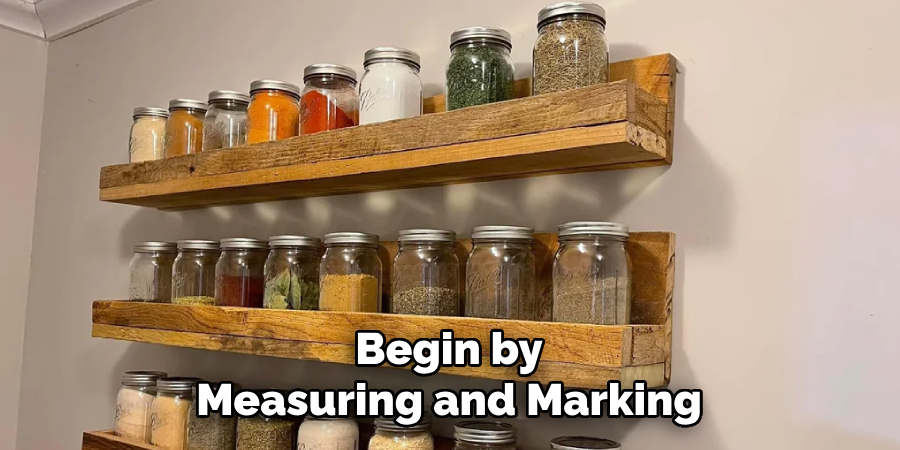
Step 1: Cut Lumber Board to Size
Begin by measuring and marking the dimensions for your spice rack on the lumber board. Use a tape measure and a pencil to ensure precision in your markings. Once the measurements are in place, use a saw to carefully cut the lumber to the desired sizes for the shelves and sides of the spice rack.
Sand down any rough edges with sandpaper to create smooth, safe surfaces that are ready for assembly. Make sure to double-check your measurements to avoid any discrepancies before moving on to the next step.
Step 2: Measure and Mark Spice Jar Spacing
Now that the pieces for your spice rack are ready, it’s time to measure and mark the spacing for your spice jars. Lay out the shelves and decide how many jars you intend to store on each one. Using a ruler or measuring tape, evenly space out the markings along the length of each shelf to ensure all jars will fit neatly.
Mark these points lightly with a pencil. For consistency, ensure the spacing aligns with the dimensions of the jars you plan to use. Accurate markings at this stage will make assembly and organization much easier in the later steps.
Step 3: Drill Holes for Spice Jar Placement
With the spacing marked, it’s time to drill the holes that will hold your spice jar support brackets or pegs. Using a drill bit that matches the diameter required for your hardware, carefully drill holes at each marked point. Be sure to keep the drill perpendicular to the surface to ensure evenly aligned holes.
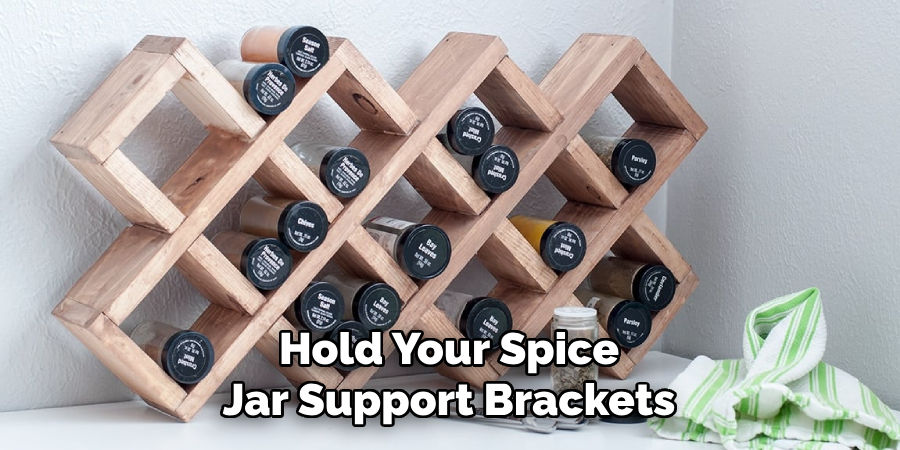
If you’re working with multiple shelves, double-check that the hole placement is consistent across all shelves. This will ensure a uniform look once the jars are placed. After drilling, remove any sawdust or debris and test the fit of your brackets or pegs to confirm proper alignment.
Step 4: Sand and Stain the Board
Begin by sanding the entire board to create a smooth surface. Start with a medium-grit sandpaper (such as 120-grit) to remove any rough spots or imperfections. Then, switch to a finer-grit sandpaper (such as 220-grit) to achieve a polished finish. Make sure to sand along the grain of the wood to avoid scratches and maintain the natural texture.
Once the board is sanded, wipe it down with a clean, damp cloth to remove any dust. Allow it to dry completely before proceeding to the staining process. Choose a stain that complements your space and enhances the wood’s natural color. Using a clean brush or cloth, apply the stain evenly across the surface, following the grain. Leave it to dry according to the manufacturer’s instructions, and consider applying a second coat for a richer tone. After staining, you may also choose to seal the board with a clear varnish for added protection and a glossy finish.
Step 5: Install Sides and Shelves
Once the staining and sealing process is complete, it’s time to assemble the sides and shelves of your project. Begin by positioning the side panels upright and securing them to the base using screws, wood glue, or brackets, depending on your design. Ensure the panels are aligned correctly and level before tightening any screws.
Next, carefully attach the shelves by sliding them into place and securing them with screws or dowels at each end. Double-check measurements to ensure even spacing between the shelves. This step not only brings the structure of your project together but also provides stability and functionality.
Step 6: Add Hooks or Clips
To enhance the functionality of your project, consider adding hooks or clips. Begin by determining the desired location for these additions, ensuring they are evenly spaced and aligned for both aesthetic appeal and practicality. Mark the spots where the hooks or clips will be installed, and use a drill or screwdriver to fix them securely in place.
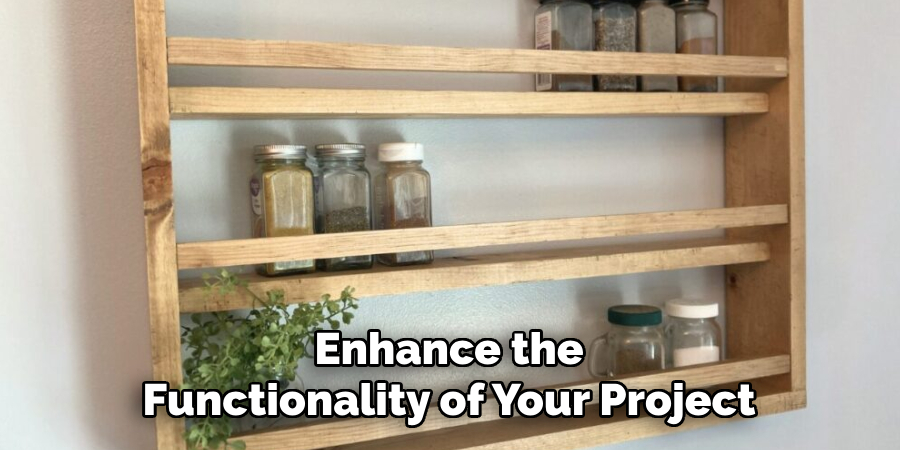
Whether you are hanging tools, accessories, or other items, these features provide added utility and make your project even more versatile. Be sure to test the stability of the hooks or clips after installation to ensure they can hold the intended weight.
Step 7: Hang and Organize
Once your spice rack is fully assembled, it’s time to hang it on the wall. Use a level to make sure it is straight and then secure it in place with screws. Finally, organize your spices onto the shelves in whatever order works best for you.
Following these steps on how to build a wooden spice rack will not only save you money but also add a personalized touch to your kitchen. You can stain or paint the rack to match your kitchen decor and even customize the size and number of shelves according to your needs.
Now that you have mastered building a wooden spice rack, why stop there? Using similar techniques, you can also build other types of racks such as for pots and pans, utensils, or even a floating shelf for decorative items. The possibilities are endless when it comes to DIY projects using wood. So go ahead and unleash your creativity! Discover space-saving and stylish wooden spice rack ideas that can bring both organization and charm to your kitchen.
Frequently Asked Questions
Q1: Can I Use Any Type of Wood for Building a Spice Rack?
A: Yes, you can use any type of wood that is sturdy enough to hold the weight of your spices. Hardwoods like oak, cherry, or maple are recommended as they are strong and durable.
Q2: How Do I Determine the Size and Number of Shelves for My Spice Rack?
A: The size and number of shelves will depend on the size of your spice jars. Measure the height, width, and depth of your jars to determine how much space you need between shelves. You may also want to consider leaving some extra room for future additions to your collection.
Conclusion
In conclusion, a DIY spice rack is an easy and practical project that can be customized to fit your space and style. With just a few materials and some basic tools, you can create a functional and aesthetically pleasing addition to your kitchen.
So next time you’re searching for spices in your cabinet, remember the convenience of having them all organized on a homemade spice rack! Keep exploring your creative side by trying out different designs or incorporating additional features such as chalkboard labels or magnetic strips for even more functionality. Thanks for reading this article on how to build a wooden spice rack.
About the Author
Adrian Green, a lifelong woodworking enthusiast, shares his passion for the craft through The Woodenify Blog. With a foundation built on years of hands-on experience in his father’s woodworking shop, Adrian is dedicated to helping others learn and grow in the world of DIY woodworking. His approach to woodworking combines creativity, practicality, and a deep appreciation for the art of building with your own hands. Through his blog, he inspires individuals of all skill levels to embark on their own woodworking journeys, creating beautiful, functional pieces of furniture and décor.
Professional Focus
- Specializes in DIY woodworking projects, from furniture to home décor.
- Provides step-by-step guides and practical tutorials for woodworkers of all skill levels.
- Dedicated to helping readers build confidence and skill through easy-to-follow instructions and tips.
- Passionate about fostering a community of makers who can share, learn, and grow together.
Education History
- University of Craft and Design – Bachelor of Fine Arts (BFA) in Woodworking and Furniture Design
- Woodworking Apprenticeships – Extensive hands-on training with skilled craftsmen to refine carpentry and furniture making techniques.
- Online Courses & Masterclasses – Continued education in advanced woodworking techniques, design principles, and specialized tools
Expertise:
- DIY woodworking, carpentry, furniture making, and home décor projects.
- Creating accessible tutorials and guides for beginner to advanced woodworkers.
- Sharing the joys and satisfaction of woodworking, from raw materials to finished products.