When it comes to home decor, the entryway often gets overlooked. Yet, it’s the first impression guests have of your home. An entryway table can make a significant impact by providing both functionality and style.
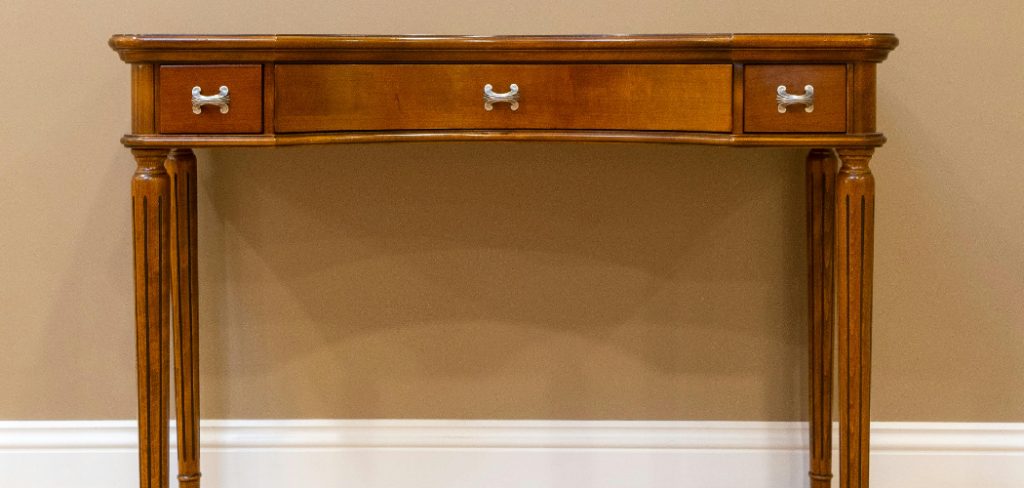
This blog post will guide you through the process of how to build an entryway table, designed to fit perfectly in your space and meet your decorative needs. Whether you’re a seasoned DIY enthusiast or a beginner looking to try your hand at woodworking, this comprehensive guide will offer valuable insights, practical tips, and step-by-step instructions.
Why Build an Entryway Table?
Versatility and Functionality
An entryway table serves multiple purposes. It can hold keys, mail, and other daily essentials, making your life more organized. It’s also a great place to add decorative elements like vases, picture frames, or a lamp, enhancing the aesthetic appeal of your entryway.
Personalization
Building your entryway table allows you to customize it to your taste and the specific dimensions of your space. You can choose the wood, finish, and design elements that match your home’s decor, creating a piece that is uniquely yours.
Cost-Effective
Store-bought furniture can be expensive, especially custom pieces. By building your own entryway table, you can save money and still end up with a high-quality piece of furniture.
Materials and Tools You’ll Need
Essential Materials
- Wood planks (for the tabletop and legs)
- Screws and nails
- Wood glue
- Sandpaper
- Wood stain or paint
Necessary Tools
- Measuring tape
- Saw (circular or miter)
- Screwdriver or drill
- Clamps
- Paintbrushes or rollers
Optional Add-Ons
- Decorative hardware (like drawer pulls)
- Additional shelving
- Protective finishes
Planning Your Design
Measuring Your Space
Before you start, measure the area where you plan to place the table. Consider the table’s height, width, and depth to ensure it fits well and doesn’t obstruct movement.

Sketching Your Design
Draw a simple sketch of your table, including dimensions and any additional features like drawers or shelves. This will serve as your blueprint during the building process.
Choosing the Right Wood
Select a type of wood that suits your needs. Pine is affordable and easy to work with, while oak offers durability and a classic look. Make sure to buy a little extra wood for practice cuts and any unexpected mishaps.
Cutting the Wood
Safety First
Always wear safety goggles and gloves when cutting wood. Ensure your workspace is clean and free of obstructions.
Making Precise Cuts
Use your measuring tape to mark the wood according to your design. Double-check measurements before making any cuts. A circular saw is great for straight cuts, while a miter saw can handle angled cuts.
Sanding the Edges
After cutting, sand the edges of each piece to remove splinters and create a smooth surface. This step is crucial for a polished final product.
Assembling the Tabletop
Laying Out the Planks
Arrange your wood planks for the tabletop on a flat surface. Ensure they align perfectly and make any necessary adjustments.
Gluing and Screwing
Apply wood glue along the edges of the planks and clamp them together. Once the glue dries, reinforce the joints with screws for added stability.
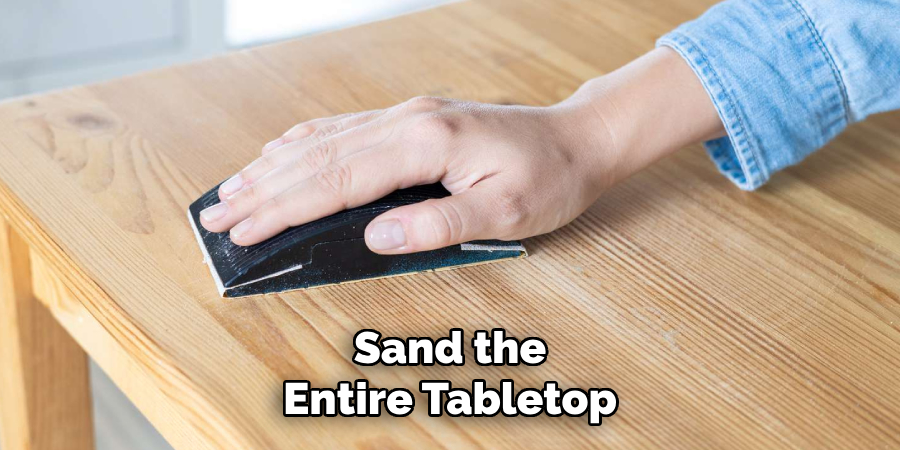
Sanding and Finishing
Sand the entire tabletop to smooth out any imperfections. Apply your chosen stain or paint, following the manufacturer’s instructions for the best results.
Building the Legs and Frame
Cutting the Legs
Cut four pieces of wood for the legs, making sure they are all the same length. Sand the edges to ensure they are smooth.
Attaching the Legs to the Frame
Use screws and wood glue to attach the legs to the frame. Ensure they are evenly spaced and perpendicular to the tabletop.
Adding Support
Add cross-braces between the legs for extra stability. This will prevent wobbling and ensure your table can support weight.
Adding Drawers and Shelves
Measuring and Cutting
Measure the space for any drawers or shelves you want to add. Cut the wood to fit these dimensions.
Assembly
Assemble the drawers and shelves separately before attaching them to the table. Use screws and wood glue for a secure fit.
Installing Hardware
Attach any drawer pulls or other hardware. Make sure they are aligned properly for a professional look.
Final Touches
Inspecting Your Work
Give your table a thorough once-over to check for any loose screws or rough edges. Make any necessary adjustments.
Applying a Protective Finish
Apply a protective finish to seal the wood and protect it from moisture and wear. This will extend the life of your table and keep it looking new.
Decorating Your Table
Once your table is complete, add decorative elements like a vase, picture frames, or a small lamp. These items will enhance the table’s appearance and make your entryway more inviting.

Caring for Your Entryway Table
Regular Cleaning
Dust your table regularly to keep it looking fresh. Use a damp cloth for any spills or stains, and avoid harsh chemicals that can damage the finish.

Seasonal Maintenance
Check the table periodically for any signs of wear or damage. Tighten loose screws and reapply the protective finish as needed.
Long-Term Care
With proper care, your entryway table can last for years. Keep it away from direct sunlight and extreme temperatures to prevent warping or fading.
Things to Consider When Building Your Entryway Table
Size and Scale
Ensure that the size of your entryway table complements the proportions of your entryway. A table that is too large can overwhelm the space, while one that is too small may lack functionality. Consider other elements in the area, such as doors and furniture, to maintain a balanced look.
Style and Aesthetics
Think about the overall design theme of your home. Choose materials and finishes that harmonize with your existing decor. Whether you prefer a rustic farmhouse style, a sleek modern look, or something in between, your table should reflect your personal style.
Functionality
Consider how you will use the table. If you need extra storage, incorporating drawers or shelves may be beneficial. Think about any specific items you plan to place on the table, such as decorative pieces, plants, or everyday essentials, and design accordingly.
Budget Constraints
Keep your budget in mind while selecting materials and tools. While it’s tempting to use high-end finishes, there are many cost-effective alternatives that offer great aesthetics and durability. Plan your budget to avoid overspending, ensuring you can complete the project without compromising on quality.
Common Mistakes to Avoid for How to Build an Entryway Table
Skipping the Planning Phase
One of the most common mistakes is diving straight into building without a proper plan. Failing to sketch out your design or measurements can lead to costly errors and wasted materials. Take the time to draft a detailed blueprint before beginning construction.
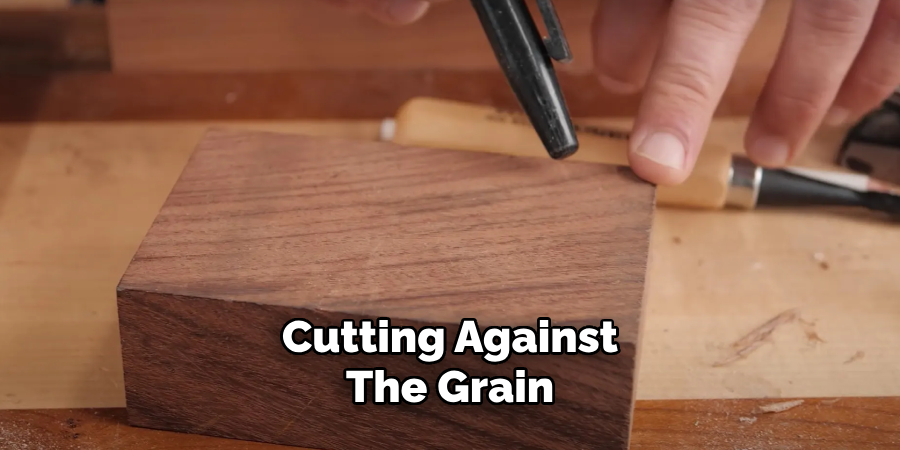
Ignoring Wood Grain Direction
When cutting and assembling your table, it’s crucial to pay attention to the direction of the wood grain. Cutting against the grain can result in splintering and an uneven finish. Always cut with the grain to achieve the best results.
Over-tightening Screws
While it may seem like a good idea to tighten screws firmly, over-tightening can damage the wood and compromise structural integrity. Tighten screws securely but do not force them; a snug fit is typically sufficient.
Neglecting Sanding
Some builders tend to overlook the importance of sanding, rushing through this step. Failing to sand adequately can leave rough edges and an unfinished appearance. Always ensure surfaces are smooth before applying any finishes.
Safety Precautions for Building Your Entryway Table
Personal Protective Equipment (PPE)
Always wear appropriate personal protective equipment when working with tools and materials. This includes safety goggles to protect your eyes from dust and debris, gloves to prevent splinters and cuts, and a dust mask to avoid inhaling harmful particles.
Workspace Safety
Ensure your workspace is clean, organized, and well-lit. Clear away any clutter that could cause accidents, and make sure you have enough space to move around safely. Adequate ventilation is also important, especially when working with paints or finishes that emit fumes.
Tool Safety
Familiarize yourself with the tools being used and always follow the manufacturer’s guidelines. Maintain your tools in good working condition, and ensure that all safety guards are in place when operating powered equipment. When using saws or drills, keep hands clear of cutting areas and always cut away from your body.
Lifting and Movement
Be cautious when lifting heavy materials or the assembled table. Use proper lifting techniques, keeping your back straight and lifting with your legs to avoid injury. If a piece is too heavy or awkward, ask for assistance to prevent accidents.
Conclusion
Building your entryway table is a rewarding project that combines functionality with personal expression. By following these steps, you can create a custom piece that enhances your home’s decor and provides practical storage solutions. Ready to get started? Gather your materials, sketch your design, and enjoy the process of bringing your vision to life.
For more DIY tips and personalized advice, book a consultation with one of our expert stylists today. Hopefully, this article gave you some helpful tips about how to build an entryway table successfully, so now that you have the proper knowledge on how to get the job done, why not give it a try today?
About the Author
Adrian Green, a lifelong woodworking enthusiast, shares his passion for the craft through The Woodenify Blog. With a foundation built on years of hands-on experience in his father’s woodworking shop, Adrian is dedicated to helping others learn and grow in the world of DIY woodworking. His approach to woodworking combines creativity, practicality, and a deep appreciation for the art of building with your own hands. Through his blog, he inspires individuals of all skill levels to embark on their own woodworking journeys, creating beautiful, functional pieces of furniture and décor.
Professional Focus
- Specializes in DIY woodworking projects, from furniture to home décor.
- Provides step-by-step guides and practical tutorials for woodworkers of all skill levels.
- Dedicated to helping readers build confidence and skill through easy-to-follow instructions and tips.
- Passionate about fostering a community of makers who can share, learn, and grow together.
Education History
- University of Craft and Design – Bachelor of Fine Arts (BFA) in Woodworking and Furniture Design
- Woodworking Apprenticeships – Extensive hands-on training with skilled craftsmen to refine carpentry and furniture making techniques.
- Online Courses & Masterclasses – Continued education in advanced woodworking techniques, design principles, and specialized tools
Expertise:
- DIY woodworking, carpentry, furniture making, and home décor projects.
- Creating accessible tutorials and guides for beginner to advanced woodworkers.
- Sharing the joys and satisfaction of woodworking, from raw materials to finished products.