Are you tired of having no space for guests to sleep in your room? A trundle bed might be the perfect solution for you. Not only does it provide an extra sleeping space, but it also easily tucks away when not in use, saving valuable floor space.
How to build trundle bed is a practical and rewarding project that can add both functionality and flair to your home.
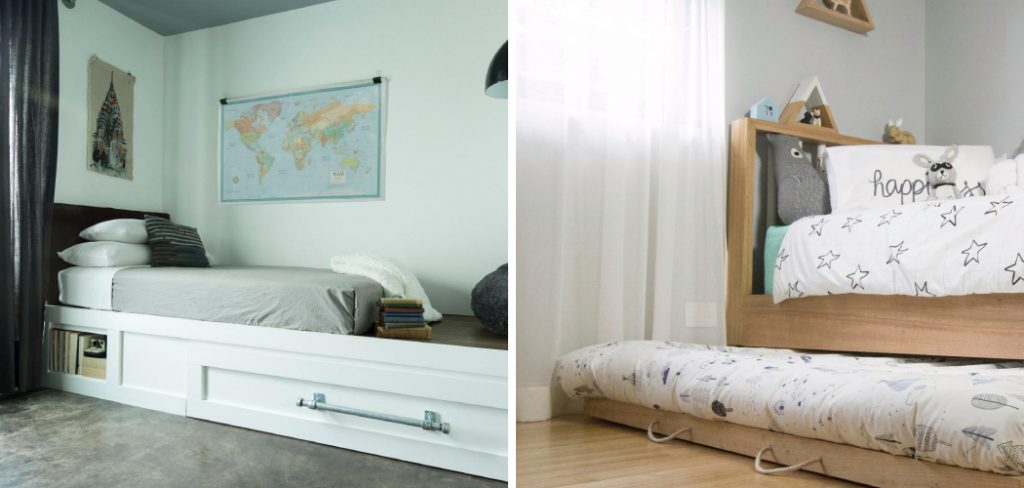
A trundle bed is a low bed on wheels that rolls under a regular bed, saving space and providing an additional sleeping area when needed. This guide will walk you through each step of the construction process, from selecting materials and tools to assembling and finishing your trundle bed.
Whether you’re an experienced woodworker or a DIY enthusiast looking for a new project, our detailed instructions will help you create a sturdy and stylish piece that maximizes your space while enhancing your home’s versatility.
What Will You Need?
Before you start building, you’ll need to gather all the necessary materials and tools. Here’s a list of what you’ll need:
- Wood: The type and amount of wood will depend on the size of your trundle bed and your design preferences. Generally, you’ll need enough plywood for the base, sides, and front/back panels.
- Screws/nails: You’ll need screws or nails to secure the wood pieces together. The size of the screws/nails will depend on the thickness of your wood.
- Saw: A saw will be necessary to cut the wood to the desired sizes and shapes.
- Drill: A drill will come in handy for making holes and screwing in the screws.
- Sandpaper: Sandpaper will help you smooth out any rough edges or surfaces before assembling and finishing the bed.
- Paint/stain/finish: Depending on your design preferences, you may want to paint, stain, or finish your trundle bed to match your room’s decor.
With all the necessary materials and tools ready, it’s time to start building!
10 Easy Steps on How to Build Trundle Bed
Step 1: Measure and Cut the Wood
Begin by measuring the dimensions of the area under your existing bed where you plan to store the trundle. Once you have your measurements, use a saw to cut the plywood to the appropriate sizes for the base, sides, and front/back panels. Accuracy is crucial here to ensure the trundle bed will fit snugly under your main bed.
Step 2: Assemble the Base Frame
Next, it’s time to construct the base frame for your trundle bed. Lay out the pieces of wood you’ve cut for the base, ensuring they align properly according to your dimensions. Begin by attaching the side panels to the base panel using screws or nails. Make sure to pre-drill the holes to prevent the wood from splitting.
Once the side panels are securely attached, proceed to fix the front and back panels in place. Use a carpenter’s square to ensure that all corners are at right angles and the frame is perfectly rectangular. This will ensure that your trundle bed fits seamlessly under your main bed without any issues.

You might consider adding additional support beams across the base to reinforce the structure. These will prevent any sagging or bending, especially if the trundle bed is used frequently. Make sure all the connections are tightly secured, and double-check for stability by gently pressing on different parts of the frame.
Step 3: Attach the Bottom Panel
After constructing the base frame, the next step is to attach the bottom panel. Lay the base frame on a flat surface, with the open side facing upwards. Place the bottom panel on top, ensuring it fits snugly within the frame.
Use screws or nails to secure the bottom panel to the frame, making sure you pre-drill any holes to avoid splitting the wood. This bottom panel will provide a solid foundation for the trundle bed, supporting the mattress and any additional weight.
Step 4: Install the Casters
With the bottom panel securely in place, the next step is to install the casters. Casters are small, wheeled devices that allow the trundle bed to roll easily in and out from under your main bed. Start by turning the assembled base frame upside down so the bottom panel faces upwards.
Mark the locations on the bottom panel where you will attach the casters. Generally, installing a caster at each corner and an additional caster at the midpoint of each long side will provide adequate support and ensure smooth movement. Use a pencil to mark the exact spots where the screws for the casters will be drilled.
Once the locations are marked, align each caster with its corresponding spot and use screws to fix them in place. Make sure to pre-drill the holes to prevent wood splitting, and ensure the screws are tightly secured to avoid any wobbling or instability when the trundle bed is in motion.
If you have the locking type of casters, you can engage the locks to stabilize the bed while installing the remaining casters.
After all the casters are installed, flip the frame back over to its upright position and test the mobility.
Step 5: Sand the Edges and Surfaces

Before moving on to the next stage, it’s essential to sand all the edges and surfaces of the trundle bed frame. This step will help eliminate any rough spots, splinters, or uneven surfaces, ensuring a smoother and safer final product. Start with coarse-grit sandpaper to remove the roughest parts, then switch to a finer grit for a silky finish.
Pay special attention to the corners and joints, smoothing them out to prevent injuries or damage to the mattress.
Once the sanding is complete, thoroughly wipe down the entire frame with a damp cloth to remove any dust or debris. This will prepare the wood for any paint, stain, or finish you choose to apply in the next steps. Ensure the surface is clean and dry before achieving the best results.
Step 6: Paint, Stain or Finish the Frame
Now that the trundle bed frame is smooth and ready, it’s time to add your choice of paint, stain, or finish. This step enhances the aesthetic appeal of your trundle bed and provides an additional layer of protection to the wood. Select a paint or stain color that matches your room’s decor.
Before applying the paint or stain, ensure you are in a well-ventilated area or outdoors. Spread out a drop cloth or newspaper to protect the floor from drips and spills. If you paint, consider applying a primer first to ensure better adhesion and coverage. Use a brush or roller to apply the paint, stain, or finish in smooth, even strokes, following the wood grain for best results.
Allow the first coat to dry completely before applying additional coats, if necessary. Depending on your product, you might need to lightly sand the surface between coats with fine-grit sandpaper to ensure a smooth finish. Once you are satisfied with the coverage and color, let the final coat dry thoroughly.

After the trundle bed frame has dried, inspect it for any touch-ups needed and make sure the finish is smooth and even. This step completes the construction and customization of your trundle bed frame, making it ready for the next stage – adding the mattress and any final accessories.
Step 7: Add the Mattress and Final Accessories
The final step in building your trundle bed is to add the mattress and any additional accessories to complete the setup. Select a mattress that fits the dimensions of your trundle bed frame, ensuring it is comfortable and supportive. Measuring the space under your main bed is a good idea to confirm that the trundle bed with the mattress will slide in and out smoothly.
Place the mattress onto the trundle bed frame, ensuring it lies flat and evenly distributed. At this point, you can also add any desired bedding such as a mattress protector, fitted sheet, and blanket to make the trundle bed ready for use. Additionally, consider using flat, low-profile bedding to maintain a sleek and unobtrusive appearance when the trundle bed is stored away.
You might want to include a few final touches to enhance functionality and comfort. For example, adding a handle or strap on the front panel can make it easier to pull the trundle bed in and out. If you opted for locking casters, don’t forget to use the locks once the bed is in place to prevent unwanted movement.
Step 8: Final Inspection and Safety Check
The final step in constructing your trundle bed is to conduct a thorough inspection and safety check. Begin by ensuring that all screws, nails, and bolts are securely fastened and that there are no loose components. Check the casters’ stability to ensure they roll smoothly and lock securely if they have a locking mechanism.
Test the trundle bed by sliding it in and out from under the main bed several times to confirm that it moves easily and fits comfortably within the designated space. Additionally, ensure that no sharp edges or splinters on the wood could cause injury – sanding down any rough areas identified during this inspection.
Finally, confirm that the mattress and any bedding remain flat and secure when the trundle bed is moved. This step ensures that the trundle bed is safe, functional, and ready for everyday use. Once you are satisfied with the inspection, your trundle bed is complete and set for comfortable, practical use.
Step 9: Maintenance and Care Tips
To ensure the longevity and optimal performance of your trundle bed, it’s important to follow some basic maintenance and care tips. Regular upkeep will help keep the bed in excellent condition, providing a safe and comfortable sleeping space for years to come.

- Regular Cleaning: Periodically clean the trundle bed frame, mattress, and casters. Use a damp cloth to wipe down the frame and vacuum the mattress to remove dust and allergens. Check for any spills or stains and clean them promptly according to the manufacturer’s recommendations.
- Check for Loose Components: Over time, screws and bolts may become loose with regular use. Inspect all fastening components every few months and retighten any that may have loosened. This will maintain the structural integrity and safety of the trundle bed.
- Lubricate the Casters: If the casters become stiff or difficult to move, apply a small amount of lubricant to the moving parts. This will ensure smooth and effortless mobility of the trundle bed. Always wipe off any excess lubricant to prevent it from attracting dirt and dust.
- Inspect the Mattress: Rotate and flip the mattress regularly to prevent uneven wear and sagging. Follow the care instructions the mattress manufacturer provides to keep it in good condition. If the mattress shows signs of wear or discomfort, consider replacing it to maintain a comfortable sleeping experience.
- Protect the Finish: To preserve the paint, stain, or finish on the trundle bed frame, avoid placing hot objects directly on the surface and use protective pads under any heavy items. If you notice any chips or scratches in the finish, touch them up promptly with matching paint or stain to prevent further damage.
Following these maintenance and care tips ensures that your trundle bed remains durable, safe, and an attractive addition to your home.

Step 10: Troubleshooting Common Issues
Even with careful construction and maintenance, you may encounter some common issues with your trundle bed. Here are solutions to address these problems effectively:
- Sticking or Difficult Movement: If your trundle bed is difficult to slide in and out, ensure the casters are free of debris and dirt. Cleaning the casters with a damp cloth and applying a light lubricant can help improve movement. Additionally, ensure that the floor surface is clear and smooth; small objects or uneven surfaces can impede the movement of the trundle bed.
- Unstable Casters: If you notice that the casters are wobbly or unstable, inspect them for wear and tear. Tighten any loose screws or bolts securing the casters to the frame. If the casters are damaged, consider replacing them with new ones to restore stability to the trundle bed.
- Sagging Mattress: A sagging mattress can compromise comfort and support. Rotate and flip the mattress regularly to distribute wear evenly. If the mattress continues to sag, it may be time to replace it with a new one to ensure a comfortable sleep surface.
- Loose Frame Components: If you hear creaks or notice that parts of the trundle bed frame have become loose, inspect all joints, screws, and nails. Tighten any loose components and reinforce joints with additional hardware if necessary. This will improve the structural integrity and safety of the bed.
- Surface Damage: Paint or finish on the trundle bed frame may chip or scratch over time. Touch up any damaged areas with matching paint or stain to maintain the bed’s appearance and protect the wood. Regularly inspect the frame to address any new damage promptly.

By addressing these common issues, you can ensure that your trundle bed remains functional, safe, and comfortable for regular use. Regular troubleshooting and maintenance will extend the life of your trundle bed and keep it in excellent condition.
5 Things You Should Avoid
When constructing a trundle bed, there are several common mistakes that can compromise its durability, safety, and functionality. Here are five things you should avoid to ensure the best results:
- Using Inferior Materials: Avoid using low-quality wood or hardware, as these can affect the bed’s strength and longevity. Instead, invest in high-quality materials to ensure a sturdy, durable trundle bed.
- Neglecting Accurate Measurements: Incorrect measurements can lead to poor fit and alignment issues. Make sure you measure accurately and double-check all dimensions before cutting the wood or assembling parts. Precision is key to a smoothly operating trundle bed.
- Ignoring Weight Limits: Trundle beds are designed to support a certain amount of weight. Do not use materials or designs that exceed the recommended weight limits. Overloading the bed can lead to structural failures and potential safety hazards.
- Skipping Pre-Drilling Holes: To prevent the wood from splitting when screwing in fasteners, always pre-drill holes. This step ensures a cleaner build and helps maintain the integrity of the wood.
- Overlooking Safety Features: Safety should be a priority in any furniture build. Do not neglect to incorporate essential safety features such as secure locking mechanisms for the casters, and ensure all edges are smooth and free of sharp corners. Proper safety checks and features prevent injuries and enhance user comfort.
By avoiding these common pitfalls, you can successfully construct a trundle bed that is both functional and durable, providing a safe and comfortable sleeping solution.

Conclusion
How to build trundle bed can be a rewarding project that adds versatile and functional sleeping space to your home. By following the detailed steps outlined in this guide, you will ensure a high-quality, durable, and aesthetically pleasing build.
Key to this process is careful planning, accurate measurements, and the use of high-quality materials.
Additionally, regular maintenance and troubleshooting will keep the trundle bed in optimal condition for years to come. Avoiding common mistakes such as using inferior materials, neglecting accurate measurements, and overlooking safety features is crucial to a successful build.
With patience and attention to detail, your trundle bed will provide a comfortable and practical sleeping solution that enhances your living space.
About the Author
Adrian Green, a lifelong woodworking enthusiast, shares his passion for the craft through The Woodenify Blog. With a foundation built on years of hands-on experience in his father’s woodworking shop, Adrian is dedicated to helping others learn and grow in the world of DIY woodworking. His approach to woodworking combines creativity, practicality, and a deep appreciation for the art of building with your own hands. Through his blog, he inspires individuals of all skill levels to embark on their own woodworking journeys, creating beautiful, functional pieces of furniture and décor.
Professional Focus
- Specializes in DIY woodworking projects, from furniture to home décor.
- Provides step-by-step guides and practical tutorials for woodworkers of all skill levels.
- Dedicated to helping readers build confidence and skill through easy-to-follow instructions and tips.
- Passionate about fostering a community of makers who can share, learn, and grow together.
Education History
- University of Craft and Design – Bachelor of Fine Arts (BFA) in Woodworking and Furniture Design
- Woodworking Apprenticeships – Extensive hands-on training with skilled craftsmen to refine carpentry and furniture making techniques.
- Online Courses & Masterclasses – Continued education in advanced woodworking techniques, design principles, and specialized tools
Expertise:
- DIY woodworking, carpentry, furniture making, and home décor projects.
- Creating accessible tutorials and guides for beginner to advanced woodworkers.
- Sharing the joys and satisfaction of woodworking, from raw materials to finished products.