Are you tired of looking at the dusty, dull hardwood floors in your home? Regular cleaning and maintenance of hardwood floors is essential to keep them looking beautiful and prolong their lifespan.

Hardwood floors add warmth and elegance to any home, but they require proper care to maintain their beauty and longevity. Unlike other surfaces, hardwood floors need a gentle yet effective cleaning routine to prevent damage and preserve their finish. With the right tools and techniques, you can keep your floors looking immaculate while protecting them from scratches, stains, and wear.
This guide on how to clean hardwood floors will walk you through the essential steps to clean and care for your hardwood floors, ensuring they stay in pristine condition for years to come. Let’s get started!
What Are the Benefits of Cleaning Hardwood Floors Regularly?
Keeping your diy hardwood floors clean has numerous benefits, including:
- Preventing Scratches and Scuffs From Dirt and Debris: Regularly sweeping or vacuuming your hardwood floors helps remove any sharp particles that could scratch the surface.
- Maintaining the Finish: Dirt and grime can dull the finish on your hardwood floors, making them look worn and aged. By cleaning regularly, you can maintain the finish’s shine and keep it looking new.
- Extending the Lifespan of Your Floors: Proper maintenance can significantly impact the longevity of your hardwood floors. Regular cleaning can prevent damage and preserve the wood’s integrity, ensuring it stays beautiful for many years.
- Improving Air Quality: Hardwood floors are an excellent option for those with allergies or respiratory issues. Unlike carpet, they do not trap dust and allergens, making it easier to maintain good air quality in your home.
- Enhancing the Aesthetic Appeal: Hardwood floors add a touch of elegance and warmth to any room, enhancing its overall aesthetic appeal. With proper maintenance, you can ensure that they continue to enhance the aesthetic appeal of your home for years to come.
What Will You Need?
To properly install hardwood floors, you will need some essential tools and materials, including:
- Hardwood flooring of your choice
- Underlayment to provide cushioning and moisture protection
- Hammer
- Pry bar
- Measuring tape
- Chalk line
- Saw (either circular saw or miter saw)
- Flooring nailer or stapler
- Level tool
- Tapping block and hammer for fitting the planks together securely
Additional materials that may be needed include adhesive, wood filler, and transition strips.
10 Easy Steps on How to Clean Hardwood Floors
Step 1: Remove Loose Dirt and Debris
The first step in cleaning hardwood floors is to remove all loose dirt and debris thoroughly. Start by sweeping the floor with a soft-bristled broom to prevent scratches on the wood’s surface. Alternatively, you can use a vacuum cleaner with a hardwood floor attachment to gently but efficiently collect debris from even the tiniest crevices.
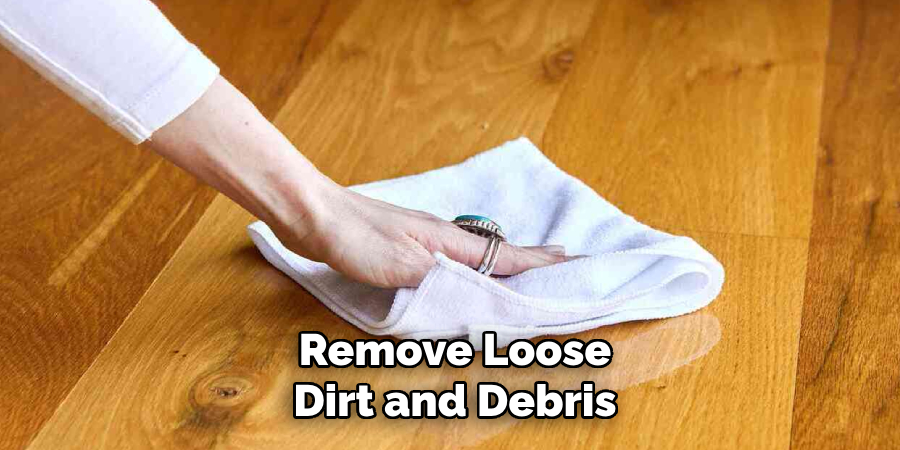
Pay close attention to corners and edges where dirt often accumulates. Taking care at this stage will not only make the subsequent steps more effective but also help protect your hardwood floor from damage caused by grit or sharp particles being dragged across its surface.
Step 2: Choose the Right Cleaning Solution
When choosing a cleaning solution for your hardwood floors, it’s essential to consider the type of finish on your wood rather than the wood itself. For most sealed hardwood floors, a pH-balanced cleaner specifically designed for hardwood is ideal, as it offers effective cleaning without causing damage. Avoid using abrasive cleaners, ammonia, or harsh chemicals, as these can strip the finish and dull the natural beauty of the wood over time. If you’re unsure about which product to use, test the cleaner on a small, inconspicuous area first to ensure it doesn’t leave streaks or cause discoloration. Alternatively, a homemade solution of warm water and a mild dish soap can be an effective and safe alternative for gentle cleaning.
Step 3: Use a Damp Mop
Using a damp mop is a crucial step in maintaining the cleanliness and longevity of your wooden floors. Ensure the mop is only lightly damp, as excess water can seep into the wood and cause it to swell, warp, or sustain long-term damage. Wring out the mop thoroughly so it feels barely wet to the touch before applying it to the floor.
Work in small sections, moving the mop with the grain of the wood to achieve an even, streak-free finish. When using a cleaning solution, ensure it is diluted correctly to prevent residue buildup or damage to the finish. After mopping, allow the floor to air dry thoroughly. Alternatively, use a soft, dry cloth to gently buff the surface for an extra level of care. Regularly using a damp mop as part of your cleaning routine helps remove dirt, grime, and spills without compromising the floor’s natural beauty and durability.
Step 4: Clean Along the Grain
When cleaning wood floors, always work with the grain. This technique helps to remove dirt and debris that may settle into the natural grooves of the wood, ensuring a more thorough cleaning.
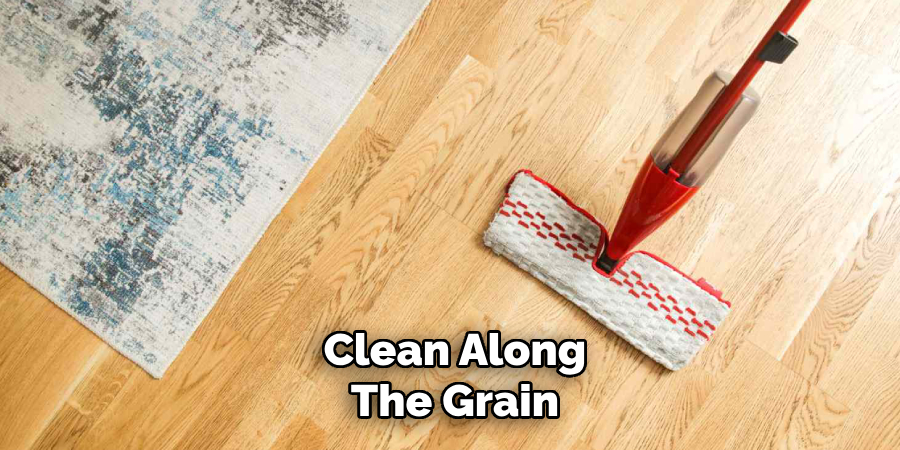
By following the grain, you also preserve the floor’s smooth texture and avoid creating streaks or smudges that may become visible after drying. Use a soft microfiber cloth or a mop with gentle movements to align with the grain’s direction for the best results. This step not only enhances the cleanliness but also helps maintain the floor’s natural luster and longevity.
Step 5: Address Stubborn Stains
For tougher stains that regular cleaning cannot remove, it’s essential to take a targeted approach. Start by identifying the type of stain—whether it is caused by spills, adhesive residues, or scuff marks. Use a cleaner specifically designed for your type of flooring, ensuring it’s safe and non-abrasive.
Apply a small amount of the cleaner to a soft cloth or sponge and gently work on the stain in a circular motion. Avoid scrubbing too vigorously, as this can damage the floor’s surface. For stubborn marks, you may need to repeat the process or use a specialized tool, such as a rubber eraser, to remove scuffs. Always finish by wiping the area with a damp cloth to remove any residue from the cleaner and allow it to dry completely.
Step 6: Dry the Floor Immediately
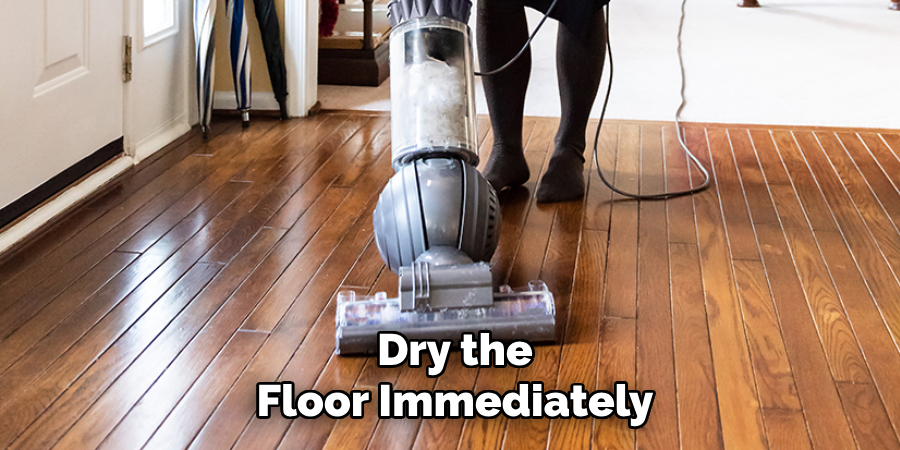
Use a clean, dry microfiber cloth or mop to thoroughly dry the floor after cleaning. This step is crucial to prevent any moisture from seeping into cracks or joints, which could lead to long-term damage or warping. Ensure you reach all areas, including corners and edges, to leave the surface completely dry and spotless. Taking the time to dry the floor properly will help maintain its durability and appearance over time.
Step 7: Polish for Shine
After ensuring the floor is completely dry, apply a suitable floor polish or wax to enhance its shine and protect the surface. Use a clean, soft applicator or a microfiber cloth to evenly distribute the polish across the floor, working in small sections to avoid streaks. Allow the polish to dry completely according to the product’s instructions. This final step not only restores the floor’s glossy appearance but also adds an extra layer of protection against wear and tear, keeping it looking pristine for a longer period.
Step 8: Avoid Abrasive Tools and Materials
To maintain the integrity and appearance of your floors, it is crucial to avoid using abrasive tools or materials during cleaning and maintenance. Items such as steel wool, harsh scrubbing pads, or stiff-bristled brushes can cause scratches, scuffs, or other damage to the surface. Instead, opt for soft, non-abrasive tools, such as microfiber cloths, mop pads, or gentle sponges, to clean effectively without harming the floor. By using the right equipment, you can preserve the floor’s finish and ensure it remains smooth and damage-free over time.
Step 9: Establish a Regular Cleaning Routine
A consistent cleaning routine is essential for maintaining the quality and appearance of your flooring. Start by setting a schedule for daily, weekly, and monthly tasks. Daily routines may include sweeping or vacuuming to remove dust and debris, while weekly cleaning could involve mopping with gentle, non-abrasive solutions to eliminate accumulated dirt. For monthly maintenance, consider a deeper clean or floor-specific treatment to address long-term wear and tear. Sticking to a regular cleaning routine not only keeps your floors looking fresh but also extends their lifespan, saving you time and money in the long run.
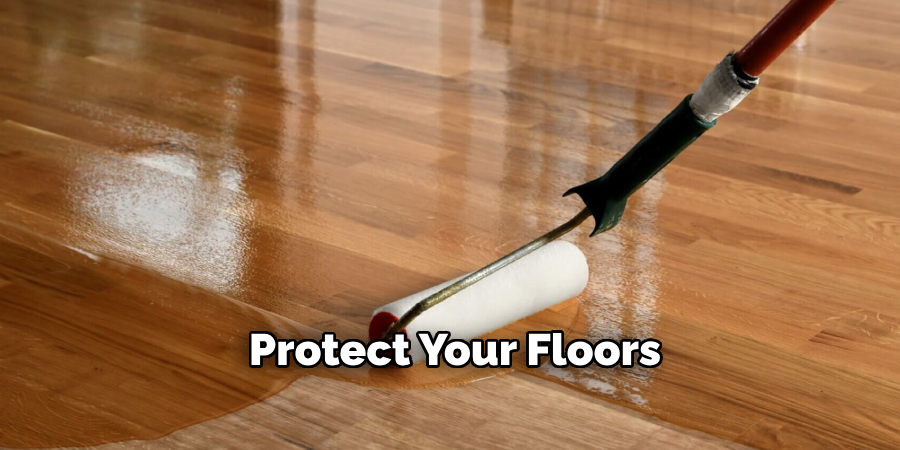
Step 10: Protect Your Floors
Protecting your floors is essential to maintain their quality and appearance over time. Start by using rugs or mats in high-traffic areas to reduce wear and tear. Furniture pads can also prevent scratches and dents caused by heavy or frequently moved items. Avoid wearing shoes with stiff soles or heels that could potentially damage the surface. Additionally, control humidity levels in your home to prevent warping or cracking, especially for wooden floors.
By following these simple steps, you can easily prolong the life and beauty of your floors.
Conclusion
How to clean hardwood floors is essential for preserving their longevity and natural beauty.
By regularly sweeping or vacuuming to remove dirt and debris, promptly cleaning spills, and using the right cleaning products, you can protect your floors from damage. Additionally, taking preventative measures such as using rugs, furniture pads, and controlling humidity will further ensure the durability of your hardwood surfaces.
With consistent care and attention to these details, your hardwood floors will remain an elegant and timeless feature of your home for years to come.
About the Author
Adrian Green, a lifelong woodworking enthusiast, shares his passion for the craft through The Woodenify Blog. With a foundation built on years of hands-on experience in his father’s woodworking shop, Adrian is dedicated to helping others learn and grow in the world of DIY woodworking. His approach to woodworking combines creativity, practicality, and a deep appreciation for the art of building with your own hands. Through his blog, he inspires individuals of all skill levels to embark on their own woodworking journeys, creating beautiful, functional pieces of furniture and décor.
Professional Focus
- Specializes in DIY woodworking projects, from furniture to home décor.
- Provides step-by-step guides and practical tutorials for woodworkers of all skill levels.
- Dedicated to helping readers build confidence and skill through easy-to-follow instructions and tips.
- Passionate about fostering a community of makers who can share, learn, and grow together.
Education History
- University of Craft and Design – Bachelor of Fine Arts (BFA) in Woodworking and Furniture Design
- Woodworking Apprenticeships – Extensive hands-on training with skilled craftsmen to refine carpentry and furniture making techniques.
- Online Courses & Masterclasses – Continued education in advanced woodworking techniques, design principles, and specialized tools
Expertise:
- DIY woodworking, carpentry, furniture making, and home décor projects.
- Creating accessible tutorials and guides for beginner to advanced woodworkers.
- Sharing the joys and satisfaction of woodworking, from raw materials to finished products.