Wood conditioning is crucial in maintaining and enhancing the appearance and durability of wood surfaces.
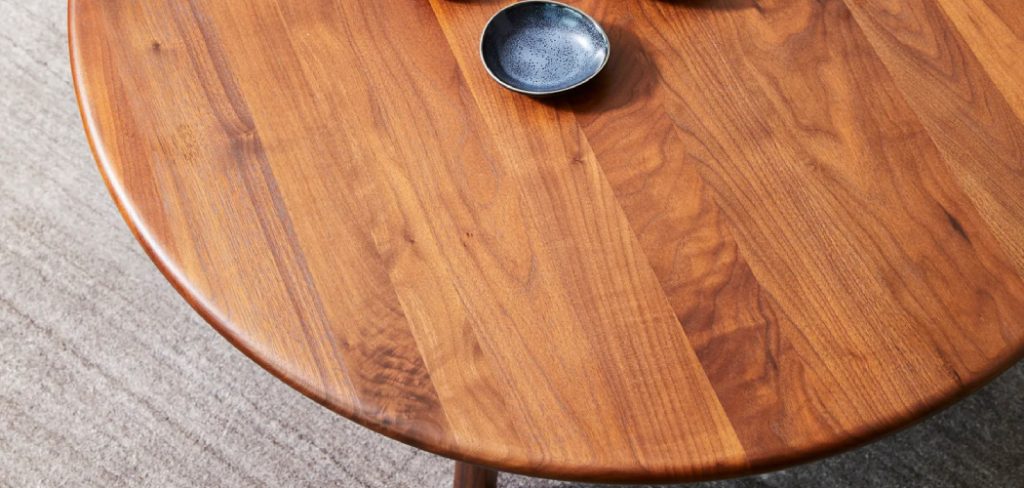
By adequately conditioning wood, you prepare it for finishing, ensuring that stains and sealants adhere properly while minimizing issues such as drying and cracking.
The process involves several essential steps, including cleaning the surface to remove any contaminants, lightly sanding to open the wood grain, and applying an appropriate wood conditioner that suits the specific type of wood being treated.
This article will provide a comprehensive guide on how to condition wood effectively, detailing each stage from preparation through to the application of the conditioner and concluding with finishing techniques to ensure a polished and long-lasting result.
By following these steps, you can significantly improve the quality of your wood projects and enhance their longevity.
Materials and Tools Needed
To effectively condition the wood, you will need the following materials: wood conditioner, clean cloths, wood cleaner, mineral spirits, sanding supplies, and an optional finish or sealant.
The essential tools required for this process include a screwdriver, paintbrush, drop cloth, fine-grit sandpaper, and a vacuum or tack cloth for cleanup. Additionally, you may consider using optional tools such as wood filler to repair imperfections and a brush or roller to apply the conditioner to ensure even coverage on the wood surface.
Preparing the Wood Surface
Proper wood surface preparation is essential for achieving optimal results when conditioning the wood. The first step in this process is cleaning the wood to eliminate any dust, dirt, or grime that may hinder the penetration of the conditioner.
Begin by using a wood cleaner or a mild soap solution combined with water to gently wipe down the surface. Pay attention to corners and crevices where dirt may accumulate, ensuring that you remove all contaminants.
Once the surface is clean, letting the wood dry completely before proceeding to the sanding stage is crucial. This will help prevent moisture from interfering with the conditioning process.
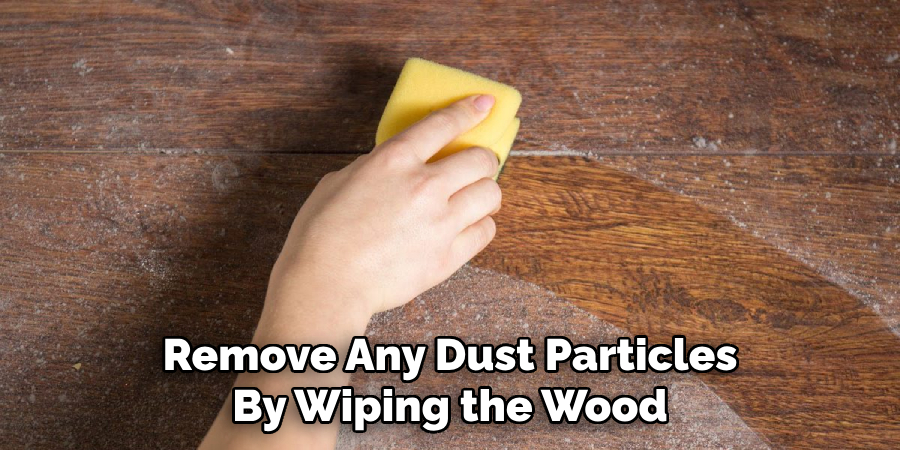
After the wood has dried, lightly sand the surface using fine-grit sandpaper. This not only smooths out imperfections but also opens up the wood grain, allowing for improved absorption of the conditioner.
Be sure to sand in the direction of the grain to avoid scratching the surface. After sanding, remove any dust particles by wiping the wood with a clean, damp cloth or using a vacuum. This ensures a smooth and clean surface for applying the wood conditioner, setting the stage for a successful treatment.
How to Condition Wood: Applying Wood Conditioner
Choosing the Right Conditioner
Selecting an appropriate wood conditioner is crucial for achieving optimal results. Different types of wood, such as softwoods like pine or hardwoods like oak, may require specific conditioners tailored to their unique characteristics.
It’s vital to consider the type of finish you plan to apply; for instance, gel stains may work better on certain surfaces, while penetrating stains may be more suitable for others.
Additionally, evaluating the wood’s current condition is important, as damaged or weathered wood may benefit from a conditioner that provides extra moisture or protection.
Always read the manufacturer’s recommendations to ensure compatibility between the wood conditioner and the subsequent finishes you intend to use, as this can significantly impact the final appearance of your project.
Applying the Conditioner
To apply the wood conditioner effectively, use a clean cloth or a brush to spread the product across the wood surface evenly. It’s essential to work in the direction of the wood grain to ensure proper absorption and to avoid streaking.
Take care not to overload the cloth or brush with conditioner, as doing so may result in an uneven application. Allow the conditioner to penetrate the wood according to the manufacturer’s instructions, typically 15 to 30 minutes.
During this time, make sure to check for any areas that may require additional product to ensure consistent absorption across the entire surface. Be mindful of any advice given on the specific conditioner being used, as some may require altering the application method based on wood species or intended finish.
Wiping Off Excess Conditioner
Once the conditioning period has elapsed, gently wipe away any excess conditioner not absorbed by the wood.
This process is essential to ensure that the surface remains smooth and free from any residual product that could interfere with the subsequent finishing steps. Use a clean, dry cloth for this task, making sure to catch any pooling or uneven patches of the conditioner.
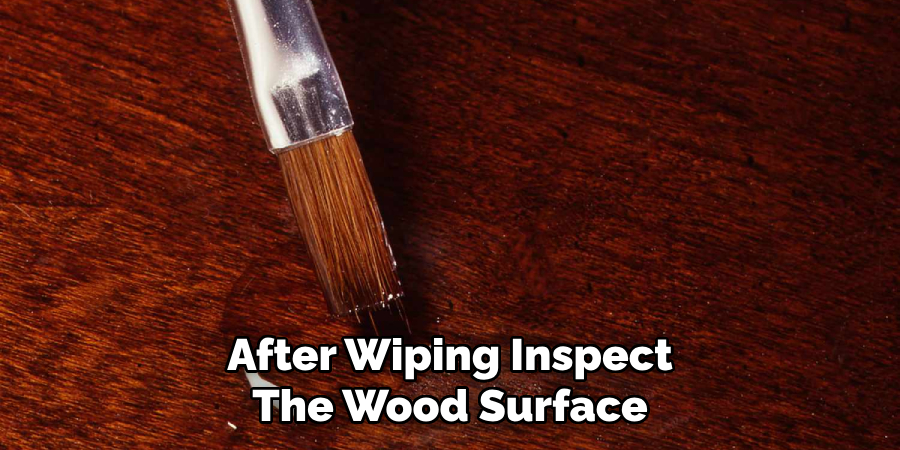
After wiping, inspect the wood surface for any remaining conditioner and ensure it is all evenly removed. This step is critical to achieving a flawless finish later on. Finally, allow the wood to dry completely before proceeding to the next steps in your finishing process.
Remaining vigilant during this drying phase can help prevent problems with the final application of stains or sealants, ensuring a high-quality and durable result.
Finishing the Wood
Choosing a Finish
Selecting the right finish is crucial for enhancing your wood project’s beauty and durability. The options range from stains, which provide color while allowing the wood grain to show through, to varnishes and polyurethanes that offer protection from moisture and wear.
Consider the desired appearance—whether you want a glossy, matte, or satin finish—and the functionality required for the wood’s intended use. For example, high-traffic areas may benefit from tougher finishes that withstand scratches and impacts.
It’s also essential to ensure compatibility between the chosen finish and the wood conditioner used earlier; some finishes may react poorly if the conditioner hasn’t fully cured.
Always refer to the manufacturer’s instructions to confirm that your selected finish will work seamlessly with the wood conditioner to achieve the best overall results.
Applying the Finish
Once you’ve chosen the appropriate finish, it’s time to apply it according to the product’s specific instructions. Use a clean brush, roller, or cloth to spread the finish evenly across the wood surface.
As with the conditioner, work along the grain to avoid streaks and ensure optimal absorption. Pay attention to the amount of product being applied; overloading your applicator can lead to drips and uneven coverage.
If multiple coats are recommended, allow sufficient drying time between each layer to achieve a professional look and durability. Following these steps will ensure an even application, contributing to your finished wood surface’s longevity and aesthetic appeal.
Final Inspection and Touch-ups
After the finish has dried, thoroughly inspect the wood surface to identify any inconsistencies or areas that may require touching up. Look for signs of unevenness or imperfections that could detract from the overall appearance.
If you notice any spots needing additional conditioning or further finish application, address them promptly to ensure a smooth and uniform surface. Fine sandpaper can help lightly abrade any uneven patches, allowing for better adhesion of touch-up finishes.

After making the necessary adjustments, perform final touch-ups to enhance the polished look of the wood. This meticulous attention to detail will result in a refined, high-quality finish that showcases your craftsmanship and ensures the project’s durability for years to come.
Troubleshooting Common Issues
Uneven Absorption
Uneven absorption of the wood conditioner can occur, leading to inconsistent color and texture in the finished product. If you notice areas that appear lighter or darker, it may be necessary to reapply the conditioner to these uneven sections.
Use a clean applicator to apply a thin layer, ensuring it works thoroughly into the wood grain. Allow adequate time for the conditioner to penetrate before wiping off any excess to promote an even surface for finishing.
Residue or Streaking
Residue or streaks left by the conditioner can mar the appearance of your wood finish. If you notice any leftover product, use a clean, dry cloth to gently buff the areas in question, smoothing out any streaks.
Work in small sections and apply light pressure, being careful not to damage the wood surface. This will help restore a uniform look and prepare the wood for its final finish, ensuring a professional-quality result.
Maintenance and Care
To keep your wood surface in optimal condition, regularly dust and clean it using a soft, dry cloth. This simple practice helps prevent grime buildup and keeps the finish looking fresh. It’s essential to avoid harsh chemicals or abrasive cleaners, as these can damage the wood surface and compromise its finish.

Additionally, consider reapplying conditioner as needed, particularly in areas exposed to sunlight or heavy usage, to maintain the wood’s natural beauty and prevent drying or cracking. Regular maintenance ensures that your wood remains vibrant and well-protected for years to come.
Conclusion
In summary, effectively conditioning wood involves well-defined steps, including proper preparation, application, and finishing. The process begins with selecting an appropriate wood conditioner and thoroughly preparing the surface to ensure optimal absorption.
The application should be made carefully, using clean brushes or rags and working along the grain, then letting the conditioner dry completely. Finally, a compatible finish enhances the wood’s beauty and protects it from wear and tear.
Understanding how to condition wood elevates your projects’ aesthetic appeal and significantly extends their longevity. We encourage you to follow this guide for the best results and to experiment with various conditioners and finishes to find what works best for your specific needs, allowing your woodworking projects to truly shine.
About the Author
Adrian Green, a lifelong woodworking enthusiast, shares his passion for the craft through The Woodenify Blog. With a foundation built on years of hands-on experience in his father’s woodworking shop, Adrian is dedicated to helping others learn and grow in the world of DIY woodworking. His approach to woodworking combines creativity, practicality, and a deep appreciation for the art of building with your own hands. Through his blog, he inspires individuals of all skill levels to embark on their own woodworking journeys, creating beautiful, functional pieces of furniture and décor.
Professional Focus
- Specializes in DIY woodworking projects, from furniture to home décor.
- Provides step-by-step guides and practical tutorials for woodworkers of all skill levels.
- Dedicated to helping readers build confidence and skill through easy-to-follow instructions and tips.
- Passionate about fostering a community of makers who can share, learn, and grow together.
Education History
- University of Craft and Design – Bachelor of Fine Arts (BFA) in Woodworking and Furniture Design
- Woodworking Apprenticeships – Extensive hands-on training with skilled craftsmen to refine carpentry and furniture making techniques.
- Online Courses & Masterclasses – Continued education in advanced woodworking techniques, design principles, and specialized tools
Expertise:
- DIY woodworking, carpentry, furniture making, and home décor projects.
- Creating accessible tutorials and guides for beginner to advanced woodworkers.
- Sharing the joys and satisfaction of woodworking, from raw materials to finished products.