Connecting glass to wood can be a tricky process, but with the right tools and techniques, it can be done successfully. Whether you are looking to attach a glass tabletop to a wooden base or create a floating glass shelf on a wooden wall, there are several methods you can use to achieve a strong and secure connection. In this guide on how to connect glass to wood, we will discuss three commonly used techniques: using adhesives, drilling and screwing, and using glass clamps.
Materials Needed
- Glass
- Wood
- Adhesive (such as epoxy or silicone)
- Clamps
- Sandpaper
- Measuring tape
12 Steps on How to Connect Glass to Wood
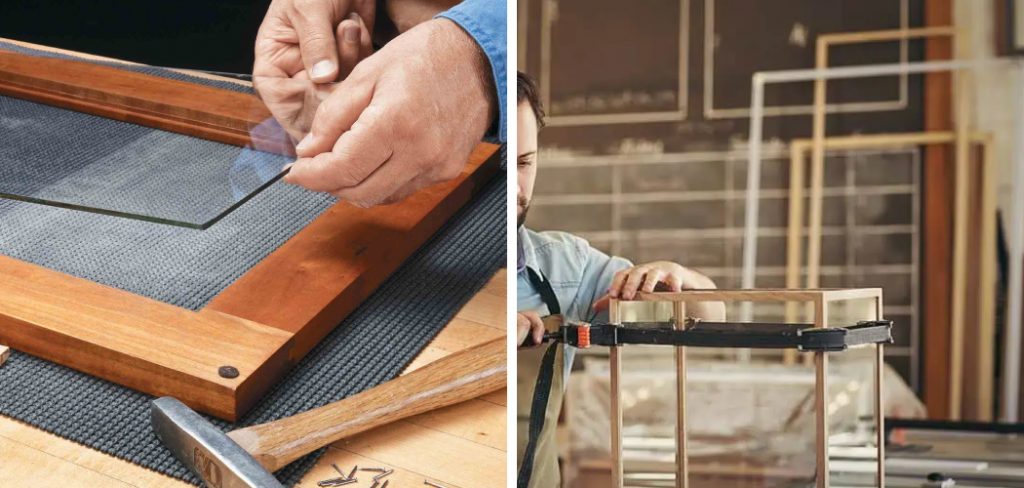
Step 1: Prepare the Surfaces
Before you begin attaching the glass to the wood, it is important to prepare both surfaces. Begin by cleaning the wood and glass with a mild soap solution and then drying them thoroughly. Depending on the type of adhesive you will be using, you may also need to sand down the surface of the wood to create a rougher texture for better adhesion.
Step 2: Measure and Cut
Measure the dimensions of both the glass and wooden surfaces where they will be joined. Once you have accurate measurements, use a glass cutter or appropriate saw to cut both materials to the desired size.
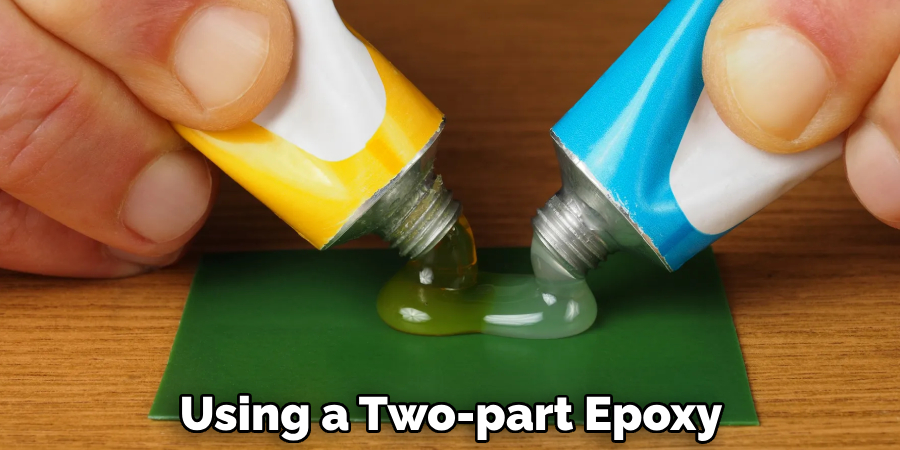
Step 3: Apply Adhesive
Select an appropriate adhesive for your specific project and apply it to the wood surface. Make sure to follow the instructions provided by the manufacturer for proper usage and curing time. If you are using a two-part epoxy, be sure to mix it according to the instructions before applying it.
Step 4: Place Glass on the Wood
Carefully place the glass onto the adhesive-covered wood surface, making sure it is centered and aligned correctly. Apply pressure evenly across the entire surface of the glass to ensure a strong bond with the wood.
Step 5: Use Clamps
If needed, use clamps to hold the glass in place while the adhesive dries. Make sure to use protective padding between the clamps and glass to prevent any damage. Then, leave the clamps in place for the recommended amount of time according to the adhesive instructions.
Step 6: Clean Up Excess Adhesive
After the adhesive has cured, use a razor blade or scraper to remove any excess adhesive that may have oozed out between the glass and wood surfaces. This will give your project a cleaner and more polished look.
Step 7: Reinforce with Screws
For an extra secure connection, you can also reinforce the glass and wood bond by drilling screws into the wood from underneath. This method is especially useful for heavier or larger pieces of glass. For a more seamless look, you can also use countersunk screws and fill the holes with wood filler after.
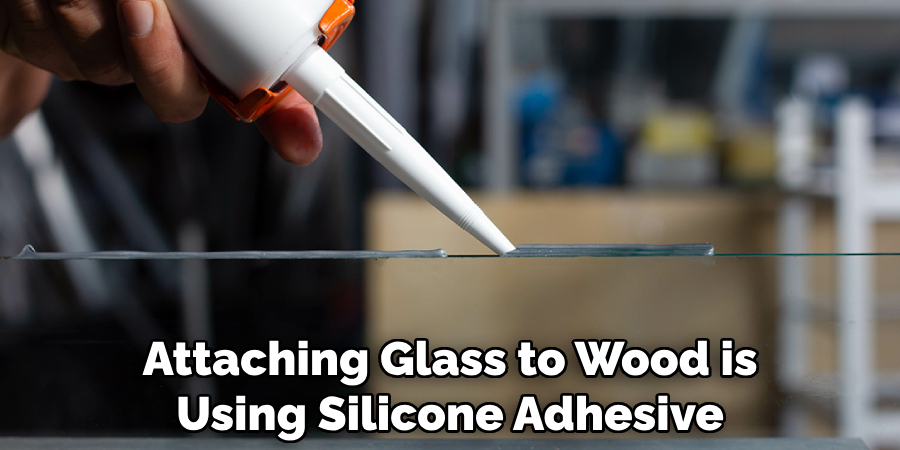
Step 8: Consider Using Silicone
Another option for attaching glass to wood is using silicone adhesive. This method is particularly useful for projects that will be exposed to moisture or outdoor elements because silicone is waterproof and weather-resistant.
Step 9: Let it Cure
Allow the adhesive to fully cure before using your project. This may take anywhere from 24 hours to a few days, depending on the type of adhesive used and environmental factors. Be sure to check the manufacturer’s instructions for specific curing times.
Step 10: Test it Out
Before putting any weight or stress on your project, do a test run by gently pushing or pulling on the glass to ensure it is securely attached to the wood.
Step 11: Maintenance
To keep your glass and wood connection strong, regularly check for any signs of wear or damage. If needed, reapply the adhesive or reinforce it with screws. As with any project, proper maintenance is key to ensuring its longevity.
Step 12: Enjoy Your Project
Congratulations, your glass and wood connection is complete! Now, you can enjoy your beautiful and functional piece of furniture or decor. Just remember to handle it with care and follow proper maintenance procedures to ensure its durability.
Connecting glass to wood can be a challenging task, but with the right materials and techniques, it is achievable. Whether you choose to use adhesive or screws, make sure to properly prepare and measure your surfaces for a strong and secure bond. And don’t forget to regularly maintain your project for long-lasting results. Now, go ahead and impress your friends and family with your newfound skills in connecting glass to wood! So go ahead, let your creativity flow, and create stunning pieces that combine the beauty of both materials seamlessly.

9 Safety Measures
1) Wear Protective Gear
When working with glass and wood, it is important to protect yourself from any potential injuries. Wear safety goggles and gloves to avoid getting cut or injured. Make sure your work area is well-ventilated to avoid inhaling any fumes from the adhesive.
2) Use Proper Tools
Using the correct tools for cutting and handling glass and wood is crucial for safety. Make sure your tools are in good condition and appropriate for the job at hand. If you are unsure, seek guidance from a professional.
3) Check for Stability
Before attaching the glass to the wood, make sure both surfaces are stable and secure. Any wobbling or unevenness can result in a weak connection and potential injury. While clamping or attaching with screws, make sure the surfaces remain stable.
4) Follow Adhesive Instructions
Be sure to follow the instructions provided by the manufacturer for any adhesive used. Improper usage can result in a weak connection or even damage to your project. However, following the instructions carefully will ensure a strong and secure bond.
5) Work in a Clean Environment
A clean work area is essential for safety when working with glass. Make sure to remove any debris or clutter that may cause accidents or damage to your project. And keep any sharp objects out of reach when they are not in use.
6) Handle Glass with Care
Glass can easily break or shatter, so handle it with caution. Use both hands to carry larger pieces and avoid bumping or dropping them. If you happen to break a piece, immediately dispose of any shards or fragments safely.

7) Avoid Using Glass with Sharp Edges
When cutting glass, make sure the edges are smoothed out and not sharp. If necessary, use sandpaper or a grinder to smooth out any rough edges before attaching it to the wood surface.
8) Stay Focused
When working with glass and wood, it is important to stay focused and alert. Avoid distractions or multitasking to prevent any accidents or mistakes. Always keep an eye on your fingers when handling sharp tools.
9) Seek Professional Help
If you are unsure or uncomfortable with handling glass and wood, it is always best to seek professional help. Don’t risk your safety for a DIY project, and leave it to the experts. And don’t hesitate to ask for advice or guidance from professionals if needed.
With these safety measures in mind, you can confidently tackle any project involving glass and wood. Remember, safety should always be your top priority. So go ahead, let your creativity flow, and create stunning pieces that combine the beauty of both materials seamlessly. Just make sure to follow these steps and safety precautions for a successful and safe project every time!
8 Things to Avoid
1) Rushing the Process
It’s important to take your time when working with glass and wood. Rushing can result in sloppy measurements, uneven surfaces, or even accidents. Plan out each step carefully and be patient to avoid any mistakes.
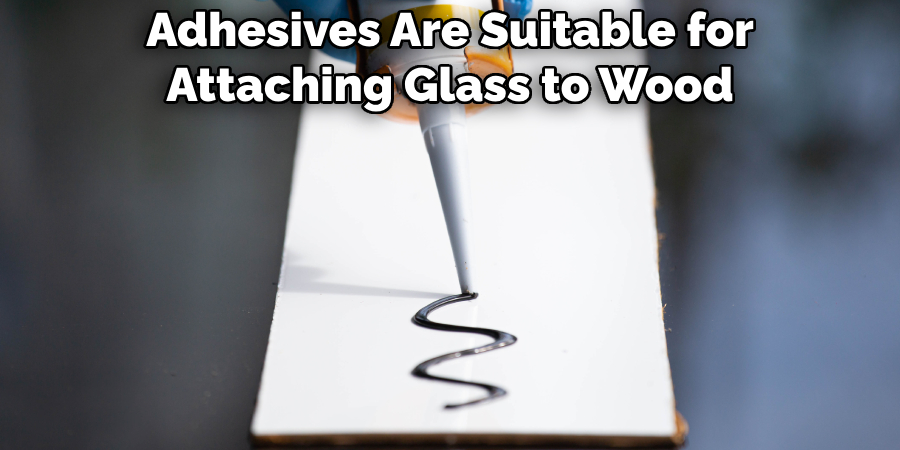
2) Using the Wrong Adhesive
Not all adhesives are suitable for attaching glass to wood. Make sure to use an adhesive specifically designed for this purpose and follow the instructions carefully.
3) Skipping Surface Preparation
Surface preparation is crucial for a strong bond between glass and wood. Skipping this step can result in a weak connection or even damage to your project. So make sure to properly clean, sand, and prime your surfaces before attaching them together.
4) Overloading the Glass
Glass can only bear so much weight, so avoid overloading it with heavy objects. Make sure to properly measure and distribute weight evenly on the surface. Then, test it out with some gentle pressure before placing any heavy objects on it.
5) Ignoring Safety Precautions
As mentioned above, safety should always be your top priority when working with glass and wood. Don’t ignore safety precautions or take shortcuts that may put you at risk of injury. If unsure, seek professional help.
6) Using Damaged Glass
Using damaged or compromised glass can result in accidents or a weak connection. Check your glass thoroughly for any cracks or chips before using it in your project. If you happen to notice any damage, replace it with a new piece.
7) Not Maintaining Your Project
Proper maintenance is crucial for the longevity of your project. Regularly clean and inspect the glass and wood surfaces to ensure they are in good condition. And make any necessary repairs or replacements to avoid accidents or damage.
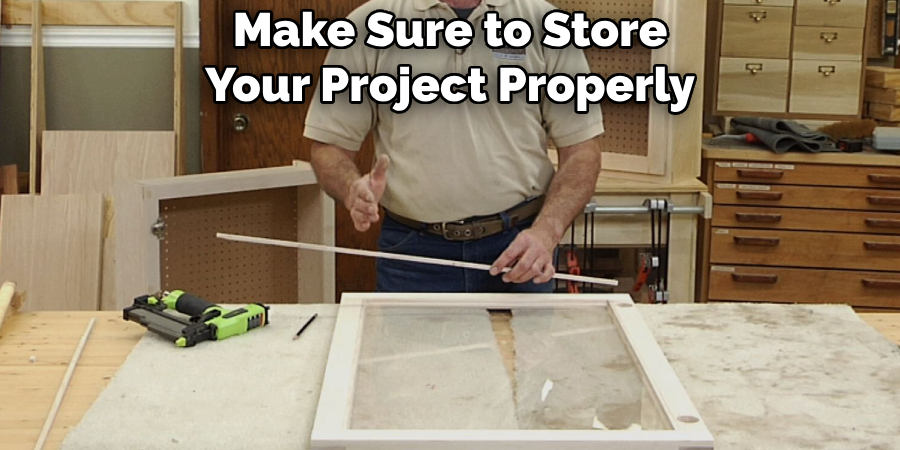
8) Storing Your Project Improperly
When not in use, make sure to store your project properly to prevent any damage. Keep it away from extreme temperatures or moisture to avoid warping or cracking. And store it in a place where it won’t be bumped or knocked over easily.
By avoiding these mistakes on how to connect glass to wood, you can ensure a successful and long-lasting project. Remember to always prioritize safety and take your time for the best results. So go ahead, let your creativity flow, and create stunning pieces that combine the beauty of both glass and wood. Just don’t forget to follow these safety measures and avoid any potential mishaps! Happy crafting! It is always best to seek professional help when in doubt. Don’t risk your safety for a DIY project, and leave it to the experts.
8 Additional Tips for Working with Glass and Wood
1) Experiment with Different Types of Glass
There are so many different types of glass available that can add a unique touch to your project. Consider using stained glass, frosted glass, or textured glass for a more interesting and personalized design.
2) Use Protective Gear
When working with glass and power tools, it’s important to wear protective gear such as safety glasses and gloves. This will help prevent any accidents or injuries that may occur. Also, make sure to properly dispose of any broken glass or shards.
3) Incorporate Wood Stains
Wood stains can add depth and character to your project. Consider using different shades of wood stains to create a more intricate design or match your existing decor. Then, seal the stain with a clear coat for added protection and shine.
4) Add LED Lights
For a more modern touch, consider adding LED lights to your glass and wood project. This can create a stunning effect when placed on shelves or used as a decorative piece in dimly lit rooms. Therefore, it is important to use safety-certified LED lights and keep them away from any flammable materials.
5) Use Templates or Stencils
If you’re not confident in your freehand drawing skills, consider using templates or stencils for your glass and wood design. This will help ensure more precise lines and shapes, resulting in a cleaner and more professional-looking project.
6) Experiment with Different Techniques
Don’t be afraid to try out different techniques when working with glass and wood. For example, you can use etching cream on glass for a frosted effect or use a decoupage to add designs or patterns onto the wood surface.
7) Get Creative with Framing
Instead of traditional frames, consider using wood as a frame for your glass artwork. This adds an interesting twist and can make your project stand out even more.
8) Recycle Old Materials
Don’t throw away old or damaged pieces of glass and wood – instead, recycle them into new projects! You can cut up old wine bottles to create coasters or use scraps of wood to make a unique wall hanging. Get creative and give new life to old materials.
By incorporating these tips into your glass and wood projects, you can elevate your skills and create even more beautiful and unique pieces. Always remember to prioritize safety and have fun with your creations! So go ahead, let your imagination run wild, and see what stunning works of art you can create with these two versatile materials. Just remember to always prioritize safety and take your time for the best results.

And don’t forget to share your creations with others – you never know who you might inspire to start their own glass and wood projects. So, keep learning, experimenting, and creating beautiful pieces that combine the strength of wood with the elegance of glass.
Frequently Asked Questions
Can I Use Regular Glass for My Project?
It is recommended to use tempered or safety glass for any projects involving glass, as they are less likely to break and cause injury. Regular glass can still be used, but extra caution should be taken. Always wear protective gear and handle the glass with care.
How Do I Cut Glass Safely?
Glass cutting can be dangerous, so it’s important to follow safety precautions. Use a designated glass cutter tool, and make sure to score the glass at least two or three times before breaking it. Also, always work on a flat and stable surface when cutting glass.
What Types of Wood is Best for Glass and Wood Projects?
Hardwoods such as oak, maple, or cherry are commonly used in glass and wood projects due to their strength and durability. It’s important to choose a type of wood that can support the weight of the glass without warping or cracking.
Can I Clean My Glass and Wood Project with Regular Household Cleaners?
Avoid using harsh chemicals or cleaning products on your glass and wood project, as they may damage the surfaces. Instead, use a mild soap and warm water to clean the glass and a gentle wood cleaner for the wooden surfaces.
What Should I Do If My Glass Breaks During the Project?
If your glass breaks during the project, make sure to carefully dispose of any broken shards and replace the glass with a new piece. Do not attempt to continue working with the broken piece, as it can cause injury or damage to your project. If you’re unsure about how to proceed, seek professional help or start over with a new project using proper safety measures. Your safety should always be the top priority when working with glass and wood.
Conclusion
Glass and wood are versatile materials that can be combined to create stunning and unique pieces of art. By following these tips on how to connect glass to wood and taking necessary safety precautions, you can elevate your glass and wood projects to a whole new level. So keep creating, exploring, and sharing your beautiful creations with others! Remember to always prioritize safety and never hesitate to seek professional help when needed. Happy crafting! So go ahead and start your next glass and wood project with confidence, knowing that you have the skills and knowledge to create something truly spectacular.
Keep pushing yourself to try new techniques and incorporate different materials – who knows what amazing creations you’ll come up with next! Just remember to have fun, stay safe, and let your creativity shine through in every piece you make. The possibilities are endless when it comes to glass and wood projects, so let your imagination run wild and see what beautiful works of art you can create. Keep learning and exploring, and who knows – one day, your glass and wood creations will inspire others to start their own crafting journey!
About the Author
Adrian Green, a lifelong woodworking enthusiast, shares his passion for the craft through The Woodenify Blog. With a foundation built on years of hands-on experience in his father’s woodworking shop, Adrian is dedicated to helping others learn and grow in the world of DIY woodworking. His approach to woodworking combines creativity, practicality, and a deep appreciation for the art of building with your own hands. Through his blog, he inspires individuals of all skill levels to embark on their own woodworking journeys, creating beautiful, functional pieces of furniture and décor.
Professional Focus
- Specializes in DIY woodworking projects, from furniture to home décor.
- Provides step-by-step guides and practical tutorials for woodworkers of all skill levels.
- Dedicated to helping readers build confidence and skill through easy-to-follow instructions and tips.
- Passionate about fostering a community of makers who can share, learn, and grow together.
Education History
- University of Craft and Design – Bachelor of Fine Arts (BFA) in Woodworking and Furniture Design
- Woodworking Apprenticeships – Extensive hands-on training with skilled craftsmen to refine carpentry and furniture making techniques.
- Online Courses & Masterclasses – Continued education in advanced woodworking techniques, design principles, and specialized tools
Expertise:
- DIY woodworking, carpentry, furniture making, and home décor projects.
- Creating accessible tutorials and guides for beginner to advanced woodworkers.
- Sharing the joys and satisfaction of woodworking, from raw materials to finished products.