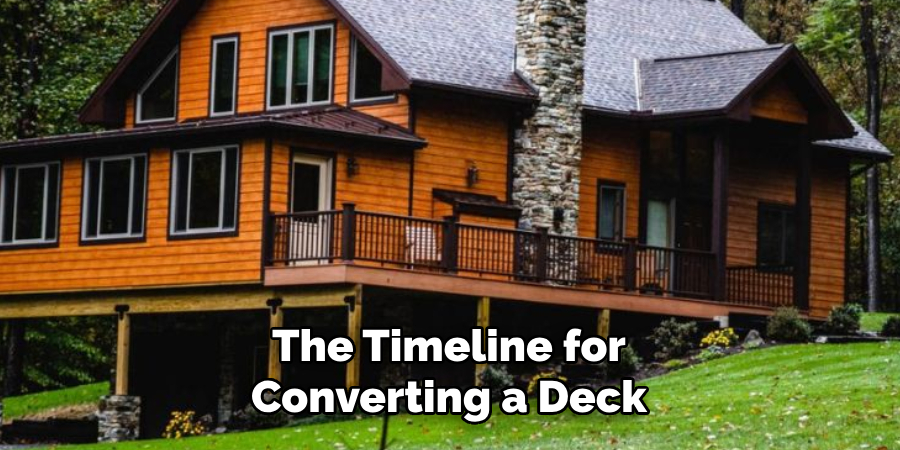
Converting a deck to a screened-in porch is a great way to add additional living space and increase the value of your home. Screened-in porches provide the perfect place to relax, entertain, and enjoy the outdoors without worrying about bugs or harsh weather conditions.
If you have an existing deck and are considering converting it into a screened-in porch, remember a few important things. In this guide, we will walk you through the steps of how to convert deck to screened in porch and provide some tips and ideas for creating your own outdoor oasis. So, let’s get started!
Understanding Deck to Screened in Porch
When converting a deck to a screened-in porch, it’s important to understand the difference between the two structures. Decks are typically open-air outdoor spaces that can be attached or detached from a house, while screened-in porches have walls and a roof made of screens to keep out insects and debris. Converting your deck into a screened-in porch will require modifications and additions to your existing structure to transform it into a comfortable and functional space.
Supplies You Will Need to Convert Deck to Screened-in Porch
- Measuring tape
- Hammer and nails
- Screws and drill
- Saw
- Screen material (such as fiberglass or aluminum)
- Screen door kit
- Lumber for framing (if necessary)
Step-by-step Guidelines on How to Convert Deck to Screened in Porch
Step 1: Assess your deck
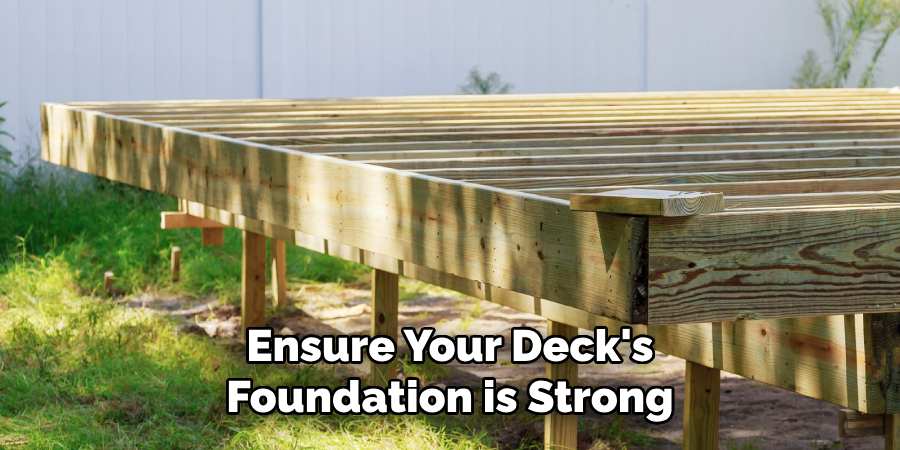
The first step in converting a deck to a screened-in porch is to assess the existing structure. Check for any damages or structural issues that must be repaired before proceeding with the conversion. Ensure your deck’s foundation is strong enough to support the added weight of walls and screens. Accessing your deck’s current state will help you determine what modifications must be made and if any professional assistance is necessary.
Step 2: Measure and plan
Using a measuring tape, accurately measure your deck’s length, width, and height. This will help you determine the amount of screen material and framing lumber needed for the project. It’s also essential to plan the layout and placement of your screened-in porch. Consider factors such as sunlight, views, and access to your home. Measuring and planning are crucial in ensuring a successful and functional conversion.
Step 3: Add framing (if necessary)
If your deck does not have existing walls or a roof, you must add framing to support the screens. Use pressure-treated lumber for durability and follow building code regulations for proper installation. If you’re uncomfortable with DIY framing, you can hire a professional contractor for this step. While it may be an additional cost, it will ensure a safe and sturdy structure for your screened-in porch.
Step 4: Install screens
With the framing in place, you can now install the screen material. Choose high-quality screen material that is durable and insect-resistant. Fiberglass, aluminum, and bronze are popular options. Start by stapling the screen material to one side of the frame and work your way around, ensuring it is tight and wrinkle-free. Trim any excess screen material with a saw. Make sure to install a screen door kit with a latch or lock for easy access.
Step 5: Add finishing touches

To complete your screened-in porch, you can add some finishing touches to make it more comfortable and inviting. This can include adding outdoor furniture, lighting, and even a ceiling fan for those hot summer days. You can also decorate the space with potted plants, rugs, and curtains for added privacy and aesthetics.
Following these steps and utilizing your creativity, you can easily convert your deck into a beautiful and functional screened-in porch. With careful planning and proper maintenance, your new outdoor space will provide you and your family with years of enjoyment. So go ahead and start envisioning your perfect screened-in porch—the possibilities are endless!
Additional Tips and Tricks to Convert Deck to Screened-in Porch
- Hiring a professional contractor for the conversion process is highly recommended if you need more confidence in your carpentry skills. This will ensure that the job is done correctly and safely.
- Obtain all necessary permits before starting the conversion project. Depending on where you live, there may be specific building codes and regulations for deck conversions. Failure to obtain proper permits can result in fines and potential safety hazards.
- Add electrical outlets and lighting fixtures to your screened-in porch for convenience and functionality. This will allow you to enjoy the space during the evening hours and provide power for electronics or appliances.
- Incorporate weather-resistant materials such as vinyl, aluminum, or composite decking boards for your screened-in porch. These materials are durable and can withstand exposure to the elements, making them ideal for outdoor use.
- When choosing a screen material for your porch, consider using a finer mesh like fiberglass or aluminum to keep out smaller insects such as mosquitoes and gnats.
- To add privacy to your screened-in porch, consider installing curtains or blinds on the screens. This will also allow you to control the amount of sunlight and breeze in the space.
- Adding a ceiling fan or portable heater can make your screened-in porch usable during different seasons, allowing you to enjoy the space year-round.
- Incorporate outdoor furniture and decor such as rugs, throw pillows, and plants into your screened-in porch design to create an inviting atmosphere. This will make the space feel like an extension of your home.
- Regularly clean and maintain your screened-in porch to ensure its longevity. Sweep or vacuum up debris, wipe down surfaces, and inspect for any damage that may need to be repaired.
- Finally, remember to have fun and personalize your screened-in porch according to your own style and preferences. This space is meant for relaxation and enjoyment, so make it your own!
- If you want to save money on materials, consider repurposing items from around your home or purchasing second-hand furniture or decor. This will reduce costs and add character and uniqueness to your screened-in porch.

Following these additional tips and tricks will help you successfully convert your deck into a screened-in porch, creating a comfortable and functional outdoor living space for you and your family to enjoy. Remember to prioritize safety and proper maintenance to enjoy this new home addition. Happy converting!
Things You Should Consider to Convert Deck to Screened-in Porch
- The first thing to consider is the location of your deck. A screened-in porch can be an extension of your living space, so it’s important to choose a location that fits your home’s flow and provides easy access.
- The next thing to consider is your deck’s size and shape. A screened-in porch can be as small or as large as you want, but it’s important to ensure that your deck’s size and shape will allow for a comfortable and functional screened-in porch.
- One of the biggest considerations when converting a deck to a screened-in porch is the type of materials you want to use. You can choose between traditional wood decking or more modern options like composite decking or stone tiles. Each option has its own benefits and drawbacks, so it’s important to carefully consider which one will work best for your home and budget.
- Another important factor is the type of screening material you want to use. Many options are available, including traditional screens, retractable screens, or even glass panels. The type of screening material you choose will depend on your personal preferences and how you plan to use your screened-in porch.
- It’s also important to consider your screened-in porch’s overall design and aesthetics. You want it to seamlessly blend with your home’s exterior while creating a comfortable and inviting space. This includes choosing the right color scheme, lighting, and decor for your new addition.
- You should also consider any necessary permits or building codes that may apply to your project. Depending on where you live, specific regulations for adding a screened-in porch may exist, so it’s important to research and obtain any necessary approvals before starting construction.
- Regarding functionality, consider what features you want to include in your screened-in porch. This could include a fireplace, ceiling fans, built-in seating, or even a small kitchenette. These features can enhance the functionality and enjoyment of your new space.
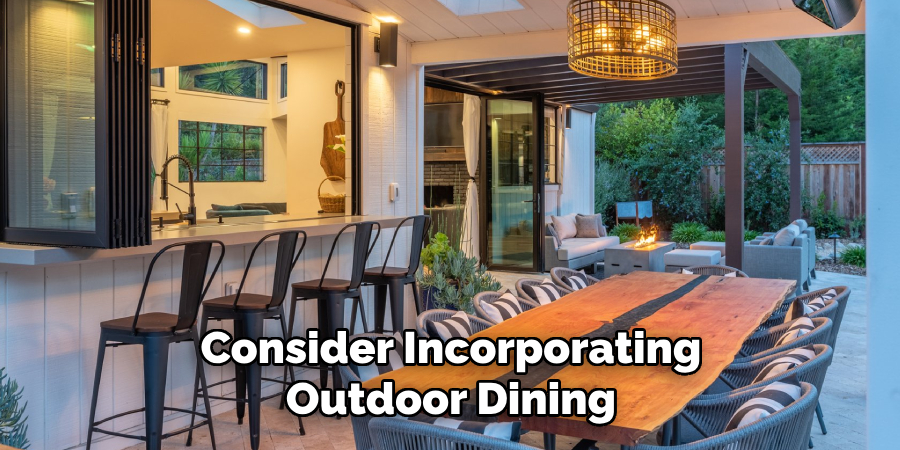
- Consider how you want to use your screened-in porch throughout the year. If you live in a colder climate, consider investing in additional heating options or considering enclosing the porch with windows for year-round use. Consider incorporating outdoor dining or lounging areas in warmer climates for maximum enjoyment.
These considerations can help you convert your deck into a beautiful, functional screened-in porch. Take the time to carefully plan and research each aspect to create a space that fits your needs and enhances your home. Proper planning lets you transform your outdoor deck into a year-round oasis for relaxing and entertaining.
If you’ve considered converting your deck to a screened-in porch, don’t hesitate to explore your options and start the process today. Your future self will thank you for the additional living space and enjoyment a screened-in porch can provide. Happy planning!
Troubleshooting Common Issues to Convert Deck to Screened in Porch
1. Uneven or Sloping Deck Surface:
If your deck surface is leveled, installing the screened-in porch components can be problematic. One solution is to add leveling shims underneath the porch posts to ensure a flat surface. Another option is to use adjustable post bases, which can be adjusted to accommodate uneven surfaces. This will ensure that your porch is level and secure.
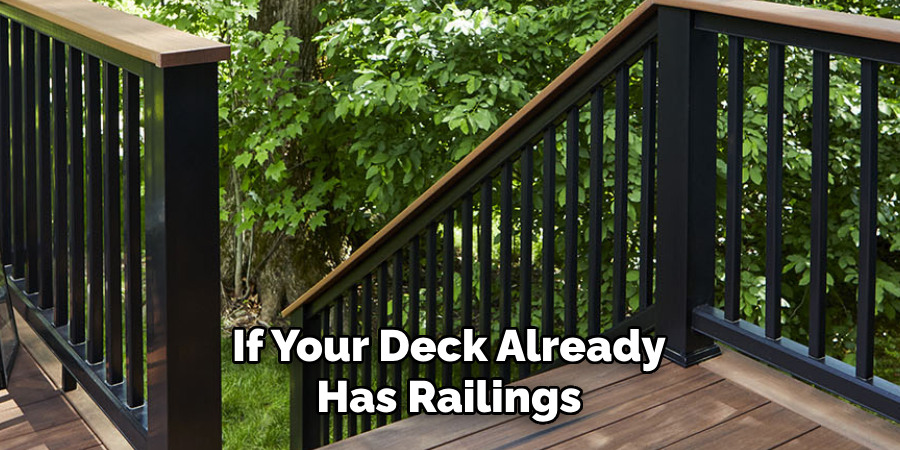
2. Existing Railings or Balusters:
If your deck already has railings or balusters, these must be removed before the screened-in porch components can be installed. This can add an extra step and potential cost to the project. However, if you are converting a deck with railings into a screened-in porch, you can repurpose the railings as part of your screened-in porch design for added aesthetic appeal.
3. Insufficient Support Posts:
If your deck needs more support posts or is spaced too far apart, it can cause problems when installing the screened-in porch components. Adding additional support posts may be necessary to ensure the porch is structurally sound. It’s always best to consult a professional contractor or engineer for guidance on properly supporting your specific deck.
4. Poor Drainage:
If your deck needs proper drainage, converting it into a screened-in porch can be problematic. Water pooling on the porch floor can cause damage over time, so it’s important to ensure proper drainage is in place before installing the porch components. This may require adding gutters or other drainage solutions to redirect water from the porch area.
5. Electrical Wiring:
If you plan on using your screened-in porch as an outdoor living space, install electrical outlets for lighting, fans, or other appliances. This will require proper wiring and may involve hiring a licensed electrician to ensure safety and compliance with building codes. This should be factored into the overall cost and timeline of converting your deck to a screened-in porch.
6. Local Building Codes:
Before beginning any conversion project, it’s important to research and understand local building codes and regulations. Some areas may have specific requirements for adding a screened-in porch, such as setback distance from property lines or minimum height clearance. Please comply with these codes to avoid costly fines or having to redo the project. It’s best to consult with a professional contractor familiar with local building codes before starting any conversion work.
7. Inclement Weather:
The weather can also play a factor when converting your deck to a screened-in porch. If you live in an area with extreme temperatures, heavy rain, or strong winds, you may need to take extra precautions to ensure the porch is weatherproof. This can include using durable materials and properly sealing all openings to prevent moisture and drafts from entering the porch.
8. Proper Ventilation:
A screened-in porch can provide a great outdoor living space, but it’s important to have proper ventilation to prevent heat buildup and moisture buildup. This can be achieved by incorporating windows or vents into the porch design and ensuring enough airflow between the deck boards. Proper ventilation will make the space more comfortable and help prevent any potential damage to the porch structure.
Following these troubleshooting tips can help you overcome common issues when converting your deck to a screened-in porch. By addressing any potential problems beforehand, you can ensure a successful and enjoyable outdoor living space that adds value and functionality to your home.

Remember to always consult with professionals if you need clarification on any aspect of the conversion process. With proper planning and execution, you can transform your deck into a beautiful and functional screened-in porch. Happy converting!
Frequently Asked Questions
How Much Does It Cost to Convert a Deck Into a Screened-in Porch?
The cost of converting a deck into a screened-in porch can vary depending on several factors, such as the size of the deck, materials used, and any additional features or upgrades. On average, homeowners can expect to spend anywhere from $8,000 to $20,000 for a basic conversion.
Still, this cost can increase significantly if you choose higher-end materials or add features like lighting or heating. It’s best to get quotes from multiple contractors to compare prices and find the best option for your budget.
Do I Need a Permit to Convert My Deck Into a Screened-in Porch?
In most cases, you will need a permit to convert a deck into a screened-in porch. This is because the conversion involves structural changes and can affect the overall safety of your home. The permit process may vary depending on your location, so it’s best to consult your local building department for specific requirements and regulations.
How Long Does It Take to Convert a Deck Into a Screened-in Porch?
The timeline for converting a deck into a screened-in porch can also vary depending on the size and complexity of the project. Generally, it can take anywhere from two to six weeks to complete the conversion process. This includes obtaining permits, ordering materials, and construction time.
Can I Convert My Deck Into a Screened-in Porch Myself?
While some homeowners may have experience with DIY projects, attempting to convert a deck into a screened-in porch is recommended with professional help. This type of conversion involves complex structural changes and requires specific skills and expertise that only a licensed contractor can provide. It’s better to invest in professional services to ensure the safety and quality of your screened-in porch.
Conclusion
Now you know how to convert deck to screened in porch and some important considerations before starting the project. Remember to budget for the cost, obtain necessary permits, and hire a licensed contractor for the best results. With a converted screened-in porch, you can enjoy the outdoors without worrying about pesky bugs or harsh weather conditions.
It’s a great way to add value and functionality to your home. So why wait? Start planning your deck conversion today and enjoy your new screened-in porch in no time! So, let’s start transforming your deck into a beautiful and functional screened-in porch that you can enjoy all year round. Happy converting!
About the Author
Adrian Green, a lifelong woodworking enthusiast, shares his passion for the craft through The Woodenify Blog. With a foundation built on years of hands-on experience in his father’s woodworking shop, Adrian is dedicated to helping others learn and grow in the world of DIY woodworking. His approach to woodworking combines creativity, practicality, and a deep appreciation for the art of building with your own hands. Through his blog, he inspires individuals of all skill levels to embark on their own woodworking journeys, creating beautiful, functional pieces of furniture and décor.
Professional Focus
- Specializes in DIY woodworking projects, from furniture to home décor.
- Provides step-by-step guides and practical tutorials for woodworkers of all skill levels.
- Dedicated to helping readers build confidence and skill through easy-to-follow instructions and tips.
- Passionate about fostering a community of makers who can share, learn, and grow together.
Education History
- University of Craft and Design – Bachelor of Fine Arts (BFA) in Woodworking and Furniture Design
- Woodworking Apprenticeships – Extensive hands-on training with skilled craftsmen to refine carpentry and furniture making techniques.
- Online Courses & Masterclasses – Continued education in advanced woodworking techniques, design principles, and specialized tools
Expertise:
- DIY woodworking, carpentry, furniture making, and home décor projects.
- Creating accessible tutorials and guides for beginner to advanced woodworkers.
- Sharing the joys and satisfaction of woodworking, from raw materials to finished products.