Are you looking for ways to cover the space under your deck? Look no further! In this guide, we will discuss various options for under deck ideas.
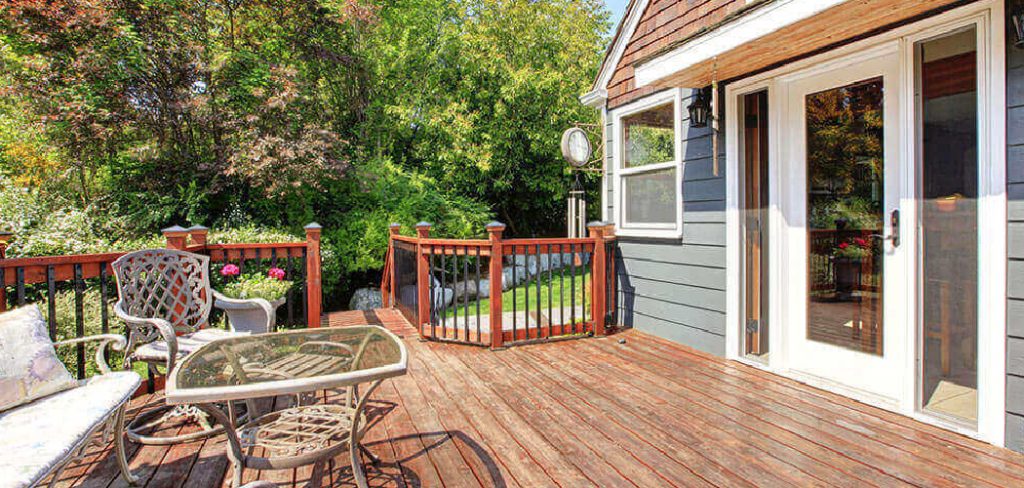
Covering the under-deck area is a practical way to maximize outdoor space while improving the aesthetics and functionality of your property. Whether you want to create a dry, usable storage space, an additional outdoor living area, or simply enhance the overall design of your deck, there are multiple techniques and materials to consider. By implementing the right method, you can protect the area from weather elements, prevent water buildup, and increase the longevity of your deck structure.
This guide on how to cover under deck will walk you through the essential steps and options to effectively cover the under-deck space, helping you achieve the perfect balance of style and utility.
What Are the Benefits of Covering the Under Deck?
Covering the space under your deck offers several advantages, including:
- Protection from rain and other weather elements
- Added privacy
- Increased usable outdoor living space
- Concealment of unsightly structural elements or storage items
- Improved the overall appearance of your deck
What Will You Need?
To cover the space under your deck, you will need:
- Measuring tape and pencil
- Pressure-treated lumber for framing
- Decking boards or other suitable materials for covering the frame
- Galvanized screws or nails
- Circular saw or hand saw
- Drill
- Level and square
- Paint or stain (optional)
10 Easy Steps on How to Cover Under Deck
Step 1: Measure the Area
Start by measuring the dimensions of the space under your deck. Use a measuring tape to determine the width, height, and depth of the area you want to cover. Be as accurate as possible, as precise measurements will help ensure that your materials fit properly. Mark these dimensions with a pencil on both the ground and any nearby supports to serve as a guide.
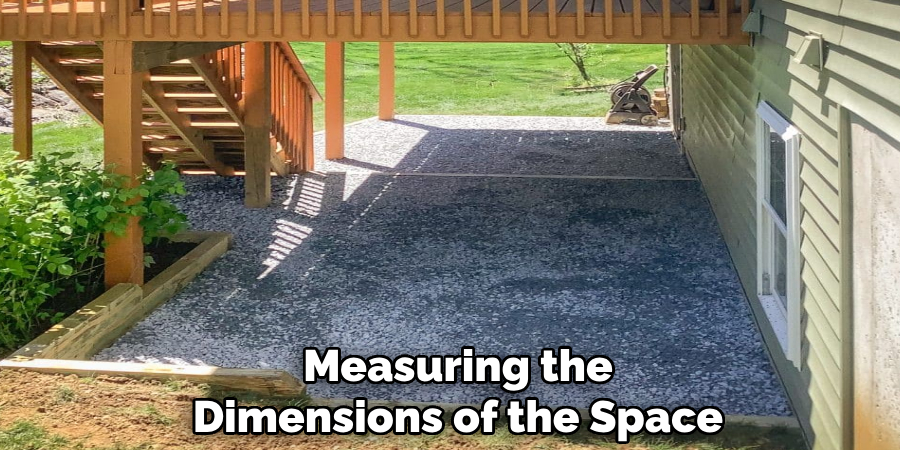
This step will also help you estimate the amount of materials you will need, such as lumber, decking boards, or other covering materials. If the ground under your deck is uneven, take additional measurements at various points to account for potential differences in height. Double-check your measurements to avoid costly mistakes or delays later in the process.
Step 2: Plan Your Design
Carefully planning your design is crucial to ensure your deck meets both your functional needs and aesthetic preferences. Start by sketching a rough layout of your deck, considering its purpose—whether it’s for dining, lounging, or entertaining.
Think about the shape, size, and location, ensuring it complements your home and blends well with your outdoor space. Consider factors like sun exposure, access points, and views, as these can significantly impact your enjoyment of the deck. Additionally, research local building codes, permits, and safety requirements to ensure compliance.
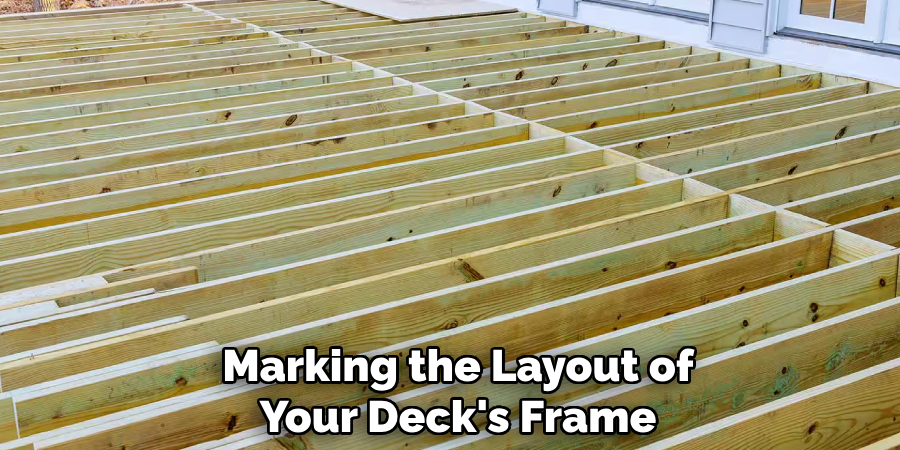
Step 3: Prepare the Frame
Start by marking the layout of your deck’s frame on the ground using stakes and string to outline the perimeter. Ensure the layout is square by measuring diagonally across the corners. Next, dig post holes at the marked positions, following the depth requirements specified by local building codes.
Securely set the posts in concrete, ensuring they are level and aligned. Once the concrete has cured, attach the beams and joists to the posts, creating a sturdy frame for the deck. Use a level throughout the process to guarantee an even surface, as this will serve as the foundation for the decking boards.
Step 4: Check for Levelness
To ensure your deck is perfectly level, use a long carpenter’s level or a laser level across the entire frame. Check all beams and joists individually to confirm they are sitting evenly. If you notice any uneven areas, make adjustments by either shaving down high points or adding shims to low points. This step is crucial, as an uneven frame can lead to issues with decking board installation and long-term structural integrity. Taking the time to check for levelness now will save you from potential problems later.
Step 5: Cut Covering Material
Measure the dimensions of your frame carefully to determine the size and quantity of the covering material needed. Using a tape measure, mark the measurements directly onto the boards or sheets to ensure accuracy. Employ a saw appropriate for your material, such as a circular saw for wood or a utility knife for composite materials, to make clean, precise cuts. Always double-check your measurements before cutting to avoid waste. Wearing proper safety gear, such as gloves and safety glasses, is strongly recommended during this process. Properly cut covering material will ensure a seamless and professional-looking finish when installed.
Step 6: Install Covering on Frame
Begin by aligning the covering material with the frame, ensuring that it is properly positioned and free of wrinkles or gaps. Use clamps or a temporary adhesive to hold the material in place as you work. Secure the covering by fastening it to the frame with screws, nails, or adhesive, depending on the material and frame structure.
Start fastening at one edge and move systematically to the opposite side, maintaining even tension to prevent sagging or misalignment. Trim any excess material using a sharp tool, and double-check for a snug fit around all edges. Taking your time during this step will result in a neat and durable installation.
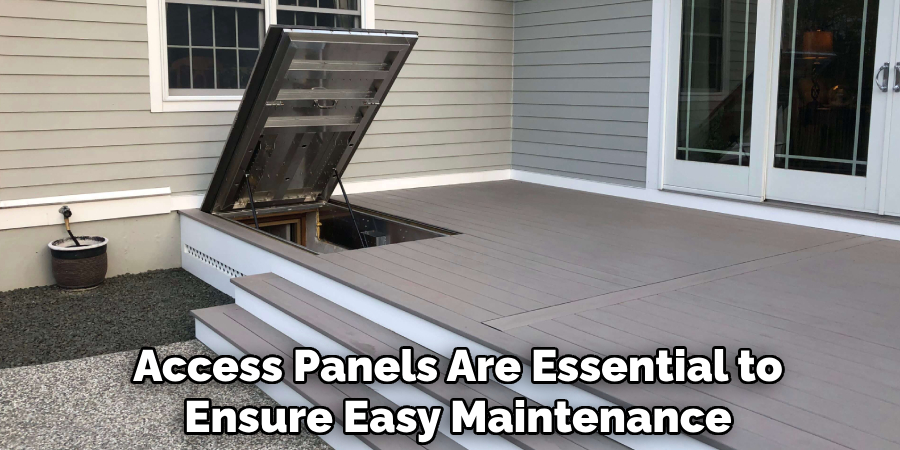
Step 7: Add Access Panels
Access panels are essential to ensure easy maintenance and inspections without dismantling the entire structure. To install access panels, select suitable locations where regular access might be necessary, such as near control units, valves, or wiring junctions. Measure and cut openings in the covering material to accommodate the panels, ensuring precise dimensions for a secure fit.
Attach the access panels using hinges, latches, or screws, based on the panel design and material. Test each panel to ensure it opens and closes smoothly while creating a tight seal when shut. Properly installed access panels will enhance the functionality and convenience of your setup.
Step 8: Fill Gaps
Inspect the installation for any gaps or spaces between the covering material and surrounding structures. Use an appropriate filler, such as caulk, foam, or sealant, to close these gaps securely. This step is essential to ensure insulation, prevent air or moisture leaks, and maintain a clean finish.
Apply the filler evenly, smoothing it out with a tool or your finger for a neat appearance. Allow sufficient curing or drying time as recommended by the product instructions before proceeding further. Filling gaps effectively will enhance the durability and efficiency of your installation.
Step 9: Paint or Stain
Once the filler has dried completely, you can proceed to paint or stain your surface to achieve the desired finish. Choose a high-quality paint or stain that suits the material and environment, ensuring it provides both aesthetic appeal and protection. Use a brush, roller, or sprayer for even application, and apply the product in thin, smooth coats to prevent drips or uneven coverage.
Allow each coat to dry fully before adding additional layers, following the manufacturer’s recommended drying times. This step not only enhances the appearance of your project but also helps protect the surface from wear, moisture, and other environmental factors.
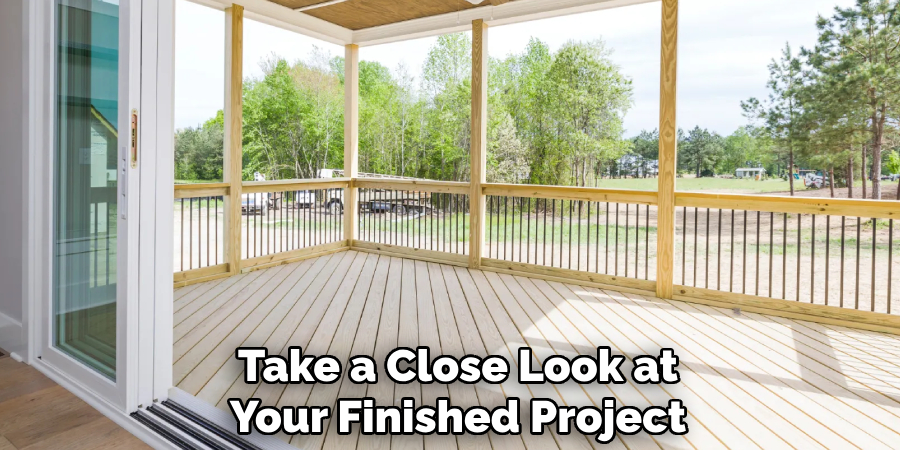
Step 10: Final Inspection
Take a close look at your finished project to ensure every detail meets your expectations. Check for any imperfections, such as uneven finishes, missed spots, or minor flaws, and address them promptly. Use adequate lighting to spot any areas that may need a touch-up. Inspect the surface for durability and make sure all layers are fully dried and properly set. A thorough final inspection ensures a professional and polished result, leaving your project ready to impress.
By following these steps, you can complete a painting project with confidence and satisfaction.
5 Things You Should Avoid
- Using Non-Durable Materials
Avoid selecting materials that cannot withstand harsh weather conditions. Under-deck spaces are often exposed to moisture, heat, and cold, so using materials prone to damage or decay, like untreated wood, can lead to costly repairs and short lifespans.
- Ignoring Proper Drainage
Failing to plan for proper water drainage can result in significant water buildup, leading to damage and mold growth. Always ensure that the covering solution includes a reliable drainage system to channel water away from the area.
- Overlooking Ventilation
Proper airflow is essential to prevent moisture accumulation, which can cause mold and mildew. Neglecting ventilation can create a damp, stuffy environment that may lead to long-term structural and health issues.
- Compromising on Installation Quality
Rushing through installation or cutting corners can lead to a poorly covered under-deck area. Ensure all components are securely fixed and aligned to maintain durability and functionality over time.
- Failing to Consider Aesthetics
While functionality is critical, ignoring the appearance of the under-deck covering can detract from the overall appeal of your outdoor space. Choose designs and finishes that complement your home’s style for a cohesive and attractive look.
Conclusion
How to cover under deck is an excellent way to enhance both the functionality and visual appeal of your outdoor space.
By carefully planning the design, choosing the right materials, and avoiding common mistakes, you can create a space that is both durable and aesthetically pleasing. Whether you’re looking to protect the area from the elements, add storage, or create a cozy retreat, investing time and effort into this project will yield rewarding results.
A well-executed under-deck covering adds value to your home and provides a versatile space for years to come.
About the Author
Adrian Green, a lifelong woodworking enthusiast, shares his passion for the craft through The Woodenify Blog. With a foundation built on years of hands-on experience in his father’s woodworking shop, Adrian is dedicated to helping others learn and grow in the world of DIY woodworking. His approach to woodworking combines creativity, practicality, and a deep appreciation for the art of building with your own hands. Through his blog, he inspires individuals of all skill levels to embark on their own woodworking journeys, creating beautiful, functional pieces of furniture and décor.
Professional Focus
- Specializes in DIY woodworking projects, from furniture to home décor.
- Provides step-by-step guides and practical tutorials for woodworkers of all skill levels.
- Dedicated to helping readers build confidence and skill through easy-to-follow instructions and tips.
- Passionate about fostering a community of makers who can share, learn, and grow together.
Education History
- University of Craft and Design – Bachelor of Fine Arts (BFA) in Woodworking and Furniture Design
- Woodworking Apprenticeships – Extensive hands-on training with skilled craftsmen to refine carpentry and furniture making techniques.
- Online Courses & Masterclasses – Continued education in advanced woodworking techniques, design principles, and specialized tools
Expertise:
- DIY woodworking, carpentry, furniture making, and home décor projects.
- Creating accessible tutorials and guides for beginner to advanced woodworkers.
- Sharing the joys and satisfaction of woodworking, from raw materials to finished products.