Finishing a plywood wall is an essential step to enhance its appearance, durability, and practicality. Whether you’re working on a new construction project or upgrading an existing space, proper preparation and finishing techniques can transform a plain plywood surface into a polished and professional feature.
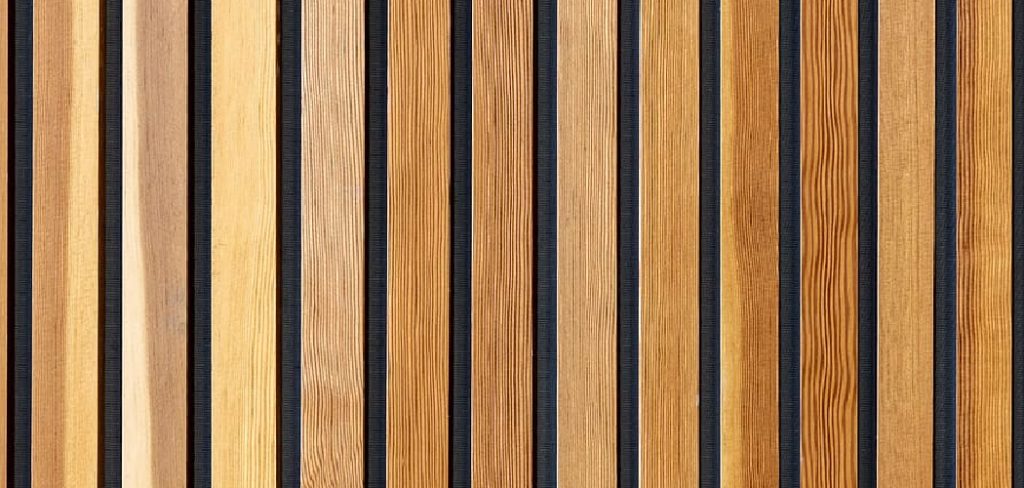
This guide on how to finish a plywood wall will walk you through the fundamental steps to achieve a smooth and attractive finish, ensuring your plywood wall looks great and lasts for years to come. Incorporating plywood walls in interior design can add a modern, minimalist touch to your space while keeping the look warm and inviting.
Why Finish a Plywood Wall?
There are several reasons why finishing a plywood wall is beneficial. First and foremost, it helps to protect the wood from damage caused by moisture, UV rays, and wear and tear. Unfinished plywood can easily warp, rot, or become discolored when exposed to these elements, compromising its structural integrity.
Furthermore, finishing your plywood wall can significantly improve its appearance and make it easier to clean and maintain. A well-finished surface will have a smooth texture that is resistant to stains, making it ideal for high-traffic areas such as kitchens and bathrooms.
Needed Materials
- Sandpaper or Sanding Block (Various Grits)
- Wood Stain or Paint
- Paintbrush or Foam Roller
- Polyurethane Sealant or Clear Coat
- Rags or Paper Towels
- Drop Cloth or Old Newspapers to Protect the Surrounding Area
9 Step-by-Step Guides on How to Finish a Plywood Wall
Step 1: Prepare the Surface
Before you begin finishing your plywood walls ideas interior design, it is important to ensure that the surface is smooth and free of any imperfections. Use a sandpaper or sanding block to lightly sand the entire surface in a circular motion.
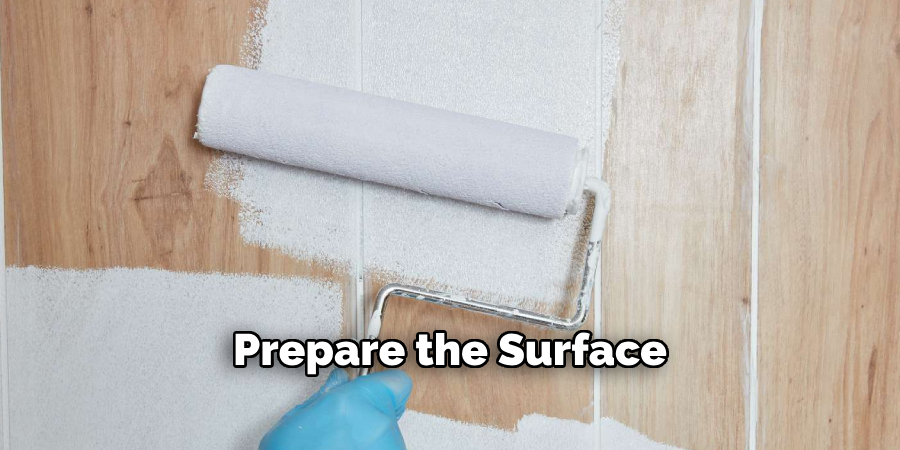
This will remove any rough spots and create an even base for the finish. Once done, use a damp cloth to wipe off any dust or debris.
Step 2: Choose Your Finish
Decide on the type of finish you want for your plywood wall, as this will impact both the appearance and durability of the surface. Common options include paint, stain, or a clear coat. Paint is ideal if you want to add color and hide the natural grain, while stain enhances the wood’s appearance by accentuating its natural patterns.
A clear coat, such as polyurethane, provides a protective layer while maintaining the wood’s original look. Consider the style of the space and the level of protection needed before making your choice.
Step 3: Protect The Surrounding Area
Before applying your chosen finish, it’s essential to protect the area around the plywood wall. Use painter’s tape to mask off edges, trim, or adjacent surfaces to prevent accidental drips or smudges. Lay down drop cloths or plastic sheeting on the floor and any nearby furniture to guard against spills.
Proper preparation not only keeps your workspace clean but also ensures a more professional and polished result by keeping unwanted areas free of the finish.
Step 4: Apply Primer (Optional)
Applying a primer to your plywood wall can enhance the overall finish and longevity of the project. A primer helps seal the surface, providing a smooth and uniform base for the final finish. If you plan to paint the plywood or use a semi-transparent stain, a primer can improve color adhesion and prevent uneven absorption.
Using a brush or roller, apply a thin and even coat of primer to the surface, following the grain of the wood whenever possible. Allow the primer to dry completely as specified in the manufacturer’s instructions before proceeding to the next step. Though optional, this step ensures a more durable and professional result.
Step 5: Sand the Surface
Once the primer has dried completely, lightly sand the surface to create a smooth, even finish. Use fine-grit sandpaper (such as 220-grit) and gently sand following the grain of the wood. This helps to remove any raised fibers or imperfections caused by the primer.
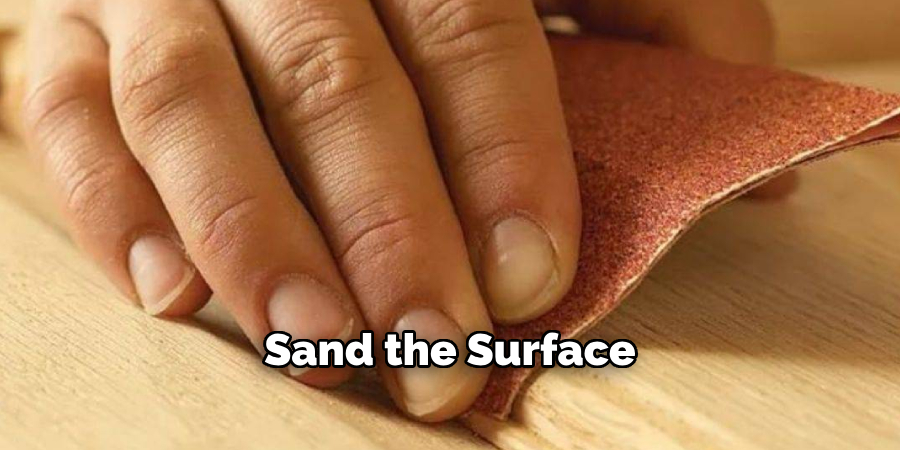
Be careful not to sand too aggressively, as this could damage the primer coat. After sanding, wipe down the surface with a clean, damp cloth to remove any dust. This step prepares the plywood for the final coat and ensures a polished, professional result.
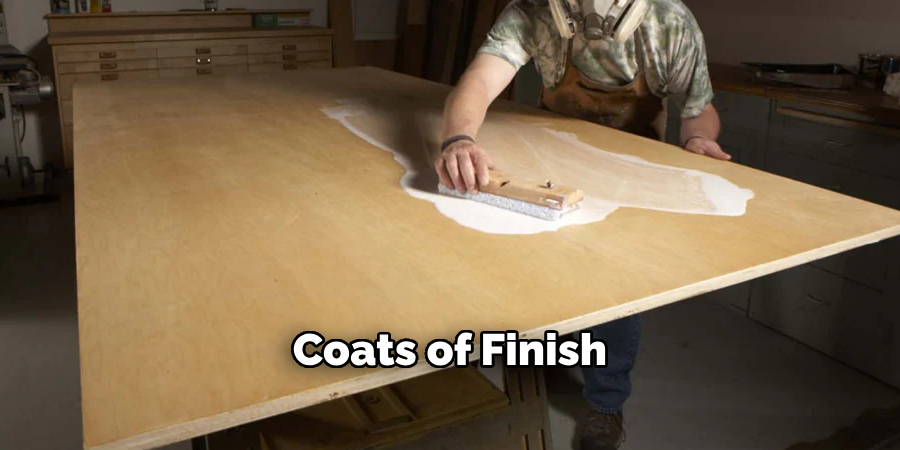
Step 6: Apply Finish
There are various options for finishing plywood, depending on your desired look and level of protection. Some popular options include:
Paint:
This is a great option if you want a solid color finish on your plywood. Use a primer specifically designed for plywood, and then choose either an oil-based or water-based paint depending on the type of wood you are using.
Stain:
This option allows the natural grain of the plywood to show through while still adding color and protection. Choose a stain that is suitable for your chosen type of wood.
Varnish:
This provides a clear, glossy finish and can add extra durability to your plywood surface. Make sure to choose a varnish that is suitable for indoor or outdoor use, depending on where your project will be located.
Step 7: Seal the Edges
Sealing the edges of your plywood is an essential step to ensure durability and protect it from moisture. Use a suitable edge sealer or wood glue to fill and cover the exposed edges. This will prevent the plywood from absorbing water, which can lead to warping or damage over time.
Apply the sealer evenly with a brush or a small applicator, making sure to cover all the edges thoroughly. Once dried, sand the edges lightly for a smooth finish before proceeding with your project.
Step 8: Sand and Finish
After your plywood has been sealed and allowed to dry, sand the surface with fine-grit sandpaper until it is smooth. Then, apply your chosen finish using a brush or cloth according to the manufacturer’s instructions. Allow it to dry completely before adding any additional coats.
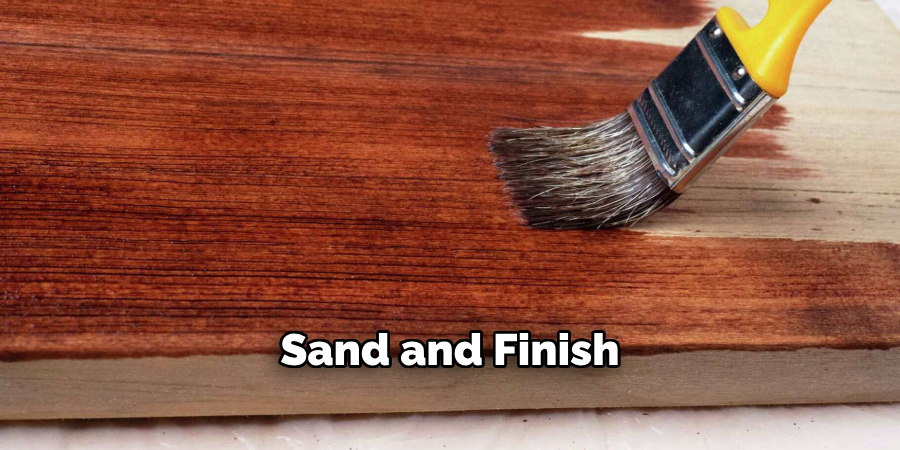
You can choose from a variety of finishes such as paint, stain, or varnish, to achieve the desired look for your project. Remember to apply multiple thin coats rather than one thick coat for a more professional finish.
Step 9: Maintenance
To keep your newly finished plywood in good condition, make sure to properly maintain it. Avoid exposing it to excessive moisture or direct sunlight for extended periods of time. Regularly clean the surface with a damp cloth and mild detergent, and avoid using harsh chemicals or abrasive cleaners. If you notice any scratches or damage to the finish, touch it up with additional coats of your chosen finish.
It is also important to regularly check for any signs of wear or damage, such as peeling or cracking. If you notice any issues, you may need to sand down the affected area and reapply a new coat of finish.
Following these maintenance tips on how to finish a plywood wall can help ensure that your wooden furniture stays looking beautiful and lasts for many years to come. In addition, incorporating protective measures such as coasters, placemats, and tablecloths can also help prevent damage from everyday use.
Frequently Asked Questions
Q1: How Often Do I Need to Finish My Plywood Wall?
A: The frequency of finishing your plywood wall depends on the amount of wear and tear it receives. Generally, it is recommended to refinish every 2-3 years, but this can vary based on factors such as humidity levels, sun exposure, and overall usage. It is important to regularly check the condition of your plywood wall and refinish as needed to maintain its protective layer.
Q2: Can I Use Any Type of Finish on My Plywood Wall?
A: While there are various types of finishes available in the market, not all of them are suitable for use on plywood walls. It is recommended to use a finish specifically designed for wood surfaces to ensure proper protection and durability. Some popular options include polyurethane, varnish, and shellac.
Q3: Do I Need to Sand My Plywood Wall Before Applying Finish?
A: Yes, it is important to sand your plywood wall before applying any type of finish. This will not only smooth out any imperfections on the surface but also help the finish adhere better. Make sure to use a fine-grit sandpaper and sand in the direction of the wood grain for best results.
Q4: How Many Coats of Finish Should I Apply on My Plywood Wall?
A: The number of coats needed for your plywood wall depends on the type and brand of finish you are using. In general, two coats are usually sufficient for most finishes. However, if you desire a thicker or more durable finish, you can apply additional coats as long as you allow proper drying time between each coat. It is important to read the instructions on your chosen finish product and follow its recommended application guidelines for best results.
Conclusion
When it comes to applying a finish on your plywood wall, proper preparation and attention to detail are crucial for achieving the best results. Always choose a high-quality finish that suits your desired look and durability requirements.
Follow the manufacturer’s guidelines on how to finish a plywood wall carefully, and ensure that you apply the appropriate number of coats with adequate drying time in between. With a little effort and patience, you can create a beautifully finished plywood wall that enhances the appearance and longevity of your space.
About the Author
Adrian Green, a lifelong woodworking enthusiast, shares his passion for the craft through The Woodenify Blog. With a foundation built on years of hands-on experience in his father’s woodworking shop, Adrian is dedicated to helping others learn and grow in the world of DIY woodworking. His approach to woodworking combines creativity, practicality, and a deep appreciation for the art of building with your own hands. Through his blog, he inspires individuals of all skill levels to embark on their own woodworking journeys, creating beautiful, functional pieces of furniture and décor.
Professional Focus
- Specializes in DIY woodworking projects, from furniture to home décor.
- Provides step-by-step guides and practical tutorials for woodworkers of all skill levels.
- Dedicated to helping readers build confidence and skill through easy-to-follow instructions and tips.
- Passionate about fostering a community of makers who can share, learn, and grow together.
Education History
- University of Craft and Design – Bachelor of Fine Arts (BFA) in Woodworking and Furniture Design
- Woodworking Apprenticeships – Extensive hands-on training with skilled craftsmen to refine carpentry and furniture making techniques.
- Online Courses & Masterclasses – Continued education in advanced woodworking techniques, design principles, and specialized tools
Expertise:
- DIY woodworking, carpentry, furniture making, and home décor projects.
- Creating accessible tutorials and guides for beginner to advanced woodworkers.
- Sharing the joys and satisfaction of woodworking, from raw materials to finished products.