Tallow wood, derived from the Australian tree species Xanthorrhoea, is known for its impressive durability and beautiful grain patterns.

Its natural color ranges from pale yellow to rich brown, making it a popular choice for various applications, including furniture, flooring, and decorative items. However, proper finishing is essential to fully appreciate and extend the tallow wood’s life. Finishing enhances the wood’s natural aesthetic and protects it from damage caused by moisture, UV exposure, and daily wear.
This article serves as a comprehensive guide on how to finish tallow wood, outlining the necessary preparation steps, materials, and techniques to achieve a flawless result. By following these instructions, woodworkers and DIY enthusiasts can ensure their tallow wood projects stand the test of time while showcasing their unique beauty.
Understanding Tallow Wood
Characteristics of Tallow Wood
Tallow wood is celebrated for its striking appearance and robust nature. It exhibits a varying color palette, typically ranging from a soft pale yellow to deep brown, often featuring beautiful, tight grain patterns that enhance its visual appeal.
The wood is well-known for its density and strength, providing excellent durability, making it an ideal choice for high-traffic areas in homes. Commonly, tallow wood is used in furniture making, flooring applications, and various decorative items, showcasing its versatility across different styles and designs.
Challenges in Finishing Tallow Wood
While many prefer tallow wood due to its beauty, finishing it can pose challenges. The natural oils present in the wood can hinder the absorption of stains and finishes, potentially leading to uneven coloration.
Additionally, the wood’s density demands careful preparation to ensure optimal adhesion of finishing products. To achieve the best results, selecting appropriate finishing products and dedicating time to proper surface preparation, including sanding and conditioning, enhance the wood’s natural properties while achieving a long-lasting finish.
Materials and Tools Needed
Essential Materials
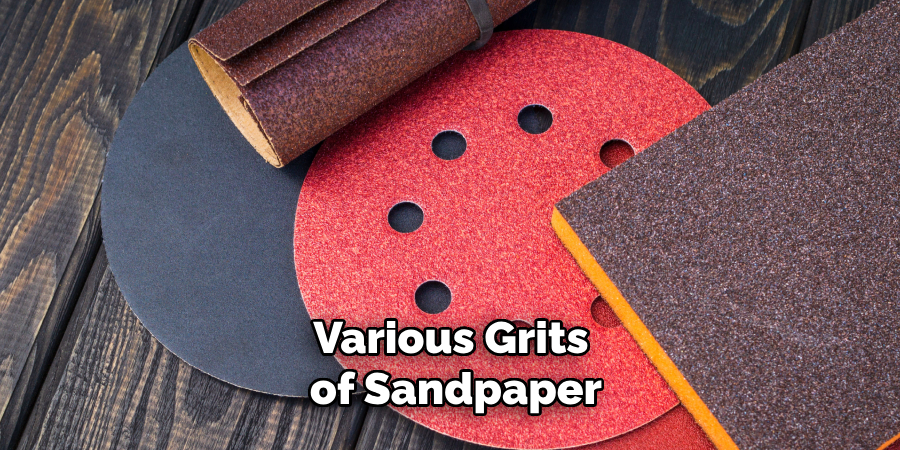
To effectively finish tallow wood, you will require several key materials. Start with various grits of sandpaper to prepare the surface, including coarse (80-100 grit) for initial sanding and finer grits (150, 220, 320, and 600 grit) for achieving a smooth finish. A wood conditioner is vital to prevent blotchiness, especially when applying any stain, which is optional depending on the desired aesthetic.
Lastly, select a wood finish, available in oil, varnish, or polyurethane, based on your preference for durability and appearance. Additional cleaning supplies such as a tack cloth, soft rags, and mineral spirits will ensure the surface is well-prepared prior to finishing.
Tools
The finishing process requires specific tools to ensure precision and efficiency. A sanding block or electric sander will help achieve a smooth surface, while brushes and foam applicators are essential for evenly applying the wood finish.
It’s also crucial to wear protective gloves to safeguard your hands from chemicals and potential irritants. Additionally, prepare your workspace by ensuring it is a dust-free, well-ventilated area with drop cloths to protect surfaces from spills and drips during the finishing process.
How to Finish Tallow Wood: Preparing the Wood
Cleaning the Surface
Before applying any finish, it is essential to prepare the wood properly by ensuring it is clean and contaminant-free. Start by removing dust, dirt, and grease from the surface. A soft, damp cloth can be effective for general cleaning, but for a thorough cleanse, use a tack cloth or a soft rag moistened with mineral spirits.
This will help dissolve any oils or residues that can affect the adhesion of the finish. Be sure to carefully wipe down the entire surface, paying extra attention to the corners and edges where dirt may accumulate. Allow the surface to dry completely before proceeding to the sanding step.
Sanding the Wood

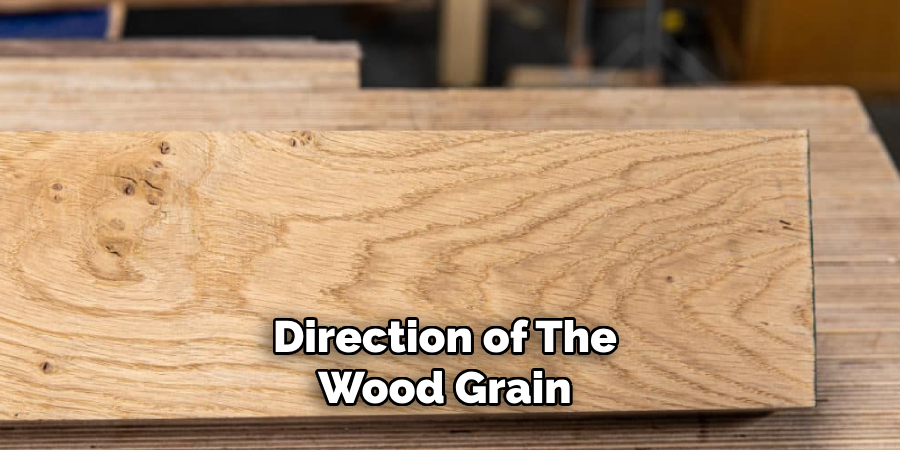
Once the wood is clean, begin sanding to create a smooth and even surface for finishing. Start with coarse-grit sandpaper, typically 80-100 grit, to remove any imperfections, rough spots, or mill marks. Sanding should be done toward the wood grain to avoid scratches that could be visible in the final finish.
After addressing any major surface issues, progress to finer grits such as 150 and 220 to refine the surface further. This gradual approach enhances the smoothness and prepares the wood for better absorption of the finish. Make sure to sand evenly across the entire surface, regularly checking for any missed areas or inconsistencies.
Applying Wood Conditioner
Using a wood conditioner is a crucial step in the finishing process, especially for tallow wood, as it helps to prevent blotchiness when applying stains or finishes. The conditioner works by partially sealing the wood grain, allowing for more even absorption of the subsequent products. To apply the wood conditioner, pour a moderate amount onto a clean cloth or brush and work it into the wood in the direction of the grain.
Ensure that you apply the conditioner evenly across the entire surface and allow it sufficient time to penetrate the wood—typically around 15-30 minutes. After this period, wipe off any excess conditioner to avoid a sticky residue, and let the wood dry completely before proceeding with the staining or finishing process. This preparation will contribute significantly to achieving a flawless and aesthetically pleasing finish on your tallow wood project.
How to Finish Tallow Wood: Staining the Wood (Optional)
Choosing the Right Stain
When selecting a stain for tallow wood, it’s important to choose one that enhances its natural beauty rather than overpowering it. Look for stains with warm tones, such as honey, amber, or light oak, which can complement the wood’s natural colors.
Prior to application, it’s advisable to test the chosen stain on a scrap piece of tallow wood to ensure it produces the desired results. This step is crucial, as the final appearance can vary significantly depending on the wood’s grain and porosity.
Applying the Stain

Apply a brush or clean rag evenly across the surface once you’ve selected the right stain. Working in the direction of the grain will help achieve a more uniform finish. After applying the stain, wipe off any excess with a dry cloth, especially if you prefer a lighter shade.
It’s vital to allow the stain to dry thoroughly, following the manufacturer’s recommended drying times, before proceeding with any additional finishing steps. Proper drying ensures that the final appearance is smooth and that the finish adheres well to the stained surface.
Finishing the Wood
Choosing the Finish
Selecting the right finish for your tallow wood project is essential, as it not only enhances the wood’s appearance but also protects it from wear and tear. There are several types of finishes to consider, including oils, varnishes, and polyurethanes.
Oils, such as tung or linseed oil, penetrate the wood and enhance its natural beauty while providing a subtle sheen. They are easy to apply and can be reapplied over time, making them ideal for furniture that may require frequent maintenance. Varnish creates a protective coating on the surface, offering a harder finish that is resistant to scratches and moisture.
It comes in various shades, from matte to high gloss. Polyurethane provides a tough, plastic-like coating that is incredibly durable and water-resistant, making it suitable for high-traffic areas. When choosing a finish, consider the level of durability you need as well as the desired appearance, ensuring the selected finish aligns with both your aesthetic preferences and the intended use of the wood item.
Applying the First Coat
Once you have selected the finish, it’s time to apply the first coat. Use a high-quality brush or foam applicator to distribute the finish evenly across the prepared surface for the best results.
Always apply the finish in the direction of the wood grain, which not only aids in creating a smooth application but also minimizes the risk of visible brush strokes. Be sure to work in small sections to maintain control and ensure the finish doesn’t begin to dry before you can smooth it out.
After applying the first coat, allow it to dry completely according to the manufacturer’s instructions—this could range anywhere from one to several hours, depending on the type of finish used and environmental conditions.
Once dry, lightly sand the surface with fine-grit sandpaper, typically around 320 grit, to eliminate imperfections and improve subsequent coats’ adhesion. This step, while subtle, significantly enhances the final appearance and durability of the finished product.
Polishing and Buffing
Final Sanding
Before moving to the polishing phase, performing a final sanding is crucial to achieve an impeccably smooth surface. Use very fine grit sandpaper, such as 600 grit, or opt for steel wool for this step. Gently sand the entire surface, ensuring that you maintain a consistent approach to eliminate any remaining imperfections left from previous sanding. This step is vital as it prepares the wood for the polish and enhances the overall finish.
Polishing the Surface
Once the final sanding is complete, it’s time to polish the surface. Using a soft cloth, apply a polishing compound or paste wax in a thin, even layer, working toward the wood grain to ensure thorough coverage. This process not only adds a protective layer but also enhances the natural beauty of the tallow wood.
After applying the compound or wax, buff the surface with a clean cloth to achieve a glossy and smooth finish. This final touch elevates the wood’s appearance, giving it a professional-grade look and feel while protecting it from everyday wear.
Maintaining Finished Tallow Wood
Regular Cleaning
Regular cleaning is essential to keeping your finished tallow wood looking its best. Use a soft, damp cloth to gently wipe down the surface, removing dust and dirt without scratching the finish. Avoid harsh chemicals, as they can damage the protective layer and compromise the wood’s appearance.
Periodic Maintenance
In addition to regular cleaning, periodic maintenance ensures that your wood retains its beauty and protection. Depending on usage and exposure to elements, a fresh coat of finish or wax as needed helps maintain the wood’s sheen and provides ongoing protection from wear and tear.
Conclusion
In conclusion, understanding how to finish tallow wood effectively involves several key steps that can significantly enhance its beauty and durability.
Start with selecting the right stain to complement the wood’s natural tones, then carefully apply and allow the stain to dry. Next, choose a suitable finish, such as oil, varnish, or polyurethane, and ensure a thorough first coat application, including fine sanding between coats. The final sanding and polishing steps are crucial to achieve a smooth, glossy appearance.
Proper preparation and finishing techniques are vital in protecting the wood while showcasing its inherent charm. By following these steps, you can enjoy the long-lasting beauty and durability of finished tallow wood, creating stunning pieces that enhance any space. Embrace the rich aesthetics that come with a well-finished product, and take pride in your craftsmanship.
About the Author
Adrian Green, a lifelong woodworking enthusiast, shares his passion for the craft through The Woodenify Blog. With a foundation built on years of hands-on experience in his father’s woodworking shop, Adrian is dedicated to helping others learn and grow in the world of DIY woodworking. His approach to woodworking combines creativity, practicality, and a deep appreciation for the art of building with your own hands. Through his blog, he inspires individuals of all skill levels to embark on their own woodworking journeys, creating beautiful, functional pieces of furniture and décor.
Professional Focus
- Specializes in DIY woodworking projects, from furniture to home décor.
- Provides step-by-step guides and practical tutorials for woodworkers of all skill levels.
- Dedicated to helping readers build confidence and skill through easy-to-follow instructions and tips.
- Passionate about fostering a community of makers who can share, learn, and grow together.
Education History
- University of Craft and Design – Bachelor of Fine Arts (BFA) in Woodworking and Furniture Design
- Woodworking Apprenticeships – Extensive hands-on training with skilled craftsmen to refine carpentry and furniture making techniques.
- Online Courses & Masterclasses – Continued education in advanced woodworking techniques, design principles, and specialized tools
Expertise:
- DIY woodworking, carpentry, furniture making, and home décor projects.
- Creating accessible tutorials and guides for beginner to advanced woodworkers.
- Sharing the joys and satisfaction of woodworking, from raw materials to finished products.