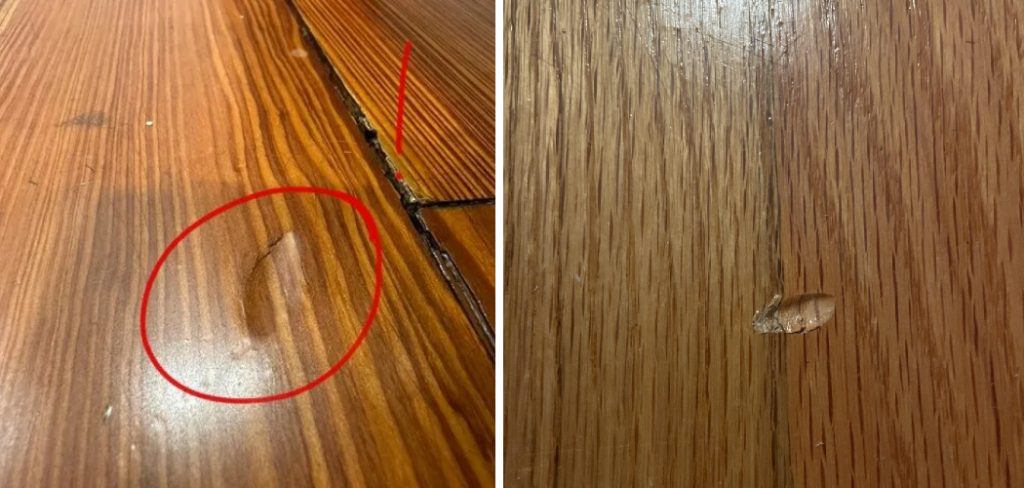
Dents in wood floors are common in any household, attributable to various reasons such as impact from dropped objects, furniture movements, or the pressure exerted by heavy items resting on the surface. These imperfections, though seemingly minor, can significantly detract from the wood flooring’s aesthetic appeal and structural integrity if not addressed promptly and properly.
Understanding how to fix dents in wood floor is crucial for homeowners seeking to maintain the beauty and value of their investment. This comprehensive guide is designed to equip you with effective techniques and step-by-step procedures for repairing dents in wood floors, ensuring the floor’s longevity and preserving its natural beauty.
Assessment and Preparation
The initial step in repairing dents in wood floors involves assessing the extent of damage to identify the most effective repair strategy.
A. Identifying the Dents:
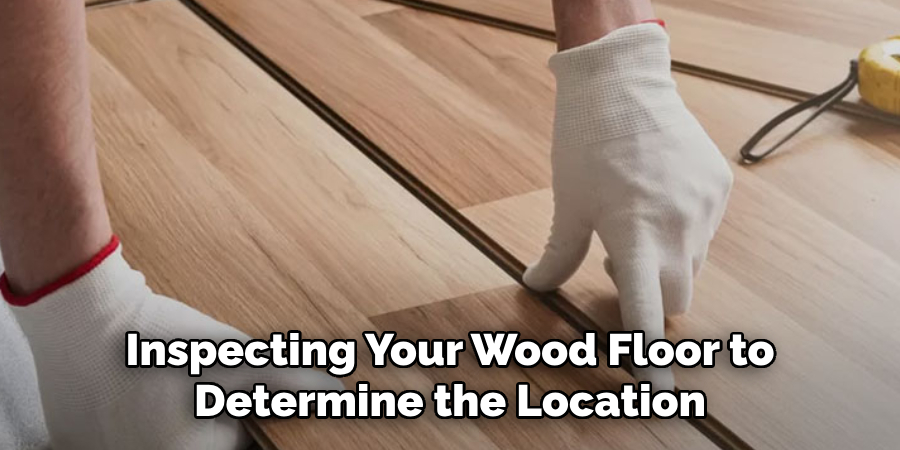
Begin by thoroughly inspecting your wood floor to determine the location, size, and severity of each dent. This can often be achieved by examining the floor at an angle, with light reflecting off the surface to highlight any imperfections. It is critical to assess whether the dents are shallow or deep and to note any potential cracks or splits in the wood around the dented area. Such details are instrumental in choosing the right repair approach, ensuring not only cosmetic but also structural restoration.
B. Cleaning the Area:
Once you have identified the dents, the next step is to prepare the area for repair. Clean the dented spots and their surroundings by vacuuming to remove any dirt, dust, and debris. Followallowing the wood to acclimate to the room’s conditions is important up, with a lightly dampened cloth to pick up any remaining fine particles. This step is crucial to ensure that no foreign materials interfere with the repair process, allowing for a smoother and more effective application of repair techniques.
C. Allowing Wood to Acclimate:
Wood is a hygroscopic material, meaning it absorbs and releases moisture depending on the humidity and temperature of its environment. Before proceeding with the repair, allowing the wood to acclimate to the room’s conditions is important. This may take at least 24 to 48 hours but is vital to prevent further expansion or contraction of the wood fibers during and after the repair process. Ensuring the wood is stable and acclimated will greatly enhance the effectiveness of subsequent steps in the repair process, helping to achieve a flawless finish.
How to Fix Dents in Wood Floor: Steam Treatment
Steam treatment is a highly effective method for repairing minor dents in wood floors, taking advantage of wood’s natural ability to swell with moisture and return to its original form. This section will guide you through the step-by-step process of steam treatment, from applying moisture to the wood fibers to allowing them to swell and fill the dented area.

A. Applying Moisture:
The first critical step in the steam treatment process involves introducing moisture to the dented area to prepare the wood fibers for swelling. Begin by dampening a clean, soft cloth with water until it is mildly wet but not dripping. Place this damp cloth directly over the dent on the wood floor. This preparation is crucial as it ensures the wood is ready to absorb the steam effectively without causing water damage to the surrounding area.
B. Using a Steam Iron:
Once the damp cloth is in place, use a steam iron set to a medium-high heat setting. Hold the iron a few inches above the damp cloth and apply steam heat in circular motions, being careful not to place the iron directly on the cloth or the wood surface. Depending on the dent’s severity, continue applying steam heat for several seconds to a few minutes. The steam from the iron penetrates the cloth, transferring moisture to the wood fibers beneath and beginning the swelling process. It is essential to monitor this step closely to ensure the wood does not become overly moist or damaged from excessive heat.
C. Allowing Wood to Swell:
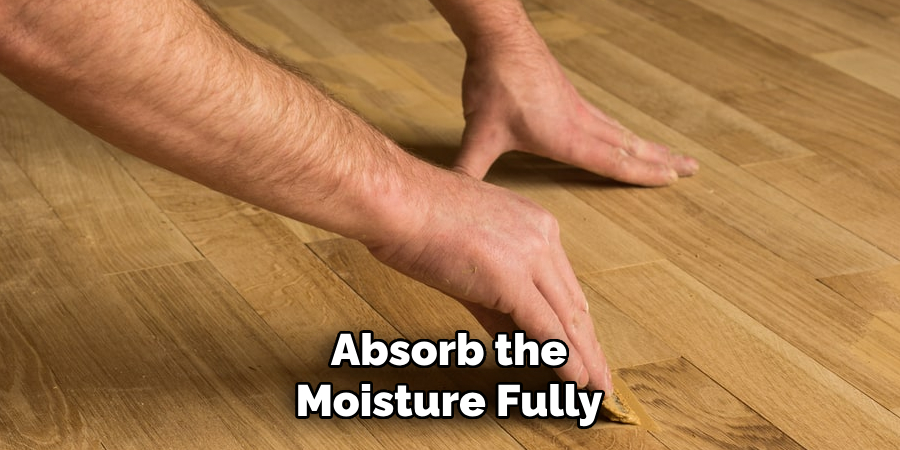
After applying steam, remove the cloth and allow the dented area to air dry naturally. This step is critical as it gives the wood fibers time to absorb the moisture fully and swell, gradually expanding to fill the dent. The process might take several hours or overnight, depending on the size of the dent and the room’s humidity. During this time, the wood fibers recover their original shape and volume, effectively reducing or eliminating the dent’s visibility.
Implementing these steps with care and patience can effectively repair dents in wood floors using steam treatment. This method is particularly suitable for small to medium-sized dents with intact wood finish, providing a non-invasive and cost-effective repair solution.

How to Fix Dents in Wood Floor: Heat and Moisture
The heat and moisture technique offers an alternative or supplementary method to steam treatment for repairing dents in wood floors. This method primarily uses a hairdryer and water to directly affect the wood fibers, promoting expansion to fill in dents. Here’s how to employ this technique effectively:
A. Using a Hairdryer:
Aiming a hairdryer at the dented area, keeping it several inches from the wood surface. Set the hairdryer to a medium or high heat setting, depending on how quickly you observe effects on the wood. The warm air from the hairdryer heats the wood fibers, making them more pliable and ready to accept moisture. Moving the hairdryer back and forth is crucial to distribute heat evenly and prevent overheating any part of the wood, which could lead to further damage. Continue this process for several minutes until the wood is warm to the touch but not too hot.
B. Spraying with Water:
Once the wood fibers have been warmed, lightly spray the dented area with water using a clean spray bottle. Be careful not to overwet the surface; a fine mist is sufficient to moisturize the fibers without saturating the wood. This step is intended to introduce a controlled amount of moisture to the area, aiding in the swelling of the wood fibers. The goal is to dampen the dented area just enough to make the fibers expand, not to soak them, as excessive water can harm the wood and surrounding finish.
C. Pressing and Holding:
After spraying, take a clean, soft cloth or a small wooden block and press down firmly on the dented area. Hold pressure on this spot for several minutes to help encourage the wood fibers to move and fill in the dent. This action, combined with the wood’s natural swelling response to heat and moisture, can significantly reduce the dent’s visibility. It’s important to apply steady pressure but avoid using so much force that it could damage the wood. After pressing, leave the wood to dry naturally, allowing the fibers to settle back into place.
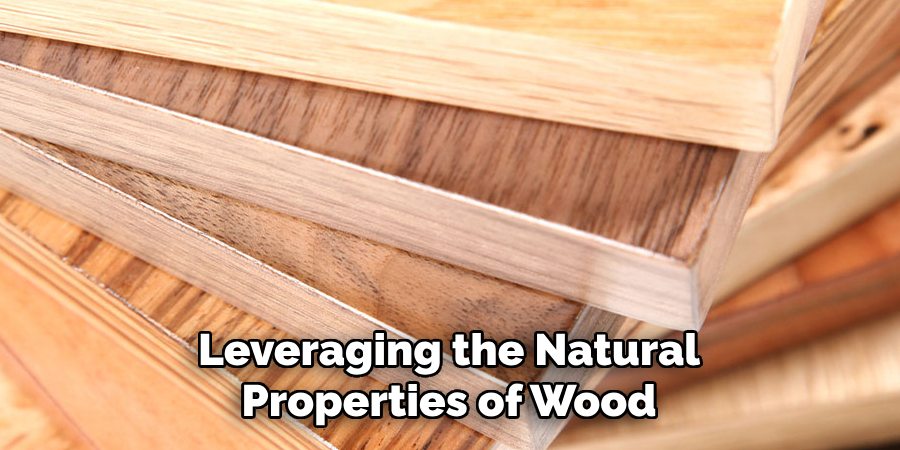
Employing the heat and moisture method can be particularly effective for small to medium-sized dents, especially in cases where the wood’s finish remains undamaged. This approach provides a gentle yet effective means of encouraging the wood fibers to expand and fill in the depressions, leveraging the natural properties of wood in response to controlled heat and moisture.

Sanding and Refinishing
A. Sanding the Surface
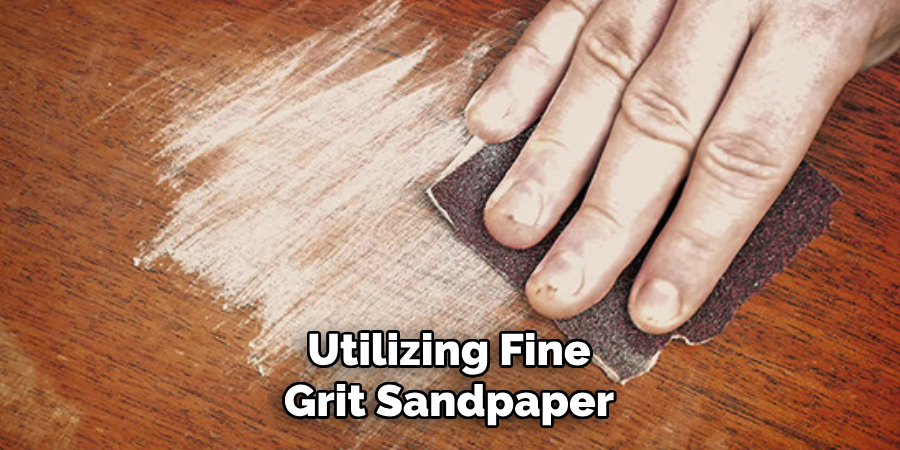
Once the wood fibers have fully expanded and the dents have been filled, the next critical step is sanding the repaired area. Utilizing fine-grit sandpaper, carefully sand the area to smooth out any roughness and ensure a seamless blend with the surrounding floor surface. It’s imperative to sand in the direction of the wood grain to avoid creating cross-grain scratches that could mar the appearance of the wood. The goal is to achieve a smooth, uniform surface that feels consistent with the untouched areas of the floor. Light, even strokes with the sandpaper will help prevent the removal of too much material from the repaired section.
B. Cleaning the Surface
Following the sanding process, thoroughly clean the area to prepare it for refinishing. Wipe down the sanded area. Use a tack or a lightly dampened cloth to remove all sanding residue and dust. This step is crucial, as any remaining particles can interfere with the finish application, leading to a less-than-desirable final appearance. Ensure the wood is completely dry and debris-free before proceeding to the next step. Properly cleaning the surface helps achieve a smooth, flawless finish upon applying the new sealant or stain.
C. Applying Finish
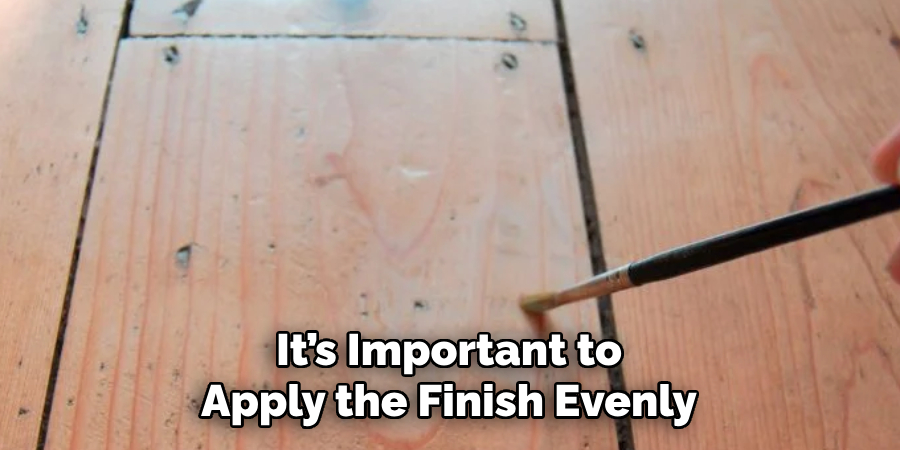
The final step in the repair process involves applying a suitable finish to the repaired area. This could be a stain, sealant, or wax that matches the existing floor’s finish. If using stain, apply it as per the manufacturer’s instructions and allow it to dry thoroughly. Next, apply a coat of sealant, such as polyurethane, to protect the wood and give it a glossy or matte finish, according to your preference. It’s important to apply the finish evenly, using a brush or roller designed for the finish type. Allow adequate drying time as recommended by the product manufacturer. Reapplying the finish restores the floor’s aesthetic appeal and reinstates its protective layer, guarding against future wear and damage.
Employing these restoration techniques—sanding the surface, cleaning it meticulously, and applying a new finish—will rejuvenate your wood floor, making the dents and damages virtually disappear. This methodical approach ensures the longevity of the floor’s appearance and functionality, restoring its natural beauty and resilience.
Wood Filler
When heat and moisture techniques or direct physical manipulation do not suffice, using wood filler becomes an indispensable part of the wood floor repair process, especially for deeper or larger dents. The correct application of wood filler not only fills and conceals the damage but also restores the floor’s structural integrity and appearance. Here’s a step-by-step guide to effectively using wood filler for floor repairs.
A. Selecting Wood Filler
Choosing the right wood filler is crucial for achieving a durable and aesthetically pleasing repair. High-quality wood filler or putty should closely match the color and grain pattern of the wood floor. Various types of wood fillers are available, including water-based, epoxy, and stainable versions. Water-based fillers are easy to clean and work well for small, shallow repairs. Epoxy fillers, on the other hand, are more suitable for significant dents and damage as they offer superior strength. Stainable fillers are an excellent choice if you plan to stain the floor post-repair, ensuring the filled area blends seamlessly with the rest of the floor.
B. Filling the Dent
Once you have the appropriate wood filler, the next step is to apply it to the damaged area. Press the filler firmly into the dent using a putty knife or spatula, ensuring it is fully seated in the cavity. It is advisable to overfill the dent slightly to compensate for any shrinkage that occurs as the filler dries. Ensure the application is smooth and even, but anticipate sanding down any excess material for a flush finish with the surrounding wood surface.
C. Sanding and Blending
The filled area must be sanded after allowing the wood filler to dry completely, according to the manufacturer’s instructions. Using fine-grit sandpaper, gently sand the filled section to remove any excess filler, working to achieve a smooth, level surface. This step is critical for blending the repair seamlessly with the surrounding wood. Sand in the direction of the wood grain to avoid creating noticeable scratches or marks. Once sanded smoothly, the filled area should be nearly indistinguishable from the rest of the floor.
Successfully selecting, applying, and finishing wood filler for wood floor repairs can significantly extend the life and beauty of your wood floors, making them look as good as new. Combined with the previously mentioned restoration techniques, this method forms a comprehensive approach for repairing and revitalizing damaged wood floors.
Professional Repair
A. Seeking Professional Assistance
There are circumstances where the damage to a wood floor goes beyond the capacity of DIY repair techniques. Consulting with a professional wood floor repair specialist is crucial in such cases. These specialists bring a wealth of experience and expert knowledge to comprehensively assess the severity and extent of flood damage. Whether due to water damage, deep scratches, or extensive wear and tear, a professional can offer insights and solutions that might not be readily apparent to the homeowner. Furthermore, they can prevent the escalation of damage by addressing issues correctly the first time.
B. Assessing Repair Options
After consulting with a professional, several repair options might be presented. The condition of the wood floor will dictate the most appropriate approach. For minor issues, spot repairs or targeted refinishing may suffice. However, severe damage might necessitate board replacement or complete floor sanding and refinishing. Each option has its considerations regarding cost, project duration, and anticipated outcomes. A professional will guide homeowners through these options, offering a tailored solution that aims to restore the floor’s beauty and integrity while keeping within budgetary constraints.
C. Hiring Professional Services
Once a course of action has been decided, the next step is hiring a qualified, experienced contractor to undertake the repairs. Selecting a contractor with a strong track record of quality work and positive customer feedback is crucial. Ensure they are licensed, insured, and willing to provide a detailed quote and timeline for the project. A skilled contractor will use high-quality materials and employ advanced techniques to ensure the repairs are both durable and aesthetically pleasing. Hiring professional services not only guarantees the workmanship but also provides peace of mind that your wood floor will continue to enhance the beauty and functionality of your home for years to come.
Engaging with professional repair services may represent an investment, but it’s one that pays dividends in the long-term durability and quality of your wood floors. By addressing severe or extensive damage appropriately, homeowners can enjoy a restored, beautiful floor that withstands the rigors of daily use.
Frequently Asked Questions
Q1: Can I Use Any Wood Filler on Any Type of Wood Floor?
A1: Selecting a wood filler that matches your wood floor in color and texture is essential. Not all wood fillers are suitable for every type of wood floor. Water-based and epoxy fillers have different properties and uses, so choose one that is appropriate for the damage and the type of wood you are repairing.
Q2: How Long Does Wood Filler Need to Dry Before Sanding?
A2: Drying times can vary depending on the type of wood filler used and environmental conditions such as humidity and temperature. Generally, it’s best to allow the filler to dry completely for at least 24 hours. However, you should always refer to the manufacturer’s instructions for specific drying times.
Q3: Can Diy Floor Repair Match the Quality of Professional Services?
A3: While DIY repair techniques can effectively address minor damage, professional services are recommended for more severe or extensive damage. Professionals have the expertise, tools, and materials to ensure repairs are durable and seamlessly integrated with the existing floor.
Q4: What Are the Signs that I Need Professional Wood Floor Repair?
A4: Signs requiring professional repair include extensive water damage, deep scratches or gouges, cracked or broken boards, and significant wear that compromises the floor’s integrity. Professional assessment and repair are advisable if the damage is beyond the surface level or the repair area is extensive.
Q5: How Do I Choose a Reputable Wood Floor Repair Service?
A5: Look for a service with positive reviews, a portfolio of past projects, and verifiable credentials such as licensing and insurance. A reputable service should provide a detailed quote, a clear timeline for the project, and a warranty or guarantee for their work.
Conclusion
The process of repairing dents in wood floors begins with proper assessment and preparation, choosing the right method—whether it’s using heat and moisture or applying wood filler—and meticulously working on the damaged area to ensure the repair blends seamlessly with the surrounding wood.
Understanding how to fix dents in wood floor entails more than just a quick fix; it requires a thorough assessment of the damage, careful preparation of the area, and the application of appropriate repair techniques. These steps are pivotal in ensuring the repair is effective and durable.
Seeing a once-damaged wood floor restored to its natural beauty and functionality is a profound satisfaction. The diligent application of the repair process and ongoing care ensure your wood floors remain a stunning feature of your home. Successfully learning how to fix dents in wood floor can transform a marred surface into one that looks as good as new, embodying both resilience and elegance.
About the Author
Adrian Green, a lifelong woodworking enthusiast, shares his passion for the craft through The Woodenify Blog. With a foundation built on years of hands-on experience in his father’s woodworking shop, Adrian is dedicated to helping others learn and grow in the world of DIY woodworking. His approach to woodworking combines creativity, practicality, and a deep appreciation for the art of building with your own hands. Through his blog, he inspires individuals of all skill levels to embark on their own woodworking journeys, creating beautiful, functional pieces of furniture and décor.
Professional Focus
- Specializes in DIY woodworking projects, from furniture to home décor.
- Provides step-by-step guides and practical tutorials for woodworkers of all skill levels.
- Dedicated to helping readers build confidence and skill through easy-to-follow instructions and tips.
- Passionate about fostering a community of makers who can share, learn, and grow together.
Education History
- University of Craft and Design – Bachelor of Fine Arts (BFA) in Woodworking and Furniture Design
- Woodworking Apprenticeships – Extensive hands-on training with skilled craftsmen to refine carpentry and furniture making techniques.
- Online Courses & Masterclasses – Continued education in advanced woodworking techniques, design principles, and specialized tools
Expertise:
- DIY woodworking, carpentry, furniture making, and home décor projects.
- Creating accessible tutorials and guides for beginner to advanced woodworkers.
- Sharing the joys and satisfaction of woodworking, from raw materials to finished products.