Wood furniture adds warmth and elegance to any home, but it’s not immune to damage—especially when a curious dog decides to chew on it.

Chewed corners, scratches, and marks can detract from the beauty of your furniture, but fortunately, these imperfections can often be repaired with the right tools and techniques. This guide will walk you through practical steps of how to fix wood furniture dog chewed.
Common Problems Caused by Dog Chewing
When a dog chews on wood furniture, several common issues can arise that affect both the appearance and functionality of the piece. Chewed corners are one of the most frequently encountered problems, as dogs often target edges and legs of tables, chairs, or cabinets. This can leave the wood with rough, uneven surfaces and exposed splinters.
Scratches and bite marks are another prevalent issue, creating visible dents or gouges that compromise the furniture’s smooth finish. Additionally, the damage may expose the underlying wood to moisture, leading to potential staining or weakening of the material over time. Identifying these problems early is essential to restoring the piece before the damage becomes more severe.
Tools and Materials Needed
To restore and repair damaged wooden furniture, you will need a variety of tools and materials. Here’s a list of essentials:
- Sandpaper (various grits): For smoothing out rough surfaces and removing splinters or old finishes.
- Wood Filler or Putty: To fill in scratches, gouges, or bite marks.
- Putty Knife: For applying and spreading wood filler evenly.
- Wood Glue: For reattaching broken pieces or securing loose parts.
- Clamps: To hold pieces in place while the glue dries.
- Stain or Paint: To match the repaired areas with the rest of the furniture.
- Brushes or Rags: For applying stain, paint, or finishes.
- Clear Protective Finish (e.g., polyurethane): To protect the repaired surface and restore its shine.
- Dust Mask and Safety Goggles: For personal protection while sanding or working with wood finishes.
- Soft Cloths: To clean and polish the finished piece.
Having these tools and materials on hand will make the process more efficient and help achieve professional-looking results.
10 Methods How to Fix Wood Furniture Dog Chewed
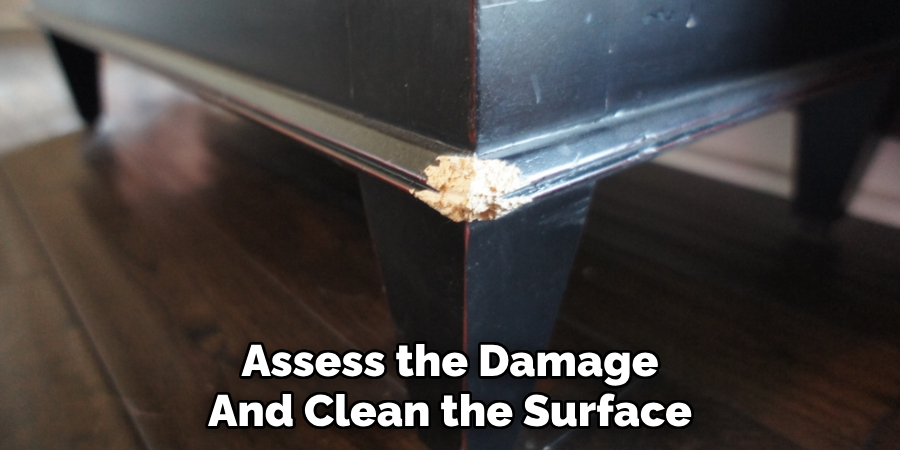
1. Assess the Damage and Clean the Surface
The first step in repairing dog-chewed wood is assessing the extent of the damage. Look closely to determine whether the damage is superficial—such as gnawed edges or scratch marks—or more severe, such as deep gouges or missing chunks. Before doing any repair work, clean the damaged area thoroughly using a damp cloth and mild soap to remove dirt, oils, and dog saliva that could interfere with adhesion. Allow it to dry completely. A clean surface provides a better bond for fillers, glues, or finishes applied later in the process.
2. Sand Light Chew Marks Smooth
If the damage is limited to surface scratches or shallow tooth marks, light sanding might be all that’s required. Use fine- to medium-grit sandpaper (120–220 grit) to sand down the damaged area. Always sand in the direction of the wood grain to avoid further scarring the finish. Feather the sanding out into the surrounding area so the transition is smooth. Once the area is even, wipe it clean with a tack cloth or damp rag. If the damage is minimal, you can often skip ahead to staining or sealing the wood after sanding.
3. Use Wood Filler for Moderate Damage
When chew marks have gouged into the wood but haven’t removed large chunks, wood filler is your best solution. Choose a high-quality wood filler that can be sanded and stained. Using a putty knife, apply the filler into the damaged area, pressing firmly to fill the gouges completely. Overfill slightly, as the material will shrink as it dries. Let it cure for the time specified on the packaging—usually a few hours. Once dry, sand it flush with the surrounding surface using fine-grit sandpaper until smooth. Be sure to clean off any dust before proceeding to staining or painting.
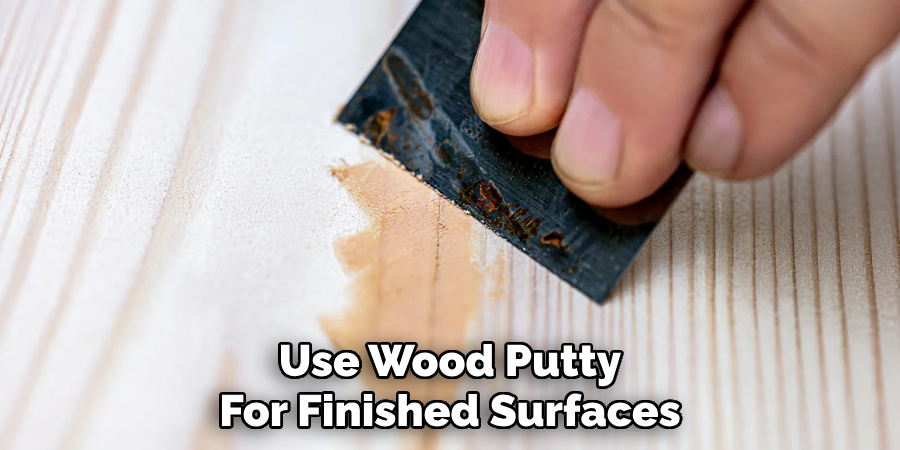
4. Use Wood Putty for Finished Surfaces
If your furniture has a stained or painted finish and the damage is relatively shallow, wood putty can provide a fast fix. Unlike filler, putty is oil-based and remains slightly flexible, making it better for small cosmetic fixes. Use a color-matched wood putty or one that can be stained. With a putty knife or your finger, press the putty into small chew marks, then smooth it out to match the surrounding area. After it sets, buff the area lightly with steel wool and reapply stain or topcoat to blend.
5. Replace Missing Wood with Epoxy Putty
For serious damage where chunks of wood are missing—like chewed corners or rounded edges—epoxy putty works wonders. Two-part epoxy putty can be molded like clay, and once it cures, it becomes rock hard and can be sanded, carved, or stained. Knead the putty together according to instructions, then shape it to rebuild missing sections. Sculpt the edges as best as possible before it hardens. After it sets (usually in a few hours), sand it smooth and blend it into the furniture’s shape. Then, paint or stain as needed to match the surrounding wood.
6. Use a Wax Repair Stick for Touch-Ups
Wax repair sticks, also known as fill sticks, are useful for quick touch-ups on minor damage. These come in various wood-tone colors and are particularly helpful for scratches, small gouges, or scuffing caused by chewing. Rub the wax stick into the damaged area, pressing down to fill the gaps. Wipe off the excess with a clean cloth and buff lightly. Though wax isn’t suitable for structural repair, it’s great for cosmetic fixes and blending small flaws back into the wood’s natural grain.
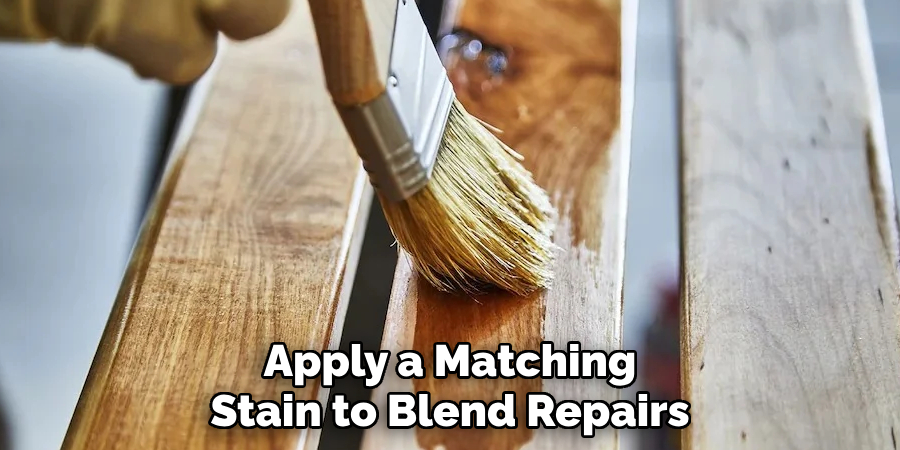
7. Apply a Matching Stain to Blend Repairs
Once the filler, putty, or epoxy has dried and been sanded flush, you’ll need to stain the repaired area to match the rest of the wood. Use a matching wood stain—gel stains work well for targeted areas because they offer better control and don’t run. Apply the stain with a small brush or lint-free cloth, feathering it into the surrounding area. Allow it to penetrate the filler and surrounding wood evenly, then wipe off any excess and let it dry. You may need to apply several coats to achieve a seamless match.
8. Seal and Protect the Repaired Surface
After staining or painting, seal the repaired area to protect it and give it a finished appearance. Apply a polyurethane, lacquer, or shellac topcoat depending on the original finish of the furniture. Use a small foam brush for precision on smaller areas. Allow the sealant to dry completely, then lightly buff with a fine-grit sanding sponge if needed before applying a second coat. Sealing the wood protects against moisture and future scratches—especially important if your furry friend has a habit of returning to the same spot.
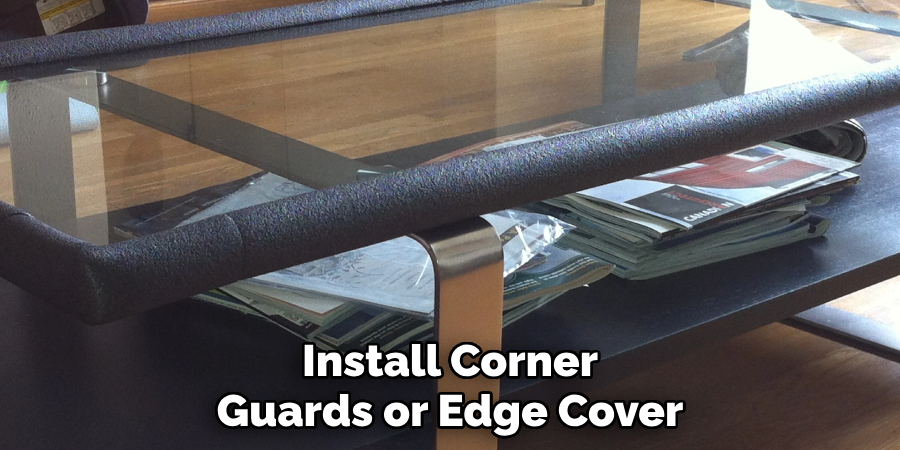
9. Install Corner Guards or Edge Covers as Preventive Measures
Once you’ve repaired the damage, take steps to prevent recurrence. Install furniture corner guards, metal caps, or soft plastic edge covers in commonly chewed areas. These are especially helpful on table legs, chair corners, and cabinet edges. Choose clear or decorative styles that blend with your furniture’s design. Not only do they protect the wood from further damage, but they also deter your dog by changing the texture and feel of the surface. You can remove these guards once your dog is trained out of the chewing habit.
10. Redirect Dog Chewing Behavior to Avoid Repeated Damage
Fixing furniture is only part of the solution—training your dog is the other. Provide plenty of chew-friendly toys, bones, or treats to redirect your dog’s natural chewing instincts. Use dog-safe deterrent sprays, like bitter apple or vinegar-based formulas, on repaired furniture legs or edges. These sprays leave an unpleasant taste that discourages further chewing. Pair this with consistent positive reinforcement for chewing on appropriate items. Crating or supervising your dog during the early stages of training helps reinforce boundaries. In the long term, redirecting behavior saves your furniture from future damage.
Things to Consider
When addressing your dog’s chewing habits, it’s essential to consider their physical and emotional needs. Ensure your dog is getting enough exercise, as pent-up energy can often lead to destructive behavior. Additionally, assess whether your dog might be chewing out of boredom or anxiety, and provide interactive toys or mental stimulation to keep them engaged. Consistency is key—establish clear boundaries and enforce them patiently. Avoid punishing your dog after the fact, as this can create confusion and stress. Instead, focus on rewarding positive behavior and providing appropriate outlets for their instincts.
Safety Considerations
When addressing your dog’s chewing behavior, it’s essential to prioritize their safety. Always ensure that any toys or chew items you provide are made from non-toxic materials and are appropriately sized to prevent choking hazards. Regularly inspect these items for wear and tear, disposing of any that have become damaged or could splinter.
If your dog has a habit of chewing on household items, keep potentially dangerous objects like electrical cords, chemicals, or small items that could be swallowed safely out of reach. Additionally, if you suspect your dog has ingested something harmful, contact your veterinarian immediately. Creating a safe environment not only protects your dog but also helps prevent accidents and emergencies.
Conclusion
While discovering your favorite wood furniture diy chewed by your dog can be disheartening, it’s far from a permanent disaster. With the right materials and methods—ranging from basic sanding and filling to full reconstruction with epoxy putty—you can restore your furniture to its original charm.
Coupled with preventive measures and behavioral training for your pup, these ten methods offer both a solution and a safeguard for preserving your home’s wooden treasures. Thanks for reading our blog post on how to fix wood furniture dog chewed! We hope you found it helpful and informative.
About the Author
Adrian Green, a lifelong woodworking enthusiast, shares his passion for the craft through The Woodenify Blog. With a foundation built on years of hands-on experience in his father’s woodworking shop, Adrian is dedicated to helping others learn and grow in the world of DIY woodworking. His approach to woodworking combines creativity, practicality, and a deep appreciation for the art of building with your own hands. Through his blog, he inspires individuals of all skill levels to embark on their own woodworking journeys, creating beautiful, functional pieces of furniture and décor.
Professional Focus
- Specializes in DIY woodworking projects, from furniture to home décor.
- Provides step-by-step guides and practical tutorials for woodworkers of all skill levels.
- Dedicated to helping readers build confidence and skill through easy-to-follow instructions and tips.
- Passionate about fostering a community of makers who can share, learn, and grow together.
Education History
- University of Craft and Design – Bachelor of Fine Arts (BFA) in Woodworking and Furniture Design
- Woodworking Apprenticeships – Extensive hands-on training with skilled craftsmen to refine carpentry and furniture making techniques.
- Online Courses & Masterclasses – Continued education in advanced woodworking techniques, design principles, and specialized tools
Expertise:
- DIY woodworking, carpentry, furniture making, and home décor projects.
- Creating accessible tutorials and guides for beginner to advanced woodworkers.
- Sharing the joys and satisfaction of woodworking, from raw materials to finished products.