Clearcoat is a transparent, tough layer that is applied over paint to enhance its durability and aesthetic appeal. Over time, however, clearcoat can become yellowed due to various factors, including prolonged exposure to ultraviolet (UV) light, oxidation, environmental pollutants, and the natural aging process. This yellowing not only detracts from the vibrant appearance of vehicles or furniture but can also lead to deeper damage if left untreated.
As clearcoat yellowing progresses, surfaces may appear dull, harsh, or simply unattractive, detracting from their overall value. The purpose of this article is to serve as a comprehensive guide on how to fix yellow clearcoat, offering a step-by-step approach to restore the original luster and clarity of your surfaces while preventing future discoloration.
Understanding Clearcoat Yellowing
Clearcoat yellowing is a common issue that can significantly diminish the appearance of surfaces coated with this protective layer. Several factors contribute to this phenomenon, primarily the exposure to UV light, oxidation, and the aging of the clearcoat itself.
Causes of Yellowing
- Exposure to UV Light: Prolonged sunlight exposure leads to the degradation of the clearcoat’s chemical structure, resulting in a yellow tint. UV rays break down the polymers in the clearcoat, causing it to lose its clarity and vibrancy.
- Oxidation and Chemical Reactions: Environmental pollutants, such as vehicle emissions, industrial byproducts, and chemicals, can react with the clearcoat, accelerating its deterioration. This reaction often leads to a loss of shine and color clarity, making surfaces appear older than their actual age.
- Aging and Wear: As time progresses, the clearcoat naturally undergoes wear and tear. Factors such as friction from washing or abrasive cleaners can further degrade its surface quality, leading to a yellowed appearance.
Types of Clearcoat Yellowing
- Surface Yellowing: This type of discoloration affects the top layer of the clearcoat, primarily due to UV exposure and minor contaminants. It is often easier to treat and restore.
- Deep Yellowing: This more severe form of yellowing can involve the underlayers of the clearcoat, resulting from prolonged neglect or severe environmental exposure. It may require more intensive repair methods to address effectively.
Assessing the Damage
Inspection of the Clearcoat
A thorough inspection of the surface is essential to effectively address clearcoat yellowing. Start with a visual inspection, examining the entire area for any signs of yellowing, peeling, or haziness. Look closely at the surface under different lighting conditions; often, yellowing may be more pronounced in direct sunlight.
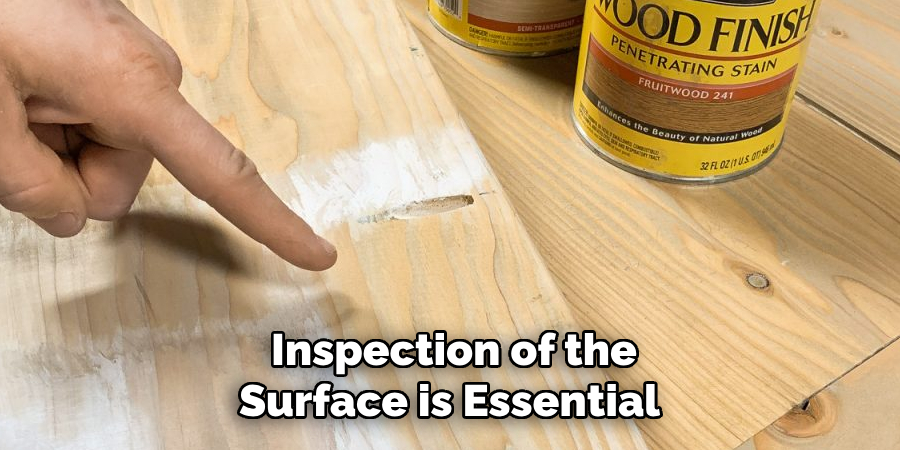
It’s also prudent to perform a test on a small, inconspicuous area, which will help gauge the severity of the yellowing without adversely affecting the overall appearance. This test can reveal how deeply the yellowing has penetrated and whether it’s just surface-level or indicative of underlying issues.
Determining the Extent of the Damage
After conducting a detailed inspection, the next step is determining the damage’s extent. Differentiate between surface and deep damage; surface yellowing typically indicates that the degradation is limited to the top layer of clearcoat, allowing for easier restoration techniques. In contrast, deep yellowing often signifies a more severe issue, requiring more intensive repair measures.
This distinction is crucial for deciding whether to take corrective action or reapply a new clearcoat layer. If the yellowing is extensive and overwhelming the protective layer, it may necessitate reapplication to restore the surface to its original clarity and shine. Understanding the difference in severity will help inform your approach to effectively restore and maintain the quality of the clearcoat.
How to Fix Yellow Clearcoat: Fixing Surface Yellowing
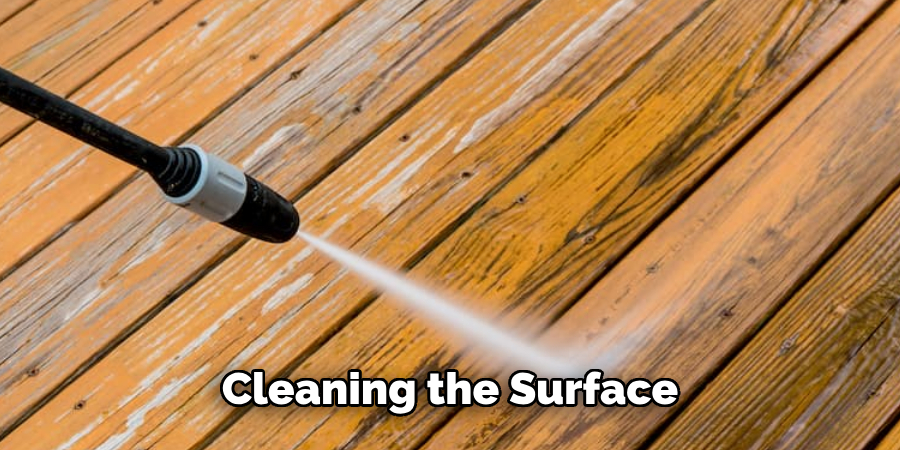
Cleaning the Area
Before addressing surface yellowing, it’s essential to clean the area thoroughly to remove any dirt, grime, or contaminants that may interfere with the restoration process. Start by washing the surface with a mild detergent mixed with water, ensuring the use of a non-abrasive sponge or cloth to avoid scratching the clear coat. Gently scrub the area in circular motions to lift away any surface residue. After washing, make sure to rinse off the detergent completely to prevent any soap residue from marring the finish. Once rinsed, dry the surface thoroughly with a clean, soft microfiber cloth. Proper drying is crucial; any moisture left on the surface could hinder the effectiveness of subsequent polishing and clearcoat restoration steps.
Polishing and Buffing
With the surface clean and dry, the next step is to polish away the yellowing. Choosing the right polish is vital—opt for a product specifically designed for automotive or clearcoat surfaces, as these contain the right balance of abrasives and compounds to effectively restore clarity without damaging the clear coat. Apply a small amount of polish to a clean, soft cloth or a buffer pad.
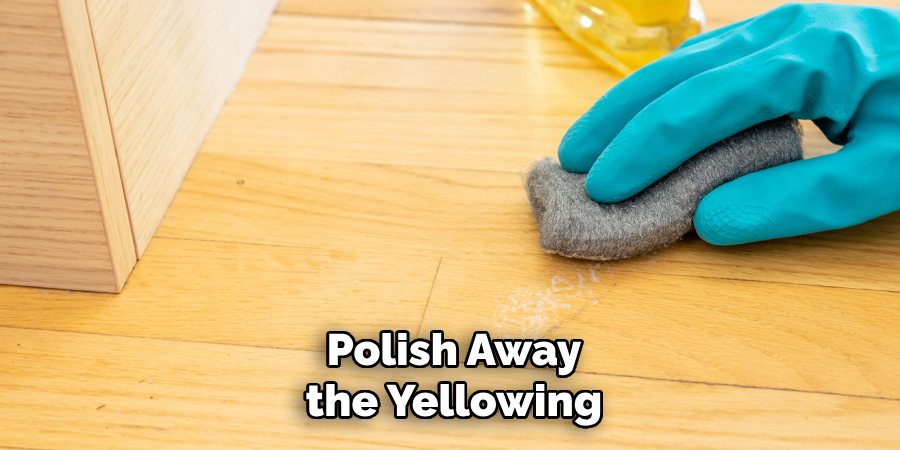
To begin the application, work the polish into the surface using circular motions, applying light to moderate pressure as needed. Focus on one section at a time, allowing the polish to lift the discoloration. After applying the polish, use a buffing tool or a clean section of your cloth to buff the area. Ensure to move in gentle back-and-forth motions, which can help enhance the shine and bring out the surface’s original clarity. If necessary, reapply the polish in areas where yellowing persists, and repeat the buffing process until a consistent shine is achieved. Keep in mind that using too much pressure can strip the clearcoat, so ensure that you maintain a gentle touch throughout the process.
Applying a Clearcoat Restorer
Once the polishing and buffing are complete, it’s time to apply a clearcoat restorer to further enhance and protect the surface. Selecting the right product is key—look for a clearcoat restorer specifically designed for automotive applications, as these typically offer better adhesion and long-lasting results. Before applying, carefully read and follow the product instructions provided, as application methods may vary.
To begin the application, make sure the surface is still clean and free from any debris. Using a clean, soft applicator pad, dispense a small amount of the restorer and apply it evenly across the surface in smooth, overlapping strokes. Ensure full coverage to create a uniform finish. Allow the product to cure according to the manufacturer’s instructions, as this step is crucial for bonding the restorer to the restored clearcoat. After curing, consider buffing lightly again with a clean microfiber cloth to enhance the gloss and durability of your rejuvenated surface.
How to Fix Yellow Clearcoat: Fixing Deep Yellowing
Sanding the Clearcoat
When the clearcoat is deeply yellowing, sanding becomes necessary to effectively remove the discolored top layer and restore clarity. The first step in this process is to choose the appropriate sandpaper; fine-grit sandpaper, typically in the range of 1000 to 2000 grit, is recommended. This allows for a more delicate touch that minimizes the risk of damaging the underlying paint.
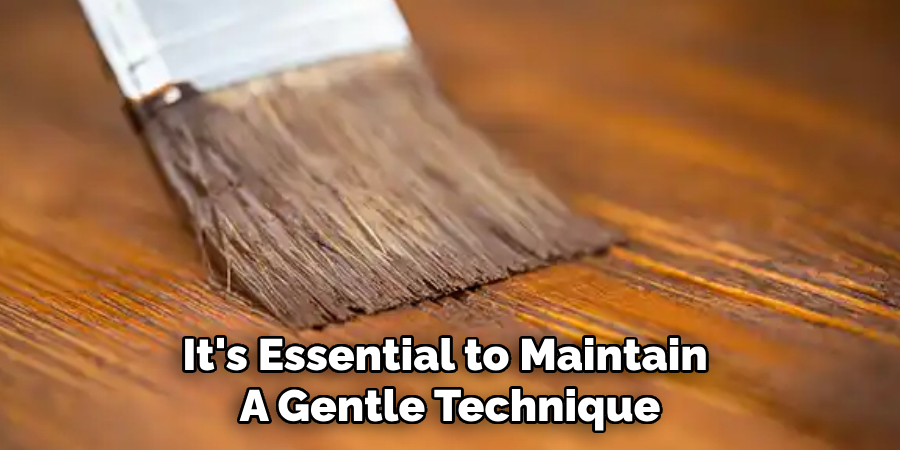
During the sanding process, it’s essential to maintain a gentle technique. Lightly sand the affected area using smooth, even strokes, taking care to focus on the yellowed spots without over-sanding. It’s critical to avoid applying too much pressure; doing so can lead to uneven surfaces or, worse, create further damage to the underlying clearcoat or paint. Regularly check your progress to ensure that you’re effectively removing the yellowing while maintaining the integrity of the clearcoat. It may be helpful to keep the area moist by lightly spritzing it with water or using a wet sanding technique, as this can help reduce dust and provide a clearer view of your progress.
Reapplying Clearcoat
Once sanding is complete, cleaning the surface thoroughly is crucial to prepare for a new layer of clearcoat. Start by washing the area with a mild detergent solution to remove any residue from the sanding process. Rinse well with clean water, ensuring there’s no soap left behind, and dry the surface with a soft, lint-free cloth. This step ensures proper adhesion of the new clearcoat to the surface.
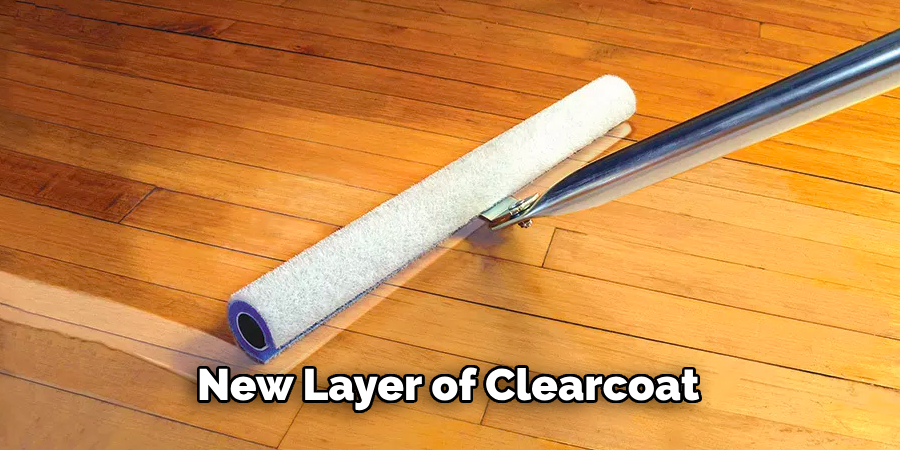
Next, gather your clearcoat product, ensuring it is specifically designed for use on automotive surfaces. Follow the manufacturer’s instructions for application, as different products may have specific guidelines. Using a sprayer or a clean spray gun can help achieve an even application. Hold the spray can or gun about 6 to 12 inches away from the surface and apply the clearcoat in thin, even layers. It’s advisable to use a sweeping motion to cover the surface uniformly without creating drips.
After applying the first layer, allow it to dry according to the manufacturer’s guidelines before assessing whether a second coat is necessary for optimal coverage. Once fully cured, which may take several hours or even days depending on the product used, the fresh clearcoat will provide a protective layer that enhances the car’s appearance while shielding it from future damage.
Polishing After Reapplication
After the new clearcoat has dried adequately, it’s time to polish the surface to ensure a seamless finish. Use a fine automotive polish to blend the new clearcoat with the existing finish. Apply a small amount of polish to a soft cloth or polishing pad, and work it into the surface using circular motions. This step enhances the shine and creates a uniform look across the entire surface.
Finally, buff the area gently with a clean microfiber cloth to achieve a smooth, glossy appearance. This final touch will significantly improve the overall aesthetics, restoring the vehicle’s factory-like finish.
Preventing Future Yellowing
Regular Maintenance
Establishing a regular cleaning routine is essential to maintain the clarity and appearance of your clear coat. Employ mild automotive-specific cleaners when washing your vehicle to eliminate dirt and contaminants without causing damage.
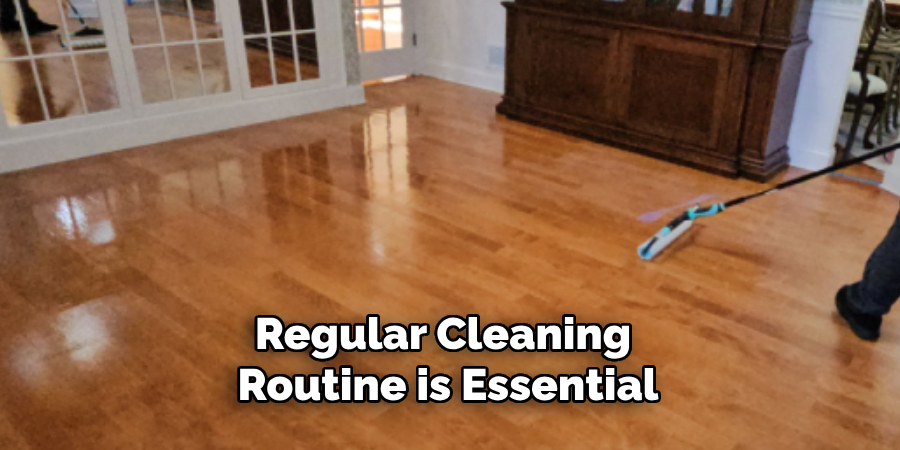
Depending on environmental conditions, aim to wash the vehicle at least once a month or more. Additionally, applying a high-quality wax or sealant every few months can provide an extra layer of protection against UV rays and pollutants that contribute to yellowing. These products not only enhance the shine but also create a barrier that guards against the elements, effectively prolonging the life of the clearcoat. Regular maintenance not only restores brilliance but also prevents future discoloration.
Avoiding Environmental Damage
Minimizing environmental exposure is vital in preventing the yellowing of clearcoat finishes. Whenever possible, park your vehicle in shaded areas or garages to protect it from direct sunlight, which can accelerate the deterioration of the clearcoat. If shade is not available, consider using a car cover designed to reflect UV rays.
Furthermore, be cautious when using cleaning products; avoid harsh chemicals or abrasive cleaners that can strip the clearcoat and expose the underlying paint. Always read the labels and choose products specifically formulated for automotive surfaces to ensure safety. By implementing these protective measures, you can help maintain the clarity and longevity of your clearcoat, keeping your vehicle looking its best.
Troubleshooting Common Issues
Persistent Yellowing
If you find that yellowing persists even after following the proper restoration techniques, it’s essential to consider potential underlying causes. Inadequate cleaning of the surface before applying products can lead to poor adhesion and subsequent discoloration. Additionally, an improper application of restoration products may fail to seal the clearcoat effectively, allowing environmental factors to penetrate and cause yellowing.
If you suspect underlying issues, such as damage to the original paint, it might be prudent to reassess the entire process, ensuring that every step was executed correctly. If these attempts do not yield results, consulting a professional detailing service can provide insights and solutions tailored to your specific situation, ensuring your vehicle’s finish is effectively restored.
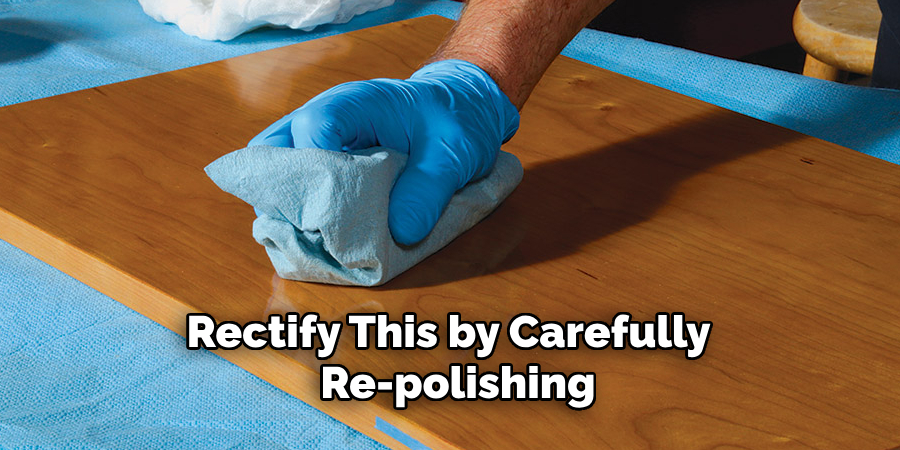
Uneven Finish After Repair
An uneven finish following the repair process is another common concern enthusiasts might encounter. This issue could arise from inconsistent application of the clearcoat, contamination during the painting process, or inadequate sanding prior to reapplication. Identifying the root cause is the first step toward resolution.
If the clearcoat was applied unevenly, you can rectify this by carefully re-polishing the affected area, which may help blend in the inconsistencies with the surrounding surface. Alternatively, if the issue persists, you may need to consider reapplying the clearcoat altogether, ensuring proper technique and conditions to achieve a uniform result. If you find yourself uncertain or if the unevenness is significant, seeking assistance from a professional is advisable, as they have the expertise and tools necessary to correct the imperfections and restore the vehicle’s aesthetic appeal.
Conclusion
In summary, addressing and fixing yellow clearcoat involves several key steps. Begin by thoroughly cleaning the surface to remove any contaminants before applying a suitable clearcoat product. Once applied, allow sufficient drying time, then polish the surface to achieve a seamless finish. Regular maintenance is essential to prevent future yellowing; this includes washing your vehicle with mild cleaners and applying a protective wax or sealant periodically.
Minimizing environmental exposure and avoiding harsh chemicals that might damage your clearcoat is crucial. By understanding how to fix yellow clearcoat and implementing these practices, you can significantly enhance the appearance and longevity of your vehicle’s finish. We encourage you to follow this guide to achieve the best possible results and maintain the beauty of your clearcoat surfaces for years to come.
About the Author
Adrian Green, a lifelong woodworking enthusiast, shares his passion for the craft through The Woodenify Blog. With a foundation built on years of hands-on experience in his father’s woodworking shop, Adrian is dedicated to helping others learn and grow in the world of DIY woodworking. His approach to woodworking combines creativity, practicality, and a deep appreciation for the art of building with your own hands. Through his blog, he inspires individuals of all skill levels to embark on their own woodworking journeys, creating beautiful, functional pieces of furniture and décor.
Professional Focus
- Specializes in DIY woodworking projects, from furniture to home décor.
- Provides step-by-step guides and practical tutorials for woodworkers of all skill levels.
- Dedicated to helping readers build confidence and skill through easy-to-follow instructions and tips.
- Passionate about fostering a community of makers who can share, learn, and grow together.
Education History
- University of Craft and Design – Bachelor of Fine Arts (BFA) in Woodworking and Furniture Design
- Woodworking Apprenticeships – Extensive hands-on training with skilled craftsmen to refine carpentry and furniture making techniques.
- Online Courses & Masterclasses – Continued education in advanced woodworking techniques, design principles, and specialized tools
Expertise:
- DIY woodworking, carpentry, furniture making, and home décor projects.
- Creating accessible tutorials and guides for beginner to advanced woodworkers.
- Sharing the joys and satisfaction of woodworking, from raw materials to finished products.