Wooden fences are a classic and versatile option for enhancing any property, offering a range of styles to suit different needs and preferences. Common types of wooden fences include picket fences, ideal for their decorative charm, privacy fences for seclusion, and split-rail fences for a rustic touch. These fences serve various purposes, including providing privacy, marking property boundaries, and enhancing the visual appeal of outdoor spaces.
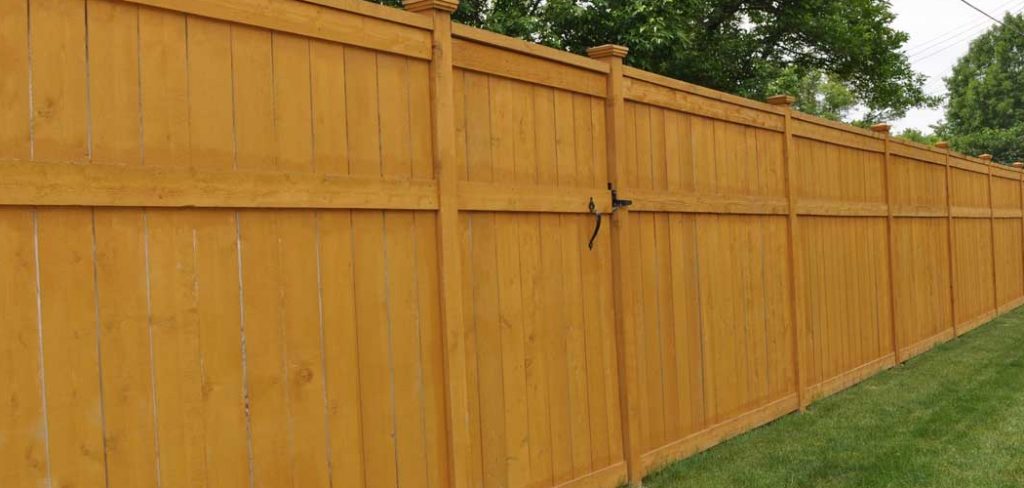
Installing a wooden fence offers numerous benefits, including enhancing property value, improving security, and enhancing the overall aesthetic of your home. This article offers a step-by-step DIY guide on how to install a wooden fence successfully, making the process approachable for homeowners looking to tackle this rewarding project with confidence. With proper planning and tools, achieving a durable and attractive wooden fence is well within reach.
Planning and Preparation
Check Local Regulations and Permits
Before starting your wooden fence project, it’s crucial to check local regulations and obtain any necessary permits. Contact your city or homeowner’s association (HOA) to ensure compliance with zoning laws, property line restrictions, and specific fence height or style guidelines. Understanding these requirements early can save time, avoid fines, and prevent disputes with neighbors.
Choosing the Fence Style and Materials
Selecting the right fence style and materials is an essential step in planning. Popular fence styles include picket fences for a classic look, privacy fences to block sightlines and increase security, and split-rail fences for a rustic feel. When it comes to materials, you’ll want to use durable wood types such as cedar, redwood, or treated pine, which are resistant to decay and weathering. Choose a style and material that complements your property’s aesthetics and meets your needs.
Measuring and Layout
Accurate measurements and a clear layout are key to a successful installation. Start by determining the total length of your fence, gate placement, and proper post spacing. Use stakes and string to mark the boundaries and ensure everything aligns with your property’s layout. This step helps visualize the project and lays the groundwork for precise construction, reducing errors later.
Gathering Tools and Materials
Before starting your fence installation, it is critical to ensure you have all the necessary tools and materials to ensure a smooth process.
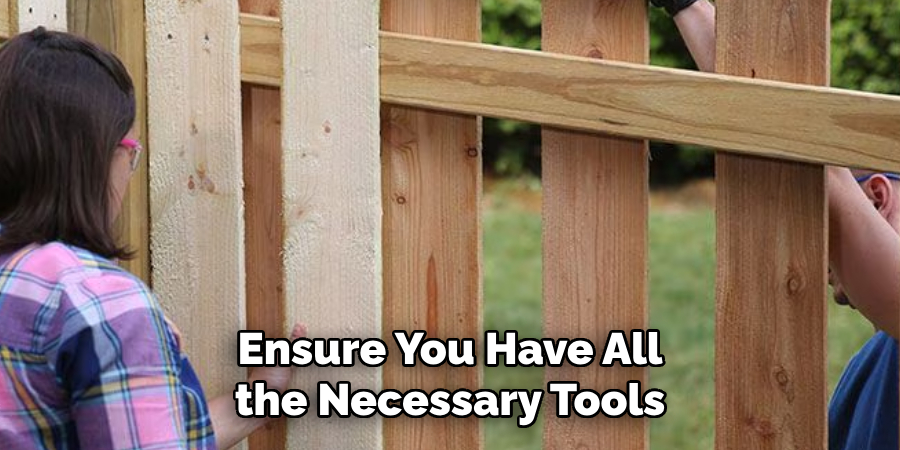
Essential Tools
To complete the job efficiently, gather the necessary tools, including a post hole digger, level, measuring tape, saw, drill, and hammer. These will help with tasks like digging precise holes, ensuring straight alignment, and securing the fence components.
Materials Needed
You’ll need essential materials, including fence panels or individual pickets, fence posts, concrete for stability, nails or screws, and brackets for assembly. These items form the foundation of your fence, ensuring its durability and structural integrity.
Optional Add-ons
Consider optional add-ons to enhance the appearance or longevity of your fence. Stain or sealant protects against weathering, while decorative caps add a touch of style. Gravel at the base of posts improves drainage and prevents water damage over time. Planning ahead ensures a well-prepared and successful installation.
How to Install a Wooden Fence: Setting Fence Posts
Digging Post Holes
Properly digging post holes is a crucial step in ensuring the stability and strength of your fence. Typically, holes should be 2–3 feet deep, depending on the height and type of fence you’re installing. A general guideline is that the hole depth should measure about one-third of the fence post’s total length.

Additionally, the diameter of the hole should be approximately three times wider than the post itself to provide adequate room for securing materials. Consistent spacing between posts is also essential for both the overall look and structural integrity of the fence. Spacing is usually 6–8 feet apart, but be sure to measure carefully and mark your spots before digging to maintain uniformity.
Placing the Posts
Once the holes are dug, place each post carefully, ensuring it is properly aligned vertically. Use a level to check the straightness of each post as you position it; this step is critical for maintaining a professional and sturdy appearance. Take your time to adjust the posts as needed before securing them in place.
Securing with Concrete
After positioning the posts, pour quick-set concrete into each hole, filling it around the post. Follow the manufacturer’s instructions for mixing and applying the concrete, and ensure there are no air pockets by tamping the concrete slightly. To facilitate water drainage, slope the top of the concrete slightly away from the post. Allow at least 24–48 hours for the concrete to cure before proceeding with fence installation. This curing time is crucial for maximizing the strength and durability of the posts.
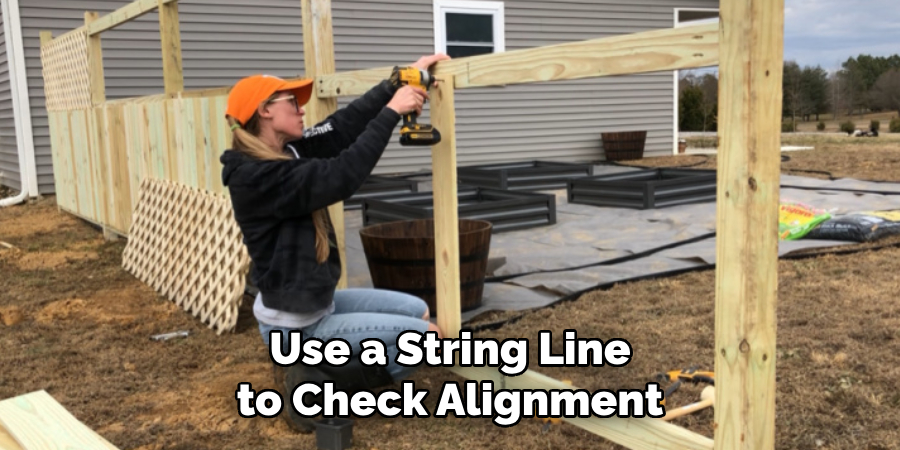
Double-Checking Post Placement
Before the concrete has completely set, take a final opportunity to verify the straightness and spacing of your posts. Use a string line to check alignment and make any necessary adjustments. Ensuring correct placement at this stage will save time and avoid issues later in the process.
Attaching Fence Rails and Panels
Installing Horizontal Rails
Begin by attaching the top and bottom rails between the fence posts. Use sturdy brackets or screws to ensure a secure connection. It is essential to use quality materials designed for outdoor use, as this will increase the longevity of your fence. To maintain a straight and level appearance, run a string line along the posts as a guide while installing the horizontal rails. This step ensures uniformity and prevents uneven sections that could detract from the fence’s finished appearance.
Mounting Fence Panels or Pickets
Once the rails are securely in place, it’s time to attach the fence panels or pickets. Align the panels evenly along the rails, ensuring their placement is uniform and aesthetically pleasing. If you’re using pickets, space them consistently according to your desired design, whether that be tight spacing for privacy or wider gaps for a more open feel. Secure the panels or pickets with corrosion-resistant screws or nails to help prevent rust and withstand weather conditions over time.
Accounting for Ground Slope
If your fence line follows uneven terrain, you must adjust your design accordingly. For sloped ground, consider using either a stepped or racked fence design. Stepped fencing involves setting the panels at incremental heights to create a stair-step effect, while racked fencing allows the panels to follow the slope closely. Both methods ensure a visually appealing and functional result that integrates seamlessly with the natural landscape. Proper adjustments here will help preserve your fence’s structural integrity and visual appeal.
Installing the Fence Gate
Measuring and Framing the Gate Area
When installing a fence gate, precise measurements are crucial to ensure proper functionality and aesthetic integration with your fence. Begin by determining the optimal width for the gate, taking into account the intended purpose—whether it’s for pedestrian or vehicle access. It’s essential to account for clearance on both sides of the gate to facilitate smooth operation and accommodate possible ground undulations. Frame the gate opening securely, ensuring it aligns with the rest of the fence and is level to prevent future structural issues.
Building or Attaching the Gate
You have two primary options for the gate itself: using a prefabricated gate or constructing one to match the style of your fence. A prefabricated gate offers convenience and uniformity, while a custom-built gate provides a cohesive and personalized appearance. Whichever you choose, ensure the gate is durable and appropriately reinforced to withstand regular use and external forces. Carefully secure the gate to its frame, ensuring it is properly fitted and balanced.

Attaching Hinges and Latch
Properly installing hinges and a latch is essential for the gate’s function and longevity. Attach the hinges to the gate and frame with care, ensuring they are aligned for a smooth swing. Allow sufficient clearance beneath the gate to avoid ground obstruction. Install the latch securely, carefully testing its operation to confirm it opens and closes easily.
Reinforcement and Testing
Once the gate is installed, test the swing direction to confirm it opens as intended. Check for smooth operation, and make any necessary adjustments to alignment or clearances. Reinforce all components as needed to ensure stability. A well-installed gate will enhance both the practicality and appearance of your fence.
Finishing Touches and Maintenance Tips
Sanding and Smoothing Rough Edges
After installation, carefully sand down any rough edges or splinters along the gate and fence. This not only improves the appearance but also prevents injuries from sharp or jagged surfaces. Use fine-grit sandpaper for the best results, ensuring the wood feels smooth to the touch.
Staining or Painting
Apply a protective finish, such as wood stain or outdoor-grade paint, to safeguard the fence from rot, moisture, and harsh weather. Choose products designed for exterior use to maximize durability. This step not only improves longevity but also enhances the visual appeal of your gate and fence.
Routine Maintenance
Conduct annual inspections to check for loose boards, signs of rot, and pest damage. Address issues promptly to prevent more extensive repairs later. Additionally, reapply stain or sealant every 2–3 years to maintain the wood’s integrity and aesthetic, ensuring your gate and fence remain durable and attractive over time.
Common Mistakes to Avoid
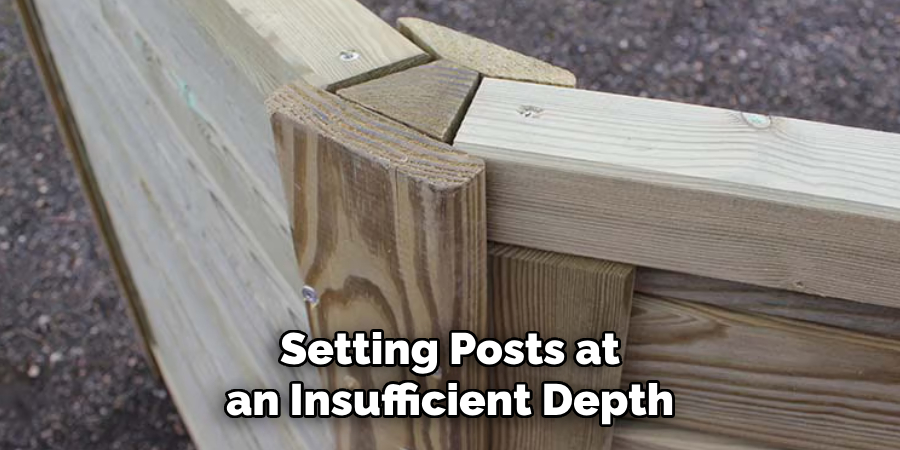
Improper Post Depth or Alignment
One of the most common errors when installing a gate or fence is setting posts at an insufficient depth or failing to align them correctly. This can lead to leaning or unstable fences, particularly in regions with shifting soil or heavy winds. To prevent this, ensure posts are buried to an appropriate depth based on your area’s frost line and use a level to maintain proper alignment.
Using Untreated or Low-Quality Wood
Opting for untreated or low-quality wood may save costs initially, but it can lead to early deterioration due to rot, pests, or weather exposure. Always choose treated or naturally durable wood designed to withstand outdoor conditions. Investing in high-quality materials ensures a longer-lasting and more reliable structure.
Skipping Local Guidelines or Property Marking
Ignoring local building codes or property boundary markings is another mistake that can create significant issues. This oversight may result in fines, the need to redo work, or disputes with neighbors. Verify all regulations and locate property lines before starting your project to save time and avoid unnecessary complications.
Conclusion
Installing a wooden fence can be a rewarding DIY project with the right preparation and tools. Start by carefully planning your layout and gathering necessary materials. Next, dig the post holes with precision to ensure a stable foundation. Attach the panels securely, paying attention to alignment and sturdiness.
Finally, make any finishing touches to enhance the fence’s appearance and functionality. With patience and adherence to these steps, you can confidently master how to install a wooden fence. Don’t forget to perform regular maintenance, such as staining or sealing, to ensure your fence remains durable and visually appealing for years to come.
About the Author
Adrian Green, a lifelong woodworking enthusiast, shares his passion for the craft through The Woodenify Blog. With a foundation built on years of hands-on experience in his father’s woodworking shop, Adrian is dedicated to helping others learn and grow in the world of DIY woodworking. His approach to woodworking combines creativity, practicality, and a deep appreciation for the art of building with your own hands. Through his blog, he inspires individuals of all skill levels to embark on their own woodworking journeys, creating beautiful, functional pieces of furniture and décor.
Professional Focus
- Specializes in DIY woodworking projects, from furniture to home décor.
- Provides step-by-step guides and practical tutorials for woodworkers of all skill levels.
- Dedicated to helping readers build confidence and skill through easy-to-follow instructions and tips.
- Passionate about fostering a community of makers who can share, learn, and grow together.
Education History
- University of Craft and Design – Bachelor of Fine Arts (BFA) in Woodworking and Furniture Design
- Woodworking Apprenticeships – Extensive hands-on training with skilled craftsmen to refine carpentry and furniture making techniques.
- Online Courses & Masterclasses – Continued education in advanced woodworking techniques, design principles, and specialized tools
Expertise:
- DIY woodworking, carpentry, furniture making, and home décor projects.
- Creating accessible tutorials and guides for beginner to advanced woodworkers.
- Sharing the joys and satisfaction of woodworking, from raw materials to finished products.