Are you planning to install blocking between the joists in your home? Adding blocking can provide additional support and stability to your floors and walls, making your home stronger and more durable.

How to install blocking between joists is a critical step in ensuring the structural integrity of your deck, floor, or ceiling. Blocks, typically made from the same material as the joists, are placed perpendicular to and between the joists to prevent them from twisting and to help distribute loads more evenly.
Besides adding strength, blocking can provide a solid base for attaching interior finishes or the underside decking board. Whether you’re working on a new construction project or reinforcing an existing structure, understanding the correct methods for installing blocking can save you time and ensure your project meets building codes and standards.
This guide will walk you through the process step-by-step, ensuring a secure and sturdy installation.
What are the Benefits of Installing Blocking?
Before we begin the installation process, let’s examine some of the benefits of installing blocking between joists.
- Increased Structural Support: By adding blocking between joists, you are effectively creating more points of contact and reinforcement within the structure. This can help distribute loads evenly and prevent twisting or shifting, making your floors and walls stronger and more durable.
- Improved Stability: Blocking can also improve the overall stability of your structure by preventing lateral movement and reducing vibrations or sway. This is especially important for decks and balconies, where there may be more movement due to foot traffic or external forces like wind.
- Allows for Easier Installation of Finishes: Installing blocking provides a solid base for attaching interior finishes such as drywall or exterior finishes like decking boards. This can make the installation process smoother and ensure a more professional finish.
- Meets Building Codes and Standards: Many building codes require the use of blocking between joists to ensure structural integrity and safety. By following proper installation methods, you can rest assured that your project meets these regulations.

These are just a few of the benefits of installing blocking between joists. Now, let’s move on to the installation process.
What Will You Need?
Before you begin installing blocking between joists, make sure you have all the necessary tools and materials on hand. Here is a list of what you’ll need:
- Measuring tape
- Safety glasses
- Circular saw or hand
- Hammer or nail gun
- Nails or screws
- Framing square
- Chalk line
Once you have all your tools and materials, you’re ready to get started on the installation process.
10 Easy Steps on How to Install Blocking Between Joists
Step 1: Measure and Mark
The first step in installing blocking between joists is to accurately measure and mark the locations where the blocks will be installed. Use your measuring tape to determine the distance between the joists, ensuring that the blocks you cut will fit snugly in between. Even spacing between blocks is essential for uniform support, so decide on the spacing beforehand. Typically, blocks are installed at intervals of 4 to 8 feet, depending on the structure’s requirements and the type of load it will bear.

Once you have your measurements, use a chalk line to mark the exact positions on the joists where each block will be placed. This visual guide will ensure that your blocks are aligned correctly during the installation process. If you’re working with a long span, it may be helpful to use a framing square to check that your lines are perpendicular to the joists, ensuring an accurate and straight installation.
Step 2: Cut the Blocks
After measuring and marking the positions for your blocking, the next step is to cut the blocks to the appropriate length. Using the measurements you took earlier, mark the cutting lines on your lumber, ensuring each piece will fit snugly between the joists. These blocks must be cut accurately to avoid gaps or overly tight fits, which can compromise the stability and integrity of the blocking.
Use a circular saw or handsaw to cut the blocks, following the marks you’ve made. For safety, always wear your safety glasses when cutting. If you’re using a circular saw, make sure the blade depth is set correctly to avoid cutting too deep. After cutting the blocks, you may lightly sand any rough edges to prevent splinters and ensure a cleaner fit.
Having these blocks prepared and ready makes the rest of the installation process smoother and more efficient.
Step 3: Install the First Block
With the blocks cut to the precise length, you’re now ready to install the first block. Place the block between the joists where you’ve marked the line, ensuring it fits snugly. The block should be level and flush with the top of the joists to maintain an even surface for the flooring or ceiling material that will be laid over it.
If you’re using nails, position the block and hold it firmly in place while you hammer the nails through the joist and into the ends of the block. For a stronger hold, consider using a nail gun, which can save time and provide a more secure fastening.
Alternatively, if screws are your choice of fastener, use a drill to drive the screws through the joists and into the ends of each block. Whether nailing or screwing, make sure to use fasteners that are appropriately sized for the thickness of the joists and blocks to ensure a tight, secure fit.

Step 4: Continue Installing Additional Blocks
After successfully installing the first block, continue the process by moving to the next marked position along the joists. Position each block as you did the first one, ensuring a snug fit between the joists and that the top of the block is level with the top of the joists. Repeat the fastening process using either nails or screws, depending on your preference and what you used for the first block.
It’s important to keep the blocks aligned with your chalk line marks to maintain consistent spacing and ensure the structural integrity of the installation. Work your way along the length of the joists, installing blocks at each predetermined mark. Taking your time during this step to ensure accuracy and a good fit will pay off in the stability and support these blocks provide to the overall structure.
Step 5: Check for Level and Adjustments
Once all the blocks are installed, it’s crucial to check that everything is level and properly aligned. Use a long level to check the tops of the blocks in relation to the joists. If any blocks are not flush or level, gently adjust them by tapping with a hammer or re-fastening as necessary.
Ensuring that all blocks are level will provide a stable base for your flooring or ceiling and avoid any unevenness in the finish. This step is essential for maintaining the structural integrity of your installation and ensuring a professional-quality outcome. If adjustments are needed, make them now before proceeding to cover the area with flooring or ceiling material.
Step 6: Inspect for Gaps and Fill if Necessary
After ensuring all blocks are level and properly aligned, the next step is to inspect each installation point for any gaps between the blocks and the joists. Even small gaps can compromise the strength of your structure, so it’s important to address them. If you find any gaps, small wood shims can be used to fill these spaces.
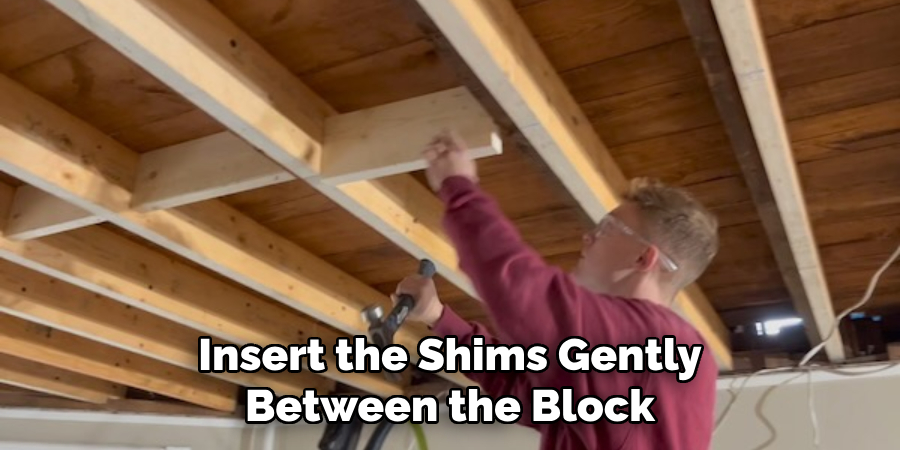
Insert the shims gently between the block and the joist until snug, then trim any excess material from the shim to maintain a clean look. For larger gaps, you may need to cut a new block custom or add additional support. This thorough inspection and adjustment process ensures that your blocking is as stable and secure as possible, providing optimal support for your structure.
Step 7: Final Cleanup and Inspection
With all the blocks installed and adjusted, the final step is a thorough cleanup of the work area. Collect all offcuts, sawdust, and debris from the cutting and installation process and dispose of them properly. This not only keeps your workspace safe but also prepares the area for any next steps in your construction project.
Following cleanup, conduct a final inspection of your work. Check each block to ensure that it is securely fastened and that there are no protruding nails or screws that could interfere with the installation of flooring or ceiling materials. This meticulous attention to detail will ensure that the structure is sound and the surface is ready for the next phase of your project.
Step 8: Prepare for Flooring or Ceiling Material Installation
With the blocking securely in place and all adjustments made, the final step before moving forward is to prepare the surface for the installation of flooring or ceiling material. This involves ensuring that the top surface of each block is free from any debris that could affect the installation.
Sweep or vacuum over the blocks and joists to remove sawdust and small particles. If you’re planning to install floorboards or ceiling panels directly over the blocks, check that the surface is smooth and even. Any high spots on the blocks can be lightly sanded down to ensure a level surface.
Ensuring that your groundwork is meticulously prepared sets a solid foundation for the next stage of your construction project, be it laying down new flooring or affixing ceiling materials. This preparation is critical in achieving a professional and quality finish in your project.
Step 9: Begin Flooring or Ceiling Material Installation
At this point, you are ready to begin the installation of your flooring or ceiling material. Start from one end of the room, aligning your first piece of material with the edge of the room or the central guideline you’ve established.
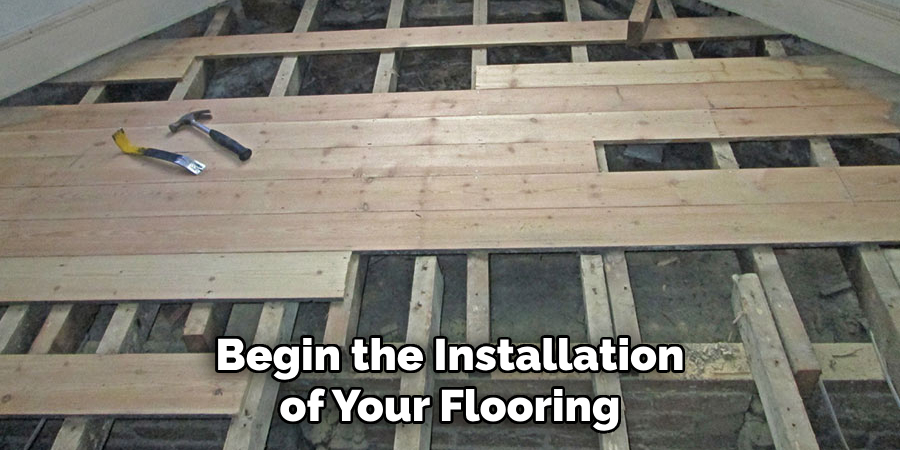
If you’re working with panels or planks, make sure the first piece is perfectly straight, as it will set the direction for all subsequent pieces. Secure the material according to the manufacturer’s instructions, typically involving nailing, screwing, or clicking pieces together for floating floor systems.
Continue laying out the flooring or ceiling material piece by piece, ensuring tight seams and a flush fit against each block. For flooring, be mindful of expansion gaps along the walls as per the manufacturer’s recommendation. This step requires patience and precision to ensure a professional appearance and long-lasting performance of your new floor or ceiling.
Step 10: Finishing Touches and Trim Installation
After the flooring or ceiling material is fully installed, it’s time to focus on the finishing touches. For flooring installations, install baseboards or quarter-round molding along the edges of the room to hide the expansion gaps and enhance the appearance of your project. If you’ve been working on a ceiling, this may involve installing trim or molding at the edges where the ceiling meets the walls.
Use finish nails or adhesive recommended by the trim manufacturer and ensure that each piece is measured accurately and cut precisely for a snug fit. Caulk any gaps at the corners or between molding and wall to achieve a clean, seamless look. These final details not only improve the aesthetic appeal but also help to seal and protect your new installation from dust and moisture.
By following these steps and properly installing blocking, you can ensure a structurally sound and professional-quality construction project.
5 Additional Tips and Tricks
1. Measure and Cut Precisely: Ensuring that each block fits snugly between the joists is critical. Measure the distance between the joists carefully and cut your blocking to these exact measurements for a tight fit. A carpenter’s square can be invaluable for getting accurate, straight cuts.
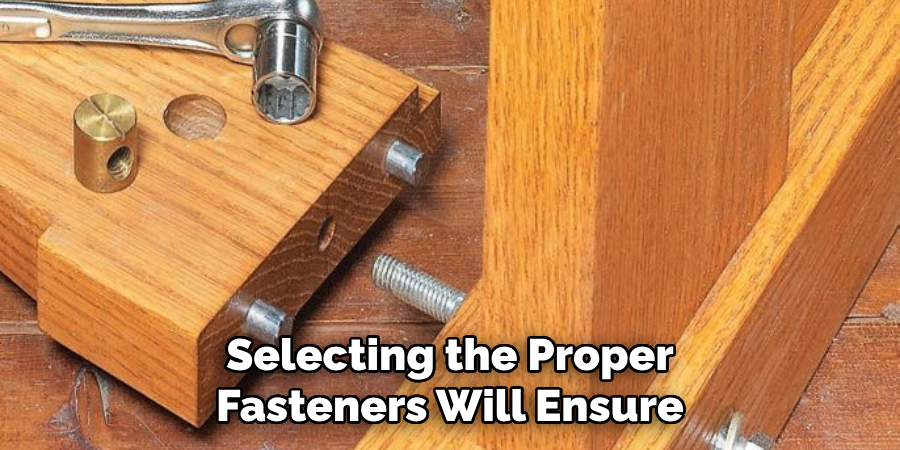
2. Use the Right Fasteners: Selecting the proper fasteners will ensure a sturdy installation. Typically, 3-inch nails or screws are recommended. Using a pneumatic nailer can save time and effort, but make sure to align everything precisely before fastening.
3. Stagger the Blocks for Easier Installation: When installing blocks in long spans, staggering them instead of aligning them directly across from each other can provide easier access for fastening and can also improve structural integrity.
4. Check for Level and Flush: Before securing the blocks, place a level on top to check that they are flush with the top of the joists. This step is critical to avoid any uneven surfaces, especially if the floor or ceiling they support will be finished.
5. Use Construction Adhesive for Added Strength: Applying a bead of construction adhesive on the ends of the blocks before nailing or screwing them in place can add extra holding power and stiffness to the floor assembly. This can be particularly beneficial in areas prone to high traffic or heavy loads.
With these additional tips and tricks, you can ensure a smooth and sturdy installation of blocking between joists.
5 Things You Should Avoid
- Skipping the Planning Phase: Failing to plan the layout of your blocks can lead to uneven spacing and misalignment. Sketching out your blocking plan prior to installation is essential to ensure a balanced and functional result.
- Ignoring Local Building Codes: Not adhering to the building codes in your area can not only lead to suboptimal structural integrity but may also have legal implications. Always check local regulations to ensure compliance.
- Using Mismatched Materials: Employing blocks of different sizes or materials can compromise the structure’s stability. Ensure all blocking material is consistent in size and type to maintain uniform support across the span.
- Neglecting to Use Protective Equipment: Sawing blocks and driving nails or screws can be hazardous. Always wear appropriate safety gear, such as goggles and gloves, to prevent injuries during the installation process.
- Overlooking the Importance of Precision: Installing blocks that are not level or flush with the joists can lead to issues with the floor or ceiling they support. Take the time to double-check measurements and level each block meticulously before securing it in place.
By avoiding these common pitfalls, you can enhance the safety and effectiveness of your DIY project and ensure durable and reliable blocking between joists.
Do You Need Blocking Between Rafters?
While blocking between joists is often necessary for structural integrity, you may also need to consider blocking between rafters. This can be particularly important in high wind or seismic areas, as it helps prevent the roof from lifting off the walls during extreme weather events.
Additionally, blocking between rafters can help distribute weight evenly and prevent sagging in the ceiling below. It can also provide a solid nailing surface for finished ceilings, such as drywall or paneling.
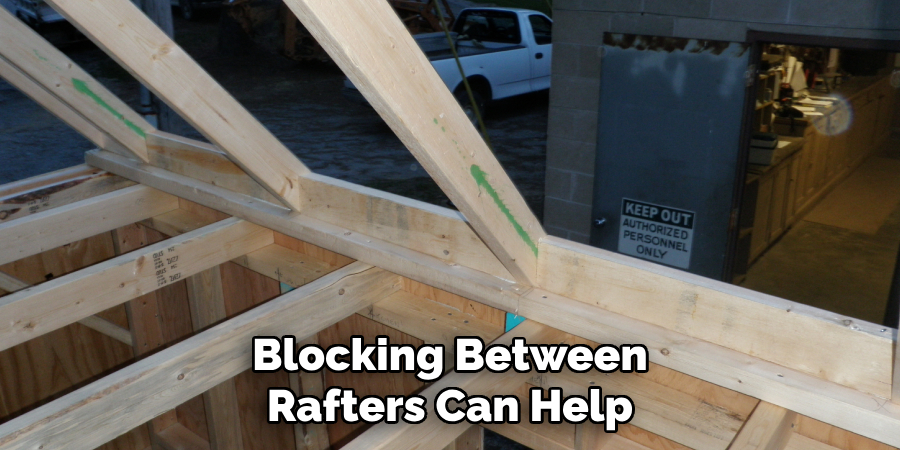
When deciding whether to install blocking between rafters, consult local building codes and consider your structure’s specific needs. If you are unsure, it is best to err on the side of caution and add blocking for added stability and safety. Proper installation of blocking between rafters can enhance your structure’s overall strength and durability. So, don’t overlook the importance of this crucial step in your DIY or construction project.
Conclusion
In summary, how to install blocking between joists is a critical aspect of any construction or DIY home improvement project that aims to ensure the structural integrity and stability of floors or ceilings.
By adhering to the steps outlined above, including precise measurement and cutting, choosing the right fasteners, and avoiding common pitfalls, you can greatly enhance the support and longevity of your building project.
Remember to always prioritize planning, comply with local building codes, and use consistent materials and protective equipment to achieve optimal results. Whether you’re reinforcing a high-traffic area or preparing for the installation of a finished surface, the addition of blocking between joists is a detail that should not be overlooked.
With careful attention to detail and adherence to best practices, you can successfully install blocking that meets both your structural and aesthetic needs.
About the Author
Adrian Green, a lifelong woodworking enthusiast, shares his passion for the craft through The Woodenify Blog. With a foundation built on years of hands-on experience in his father’s woodworking shop, Adrian is dedicated to helping others learn and grow in the world of DIY woodworking. His approach to woodworking combines creativity, practicality, and a deep appreciation for the art of building with your own hands. Through his blog, he inspires individuals of all skill levels to embark on their own woodworking journeys, creating beautiful, functional pieces of furniture and décor.
Professional Focus
- Specializes in DIY woodworking projects, from furniture to home décor.
- Provides step-by-step guides and practical tutorials for woodworkers of all skill levels.
- Dedicated to helping readers build confidence and skill through easy-to-follow instructions and tips.
- Passionate about fostering a community of makers who can share, learn, and grow together.
Education History
- University of Craft and Design – Bachelor of Fine Arts (BFA) in Woodworking and Furniture Design
- Woodworking Apprenticeships – Extensive hands-on training with skilled craftsmen to refine carpentry and furniture making techniques.
- Online Courses & Masterclasses – Continued education in advanced woodworking techniques, design principles, and specialized tools
Expertise:
- DIY woodworking, carpentry, furniture making, and home décor projects.
- Creating accessible tutorials and guides for beginner to advanced woodworkers.
- Sharing the joys and satisfaction of woodworking, from raw materials to finished products.