Are you tired of your old furniture? Do you want to give it a new look and feel without spending a lot of money?
Installing furniture legs ideas is a simple and effective way to customize or repair your furniture, giving it a fresh look and ensuring stability. Whether you’re replacing old, worn-out legs or attaching brand-new ones to a piece of furniture, the process can be straightforward with the right tools and guidance. Before starting, it’s essential to gather all the necessary materials and identify the type of legs and attachment method that best suit your furniture.
This guide on how to install furniture legs will walk you through the steps to securely and efficiently install furniture legs, ensuring a durable and polished result. Let’s get started!
What Are the Benefits of Installing Furniture Legs?
Adding legs to furniture can provide a range of benefits, including:
- Improved Aesthetics: Furniture legs can instantly elevate the look and feel of a piece by creating visual interest and adding dimension. Furthermore, they can make a piece appear lighter and airy, perfect for smaller spaces.
- Enhanced Functionality: By raising furniture off the ground, you can create valuable storage space underneath or easily clean hard-to-reach areas. Additionally, furniture legs facilitate the easier movement and rearrangement of heavy pieces.
- Increased Durability: Properly installed furniture legs provide support and stability for your furniture, reducing the risk of damage from frequent use or weight.
What Will You Need?
- Furniture Legs: These can be purchased at most hardware or home goods stores and come in various heights, styles, and materials.
- Power Drill: This tool will make the installation process much easier and more efficient.
- Screwdriver or Wrench: Depending on the type of furniture legs you choose, you may need one of these tools to tighten screws or bolts.
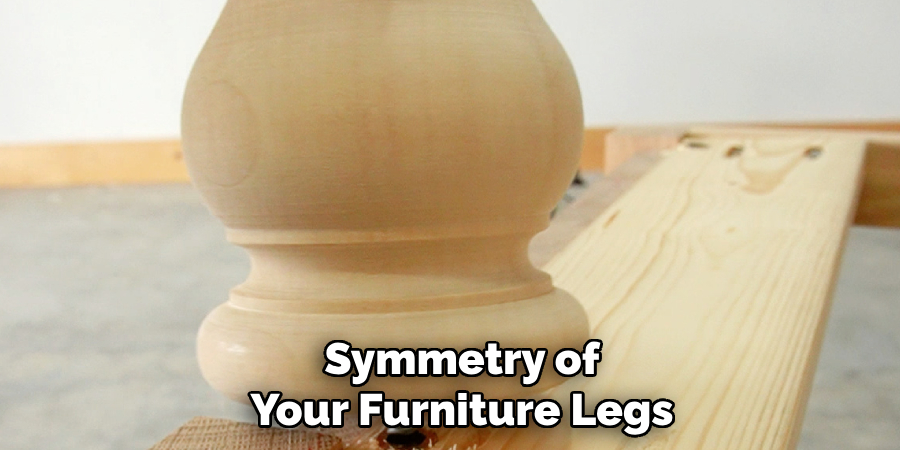
- Measuring Tape: To ensure proper placement and symmetry of your furniture legs, a measuring tape is necessary.
10 Easy Steps on How to Install Furniture Legs
Step 1. Prepare Your Workspace
Clear a clean and spacious area to work, ensuring that you have enough room to move around comfortably. Remove any clutter or obstacles to avoid accidents during the installation. Ideally, place a protective covering, such as a drop cloth or old sheet, on the floor to prevent scratches or damage to your furniture or flooring. Gather all the necessary tools and materials listed earlier so that everything is within easy reach. Having an organized and prepared workspace will help streamline the installation process and minimize interruptions.
Step 2. Examine Your Furniture
Start by carefully inspecting your furniture for any signs of damage, wear, or loose components. Check for cracks, splinters, or unstable joints that could affect the installation process or compromise the furniture’s stability. If you identify any issues, repair them before proceeding to ensure the furniture is in optimal condition. Pay special attention to screws, bolts, or other hardware, ensuring they are secure and not stripped. Taking the time to examine your furniture thoroughly will help avoid complications later and provide a safe and successful assembly or installation.
Step 3. Remove Old Legs
Carefully turn the piece of furniture upside down or on its side to access the old legs. Use the appropriate tools, such as a screwdriver or wrench, to unscrew and detach the legs. Be sure to keep all removed screws, bolts, and hardware in a safe place in case they are needed later. If any parts are stuck or difficult to remove due to rust or wear, apply a lubricant such as WD-40 to loosen them. Take care not to damage the furniture frame during this process. Once all legs are removed, inspect the attachment points to ensure they are clean and free from debris. This will prepare the surface for securely attaching the new legs in the next step.
Step 4. Locate the Attachment Points
Examine the underside of the furniture to identify where the new legs will be attached. Look for pre-drilled holes, metal brackets, or other mounting hardware that will serve as the connection points. If the furniture does not have pre-existing attachment points, carefully measure and mark where the legs should be installed to ensure even placement. Use a ruler or measuring tape to ensure alignment and balance. Properly locating these points is crucial for stability and avoiding damage during assembly.
Step 5. Drill Pilot Holes
Using a drill and a bit slightly smaller than the screws you’ll be using, carefully create pilot holes at the marked attachment points. This step is essential to prevent the wood or material from splitting and to ensure the screws enter easily and securely. Drill straight and to a consistent depth, avoiding overdepth. If your furniture is made of a rigid material like metal, use a drill bit specifically designed for that purpose. Once all pilot holes are drilled, double-check their alignment before proceeding to the next step.
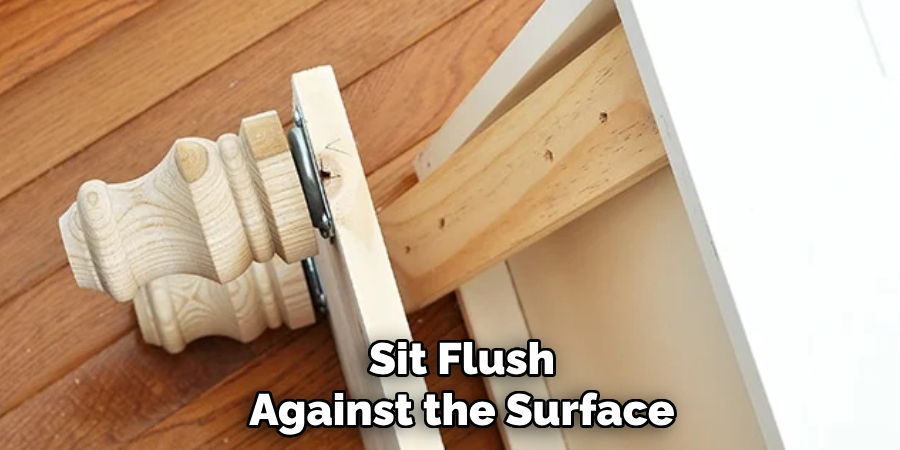
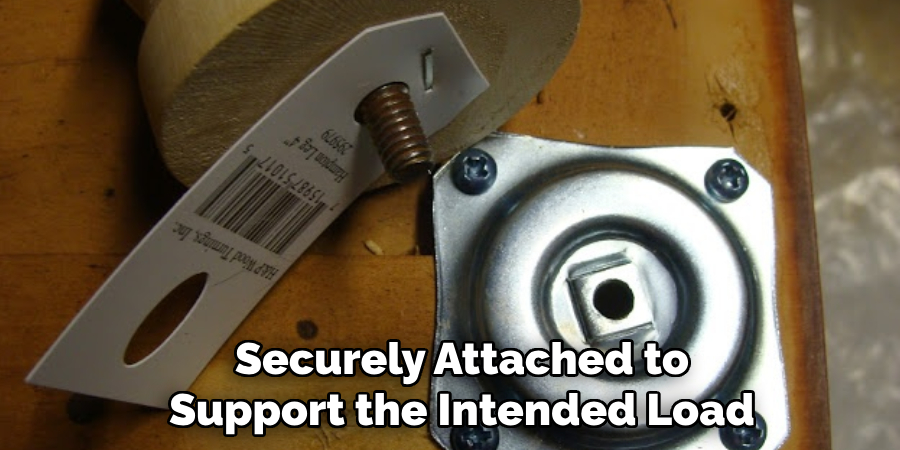
Step 6. Attach the Mounting Plates
Using the screws provided, align the mounting plates with the pilot holes you drilled earlier. Ensure the plates are correctly positioned and sit flush against the surface. Begin by partially tightening each screw to hold the mounting plate in place, then go back and fully tighten them once everything is aligned. Avoid overtightening, as this can strip the screws or damage the material. Double-check that all plates are securely attached and stable before moving on to the next step.
Step 7. Screw in the Furniture Legs
Carefully align each furniture leg with the mounting plates you secured in the previous step. Insert the screws or bolts provided with the legs into the corresponding holes on the mounting plates. Start by lightly screwing them in to ensure proper alignment, then gradually tighten each one using a screwdriver or wrench, depending on the type of hardware. Be cautious not to overtighten, as this could damage the thread or impact the stability of the legs.
Step 8. Double-Check Stability
Once all the legs are securely attached, carefully place the furniture upright on a level surface. Gently press down on each corner and wiggle the furniture slightly to test for any wobbling or instability. If any movement is detected, revisit the legs to ensure they are properly tightened and aligned. This step is crucial to ensure both the safety and functionality of your furniture. Repeat the stability check until the piece feels solid and balanced.
Step 9. Flip the Furniture Upright
Once you have confirmed that all the legs are securely attached and the furniture is stable, it’s time to flip it upright carefully. This step should be performed with caution, especially when working with larger or heavier pieces of furniture.
Start by grabbing onto one side of the furniture and gently lifting it off the ground. Have someone help you if necessary to avoid straining your back or causing any accidents. Slowly rotate the piece until it is completely flipped over and resting on its legs. Repeat this process for any other sides if needed, paying close attention to maintaining stability throughout the flipping process.
Step 10. Test and Enjoy
Once the furniture is securely positioned and assembled, give it a thorough test to ensure everything is stable and functioning as intended. Sit, lean, or apply gentle pressure where appropriate to check its sturdiness. If it’s a functional piece, such as a chair or table, ensure it performs its role comfortably and safely. Adjust or tighten any parts if needed. Once satisfied, take a moment to appreciate your hard work and enjoy the results of your efforts in creating a valuable and well-placed piece of furniture.
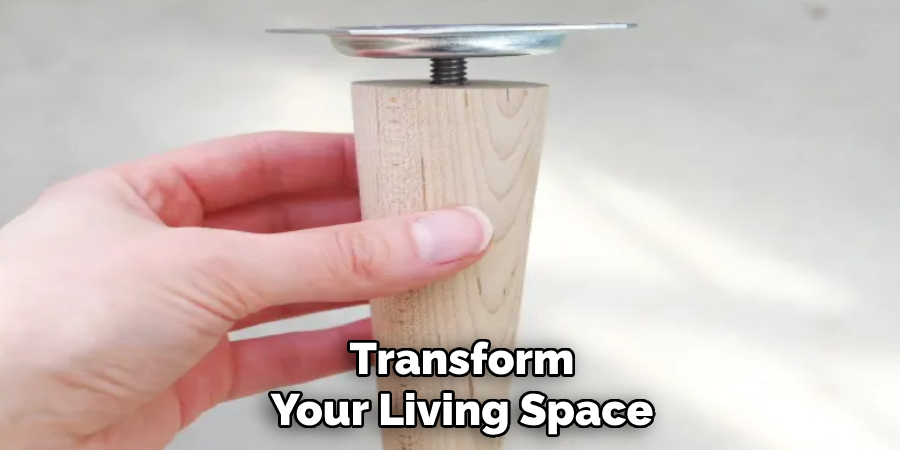
By following these steps, you can successfully assemble any piece of furniture and transform your living space with functional and stylish additions.
5 Things You Should Avoid
- Skipping the Instructions
Avoid the temptation to skip reading the instructions provided. Each furniture leg may have specific installation requirements, and ignoring them can lead to improper assembly or damage to the furniture.
- Using the Wrong Tools
Using incorrect tools, such as a mismatched screwdriver or a weak drill, can damage screws, misalign the legs, or make the process unnecessarily complicated. Always ensure you have the recommended tools ready before starting.
- Over-Tightening Screws
Over-tightening screws is a common mistake that can strip threads, crack wooden furniture, or weaken the overall stability of the legs. Tighten screws just enough to secure the legs firmly without forcing them.
- Installing on Uneven Surfaces
Working on uneven or unstable surfaces can result in improperly installed legs, causing your furniture to wobble or become unbalanced. Always assemble furniture on a flat, stable surface for the best results.
- Ignoring Weight Distribution
Failing to account for proper weight distribution can lead to uneven pressure on the furniture legs, which may cause them to break or become unstable over time. Ensure that the legs are evenly positioned and securely attached to support the intended load.
Conclusion
How to install furniture legs properly is crucial for both functionality and durability.
By following the outlined steps, such as selecting the right tools, preparing the surface, and ensuring proper alignment and weight distribution, you can avoid common issues like instability or damage. Taking the time to assemble your furniture legs with care will result in a sturdy, long-lasting piece that complements your living space effectively.
Remember, attention to detail and patience are key to achieving the best outcome.
About the Author
Adrian Green, a lifelong woodworking enthusiast, shares his passion for the craft through The Woodenify Blog. With a foundation built on years of hands-on experience in his father’s woodworking shop, Adrian is dedicated to helping others learn and grow in the world of DIY woodworking. His approach to woodworking combines creativity, practicality, and a deep appreciation for the art of building with your own hands. Through his blog, he inspires individuals of all skill levels to embark on their own woodworking journeys, creating beautiful, functional pieces of furniture and décor.
Professional Focus
- Specializes in DIY woodworking projects, from furniture to home décor.
- Provides step-by-step guides and practical tutorials for woodworkers of all skill levels.
- Dedicated to helping readers build confidence and skill through easy-to-follow instructions and tips.
- Passionate about fostering a community of makers who can share, learn, and grow together.
Education History
- University of Craft and Design – Bachelor of Fine Arts (BFA) in Woodworking and Furniture Design
- Woodworking Apprenticeships – Extensive hands-on training with skilled craftsmen to refine carpentry and furniture making techniques.
- Online Courses & Masterclasses – Continued education in advanced woodworking techniques, design principles, and specialized tools
Expertise:
- DIY woodworking, carpentry, furniture making, and home décor projects.
- Creating accessible tutorials and guides for beginner to advanced woodworkers.
- Sharing the joys and satisfaction of woodworking, from raw materials to finished products.