Are you tired of having a cluttered and disorganized laundry room? Installing cabinets can be a great solution to help you organize your space and make doing laundry more efficient. In this guide, we will walk you through the step-by-step process of how to install laundry room cabinets.
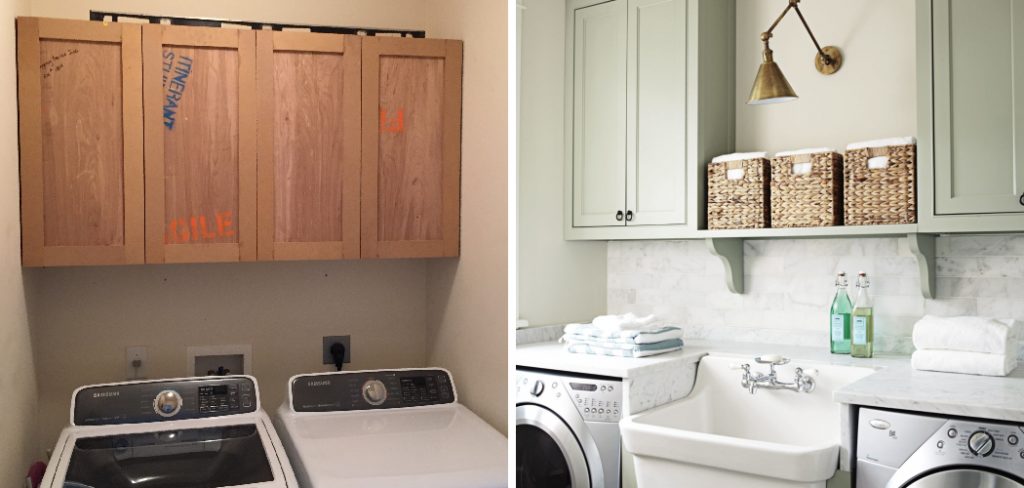
Installing cabinets in your laundry room can greatly enhance its utility and aesthetic appeal. A well-organized laundry room makes chores more manageable and creates a tidy, efficient space. Whether you’re a seasoned DIY enthusiast or a complete novice, this guide will walk you through the process step-by-step.
From gathering the right tools and materials to ensuring that your cabinets are securely mounted, we’ll cover everything you need to know to install cabinets in your laundry room successfully.
So roll up your sleeves, and let’s get started on transforming your laundry area into a functional and stylish workspace.
What are the Benefits of Installing Laundry Room Cabinets?
Before we dive into the installation process, let’s take a moment to understand why installing cabinets in your laundry room can be beneficial:
- Extra Storage Space: Laundry rooms tend to accumulate clutter and become disorganized easily. Adding cabinets can provide extra storage space for laundry essentials such as detergent, fabric softener, and cleaning supplies, helping to keep your laundry room tidy and free of clutter.
- Efficient Use of Space: Cabinets also efficiently use vertical space in your laundry room. Installing cabinets on the walls allows you to maximize storage without taking up valuable floor space.
- Improved Aesthetics: Adding cabinets can greatly enhance your laundry room’s overall look and feel. With a variety of styles and designs to choose from, you can easily find cabinets that complement your existing decor.
- Concealment of Unsightly Items: Laundry rooms often have exposed pipes or wires, which can be an eyesore. Installing cabinets allows you to hide these unsightly elements and create a more polished look.
Now that we’ve covered the benefits, let’s jump into the installation process.
What Will You Need?
Before you begin installing your laundry room cabinets, gathering all the necessary tools and materials is essential. Here’s a list of items you’ll need:

- Cabinets: Choose cabinets that fit your laundry room space and meet your storage needs. Consider the style, size, and color to match your decor.
- Measuring Tape: You’ll Need a Measuring Tape to accurately measure your walls and cabinets to ensure they fit properly.
- Level: A level will help you ensure that your cabinets are installed straight and even.
- Screwdriver or Drill: Depending on the type of cabinet you choose, you may need either a screwdriver or a drill to attach the cabinets to the wall. Make sure to have the correct size and type of screws.
- Wall Anchors: If your walls are made of drywall, you’ll need wall anchors to provide additional support for your cabinets.
- Stud Finder: This tool will help you locate the wall studs essential for securely mounting your cabinets.
- Safety Equipment: Remember to wear gloves and safety glasses while working with tools to protect yourself from potential injuries.
Once you have all your tools and materials ready, it’s time to start installing your cabinets.
10 Easy Steps on How to Install Laundry Room Cabinets
Step 1: Prepare Your Workspace
Before you begin installing your laundry room cabinets, it’s crucial to prepare your workspace to ensure a smooth and efficient process. Follow these steps to get your learning room ready for the installation:
- Protecclear the Area: Remove any items from the laundry room that might obstruct your work. This includes laundry baskets, hampers, cleaning supplies, and other belongings. Ensure the floor and walls are clutter-free so you have ample room to maneuver and work safely.
- Protect Your Flooring: Lay down a drop cloth or protective covering on the floor to prevent any damage from tools or materials. This is particularly important if you have delicate or expensive flooring.
- Check for Electrical Outlets and Plumbing Fixtures: Identify the location of any electrical outlets and plumbing fixtures on your walls. Note these areas to avoid during the cabinet installation process. If necessary, plan to move or adjust the placement of your cabinets to accommodate these fixtures.
- Clean the Wallslocate Wall Studs: Using a stud finder, locate and mark the wall studs where you plan to install the cabinets. Wall studs provide the necessary support for securely mounting heavy cabinets. Mark the locations with a pencil so they’re easily visible during the installation process.
- Clean the Walls: Wipe down the walls with a damp cloth to remove any dust, dirt, or grease. This ensures that the cabinets adhere securely and look neat once installed.
- Measure and Mark: Measure the dimensions of your cabinets and use a pencil and measuring tape to mark where the cabinets will be positioned on the wall. Ensure that the marks are level and even.

By thoroughly preparing your workspace, you can ensure that the installation process goes smoothly and that your cabinets are fitted securely and efficiently. Proper preparation minimizes potential issues and helps create a safe working environment. Now that your workspace is ready let’s move on to the next step.
Step 2: Assemble the Cabinets
If your cabinets come unassembled, you must assemble them before hanging them on the wall. Follow these steps for proper assembly:
- Unpack and Organize: Unpack all pieces of your cabinets and organize them according to size and type. This will make finding the pieces you need easier as you begin assembly.
- Read instructions: Carefully read the instructions that came with your cabinets before starting the assembly process. This will ensure that you clearly understand how to assemble them and any necessary tools or hardware.
- Lay Out All Pieces: Lay out all pieces on a flat surface, ensuring you have all the necessary components.
- Follow Instructions: Begin assembling the cabinets according to the instructions provided. Make sure to use the correct screws and hardware for each step and double-check your work as you go.
- Securely Tighten All Screws: Once the cabinet is fully assembled, go through and make sure that all screws are securely tightened. This will ensure that your cabinets are sturdy and safe to hang on the wall.
Step 3: Mark Cabinet Placement on the Wall
Now that your cabinets are assembled, you can start positioning them on the wall. Follow these steps:
- Line Up Cabinets: Have someone help you hold the cabinets against the wall in their designated positions. Use a level to ensure that they are straight and even.
- Mark the Wall: Use a pencil to trace the outline of the cabinet on the wall. Once you remove the cabinets from the wall, this will serve as a guide for where to attach them.
- Label Each Cabinet: To avoid any confusion during installation, label each cabinet with its designated position on the wall (e.g., “Cabinet A,” “Cabinet B,” etc.).
Step 4: Mount the Cabinets
With the cabinets marked and labeled, it’s time to mount them on the wall. Follow these steps:

- Remove Doors and Shelves: Before mounting the cabinets, remove any doors or shelves that may interfere with installation.
- Drill Pilot Holes: Using a drill and appropriate size drill bit, drill pilot holes into the wall studs following the marked outlines of the cabinets.
- Attach Cabinets: With the help of a friend, lift and hang each cabinet onto its designated spot on the wall. Use screws to attach the cabinets to the wall through the pre-drilled holes.
- Adjust as Needed: Use shims or spacers to adjust any gaps or unevenness between cabinets or between the cabinet and the wall.
Step 5: Install Cabinet Doors and Shelves
Once your cabinets are securely mounted, you can reattach any shelves or doors removed earlier. Follow these steps:
- Check for Alignment: Before attaching the doors and shelves, ensure they align correctly with the rest of the cabinet and make any necessary adjustments.
- Attach Hinges: If using cabinet doors, attach the hinges to the doors and then to the cabinet. Make sure they are securely fastened.
- Install Shelves: Place the shelves inside the cabinets and adjust them as needed for your storage needs.
Step 6: Add Finishing Touches
To give your laundry room cabinets a polished look, consider these finishing touches:
- Install Hardware: Install knobs or handles on your cabinet doors for easier opening and closing.
- Add Lighting: Add under-cabinet lighting to brighten up your laundry room and make it easier to see inside the cabinets.
- Apply Paint or Finish: Apply a coat of paint or finish to match your existing decor or create a new look for your laundry room. Allow time to dry before using the cabinets.
With these steps, you can successfully install cabinets in your laundry room and have a functional and organized space for all of your laundry needs.
Step 7: Secure and Organize
With your cabinets fully installed and finishing touches applied, it’s time to secure and organize the items you plan to store. Here are some tips:
- Safety Check: Ensure that all cabinets are securely fastened to the wall and that there are no loose screws or fixtures. Test each cabinet by gently pulling on it to confirm it is mounted firmly.
- Arrange Items: Begin placing items inside the cabinets logically and organized—group similar items together, such as detergents, cleaning supplies, and fabric softeners.
- Use Storage Bins: Utilize storage bins or baskets to keep smaller items contained and accessible. Clear bins can help you quickly see what’s inside.
- Labeling: Label shelves or bins to make it easier to identify where items belong. This helps maintain organization over time.
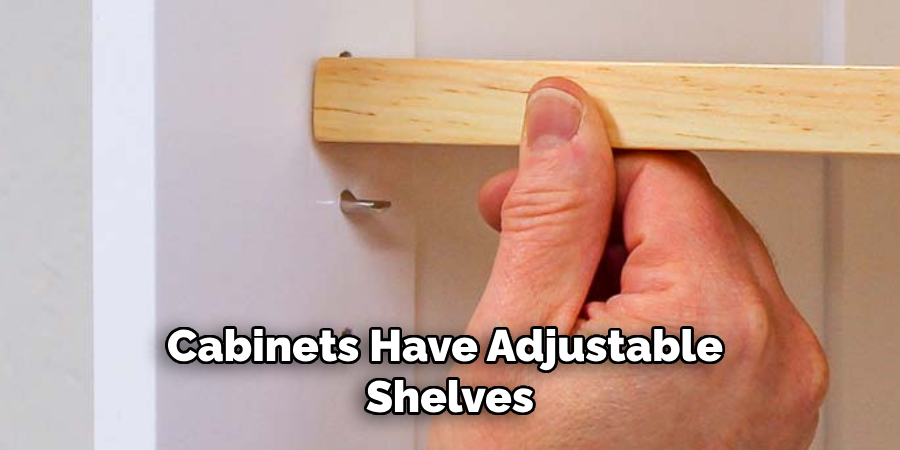
- Adjusting Shelves: If your cabinets have adjustable shelves, arrange them to accommodate larger items or create additional space.
By taking these organizational steps, your laundry room cabinets will look neat and function efficiently, making your laundry chores more manageable.
Step 8: Maintain Your Cabinets
To ensure your laundry room cabinets remain in excellent condition and continue to meet your storage needs, follow these maintenance tips:
- Regular Cleaning: Wipe down the exterior and interior of your cabinets regularly with a damp cloth and mild detergent. This prevents dust and grime from building up.
- Inspect Hardware: Periodically check the hinges, handles, and screws to ensure they remain tight and secure. Tighten any loose components as needed.
- Avoid Overloading: Do not overload shelves or cabinets with heavy items. This can cause sagging or damage to the hardware. Distribute weight evenly across shelves.
- Address Spills Immediately: Clean up any spills promptly to prevent stains or damage to the cabinet surfaces.
- Lubricate Hinges: If your cabinet doors start to squeak, apply a small amount of lubricant to the hinges to keep them operating smoothly.
- Reorganize Periodically: Every few months, take some time to reorganize the contents of your cabinets. This helps maintain order and ensures that items you no longer need are removed, making space for essential items.
Maintaining your laundry room cabinets will extend their lifespan and keep your laundry area organized and efficient.
Step 9: Utilize Vertical Space
Maximize the storage potential of your laundry room by incorporating vertical space. Follow these tips to make the most out of your cabinets and walls:
- Install Additional Shelves: Adding extra shelves inside your cabinets can create more storage areas for smaller items. Adjustable shelves offer flexibility for different storage needs.
- Use Hooks and Racks: Attach hooks or racks to the cabinet doors or walls to hang items such as cleaning cloths, brushes, or ironing boards. This helps keep these items off the floor and easily accessible.
- Hanging Baskets: Use hanging baskets mounted under shelves or cabinets to store light items, such as dryer sheets or small cleaning supplies.
- Stackable bins: Use stackable bins to store items vertically within cabinets. This allows you to store more in the same footprint and keeps everything organized.
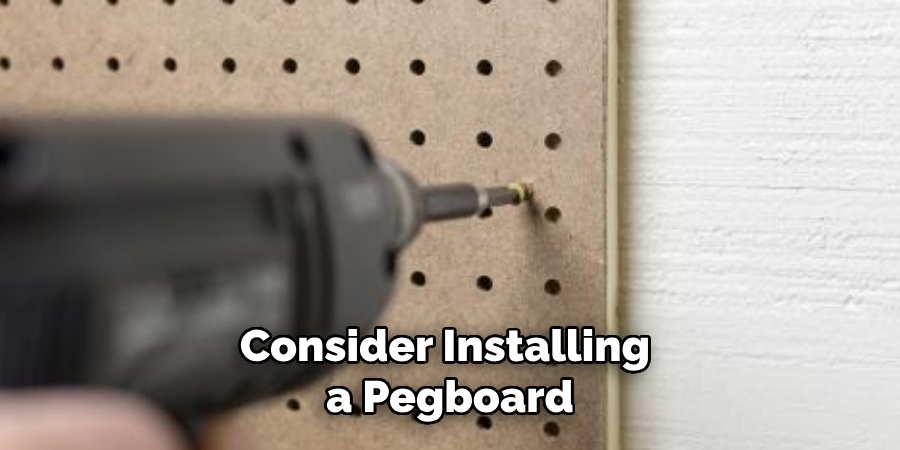
- Pegboard Installation: Consider installing a pegboard on an empty wall or inside a cabinet door. Pegboards provide customizable storage options with hooks, bins, and shelves that can be rearranged as needed.
By effectively using vertical space, you can enhance your laundry room cabinets’ storage capacity and functionality, creating a more organized and efficient space.
Step 10: Personalize Your Space
Transform your laundry room from a functional area to a personalized and inviting space by adding unique touches. Here are some ways to personalize your laundry room cabinets and overall area:
- Decorative Elements: To add a personal touch, incorporate decorative items such as artwork, plants, or containers on top of or beside your cabinets.
- Color Coordination: Coordinate the colors of your laundry room accessories, such as baskets, bins, and even cabinet materials, to complement the room’s overall color scheme.
- Themed Decor: Consider a theme for your laundry room, such as rustic, modern, or vintage, and choose decor elements that fit within this theme. This can include light fixtures, rugs, and wall decorations.
- Message Board: Install a chalkboard or whiteboard on the wall or cabinet doors where you can write notes, reminders, or motivational quotes.
- Scent Diffusers: Use scent diffusers or air fresheners to keep the laundry room smelling fresh. Choose scents that make you feel relaxed and happy.
- Personal Accessories: Add small personal items such as family photos, a favorite vase, or an interesting decor piece to make the space feel uniquely yours.
By adding these personal touches, your laundry room will be a place to complete chores and a comfortable and pleasant space that reflects your style.
With these ten steps, you can transform your laundry room cabinets into an organized, functional, and personalized space that simplifies your laundry routine.
5 Things You Should Avoid

When installing laundry room cabinets, avoiding certain pitfalls can help ensure a smooth process and a successful outcome. Here are five things you should steer clear of:
- Skipping the Measurements: Neglecting to measure your space accurately can lead to problems down the line. Always measure the height, width, and depth where you plan to install the cabinets to ensure they will fit properly. Double-check your measurements before making any cuts or purchases.
- Ignoring Wall Studs: Failing to mount your cabinets into wall studs can result in instability and potential accidents. Use a Stud Finder to locate the studs and secure your cabinets to them. This provides the necessary support to handle the cabinets’ weight and contents.
- Overloading Cabinets: Avoid overloading the cabinets with heavy items which can cause the shelves to sag or the hardware to fail. Distribute weight evenly and be mindful of the weight limits of your cabinets, especially with older or DIY installations.
- Using Incorrect Tools: Using the Wrong Tools can damage your cabinets or create unsafe installations. Ensure you have the proper tools, such as a drill, level, and the correct screws and anchors, to complete the job efficiently and safely.
- Neglecting to Plan for Plumbing and Electrical: If your laundry room requires plumbing or electrical work, make sure to plan for these elements before installing cabinets. This can prevent potential conflicts with cabinet placement and ensure the safety of the overall installation.

By avoiding these common mistakes, you can save time, money, and hassle in your laundry room cabinet installation process.
Conclusion
How to install laundry room cabinets can significantly enhance the organization, functionality, and aesthetics of your space. You can ensure a seamless installation process by following a step-by-step approach, starting with proper planning and accurate measurements.
The key to achieving a stable and safe setup is prioritizing the correct use of tools and adherence to safety protocols, such as mounting cabinets into wall studs and planning around plumbing and electrical requirements. Utilizing vertical space and personalizing your cabinets further optimizes their use and brings a touch of individuality to your laundry area.
Finally, by avoiding common pitfalls like skipping measurements and overloading cabinets, you can create a practical, efficient, and pleasant laundry environment that simplifies your everyday chores and adds value to your home.
About the Author
Adrian Green, a lifelong woodworking enthusiast, shares his passion for the craft through The Woodenify Blog. With a foundation built on years of hands-on experience in his father’s woodworking shop, Adrian is dedicated to helping others learn and grow in the world of DIY woodworking. His approach to woodworking combines creativity, practicality, and a deep appreciation for the art of building with your own hands. Through his blog, he inspires individuals of all skill levels to embark on their own woodworking journeys, creating beautiful, functional pieces of furniture and décor.
Professional Focus
- Specializes in DIY woodworking projects, from furniture to home décor.
- Provides step-by-step guides and practical tutorials for woodworkers of all skill levels.
- Dedicated to helping readers build confidence and skill through easy-to-follow instructions and tips.
- Passionate about fostering a community of makers who can share, learn, and grow together.
Education History
- University of Craft and Design – Bachelor of Fine Arts (BFA) in Woodworking and Furniture Design
- Woodworking Apprenticeships – Extensive hands-on training with skilled craftsmen to refine carpentry and furniture making techniques.
- Online Courses & Masterclasses – Continued education in advanced woodworking techniques, design principles, and specialized tools
Expertise:
- DIY woodworking, carpentry, furniture making, and home décor projects.
- Creating accessible tutorials and guides for beginner to advanced woodworkers.
- Sharing the joys and satisfaction of woodworking, from raw materials to finished products.