Are you tired of dealing with the extreme heat in your home during the summer months? Installing radiant barrier plywood can help keep your house cooler and reduce your energy bills. In this guide, we will discuss how to install radiant barrier plywood.
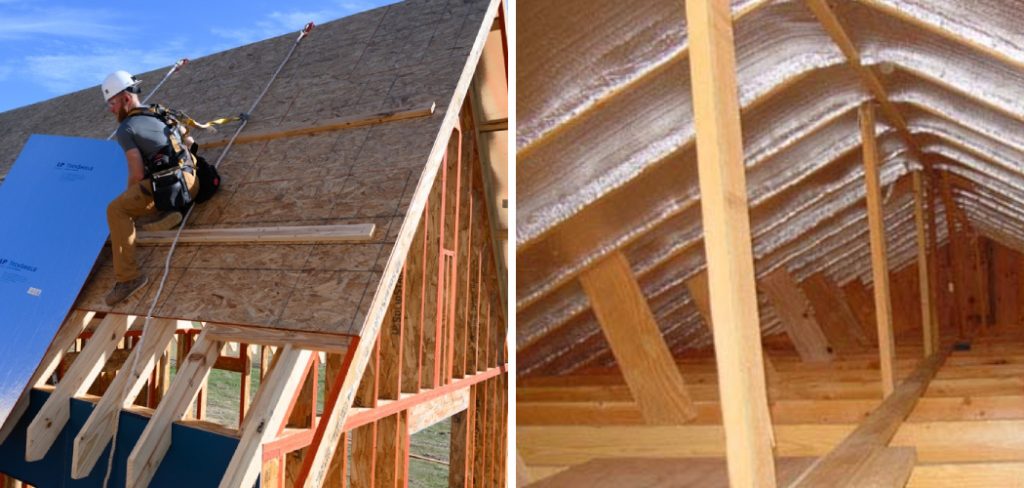
Installing radiant barrier plywood is a valuable home improvement task that can significantly enhance your home’s energy efficiency. Radiant barriers reflect radiant heat, reducing heat transfer into your living spaces. This installation is particularly beneficial in attics, where it can help maintain cooler temperatures during hot weather and reduce energy costs.
Whether you’re a seasoned DIY enthusiast or a novice looking to make impactful changes, this guide will provide the necessary steps and tips to install radiant barrier plywood effectively, ensuring optimum performance and durability.
What Is Radiant Barrier Plywood?
Radiant barrier plywood, also known as foil-backed or reflective-backed plywood, is a roofing material comprising a layer of aluminum foil attached to one side. This reflective backing helps reduce radiant heat transfer by reflecting it away from the surface, thus keeping your living spaces cooler. Usually installed in attics, it can also be used on walls and roofs to prevent heat from seeping during summer.
What are the Benefits of Installing Radiant Barrier Plywood?
Installing radiant barrier plywood in your home comes with a variety of benefits, including:
- Reducing Energy Costs: By reflecting heat away from your living spaces, radiant barrier plywood can help keep your home cooler and reduce the amount of air conditioning needed, resulting in lower energy bills.
- Enhancing Comfort: With less heat entering your home, you can enjoy a more comfortable living environment, especially during the hot summer months.
- Improving Energy Efficiency: Radiant barriers work alongside other insulation materials to improve your home’s overall energy efficiency.
- Extending Roof Lifespan: Radiant barrier plywood can also help prolong the lifespan of your roof by reducing heat transfer into your attic and living spaces and preventing damage from excessive heat exposure.
- Eco-friendly: Radiant barrier plywood can also reduce your carbon footprint by decreasing the energy needed to cool your home.
Now that you know the benefits of installing radiant barrier plywood, let’s discuss how to install it in your home.
What Will You Need?
Before you begin the installation process, gather all the necessary tools and materials. Here’s a list of essential items:
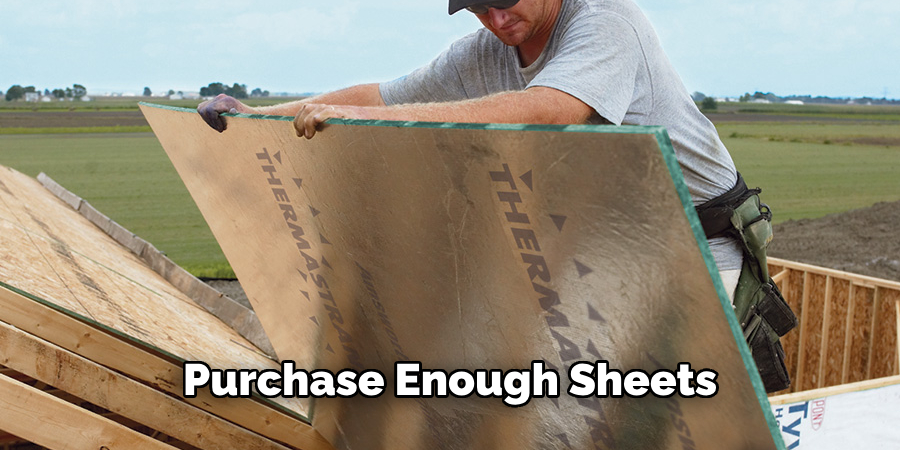
- Radiant Barrier Plywood: Purchase enough sheets to cover your attic floor or roof.
- Tape Measure: To accurately measure the size of your attic or roof space.
- Utility Knife: For cutting the radiant barrier plywood to fit into smaller areas or around obstacles.
- Staple Gun: To attach the radiant barrier plywood to the rafters or roof deck.
- Safety Gear: Wear protective clothing, gloves, and goggles when handling and installing the plywood.
Once you have everything you need, it’s time to start the installation process.
10 Easy Steps on How to Install Radiant Barrier Plywood:
Step 1. Prepare the Attic or Roof Space:
Before you begin installing the radiant barrier plywood, it’s crucial to prepare the attic or roof space to ensure a smooth and safe installation process. Start by clearing out any insulation that might be obstructing the area where you plan to install the plywood. Having a clean and clear workspace to work efficiently and avoid potential hazards is important. Inspect the attic or roof space for any signs of damage, such as leaks, rot, or structural weaknesses. Addressing these issues before installation is necessary to prevent future complications and ensure the radiant barrier plywood can perform effectively.
Next, ensure your attic is well-ventilated to help maintain optimal temperatures and prevent moisture buildup. Proper ventilation is key to the radiant barrier’s effectiveness and the overall health of your attic space. Use a fan if necessary to keep the area cool and well-ventilated during the installation process. Having a good lighting source in the attic is also advisable to avoid any accidents while working.
Step 2. Measure and Cut the Plywood:
Using a tape measure, accurately measure the dimensions of the areas where you plan to install the radiant barrier plywood. Carefully note down these measurements to ensure precise cuts. Roll out the radiant barrier plywood on a flat, stable surface. Using the utility knife, cut the plywood sheets to the required sizes. Be sure to cut slightly larger pieces to allow for any adjustments during installation. It’s crucial to wear your safety gear, including gloves and goggles, to protect yourself from sharp edges and debris while cutting. Accurate cutting ensures the plywood fits snugly and provides maximum coverage, enhancing its effectiveness in reflecting radiant heat.
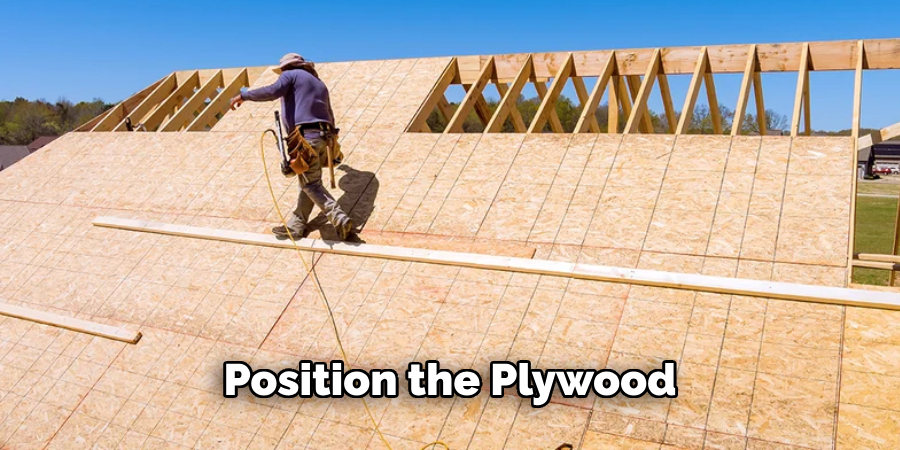
Step 3. Position the Plywood:
Once you have cut the radiant barrier plywood to the appropriate sizes, it’s time to position the sheets in the attic or on the roof deck. Carefully carry the cut pieces into the installation area. Begin by placing the first sheet at one corner of the attic or roof space, ensuring that the reflective side faces downwards towards the living space. Line up the edges of the plywood with the rafters or joists for a secure fit.
As you position each sheet, leave a small gap (about 1/4 inch) between the plywood and any adjacent structures, such as walls or beams, to allow for any expansion or movement. This gap also helps with ventilation. Continue positioning each subsequent sheet, overlapping the edges slightly to ensure complete coverage and prevent any gaps where heat could escape. Proceed methodically across the entire attic or roof surface, maintaining alignment and coverage. This step is crucial to setting the foundation for effectively reflecting radiant heat and optimizing energy efficiency.
Step 4. Secure the Plywood:
With the radiant barrier plywood properly positioned, securing it to the rafters or roof deck is the next step. Using a staple gun, firmly attach the plywood sheets to the underlying structure. Begin at one corner and work your way across, placing staples approximately 8 inches apart along the edges and every 12 inches in the center of each sheet. This ensures that the plywood remains securely fixed and prevents any movement that could disrupt its effectiveness.
Take care to avoid puncturing or tearing the plywood’s reflective surface, as this can reduce its efficiency in reflecting radiant heat. If you encounter obstacles, such as vents or wiring, carefully cut around them and ensure the plywood remains flush with the surrounding area. Ensuring a tight, secure fit for each sheet is paramount for achieving optimal energy savings and maintaining the structural integrity of the installation.
Step 5. Overlap and Seal the Seams:
To enhance the effectiveness of your radiant barrier plywood installation, it’s important to overlap and seal the seams between the sheets. Overlapping the edges of each plywood sheet by about 2 inches helps to create a continuous barrier against radiant heat.
Once the sheets are overlapped appropriately, use high-quality, heat-resistant tape to seal the seams. Apply the tape along the entire length of each seam, pressing firmly to ensure it adheres well. This step prevents any heat from escaping through gaps between the plywood sheets and enhances the overall energy efficiency of your attic or roof space. Ensuring that the seams are tightly sealed will contribute significantly to the durability and performance of the radiant barrier.
Step 6. Install Around Obstacles:
When installing radiant barrier plywood, it’s essential to carefully navigate around any obstacles such as vents, pipes, or wiring. Start by identifying and marking these obstacles on the plywood sheets during the positioning step. Using your utility knife, cut out openings where the obstacles are located, ensuring a snug fit.
Maintaining the integrity of the barrier around these cut-out sections is critical by sealing the edges with high-quality, heat-resistant tape. Apply the tape around the cut-outs’ edges to prevent gaps that could allow heat to penetrate. This meticulous attention to detail ensures that the radiant barrier functions effectively throughout the entire attic or roof space, providing optimal energy savings and maintaining the stability of your insulation system. Proceed with caution to ensure you do not damage any existing structures or systems while making the necessary adjustments for a seamless installation.
Step 7. Inspect and Finalize the Installation:
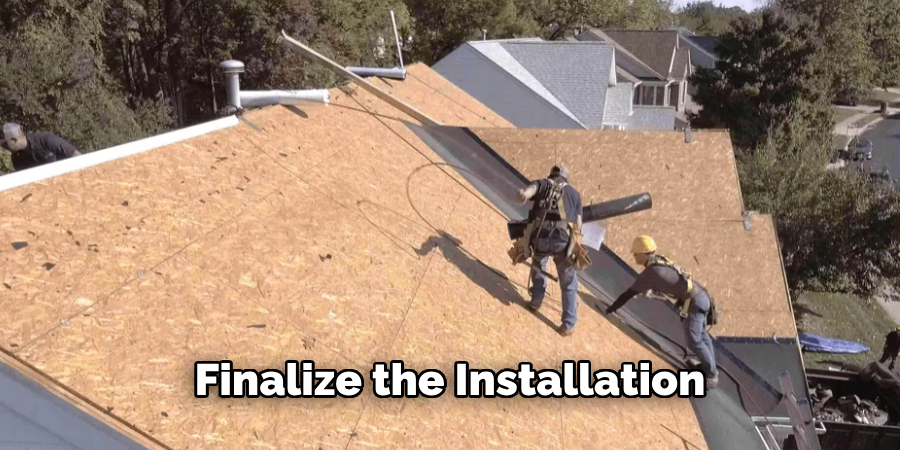
With all the radiant barrier plywood sheets installed, overlapped, and sealed, the final step is to conduct a thorough inspection. Carefully examine each sheet to ensure it is securely attached and that no gaps could compromise the barrier’s effectiveness. Check that all seams are properly taped and that the reflective surfaces are intact without any punctures or tears.
If you notice any loose areas or gaps, address them promptly by adding additional staples or tape. Make sure that the barrier fits snugly around any obstacles, ensuring that the tape seals are intact. This inspection is crucial for guaranteeing that the entire system will function as intended and provide maximum energy efficiency.
After completing the inspection, clear the attic or roof space of debris or leftover materials. Responsibly dispose of any excess plywood or tape.
Step 8. Clean-Up and Safety Check:
After finalizing the installation and conducting a thorough inspection, the next step involves cleaning up the work area and performing a safety check. Start by clearing the attic or roof space of any leftover materials, such as plywood scraps, used tape, or debris. Ensuring a tidy workspace is essential for preventing accidents or obstructions.
Next, conduct a comprehensive safety check. Ensure that all tools and equipment used during the installation are accounted for and properly stored. Check for any loose nails or staples that could pose a hazard. Confirm that the installation area is secure, especially if it is a frequently accessed part of the home.
Additionally, verify that the lighting and ventilation in the attic or roof space are adequate and that there are no exposed wires or potential fire hazards.
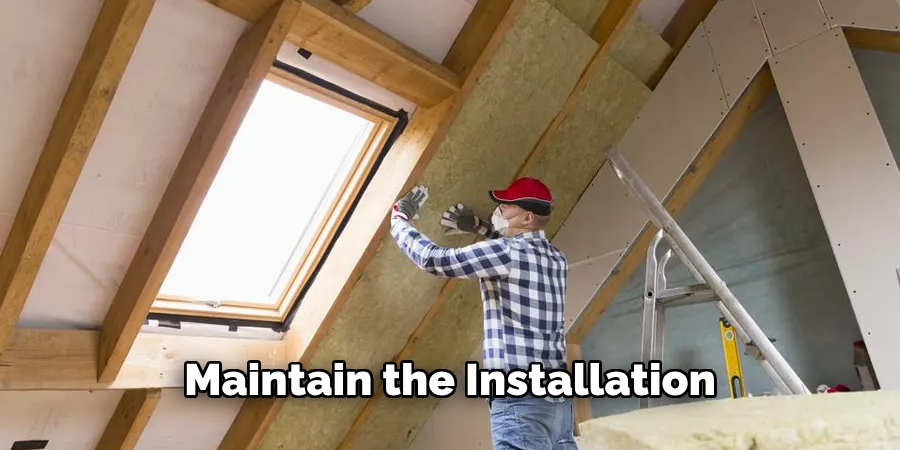
Step 9. Monitor and Maintain the Installation:
Once the installation is complete, it’s important to periodically monitor and maintain your radiant barrier plywood to ensure its ongoing effectiveness. Over time, factors such as temperature fluctuations, humidity, and physical impacts can affect the barrier’s performance. Conducting routine checks will help you identify and address any issues before they become significant problems.
Schedule regular inspections at least twice a year to examine the barrier’s integrity. Look for signs of wear and tear, such as loose or damaged plywood sheets, peeling tape, or any new gaps that may have formed. If you discover any issues, promptly repair them using additional staples, heat-resistant tape, or replacement plywood if necessary.
Remove any accumulated dust or debris that could affect the reflective surface of the plywood to maintain the cleanliness of the attic or roof space. Keeping the area well-ventilated and dry will further enhance the durability and efficiency of your radiant barrier.
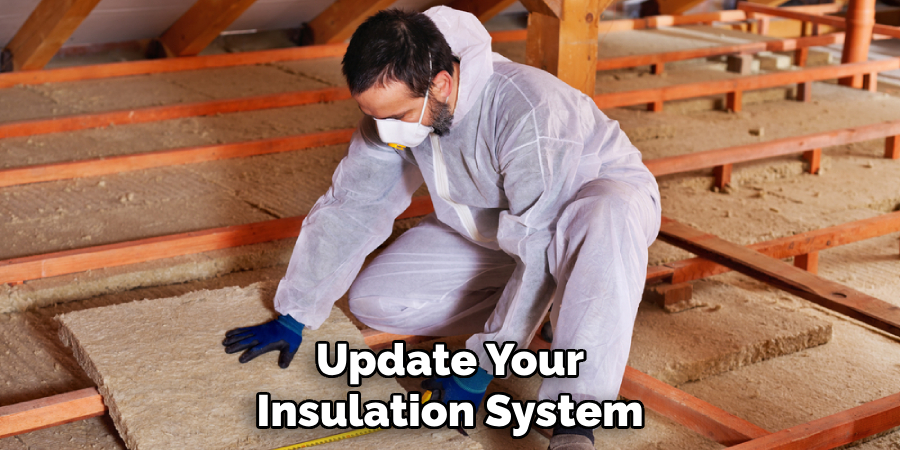
Step 10. Review and Update Your Insulation System:
As part of the long-term maintenance of your radiant barrier plywood installation, it’s beneficial to periodically review and update your overall insulation system. Advances in insulation materials and technology can offer improved energy efficiency and cost savings. Regularly researching these innovations can provide you with opportunities to enhance the performance of your home’s insulation.
Assess the current condition of your insulation alongside the radiant barrier. Look for areas where additional insulation may be needed or existing insulation might need to be replaced. This could include insulating pipes, adding weather stripping to doors and windows or enhancing underfloor insulation.
By following these steps and regularly maintaining your radiant barrier plywood installation, you can ensure long-term energy savings and a comfortable living environment.
5 Additional Tips and Tricks
- Measure Twice, Cut Once: Take accurate measurements of the area where the plywood will be installed. Double-checking your measurements will help avoid mistakes and ensure that the plywood fits perfectly, reducing waste and saving time.
- Seal the Edges: Using foil tape to seal the edges after installing the plywood. This prevents air leaks and ensures maximum efficiency of the radiant barrier by maintaining a continuous reflective surface.
- Ventilation Considerations: Proper attic or installation area ventilation is crucial for the radiant barrier to function effectively. Maintain adequate ventilation to prevent moisture buildup, which can damage the plywood and reduce the barrier’s effectiveness.
- Safety Gear: Always wear appropriate safety gear, including gloves, safety glasses, and a dust mask. Plywood can produce splinters and dust, and the barrier may have sharp edges that could cause injury. Prioritizing safety will ensure a smoother and accident-free installation process.
- Check for Local Building Codes: Before installing plywood or any type of insulation, make sure to check with your local building codes and regulations. They may have specific requirements for using radiant barriers and installation methods that must be followed.
These additional tips and tricks will help you ensure a successful and efficient installation of plywood as a radiant barrier.
5 Things You Should Avoid
- Skipping the Gap: Never install radiant barrier plywood directly onto the roof deck without leaving an air gap. The reflective surface needs space to function correctly and to ventilate hot air away from the living spaces.
- Ignoring Moisture Barriers: Don’t neglect the importance of installing a moisture barrier. Over time, moisture can seep through the plywood and cause mould, rot, or even structural damage.
- Using Incorrect Fasteners: Avoid using fasteners that are too short or prone to rust. Use proper screws or nails that are designed for exterior applications to ensure the plywood stays secure and in place.
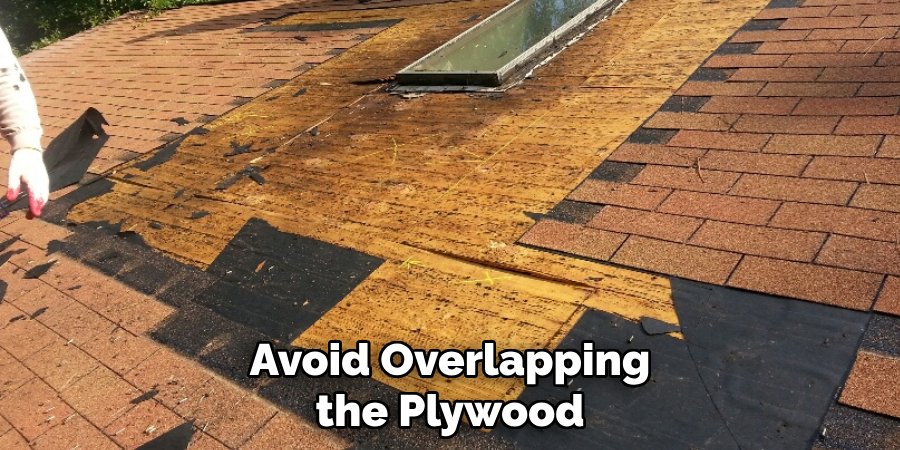
- Overlapping Too Much: While it might seem like a good idea, avoid overlapping the plywood excessively. This could create gaps and spaces which can compromise the efficiency of the radiant barrier and may lead to air leaks.
- Disregarding Safety Protocols: Nothing is more important than safety. Don’t skip wearing the recommended safety gear, and make sure to use proper tools and techniques to avoid accidents or injuries during installation.
Avoiding these common mistakes will help ensure your radiant barrier plywood installation is effective, long-lasting, and safe.
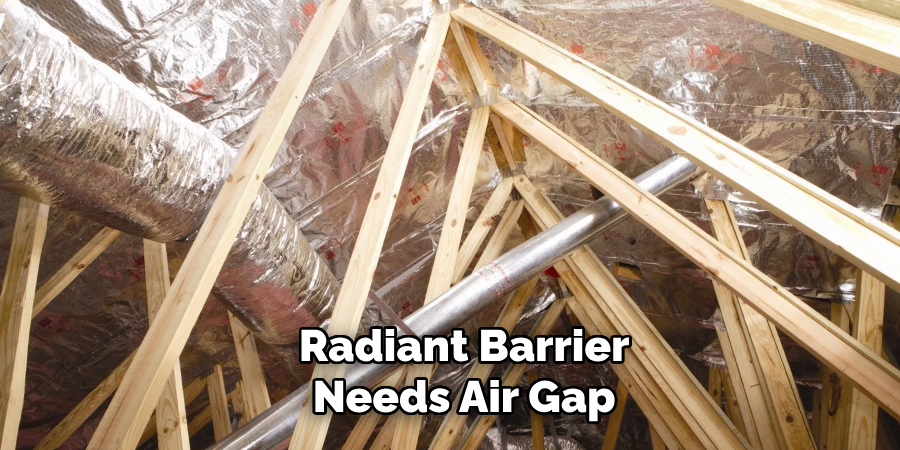
Does a Radiant Barrier Need an Air Gap?
The short answer is yes. A radiant barrier needs to have an air gap between the reflective surface and the insulation material or roof deck to function effectively. This air gap allows for proper ventilation and prevents heat transfer through conduction.
An air gap of at least 1 inch is recommended for best results, but even a smaller gap can still significantly reduce heat gain in your home. Without an air gap, the radiant barrier plywood will function as a regular insulation material, reducing its effectiveness.
Moreover, without proper ventilation and airflow in the attic or installation area, moisture can build up and cause damage to the plywood and other materials. This is why ensuring adequate ventilation is crucial when installing a radiant barrier.
Conclusion
How to install radiant barrier plywood requires meticulous planning and attention to detail to ensure optimal performance and durability. Begin by taking precise measurements and double-checking all dimensions to minimize errors and material waste. Always seal the edges with foil tape to prevent air leaks and guarantee the continuity of the reflective surface. Adequate ventilation is paramount, as it prevents moisture buildup and ensures the radiant barrier functions at its peak efficiency.
Safety should always be a top priority; wearing the appropriate safety gear can prevent injuries from splinters, sharp edges, and dust. It’s also crucial to adhere to local building codes and regulations, which may have specific requirements for the installation process. Avoid common pitfalls such as skipping the air gap, neglecting moisture barriers, using inappropriate fasteners, excessive overlapping, and disregarding safety protocols.
By following these guidelines, you can ensure a successful, efficient, and safe installation of radiant barrier plywood, achieving significant energy savings and comfort improvements in your home.
About the Author
Adrian Green, a lifelong woodworking enthusiast, shares his passion for the craft through The Woodenify Blog. With a foundation built on years of hands-on experience in his father’s woodworking shop, Adrian is dedicated to helping others learn and grow in the world of DIY woodworking. His approach to woodworking combines creativity, practicality, and a deep appreciation for the art of building with your own hands. Through his blog, he inspires individuals of all skill levels to embark on their own woodworking journeys, creating beautiful, functional pieces of furniture and décor.
Professional Focus
- Specializes in DIY woodworking projects, from furniture to home décor.
- Provides step-by-step guides and practical tutorials for woodworkers of all skill levels.
- Dedicated to helping readers build confidence and skill through easy-to-follow instructions and tips.
- Passionate about fostering a community of makers who can share, learn, and grow together.
Education History
- University of Craft and Design – Bachelor of Fine Arts (BFA) in Woodworking and Furniture Design
- Woodworking Apprenticeships – Extensive hands-on training with skilled craftsmen to refine carpentry and furniture making techniques.
- Online Courses & Masterclasses – Continued education in advanced woodworking techniques, design principles, and specialized tools
Expertise:
- DIY woodworking, carpentry, furniture making, and home décor projects.
- Creating accessible tutorials and guides for beginner to advanced woodworkers.
- Sharing the joys and satisfaction of woodworking, from raw materials to finished products.