Looking for a practical way to maximize your kitchen or office space? Learning how to install shelves between cabinets is a fantastic DIY project for both beginners and seasoned home improvers. Not only can it enhance the functionality of your space, but it can also add a unique decorative touch, perfect for showcasing cookbooks, knick-knacks, or even plants.

Before beginning this project, gather all the necessary tools and materials. You will need a tape measure, a level, a drill, screws, brackets, and your preferred material for the shelves, such as wood or metal. Ensuring you have the right tools on hand will make the installation process smoother and more efficient. Additionally, take measurements of the space between the cabinets to determine the exact dimensions of your shelves, allowing you to cut them to size if needed. Accurate preparation is key to achieving a polished final result.
This guide walks you through a simple yet detailed process to help you securely mount shelves between cabinets. Whether you’re refreshing your kitchen layout or improving your storage options, this DIY task is approachable and highly rewarding. Throughout this article, you’ll find tips tailored for beginners, ensuring each step is clear and easy to follow.
Why Install Shelves Between Cabinets?
The idea of installing shelves between cabinets often stems from the need to maximize usable space or to creatively fill an otherwise awkward gap. For many, it’s an opportunity to create a design focal point while improving storage utility. With homes leaning toward more personalized and functional layouts, this home improvement project is becoming increasingly popular.
Shelves between cabinets allow you to make the most of vertical and horizontal space while maintaining a cohesive aesthetic. For instance, in the kitchen, shelves can hold mugs, spice jars, or even small plants, transforming plain walls into visually appealing, functional areas. The customization potential is another reason to love this project — you can select materials, finishes, and styles that match your overall décor.
No longer reserved for professional carpenters, this task can be accomplished with just a little planning, the right tools, and a clear step-by-step guide.
Step-by-Step Guide on How to Install Shelves Between Cabinets
Installing shelves between cabinets is a manageable project that only requires patience and attention to detail. Whether you’re a casual DIY enthusiast or tackling your first-ever installation, follow this guide for impressive results.

Step 1: Measure the Space
Before you start drilling or cutting, take time to carefully measure the distance between the interior edges of your cabinets. Accuracy here is crucial for ensuring your shelves fit perfectly without the need for major adjustments.
Using a tape measure, record the width, depth, and height of the space where your shelves will go. It’s a good idea to measure multiple times to ensure accuracy. Jot down the details, as you’ll use them to purchase or cut the shelving material.
Step 2: Select Your Shelving Material
The next step is choosing the material for your shelves. If you want a uniform look, consider wood or MDF that matches your cabinetry. Other materials like glass or metal may give a modern edge, depending on your design preference.
Ensure the selected material can withstand the weight you intend to place on it. For instance, wood and plywood are great for heavier items, while glass works better for lighter, decorative objects.
Step 3: Cut the Shelves
If you’re working with raw materials, you’ll need to cut the shelves to size. For this, use a saw and follow the measurements you took earlier. If you’re not confident in your cutting skills, many hardware shops offer custom cutting services.
When cutting, ensure smooth edges by sanding down the sides. This will prevent splinters and make finishing (if needed) easier later.
Step 4: Decide on Bracket Placement
Determine the spots where you’ll secure brackets or supports for your shelves. Ideally, brackets should be evenly spaced for better weight distribution. For narrow shelves, two brackets may suffice, but wider shelves may require additional support.
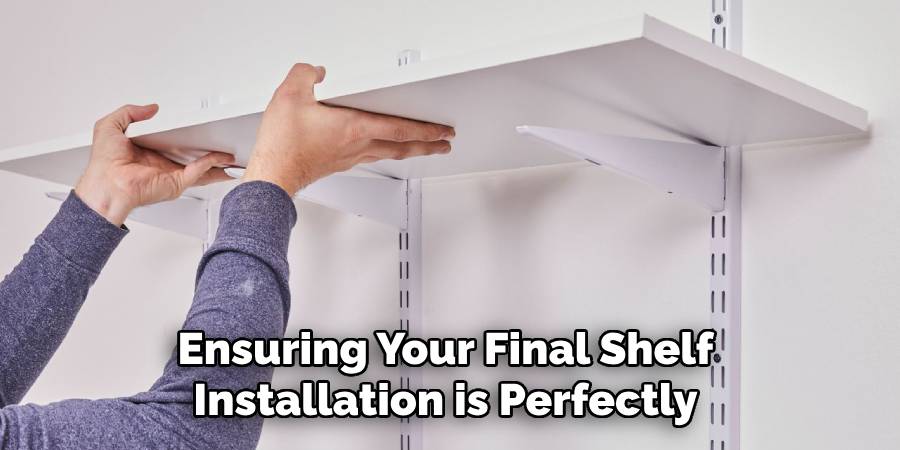
Mark the spots for brackets on both inner sides of your cabinets. Use a level to make sure the markings are even, ensuring your final shelf installation is perfectly horizontal and stable.
Step 5: Attach Brackets to the Cabinets
Using a drill, attach the brackets or supports to the interiors of your cabinets where you made the markings. Be sure to use screws suited to the type of material your cabinets are made from. Tighten securely to avoid wobbly supports.
Avoid over-tightening the screws, as this could damage the wood or surface of the cabinets.
Step 6: Paint or Stain the Shelves
If your shelves require painting or staining, do this before actual installation. It’s easier to achieve a smooth, professional finish when the shelves are not yet mounted. Choose paints or stains that match or complement your existing cabinetry.
Allow the paint or stain to dry completely before moving on to the next step.
Step 7: Mount the Shelves
Carefully place the shelves onto the installed brackets. Depending on your choice of brackets, you may need to secure the shelves in place by tightening small screws or using additional fasteners.
Double-check that the shelves are level and sturdy by applying gentle pressure. Uneven or unstable shelves can be easily corrected by adjusting the brackets.
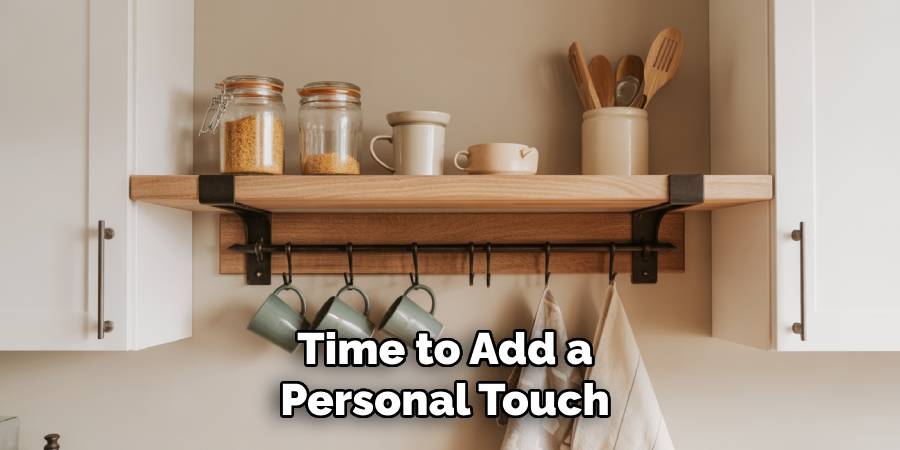
Step 8: Style and Enjoy
Now that your shelves are fully installed, it’s time to add a personal touch. Arrange items like mugs, glassware, plants, or décor to create a functional yet visually appealing space.
Take a step back and admire your handiwork. Congratulations — you’ve successfully learned how to install shelves between cabinets!
Common Installation Mistakes
- Skipping Measurements: Failing to measure accurately can result in uneven or improperly spaced shelves. Always double-check your dimensions before starting.
- Using the Wrong Tools: Using incorrect or low-quality tools can damage your cabinet shelf decor or make installation harder than it needs to be.
- Ignoring Wall Studs: If your shelves rely on wall support, neglecting to locate and secure to studs can lead to instability and safety issues.
- Overloading the Shelves: Placing heavy items on shelves without considering their weight capacity can cause them to sag or even collapse.
- Neglecting Leveling: Uneven shelves not only look unprofessional but can also lead to items sliding off. Always use a level to ensure accuracy.
- Improper Bracket Placement: Misaligned or weakly secured brackets can undermine the stability of the entire setup.
- Rushing the Process: Hurrying through the installation can lead to mistakes that could have been easily avoided by taking your time.
Avoiding these mistakes will help ensure a smooth and successful shelf installation.
Frequently Asked Questions Section
1. What tools do I need to install shelves between cabinets?
You’ll require a basic toolkit, including a tape measure, level, drill, saw, screws, brackets, and sandpaper. Having painter’s tape on hand can also help with marking surfaces without leaving residue behind.
2. How do I choose the best brackets for my shelves?
The type of bracket depends on the material of your shelves and the weight they’ll hold. Metal L-brackets are ideal for heavier loads, offering sturdy support, while floating brackets work well for lighter shelves if you prefer a clean, modern look.
3. What is the best material for shelves in a kitchen?
Wood or plywood is typically the most popular due to its durability and easy customizability. For a sleek and contemporary appearance, tempered glass may work well. However, ensure the chosen material can withstand exposure to moisture and heat commonly found in kitchens.
4. How much weight can shelves between cabinets hold?
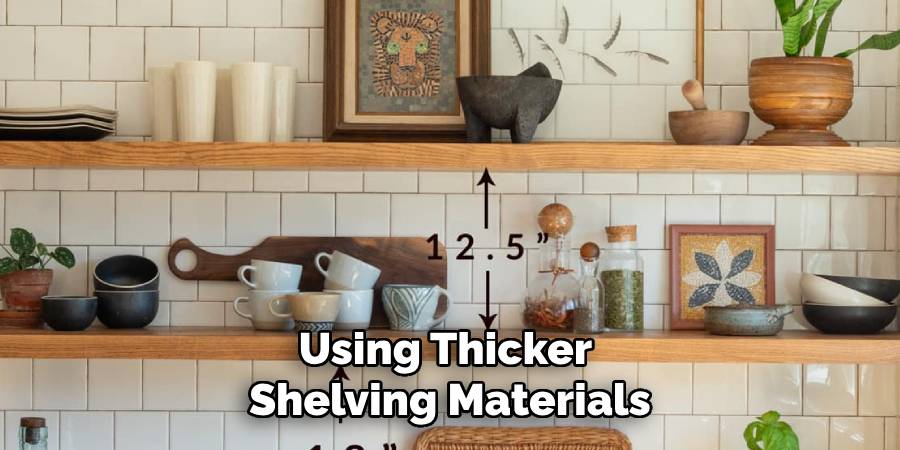
The weight capacity depends on both the shelf material and the quality of brackets used. Typically, well-installed shelves with heavy-duty supports can manage between 20–50 pounds. If you plan on placing heavier items, consider reinforcing the brackets or using thicker shelving materials.
5. Are there alternatives to drilling when installing shelves?
Yes, adhesive brackets and tension rods are non-invasive alternatives. However, they’re typically less secure than drilling and may only work well for lightweight shelves or decorative applications. Drilling remains the most reliable and durable method.
Conclusion
Adding shelving between cabinets is one of the simplest, most cost-effective ways to enhance your living spaces. By following this guide, you now know exactly how to install shelves between cabinets in a straightforward and approachable way. Not only will the shelves serve a practical purpose, but they’ll also elevate your room’s aesthetic with a tailored, custom touch.
When selecting materials for your shelves, it’s important to consider both durability and style. Solid wood offers timeless appeal and strength, while engineered wood provides affordability and a variety of finishes. Glass shelves can create a sleek, modern look, but may require extra care to prevent damage. Whichever material you choose, ensure it complements the rest of your décor and suits the intended use of the shelving.
Now it’s time to gather your tools, pick your materials, and begin this rewarding DIY project. With just a little effort, you’ll create a functional feature that combines beauty and practicality in equal measure!
About the Author
Adrian Green, a lifelong woodworking enthusiast, shares his passion for the craft through The Woodenify Blog. With a foundation built on years of hands-on experience in his father’s woodworking shop, Adrian is dedicated to helping others learn and grow in the world of DIY woodworking. His approach to woodworking combines creativity, practicality, and a deep appreciation for the art of building with your own hands. Through his blog, he inspires individuals of all skill levels to embark on their own woodworking journeys, creating beautiful, functional pieces of furniture and décor.
Professional Focus
- Specializes in DIY woodworking projects, from furniture to home décor.
- Provides step-by-step guides and practical tutorials for woodworkers of all skill levels.
- Dedicated to helping readers build confidence and skill through easy-to-follow instructions and tips.
- Passionate about fostering a community of makers who can share, learn, and grow together.
Education History
- University of Craft and Design – Bachelor of Fine Arts (BFA) in Woodworking and Furniture Design
- Woodworking Apprenticeships – Extensive hands-on training with skilled craftsmen to refine carpentry and furniture making techniques.
- Online Courses & Masterclasses – Continued education in advanced woodworking techniques, design principles, and specialized tools
Expertise:
- DIY woodworking, carpentry, furniture making, and home décor projects.
- Creating accessible tutorials and guides for beginner to advanced woodworkers.
- Sharing the joys and satisfaction of woodworking, from raw materials to finished products.