Are you looking for ways how to lighten cherry wood furniture?
Cherry wood furniture is admired for its rich color and timeless appeal, but over time, its natural darkening can make it appear heavier or less suited to lighter, modern spaces. Lightening cherry wood furniture is an effective way to refresh its appearance and bring a brighter touch to your decor. Whether you want to adjust the tone or subtly transform its appearance, several techniques are available to help achieve the desired effect while preserving the wood’s inherent beauty and durability.

Before starting, it’s essential to understand the correct methods to use and the necessary precautions to protect your furniture during the process.
What Will You Need?
- Sanding Equipment: To refinish your furniture, you will need sanding equipment, such as sandpaper or an electric sander. Sanding is a crucial step in the refinishing process as it helps remove old finishes and prepares the surface for new ones.
- Stripping Agent: If your furniture has multiple layers of paint or stubborn stains, you may need to use a stripping agent before sanding. This chemical solution helps dissolve old finishes, making it easier to remove them.
- Safety Gear: When working with any chemical solutions, it is essential to wear proper safety gear, including gloves, goggles, and a respirator mask. These items will protect your skin, eyes, and lungs from any potential harm.
- Sanding Tools: Various sanding tools are available on the market, including sandpaper, sanding blocks, and electric sanders. Depending on the size and shape of your furniture piece, you may need different types of tools to achieve a smooth and even surface.
10 Easy Steps on How to Lighten Cherry Wood Furniture
Step 1. Prepare Your Workspace
Ensure that your workspace is appropriately set up to make the process efficient and safe. Start by choosing a well-ventilated area, as you may be working with chemicals and dust that require adequate air circulation to prevent exposure. Lay down a drop cloth or tarp to protect your flooring from debris, dust, or spills.

Keep all necessary materials and tools—such as safety gear, sanding tools, and cleaning supplies—within reach to avoid interruptions. Additionally, ensure there’s enough lighting in your workspace so you can see the surface of the furniture and catch any imperfections as you work. Taking the time to organize and prepare your workspace properly will save you time and effort throughout the project.
Step 2. Clean the Furniture
Before beginning the refinishing process, it is crucial to thoroughly clean the furniture to remove dirt, grime, and old residues that could interfere with the finish. Start by wiping down the entire surface with a soft cloth to remove loose dust and particles. For a deeper clean, use a mild detergent mixed with warm water or a wood-cleaning solution specifically designed for furniture. Apply the solution with a clean cloth or sponge, working gently to prevent damage to the wood. Pay special attention to any crevices, carvings, or ornate details where dirt tends to accumulate, using a soft brush or toothbrush if needed.
Step 3. Remove the Existing Finish
To remove the existing finish, you will need to use a chemical stripper or sandpaper, depending on your preference and the type of finish on the furniture. Begin by applying a liberal amount of chemical stripper to the surface with a brush, following the manufacturer’s instructions carefully.
Allow the stripper to sit for the recommended amount of time, which will soften the old finish. Once the finish starts to bubble or lift, use a scraper or putty knife to gently remove it, working in the direction of the wood grain to avoid causing damage. If you prefer to use sandpaper, start with a coarse grit (such as 80-grit) to remove the bulk of the finish, and gradually move to finer grits (such as 120-grit or 220-grit) to smooth the surface. Be sure to sand evenly across the entire piece to maintain a uniform finish. For intricate areas or detailed carvings, use sanding sponges, small files, or steel wool to reach into crevices without damaging the details.
Step 4. Sand the Surface
Once the old finish has been removed, it’s time to sand the surface to prepare it for the new finish. Begin with coarse-grit sandpaper to remove any remaining imperfections or residue. Gradually switch to finer grits, progressing to at least 220-grit sandpaper, to achieve a smooth and even surface.
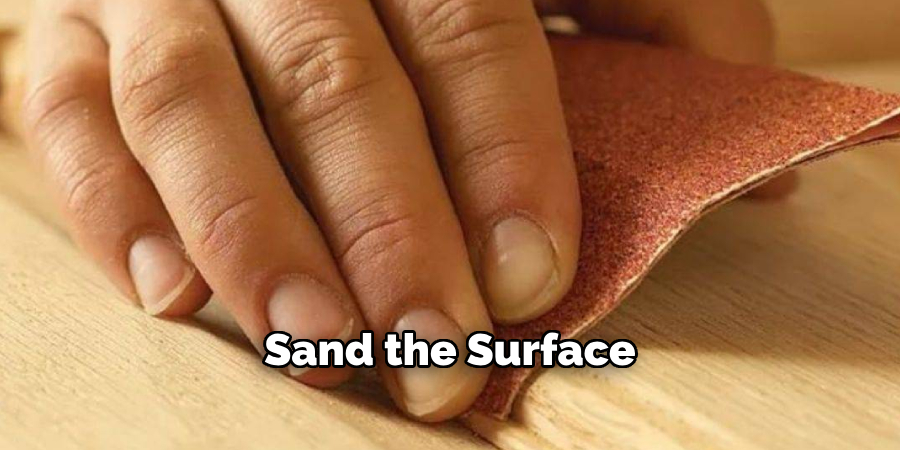
Always sand in the direction of the wood grain to avoid scratches and maintain the natural appearance of the wood. For edges and tight corners, use flexible sanding tools or sanding blocks designed for precision work. After sanding, wipe down the surface with a tack cloth or a damp rag to remove all dust particles, as these can affect the appearance of the new finish. Patience and attention to detail during the sanding process will ensure the best possible foundation for your project.
Step 5. Apply a Wood Bleach
Applying wood bleach can help lighten the wood’s color, remove stains, or balance uneven tones. Before starting, ensure you are working in a well-ventilated area and wear protective gloves and goggles to safeguard yourself from the chemicals. Choose the appropriate type of wood bleach for your project—oxalic acid is ideal for removing rust or water stains. In contrast, two-part bleach is effective for significantly lightening the wood. Follow the manufacturer’s instructions carefully, mixing and applying the bleach as directed. Use a synthetic brush to spread the bleach evenly across the surface, working in consistent strokes. Allow the bleach to sit for the recommended duration, then neutralize it with water or the specified solution.
Step 6. Neutralize the Bleach
After the bleach has finished its work, it’s crucial to neutralize it properly to ensure the wood is safe for further finishing. Rinse the wood thoroughly with clean water to remove any residual bleach. Alternatively, if the bleach manufacturer specifies a neutralizing solution, prepare and apply it according to the instructions. Use a lint-free cloth or sponge to ensure the solution is evenly distributed across the surface. Once the neutralization process is complete, wipe off excess moisture and allow the wood to dry completely before proceeding to the next step.
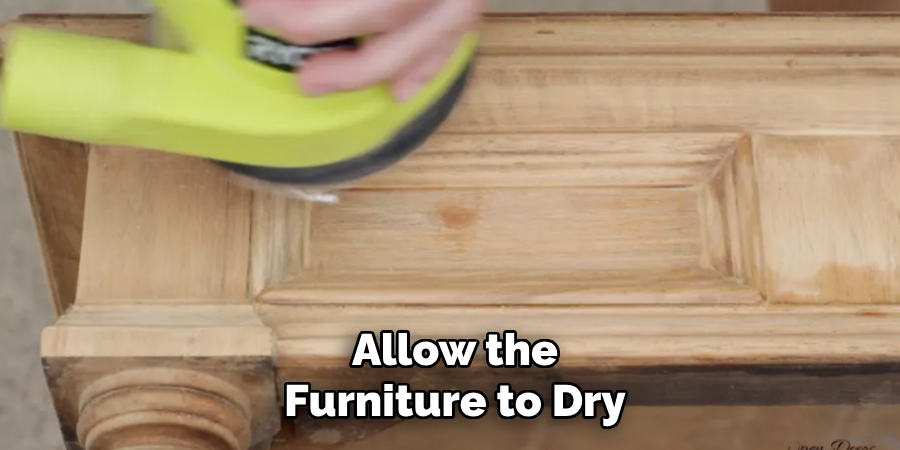
Step 7. Allow the Furniture to Dry
Drying is a crucial step to ensure the wood is ready for further treatment or use. Place the furniture in a well-ventilated area, preferably outdoors but away from direct sunlight, as intense heat can cause warping or cracking. If drying indoors, make sure the space is well-ventilated to prevent moisture buildup. Depending on the thickness of the wood and environmental conditions, the drying process may take several hours to a couple of days. Ensure the wood feels completely dry to the touch before proceeding to any subsequent steps, such as sanding or applying a finish.
Step 8. Stain the Furniture
To stain the furniture, begin by selecting a wood stain that complements your desired aesthetic. Stir the stain thoroughly to ensure an even color distribution. Using a clean, lint-free cloth or a brush, apply the stain in the direction of the wood grain, working in small sections at a time. Allow the stain to penetrate the wood for several minutes before wiping away excess with a clean cloth. For a darker finish, you can apply additional coats, ensuring each layer dries fully before applying the next. Always work in a well-ventilated area and wear protective gloves to avoid skin contact.
Step 9. Seal the Surface
To preserve the wood and enhance its durability, apply a clear sealant or topcoat as the final step. Select a product suitable for your project, such as polyurethane, lacquer, or shellac, based on your desired finish and level of protection. Using a clean brush or applicator, apply the surface evenly in thin layers, following the wood grain to prevent streaks or bubbles. Allow each coat to dry completely before applying additional layers, typically two to three coats for optimal protection. Sand lightly between coats with fine-grit sandpaper to achieve a smooth, polished finish.
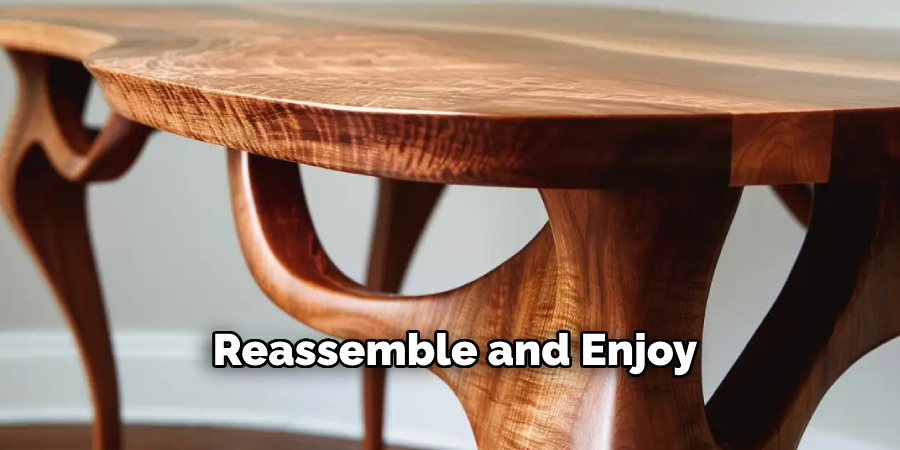
Step 10. Reassemble and Enjoy
Once the finish has thoroughly dried and cured, it’s time to reassemble your project. Carefully reinstall any hardware or attachments, ensuring all parts are correctly aligned and securely fastened. Take a moment to admire the transformation and the results of your hard work. Now, you can enjoy your beautifully refinished piece, whether it’s furniture, a handmade decoration, or a well-crafted gift. Your efforts have not only restored its appearance but also extended its life for years to come!
By following these steps and using the proper techniques, you can successfully refinish any wooden project with a beautiful and professional-looking outcome.
Conclusion
How to lighten cherry wood furniture can be a rewarding process that transforms the look and feel of your home.
By carefully selecting the proper methods, such as sanding, bleaching, or applying a lighter stain, you can achieve a brighter appearance while preserving the wood’s natural beauty. It’s essential to take your time, test products on a small, inconspicuous area, and follow safety guidelines throughout the process.
With patience and attention to detail, you can successfully refresh your furniture and elevate the aesthetic of your space.
About the Author
Adrian Green, a lifelong woodworking enthusiast, shares his passion for the craft through The Woodenify Blog. With a foundation built on years of hands-on experience in his father’s woodworking shop, Adrian is dedicated to helping others learn and grow in the world of DIY woodworking. His approach to woodworking combines creativity, practicality, and a deep appreciation for the art of building with your own hands. Through his blog, he inspires individuals of all skill levels to embark on their own woodworking journeys, creating beautiful, functional pieces of furniture and décor.
Professional Focus
- Specializes in DIY woodworking projects, from furniture to home décor.
- Provides step-by-step guides and practical tutorials for woodworkers of all skill levels.
- Dedicated to helping readers build confidence and skill through easy-to-follow instructions and tips.
- Passionate about fostering a community of makers who can share, learn, and grow together.
Education History
- University of Craft and Design – Bachelor of Fine Arts (BFA) in Woodworking and Furniture Design
- Woodworking Apprenticeships – Extensive hands-on training with skilled craftsmen to refine carpentry and furniture making techniques.
- Online Courses & Masterclasses – Continued education in advanced woodworking techniques, design principles, and specialized tools
Expertise:
- DIY woodworking, carpentry, furniture making, and home décor projects.
- Creating accessible tutorials and guides for beginner to advanced woodworkers.
- Sharing the joys and satisfaction of woodworking, from raw materials to finished products.