Lightening wood cabinets can breathe new life into your kitchen or living space, providing a fresh and inviting aesthetic upgrade.
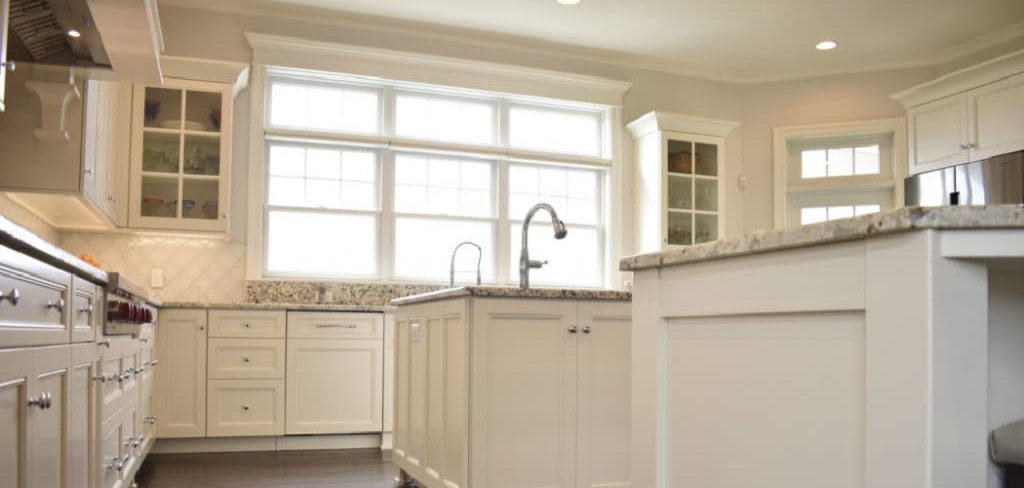
Many homeowners choose to lighten their cabinets to modernize their interiors, creating a brighter atmosphere that enhances the overall design. A lighter finish increases the sense of space and complements various decor styles, making your cabinetry a focal point of beauty rather than a hindrance.
In this guide, you will learn how to lighten wood cabinets effectively by using wood bleach, applying lighter stains or paints, and finishing with a protective topcoat.
By following the detailed steps outlined in this article, you can achieve a stunning transformation that will rejuvenate your cabinets and elevate the entire feel of your home.
Materials and Tools Needed
To successfully lighten your wood cabinets, gather the following materials and tools:
Materials:
- Wood cleaner
- Wood bleach or wood lightener
- Paint or stain in a lighter color
- Clear sealer
Tools:
- Screwdriver
- Paintbrushes or rollers
- Drop cloth
- Rags or paper towels
- Fine-grit sandpaper
- Wood conditioner
Optional Materials:
- Primer
- Clear coat
Preparing the Workspace
Setting Up the Area
Ensuring a safe and efficient workspace is crucial before starting any cabinet lighting project. Begin by opening windows and using fans to ensure proper ventilation, which will help dissipate any fumes from the wood cleaner and finishing products.
Protect the surrounding areas by laying down drop cloths or plastic sheeting; this will catch any drips or spills and save you time on cleanup. Lastly, remove cabinet doors, hardware, and fixtures; this allows for easier access to all surfaces and prevents accidental damage during the work.
Preparing the Cabinet Surface
Once your area is set up, it’s time to prepare the surface of the cabinets. Start by cleaning the cabinets thoroughly with a wood cleaner to eliminate any dust, grease, and grime that may have accumulated over time.
Next, take fine-grit sandpaper and lightly sand the wood to remove any existing finish, ensuring you create a smooth surface for the subsequent application of bleach or lighter stains.
After sanding, wipe down the surface with a damp cloth to remove any sanding dust, leaving a clean base for your lightening process.
How to Lighten Wood Cabinets: Lightening Wood Cabinets
Using Wood Bleach or Lightener
To begin the process of lightening your wood cabinets, it’s crucial to select the appropriate wood bleach or lightener that suits your specific cabinet type. Different wood types may react differently to bleaching, so it’s important to read the product labels carefully.
Once you have your chosen product, apply the bleach or lightener according to the manufacturer’s instructions, typically using a brush or sponge for an even application.
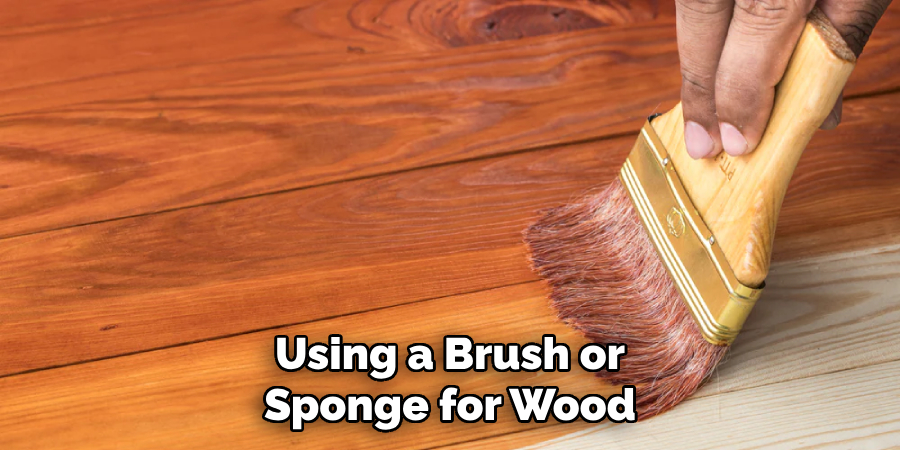
Be sure to work in sections to ensure that the product is applied uniformly and to prevent overlapping drying areas that can lead to streaks. After applying, allow the bleach or lightener to sit for the recommended time to achieve the desired lightness, monitoring the process closely.
Once the time has elapsed, wipe off any excess with a clean cloth, and then thoroughly rinse the surface with water to neutralize the bleach and prepare it for further treatment.
Staining or Painting Cabinets
After the bleaching process, you may choose to apply a lighter stain or paint to refine the look of your cabinets further. Select a stain or paint that complements your interior design to achieve the desired color and finish.
Begin by using a brush or roller to apply an even coat of stain or paint, ensuring that you follow the grain of the wood for the best results and to highlight its natural beauty. Coverage is essential, so take your time to apply a uniform layer, and be cautious not to overload the brush to avoid drips.
It is vital to allow the stain or paint to dry completely between coats—usually, the manufacturer will provide specific drying times that you should adhere to. Once you achieve the desired depth of color, gently sand between coats to ensure a smooth finish and perfect adherence.
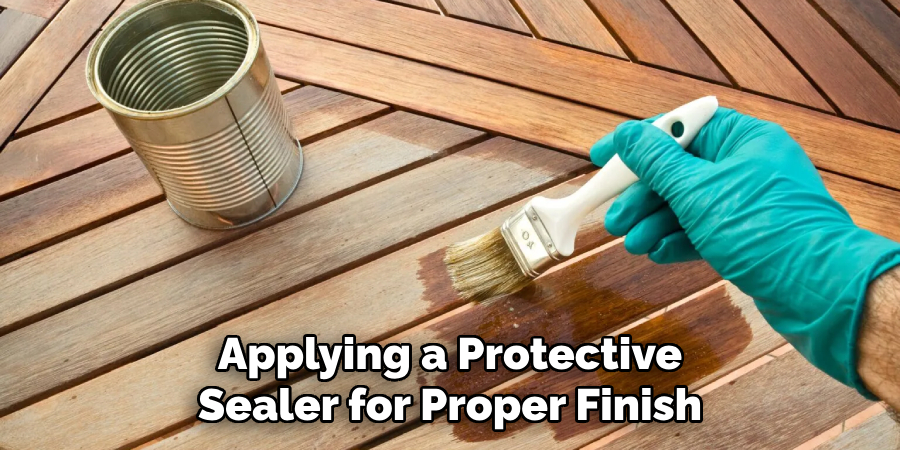
Applying a Clear Sealer or Topcoat
The final step in lightening your wood cabinets is to apply a clear sealer or topcoat. This protective layer is essential for enhancing the durability of the newly lightened surface, safeguarding it against daily wear and tear.
Start by choosing a high-quality sealer that is compatible with your stain or paint—this information is often provided on the product label.
Apply the sealer using a brush or roller, following the product’s instructions regarding proper application techniques and drying times. After the first coat has dried, inspect the surface and apply a second coat if necessary to ensure full protection.
Once the sealer has dried completely, you can proceed to reattach cabinet doors and hardware, transforming your cabinets into beautifully lightened showcases within your home.
Inspecting and Finalizing the Cabinets
Inspecting the Cabinets
Once you have completed the staining and sealing processes, it’s time to thoroughly inspect your cabinets. Begin by checking for evenness in color and finish; ensure there are no streaks or patches that detract from the overall appearance
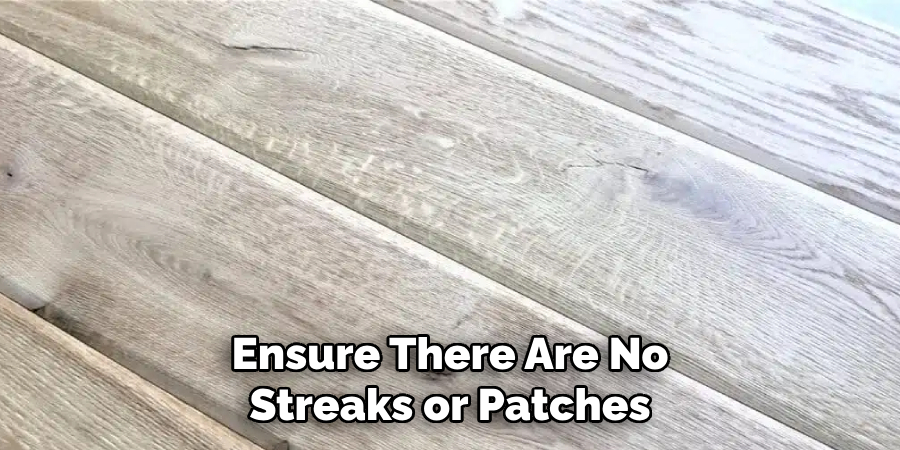
If you notice any areas that require touch-ups or additional coats, address these promptly to achieve a consistent look across all surfaces. Additionally, confirm that all surfaces are clean and free from dust or residue, as this will help maintain the integrity of the finish and ensure a polished final result.
Reattaching Doors and Hardware
After the finish has fully dried, you can reattach the cabinet doors, hardware, and fixtures. Carefully align each door and secure it in place, ensuring that all screws and fittings are fastened tightly to prevent any wobbling or misalignment.
Testing each door by opening and closing them is critical to confirm they operate smoothly. Pay attention to the alignment of the hardware to ensure a cohesive look that enhances the overall aesthetic of your newly lightened cabinets.
With this final step, your cabinets are now ready to showcase their freshly updated appearance.
Troubleshooting Common Issues
Uneven Color or Finish
If you encounter uneven color or finish on your cabinets, it’s essential to act swiftly. Start by reapplying stain or paint to the areas with inconsistencies, using a brush or roller to gently blend the new application with the surrounding areas.
Flfeathering the edges to create a seamless transition, making the finish appear uniform. This technique can help restore the consistent look you’re aiming for.
Bleaching or Paint Residue
Bleaching or paint residue can cause unsightly imperfections on your freshly finished cabinets. To avoid this, ensure thorough rinsing and cleaning after the bleaching process. Use a damp cloth to wipe down surfaces, removing any lingering bleach or stain residue.
This step is critical for achieving a smooth, clean finish, as leftover residue can interfere with the adherence and overall appearance of your cabinets. Proper cleaning will enhance the beauty of your lightened cabinets.
Maintenance and Care
Regular maintenance is essential to keep your lightened cabinets looking fresh and vibrant. Dusting and cleaning them frequently using a soft, damp cloth to remove dirt and grime without harming the finish.
Avoid using harsh chemicals or abrasive cleaners, as these can damage the protective layer and cause premature wear. Instead, opt for gentle cleaning solutions specifically designed for wood surfaces.
Additionally, to preserve the cabinet’s look and enhance its durability, consider reapplying a protective sealer every couple of years or as needed, depending on usage and wear.
This practice maintains the aesthetic appeal and not only maintains the aesthetic appeal but also helps protect against moisture and daily wear, ensuring that your cabinets remain a beautiful focal point in your home for years to come.
Frequently Asked Questions
How Long Does the Entire Cabinet Lightening Process Take?
The time required for the cabinet lightening process can vary based on the size of your cabinets and the number of coats applied. Generally, you should allocate a few days for the entire process, including drying times for bleaching, staining, and sealing.
Can I Lighten Dark Cabinets without Sanding?
Yes, it is possible to lighten dark cabinets without sanding by using a bleaching product specifically designed for wood. However, be aware that results may vary depending on the wood type and the initial stain or finish.
What Type of Sealer Should I Use on My Cabinets?
A high-quality polyurethane or water-based sealer is recommended for cabinets, providing excellent durability and protection against moisture and wear. Always ensure the sealer is compatible with the stain or paint you used.
Is It Safe to Use Bleach on Wood Cabinets?
Bleach can be safe for lightening wood cabinets when used properly and in a well-ventilated area. To prevent damage, be sure to follow product instructions, wear protective gear, and thoroughly rinse the surface after treatment.
How Can I Maintain the Lightened Appearance of My Cabinets?
To maintain the lightened look of your cabinets, regularly dust and clean them with a soft, damp cloth. Avoid abrasive cleaners, and consider reapplying a protective sealer every few years to keep them looking fresh and vibrant.
Conclusion
In summary, effectively learning how to lighten wood cabinets involves a series of key steps: starting with cleaning and preparing the surfaces, progressing to bleaching for a lighter base, followed by applying a stain or paint that complements your design vision, and finishing with a clear sealer for protection.
Each stage enhances the aesthetic appeal of your cabinets and transforms your space, giving it a refreshed and modern look. Remember, following this guide meticulously and taking the necessary precautions can lead to the best results.
Embrace the transformative power of lightening wood cabinets, and enjoy the stunning difference it brings to your home environment. With careful attention and a touch of creativity, you can achieve beautiful cabinets that elevate your interior design for years to come.
About the Author
Adrian Green, a lifelong woodworking enthusiast, shares his passion for the craft through The Woodenify Blog. With a foundation built on years of hands-on experience in his father’s woodworking shop, Adrian is dedicated to helping others learn and grow in the world of DIY woodworking. His approach to woodworking combines creativity, practicality, and a deep appreciation for the art of building with your own hands. Through his blog, he inspires individuals of all skill levels to embark on their own woodworking journeys, creating beautiful, functional pieces of furniture and décor.
Professional Focus
- Specializes in DIY woodworking projects, from furniture to home décor.
- Provides step-by-step guides and practical tutorials for woodworkers of all skill levels.
- Dedicated to helping readers build confidence and skill through easy-to-follow instructions and tips.
- Passionate about fostering a community of makers who can share, learn, and grow together.
Education History
- University of Craft and Design – Bachelor of Fine Arts (BFA) in Woodworking and Furniture Design
- Woodworking Apprenticeships – Extensive hands-on training with skilled craftsmen to refine carpentry and furniture making techniques.
- Online Courses & Masterclasses – Continued education in advanced woodworking techniques, design principles, and specialized tools
Expertise:
- DIY woodworking, carpentry, furniture making, and home décor projects.
- Creating accessible tutorials and guides for beginner to advanced woodworkers.
- Sharing the joys and satisfaction of woodworking, from raw materials to finished products.