Machine embroidering on balsa wood is an innovative approach that combines the delicate art of embroidery with the rustic charm of woodcraft. This technique allows for the creation of unique, textured designs that can add a distinctive touch to a wide range of projects, from decorative pieces to personalized gifts. Embroidering on balsa wood requires a bit of preparation and the right materials, but the results are undoubtedly rewarding.
In this guide on how to machine embroider balsa wood, we’ll explore the steps necessary to successfully machine embroider balsa wood, including selecting the appropriate wood thickness, preparing your embroidery machine, and choosing the best designs for wood embroidery. Whether you’re an experienced embroiderer looking to explore new mediums or a woodworking enthusiast interested in adding intricate details to your projects, this guide will provide you with the knowledge to expand your crafting repertoire.
What is Balsa Wood?
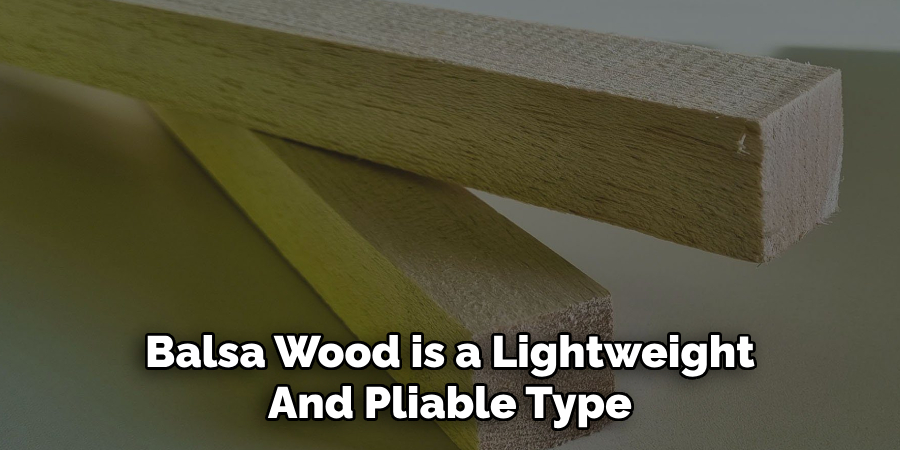
Balsa wood is a lightweight and pliable type of wood that comes from the balsa tree, scientifically known as Ochroma pyramidale. It is native to Central and South America, particularly Ecuador and Peru, but is now produced in various countries around the world due to its commercial demand. Balsa wood is commonly used for crafting, model making, and even in the aerospace industry due to its low weight and strength-to-weight ratio.
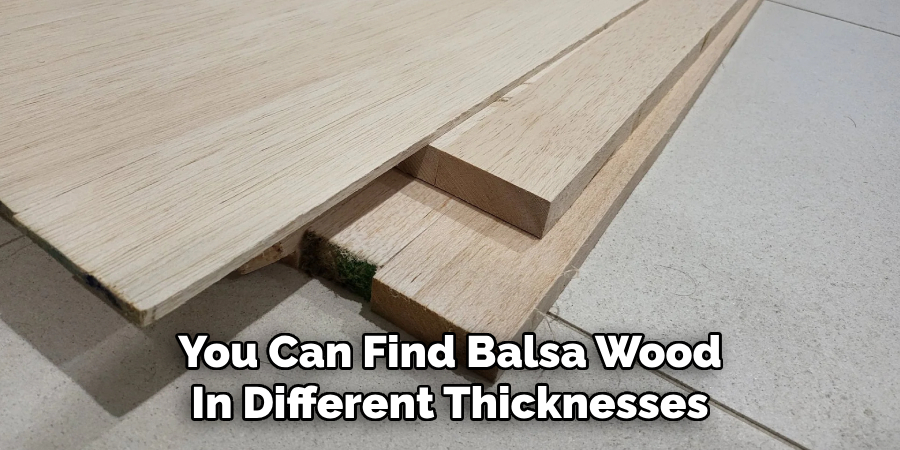
You can find balsa wood in different thicknesses, ranging from 1/16 inch to 1 inch. Thinner pieces are more flexible and easier to embroider on, while thicker pieces provide a sturdier base for larger designs.
The lightness and softness of balsa wood make it an ideal material for machine embroidery, as it can easily be pierced by the needle without causing damage to the wood or breaking the thread. It also allows for intricate details and textures to be created through different stitching techniques.
Why Machine Embroider on Balsa Wood?
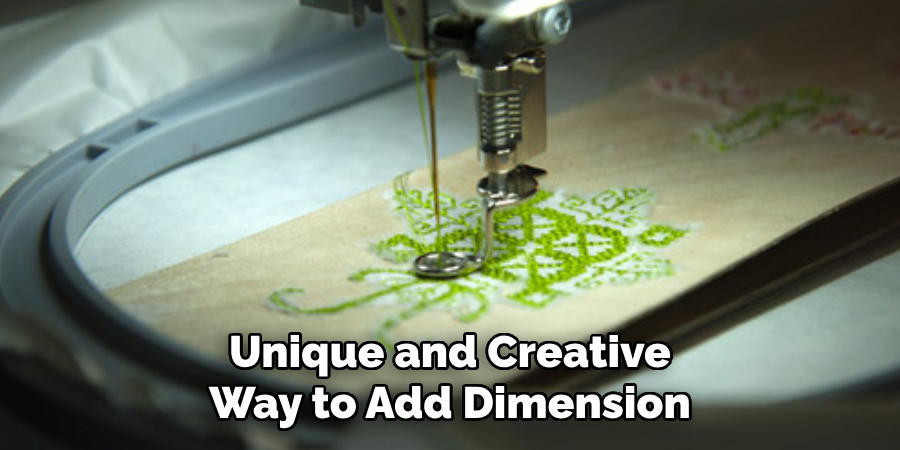
Machine embroidering on balsa wood offers a unique and creative way to add dimension and texture to your projects. It adds a handcrafted touch that cannot be achieved with traditional embroidery methods, making it perfect for personalizing gifts or creating one-of-a-kind pieces.
Additionally, machine embroidery on balsa wood is a great way to repurpose or upcycle scrap pieces of wood. You can turn simple scraps into beautiful and intricate designs with just a few stitches.
It is also a fun and challenging technique for experienced embroiderers looking to expand their skills or try something new.
Necessary Materials for Machine Embroidering on Balsa Wood
To successfully machine embroider on balsa wood, you will need the following materials:
- Abalsa Wood of the Desired Thickness
- Embroidery Machine With Appropriate Size Needle (75/11 or Smaller)
- Embroidery Thread
- Stabilizer
- Design Template or Digital Embroidery File
- Painter’s Tape or Adhesive Spray
10 Step-by-step Guides on How to Machine Embroider Balsa Wood
Step 1: Select the Right Wood Thickness
As mentioned earlier, balsa wood comes in a variety of thicknesses, so it’s essential to choose the right one for your project. Thicker pieces are better for larger designs, while thinner pieces are perfect for detailed and delicate designs. You can also layer thinner pieces together to create a sturdier base for bigger designs.
Step 2: Prepare Your Embroidery Machine
Before starting, ensure that your embroidery machine is clean and free of any dust or debris. You may want to use a soft brush or compressed air to remove any excess dirt from the machine. Next, check that you have the appropriate size needle installed for embroidering on balsa wood. A 75/11 or smaller needle is recommended to prevent any damage to the wood.
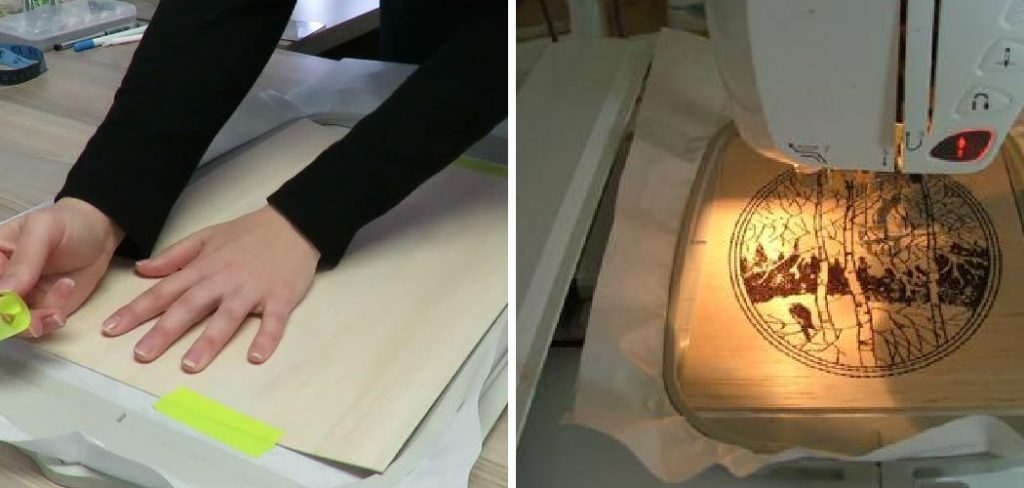
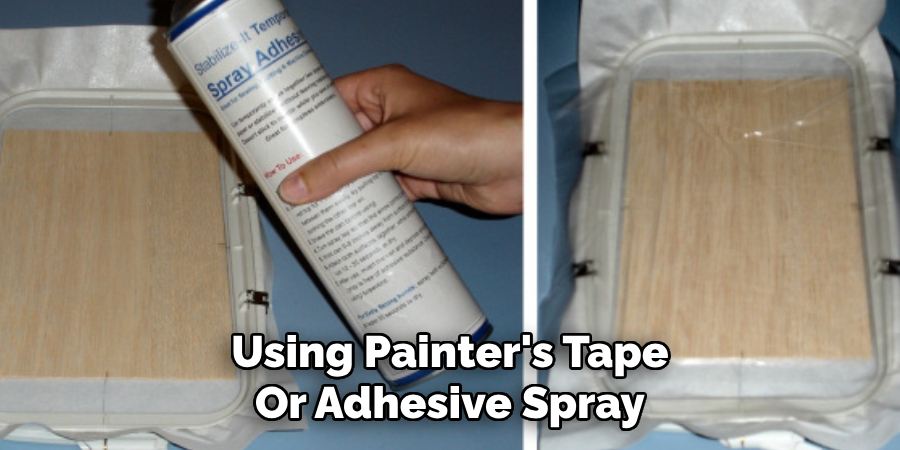
Step 3: Secure Your Balsa Wood
Using painter’s tape or adhesive spray, secure your balsa wood to the embroidery hoop. This will ensure that the wood stays in place while being stitched and prevents any shifting or slipping during the embroidery process. It’s essential to secure the wood but not too tightly, as it may cause the wood to warp or bend.
Step 4: Prepare Your Design
Choose a design template or digital embroidery file that is suitable for balsa wood. It’s best to start with simple designs before moving on to more complex ones. You can also experiment with different stitch types and techniques to create unique textures and patterns on the wood. But keep in mind that too many stitches can weaken the wood and cause it to break.
Step 5: Transfer the Design
Transfer the design onto your balsa wood using a transfer pencil or water-soluble pen. Make sure to trace lightly so the markings do not show through after embroidery is completed. Otherwise, you can also print the design directly onto the balsa wood using a printer. It is recommended to use a lower ink setting and test on scrap wood before printing onto your final piece.
Step 6: Hoop Your Design
Place your embroidery hoop over the desired area of the design and secure it in place. Make sure that the hoop is tight enough to keep the wood steady but not too tight as it may cause damage to the wood or distort your design. Although it may seem unconventional, you can also use embroidery hoops of different sizes to fit larger designs.
Step 7: Set Up Your Machine
Set your embroidery machine to the appropriate settings for balsa wood. This includes adjusting the speed and tension of the machine to prevent any damage or breaking of the thread. It’s always a good idea to test on scrap wood first before starting on your final piece. But don’t worry if it takes a few tries to get the right settings; practice makes perfect!
Step 8: Stitch Your Design
Once everything is set up, you can start stitching your design. Be sure to take it slow and steady, as the needle may be more prone to breaking when embroidering on wood. You may also want to use a backstitch at the beginning and end of each line to secure the thread in place. It’s also essential to keep an eye on the thread tension and adjust if necessary to avoid any tangling or breaking.
Step 9: Remove the Stabilizer
After completing your design, carefully remove the embroidery hoop and stabilizer from the wood. Be gentle as the stabilizer may leave some residue on the wood, which can be easily wiped away with a damp cloth. There may also be some small holes left behind from the needle, but these can easily be filled with wood filler or sanded down for a smoother finish.
Step 10: Finishing Touches
Once the stabilizer is removed, you can add finishing touches to your embroidered balsa wood, such as painting or varnishing it for a more polished look. You can also frame it or incorporate it into other projects. You can also try experimenting with different types of wood, such as birch or basswood, for different textures and effects.
Following these step-by-step guides on how to machine embroider balsa wood will help you successfully machine embroider on balsa wood and create beautiful and unique pieces. With some practice and experimentation, you can take your embroidery skills to the next level and add a new dimension to your projects. So go ahead, grab some balsa wood, and let your creativity soar! Happy stitching!
Tips and Tricks for Machine Embroidering on Balsa Wood
- Start with simple designs before moving on to more complex ones.
- Test on scrap wood before embroidering on your final piece.
- Use a lower ink setting when printing designs onto wood to avoid any bleeding.
- Experiment with different types of wood for unique textures and effects.
- Take it slow and steady, as the needle may be more prone to breaking when embroidering on wood.
- Adjust the speed and tension settings on your machine accordingly.
- Secure the wood firmly but not too tightly to avoid warping or bending.
- Use painter’s tape or adhesive spray to keep the wood in place.
- Consider using embroidery hoops of different sizes for larger designs.
- Have fun and be creative! The possibilities are endless with machine embroidering on balsa wood. So, don’t be afraid to think outside the box and try new techniques. You never know what amazing results you may achieve! Happy embroidering! :needle_and_thread:
Frequently Asked Questions
Q: Can I Use Regular Embroidery Thread to Embroider on Balsa Wood?
A: Yes, you can use regular embroidery thread, but it’s recommended to use a smaller needle size and adjust the tension settings on your machine to prevent any thread breakage.
Q: What Other Types of Wood Can I Use for Machine Embroidery?
A: You can use a variety of wood types such as birch, maple, and basswood, for different textures and effects. It’s best to experiment with different woods to find which one works best for your desired design.
Q: Can I Wash My Embroidered Balsa Wood?
A: Washing embroidered balsa wood is not recommended as it may cause the thread to unravel or damage the wood itself. Instead, you can gently dust the wood with a dry cloth to keep it clean. If you want to preserve your piece for a long time, consider adding a layer of varnish or sealant for protection.
Conclusion
Venturing into the world of machine embroidering on balsa wood opens the door to a unique blend of textile art and woodworking. By following the detailed steps and tips provided on how to machine embroider balsa wood, from selecting the right materials to applying the finishing touches, enthusiasts at all levels can create stunning, one-of-a-kind pieces.
Remember, patience and practice are key to mastering this skill, as each type of wood and design presents its own set of challenges. Encourage your creative spirit to explore this fascinating intersection of crafts, and you may discover a rewarding new outlet for your artistic expression. Happy embroidering!
About the Author
Adrian Green, a lifelong woodworking enthusiast, shares his passion for the craft through The Woodenify Blog. With a foundation built on years of hands-on experience in his father’s woodworking shop, Adrian is dedicated to helping others learn and grow in the world of DIY woodworking. His approach to woodworking combines creativity, practicality, and a deep appreciation for the art of building with your own hands. Through his blog, he inspires individuals of all skill levels to embark on their own woodworking journeys, creating beautiful, functional pieces of furniture and décor.
Professional Focus
- Specializes in DIY woodworking projects, from furniture to home décor.
- Provides step-by-step guides and practical tutorials for woodworkers of all skill levels.
- Dedicated to helping readers build confidence and skill through easy-to-follow instructions and tips.
- Passionate about fostering a community of makers who can share, learn, and grow together.
Education History
- University of Craft and Design – Bachelor of Fine Arts (BFA) in Woodworking and Furniture Design
- Woodworking Apprenticeships – Extensive hands-on training with skilled craftsmen to refine carpentry and furniture making techniques.
- Online Courses & Masterclasses – Continued education in advanced woodworking techniques, design principles, and specialized tools
Expertise:
- DIY woodworking, carpentry, furniture making, and home décor projects.
- Creating accessible tutorials and guides for beginner to advanced woodworkers.
- Sharing the joys and satisfaction of woodworking, from raw materials to finished products.